What is a Checklist Owner? | Eolas Medical | Help Center
Discover the step-by-step process to assign a checklist owner for notifications, ensuring efficient task management.
When creating a checklist, it's important to assign ownership to yourself, a colleague, or a team lead. This ensures that you or the designated person is notified by email when the checklist is completed or if any issues are reported.
Here's how to do it:
Assigning a checklist owner on new checklists.
-
Navigate to the "Admin Panel".
-
Click on "Content Management" and then choose "Checklists".
-
Choose the section where you want to store the checklist. Remember, you will need a section to create a new checklist.
-
If you're unsure how to create a checklist section, refer to our guide: "Creating a New Checklist Section".
-
-
Click "Add New Checklist".
-
Select "Add Checklist Owners"
-
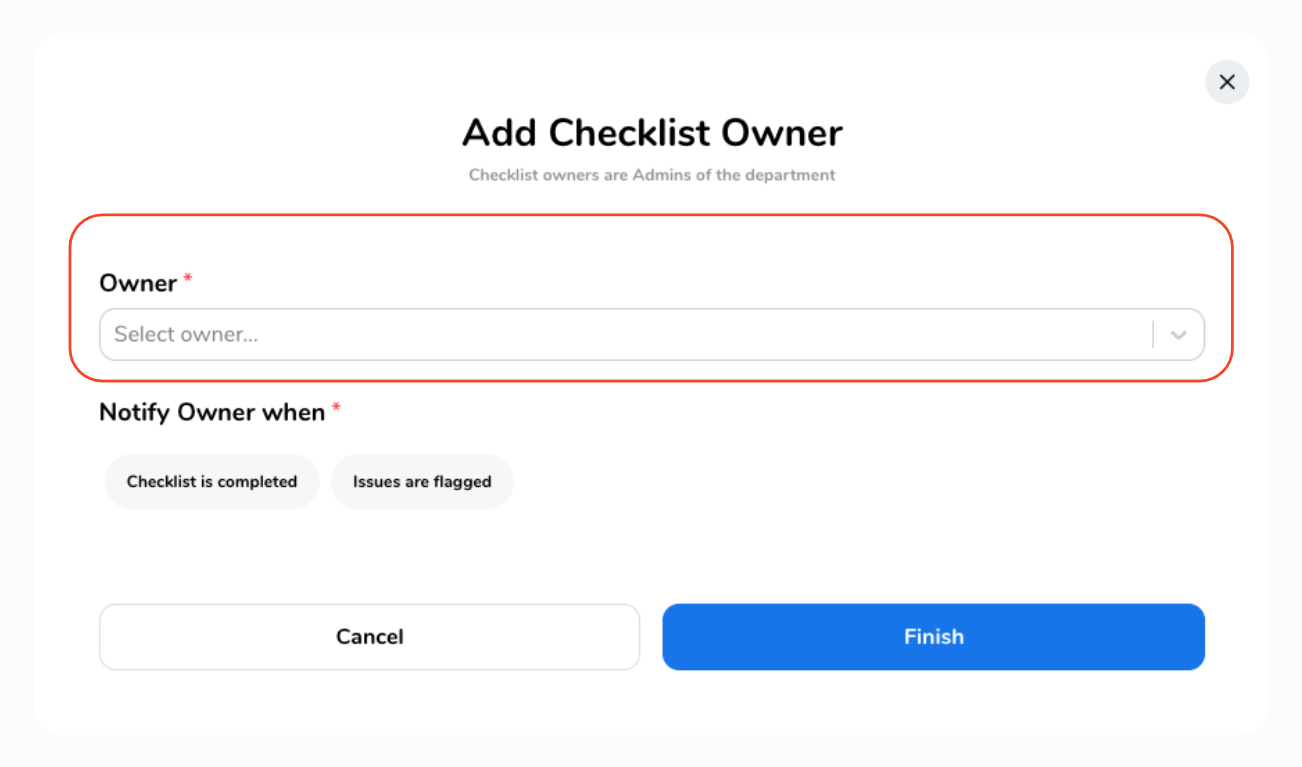
A pop-up window will appear, allowing you to assign an owner. Click the dropdown and select an owner from the list. Keep in mind that checklist owners must be admin users within your space.
-
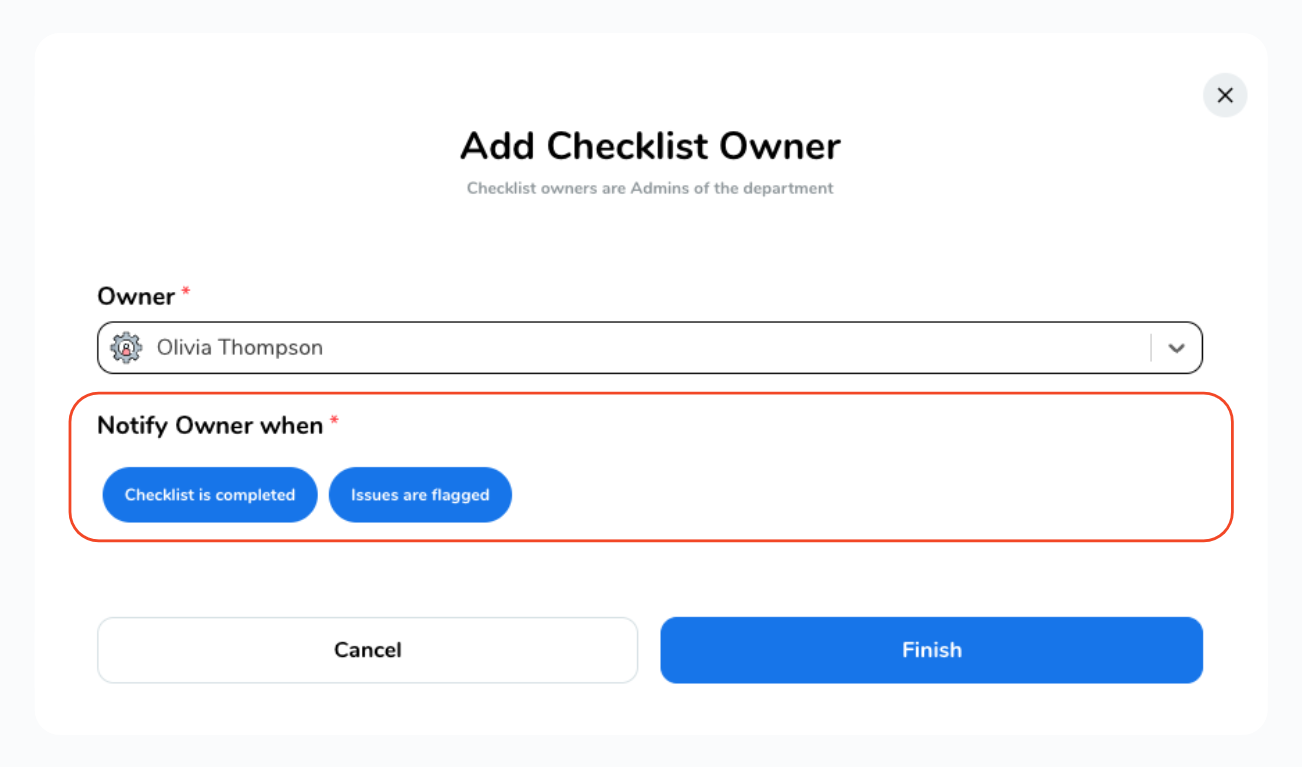
Choose when you want to be notified: when the checklist is completed, when issues are flagged, or both.
-
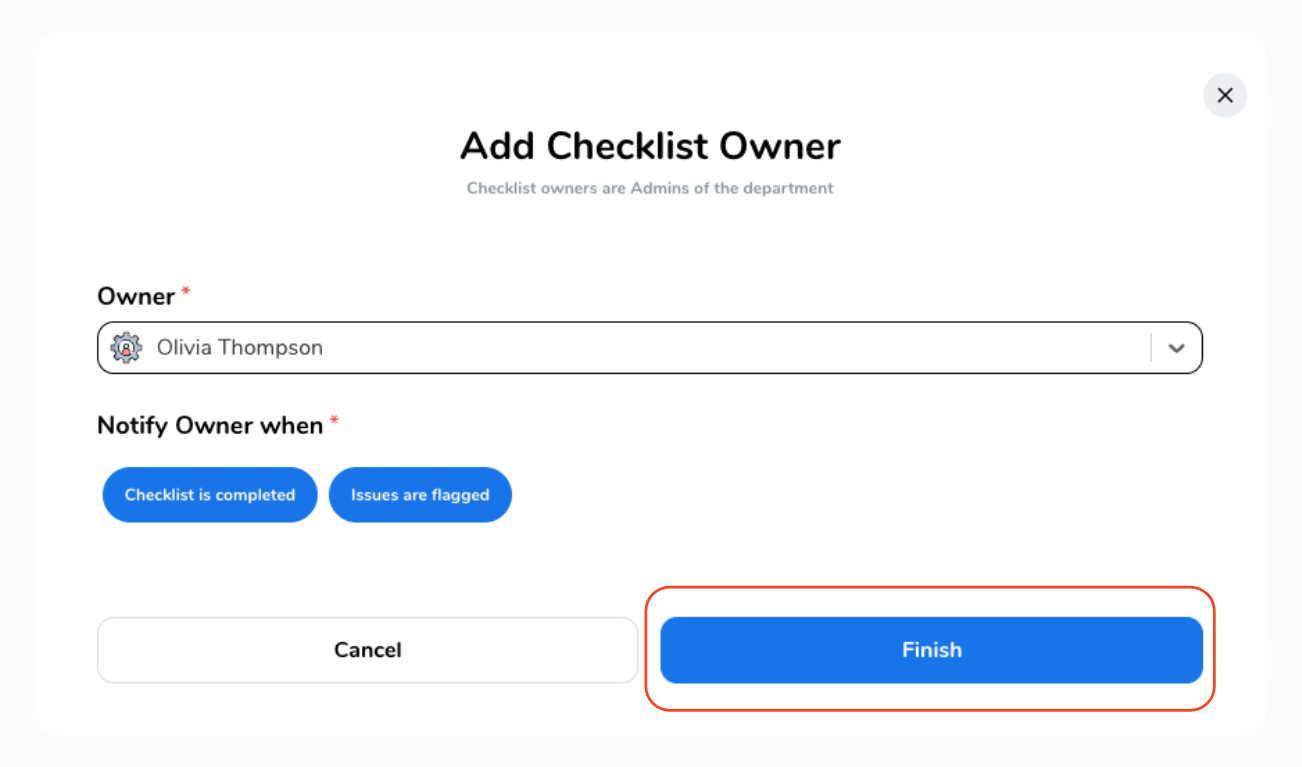
Don't forget to click "Finish" to assign ownership.
Navigate to the "Admin Panel".
Click on "Content Management" and then choose "Checklists".
Choose the section where you want to store the checklist. Remember, you will need a section to create a new checklist.
-
If you're unsure how to create a checklist section, refer to our guide: "Creating a New Checklist Section".
If you're unsure how to create a checklist section, refer to our guide: "Creating a New Checklist Section".
Click "Add New Checklist".
Select "Add Checklist Owners"
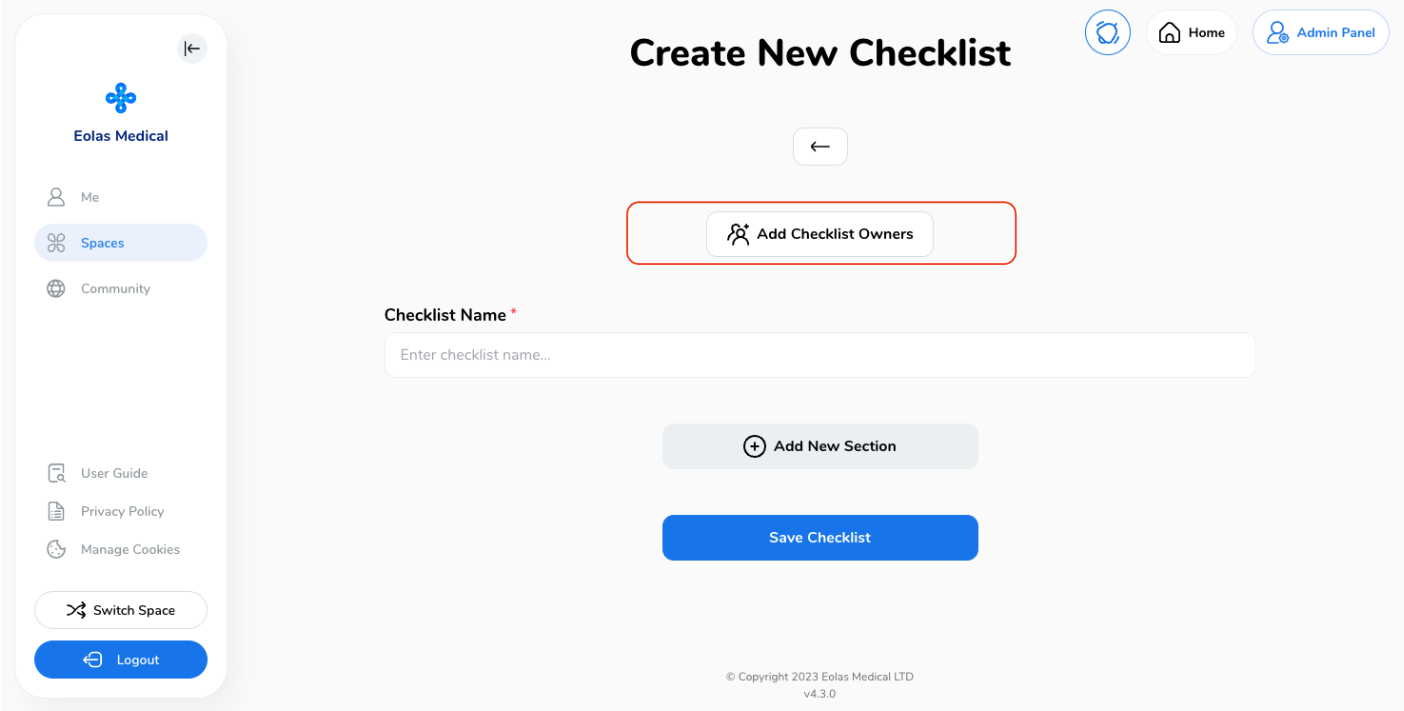
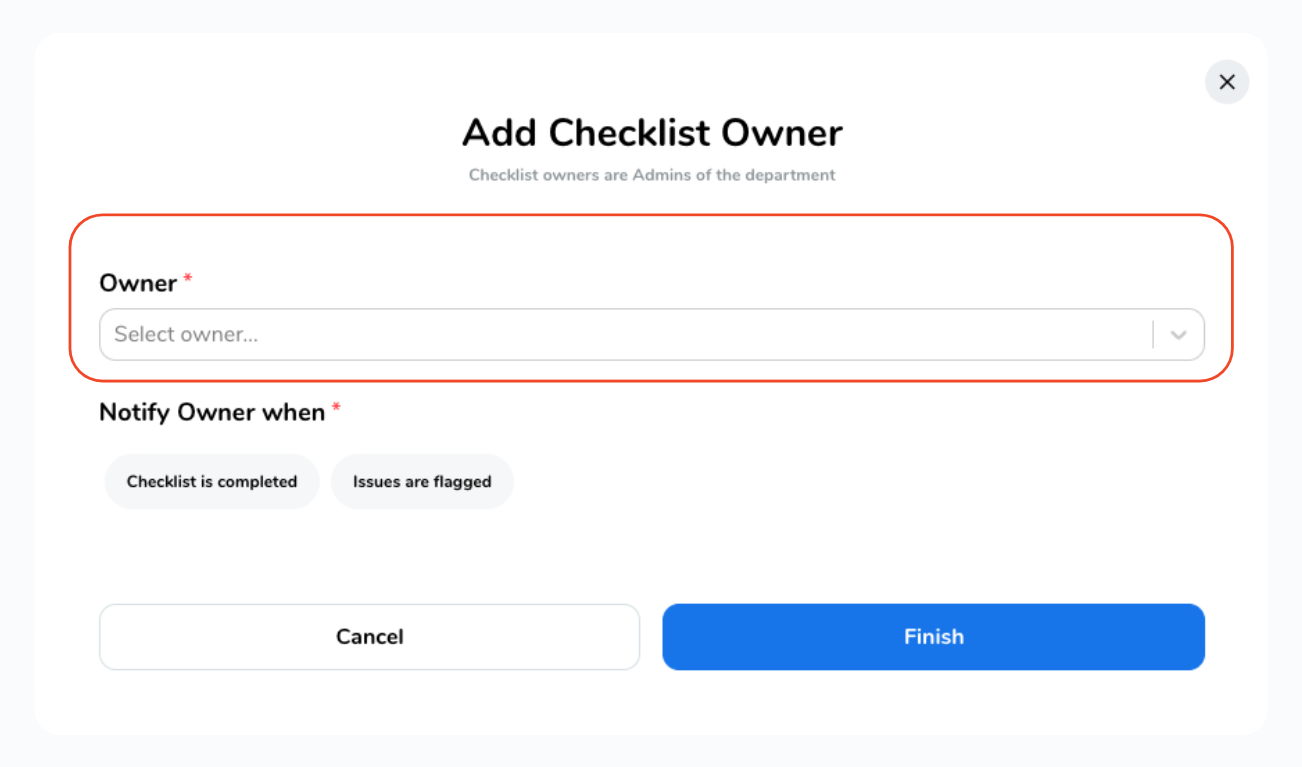
A pop-up window will appear, allowing you to assign an owner. Click the dropdown and select an owner from the list. Keep in mind that checklist owners must be admin users within your space.
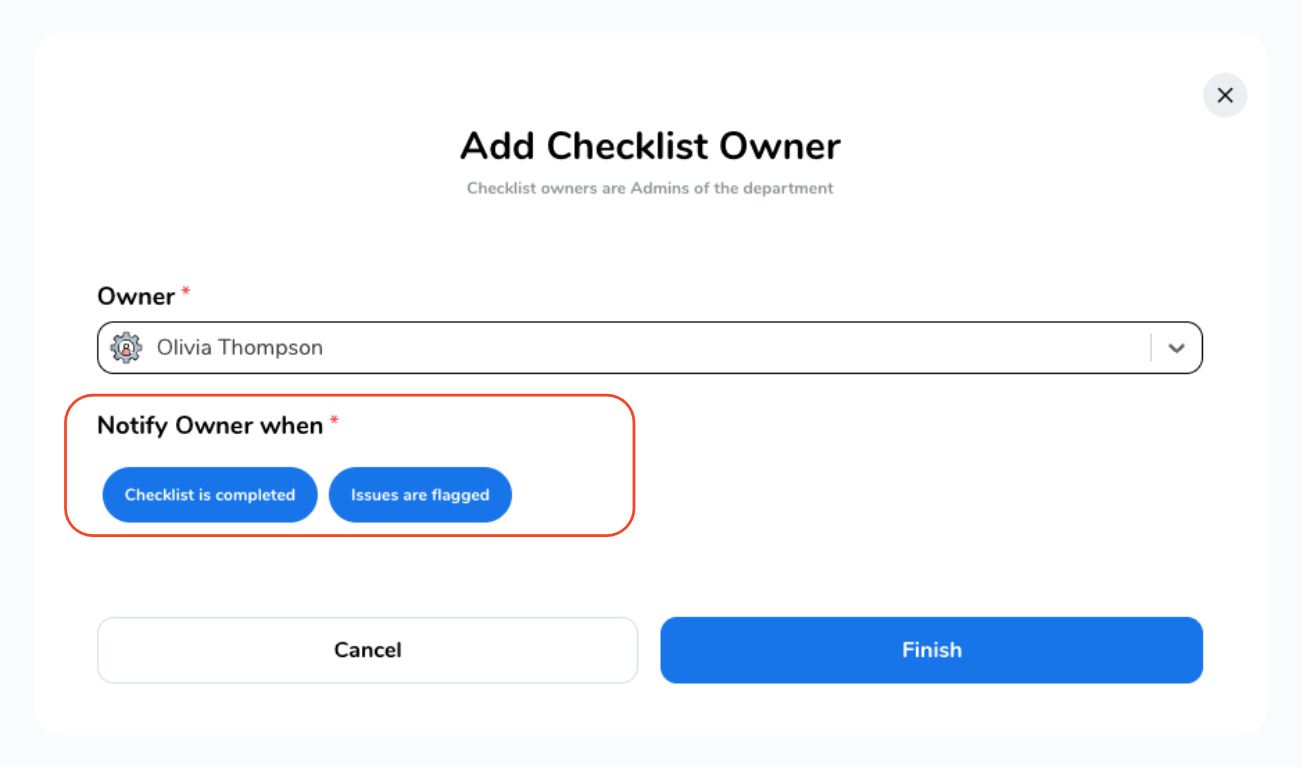
Choose when you want to be notified: when the checklist is completed, when issues are flagged, or both.
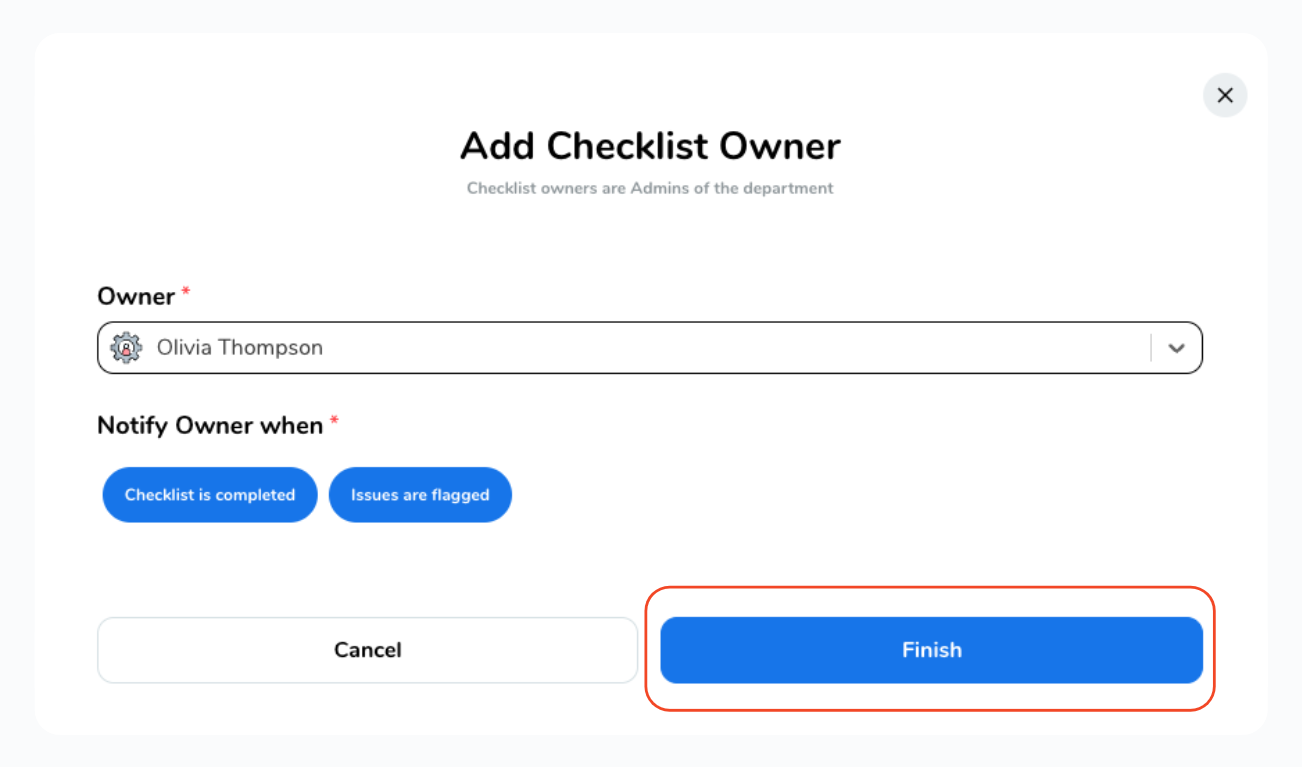
Don't forget to click "Finish" to assign ownership.
Congratulations! You've successfully added a checklist owner. They will now receive notifications based on your specified preferences.
Existing Checklists without an Owner.
But what if the checklist has been already created without an owner? Don't worry you can still give ownership following the the next steps:
-
Navigate to the "Admin Panel".
-
Click on "Content Management" and then choose "Checklists".
-
Locate the section containing the specific checklist you want to review and click on it.
-
Select the checklist.
-
You'll be taken to the checklist management page. Click on "View/Edit Checklist".
-
A pop-up window will appear, allowing you to assign an owner. Click the dropdown and choose an owner from the list. Remember, checklist owners must be admin users within your space.
-
Choose when you want to be notified: when the checklist is completed, when issues are flagged, or both.
-
Click "Finish" to assign ownership.
Navigate to the "Admin Panel".
Click on "Content Management" and then choose "Checklists".
Locate the section containing the specific checklist you want to review and click on it.
Select the checklist.
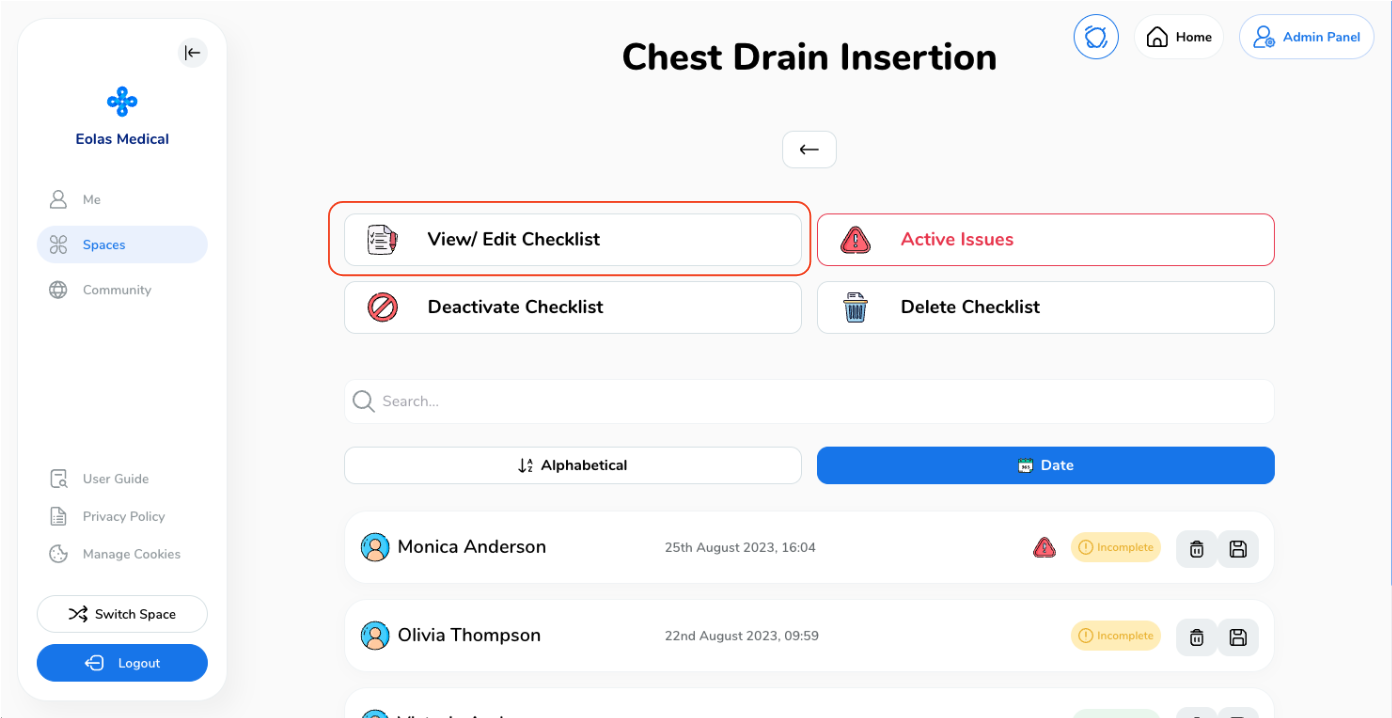
You'll be taken to the checklist management page. Click on "View/Edit Checklist".
A pop-up window will appear, allowing you to assign an owner. Click the dropdown and choose an owner from the list. Remember, checklist owners must be admin users within your space.
Choose when you want to be notified: when the checklist is completed, when issues are flagged, or both.
Click "Finish" to assign ownership.
Congratulations! You've successfully added a checklist owner. They will now receive notifications based on your specified preferences.


