Master the art of renaming this section and uploading a schedule/roster file to your Space.
The Schedule, Roster or Rota section is a powerful feature within that allows administrators to efficiently upload and store work schedules, rosters, shift plans, or shifts for their space department. This feature is highly customisable, allowing you to adapt it to your department's specific terminology and needs.
Centralised Access.
By using this feature, your department can access the roster or schedule from a single, centralised location within our platform.
Real-Time Updates.
When using web links, any changes made to the online roster will be reflected instantly for department users. No need to upload a new file every time there's a change.
Easy Retrieval.
PDF uploads ensure that even offline schedules can be easily retrieved, download and shared with space department members.
Customisation.
The ability to rename the section allows you to tailor it to your department's unique terminology and preferences.
Managing your Schedule/Roster section.
Before we get started, there are a few important things to remember:
-
You need to be an Administrator to upload a Schedule/Roster to your Space. If you created a Space, you automatically have admin rights.
If you're not part of one, refer to our guide on Create Spaces to Collaborate with Your Healthcare Community. -
Access the application via a web browser on a desktop computer and log in to your account.
You need to be an Administrator to upload a Schedule/Roster to your Space. If you created a Space, you automatically have admin rights.
If you're not part of one, refer to our guide on Create Spaces to Collaborate with Your Healthcare Community.
Access the application via a web browser on a desktop computer and log in to your account.
Now, let's quickly recap the steps to get to the Content Management page:
-
Log into your Space.
-
Locate the "Admin Panel" button in the upper-right corner and click on it.
-
Then, click on "Content Management".
-
For more detailed guidance, please refer to our Admin - Content Management Overview
-
-
Once you've accessed the Content Management page, you will see a list of features. Search for the "Schedule/Roster" tab.
-
Now, let's begin by customising the section name to better suit your department's terminology (if needed) This ensures that the system aligns seamlessly with your department's specific workflows.
Log into your Space.
Locate the "Admin Panel" button in the upper-right corner and click on it.
Then, click on "Content Management".
-
For more detailed guidance, please refer to our Admin - Content Management Overview
For more detailed guidance, please refer to our Admin - Content Management Overview
Once you've accessed the Content Management page, you will see a list of features. Search for the "Schedule/Roster" tab.
Now, let's begin by customising the section name to better suit your department's terminology (if needed) This ensures that the system aligns seamlessly with your department's specific workflows.
-
To do this, simply click on the "Pen and Paper" icon located on the right side of the card.
To do this, simply click on the "Pen and Paper" icon located on the right side of the card.

-
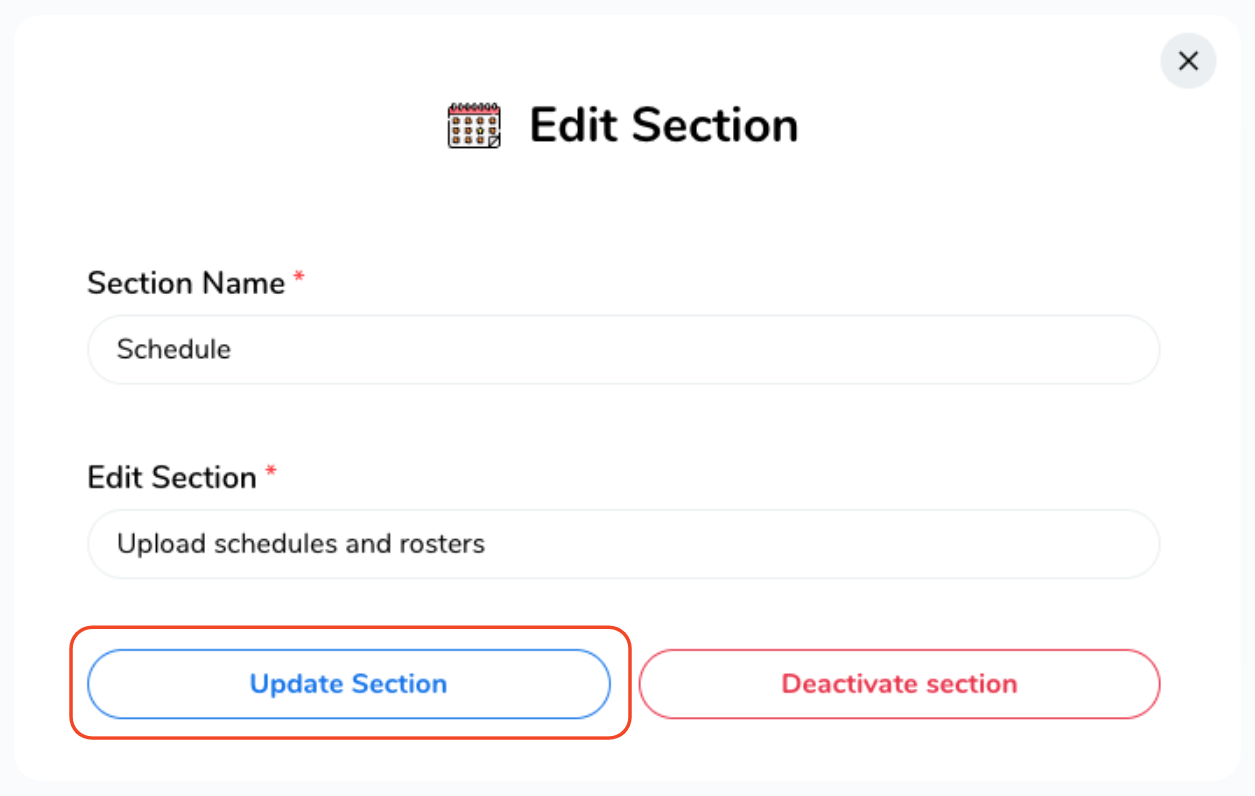
A pop-up window will appear, allowing you to edit the section name and description. Once you're satisfied with the changes, click "Update Section".
A pop-up window will appear, allowing you to edit the section name and description. Once you're satisfied with the changes, click "Update Section".

Uploading a file to your Schedule/Roster section.
-
Begin by clicking on "Schedule/Roster" or the customised section name you've assigned.
-
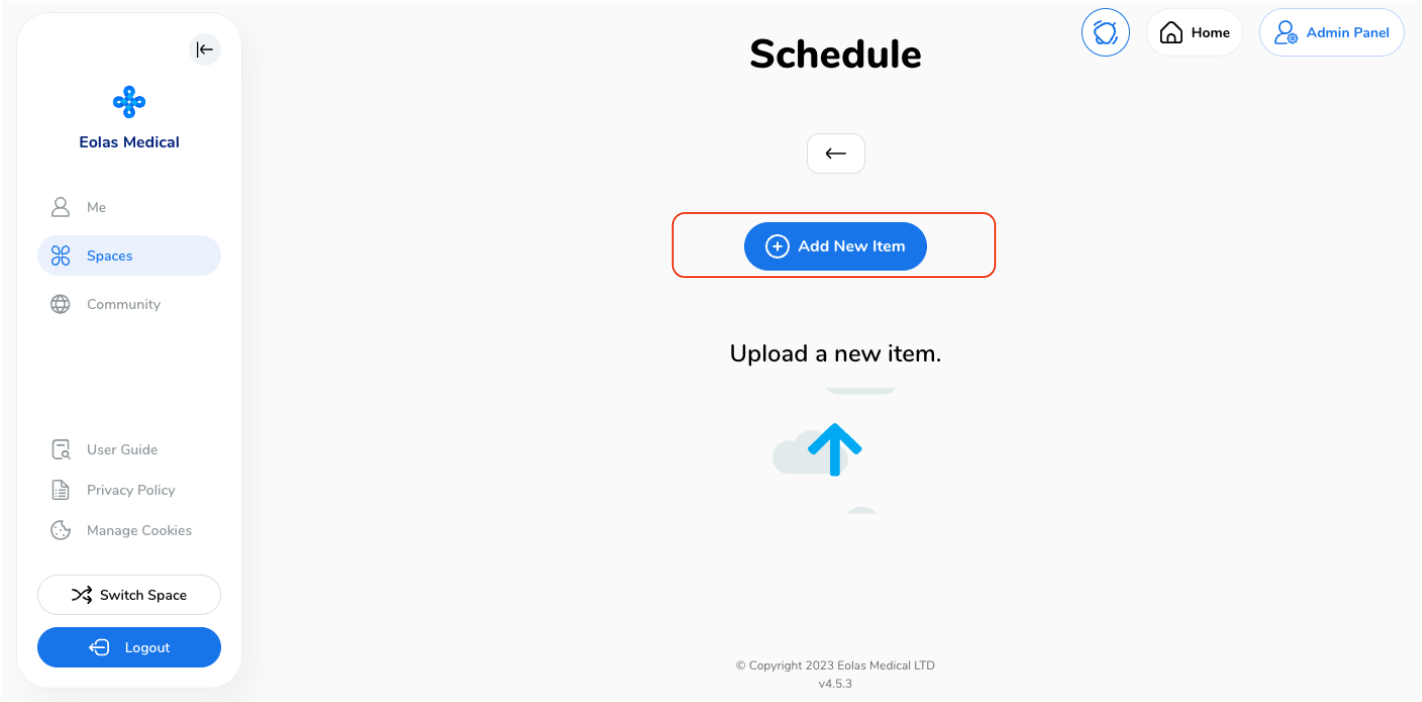
You will be directed to the 'Schedule' page, where you can start the file upload process.
-
Click on "Add New Item".
-
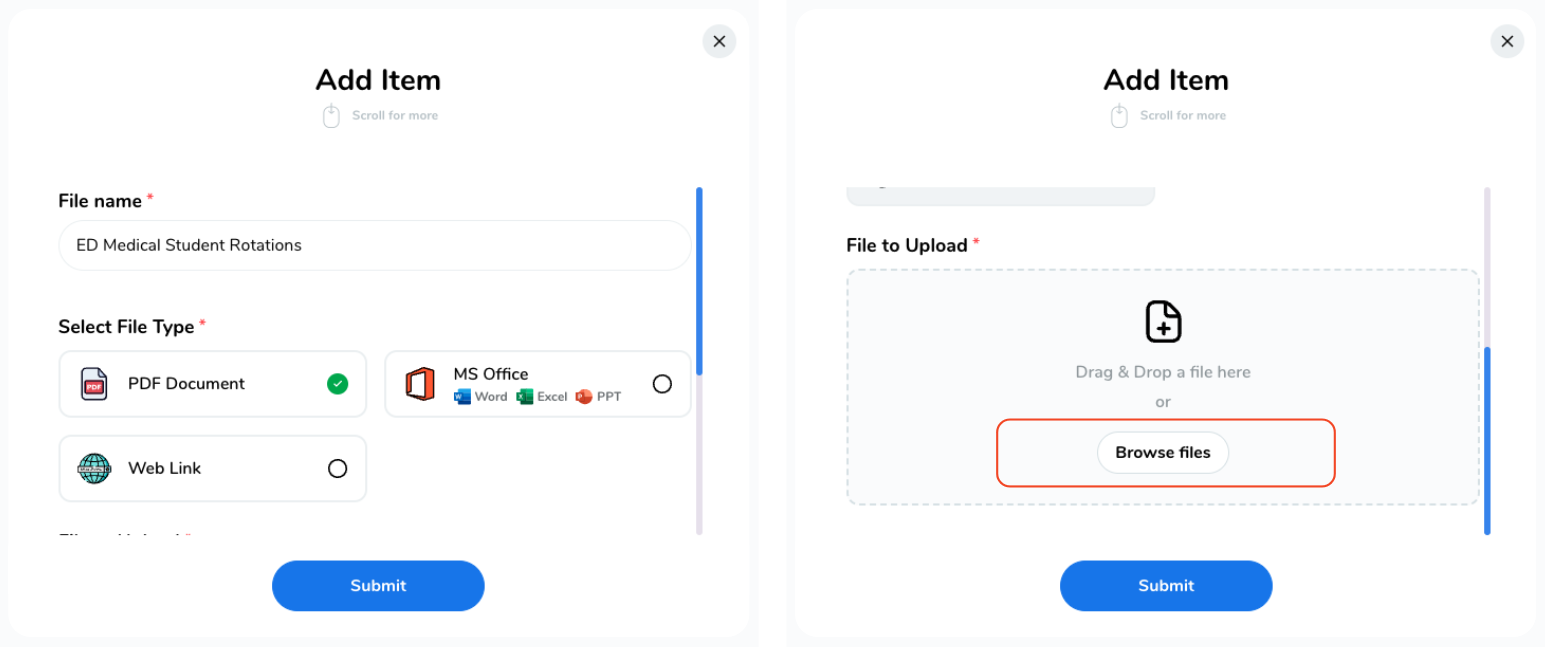
In the pop-up window, enter a name for your file.
-
Then, choose the file type you wish to upload. You have two options:
-
PDF Documents / MS Office Files containing the roster information. This option is convenient if your schedule is created offline and needs to be stored and distributed as a static document.
-
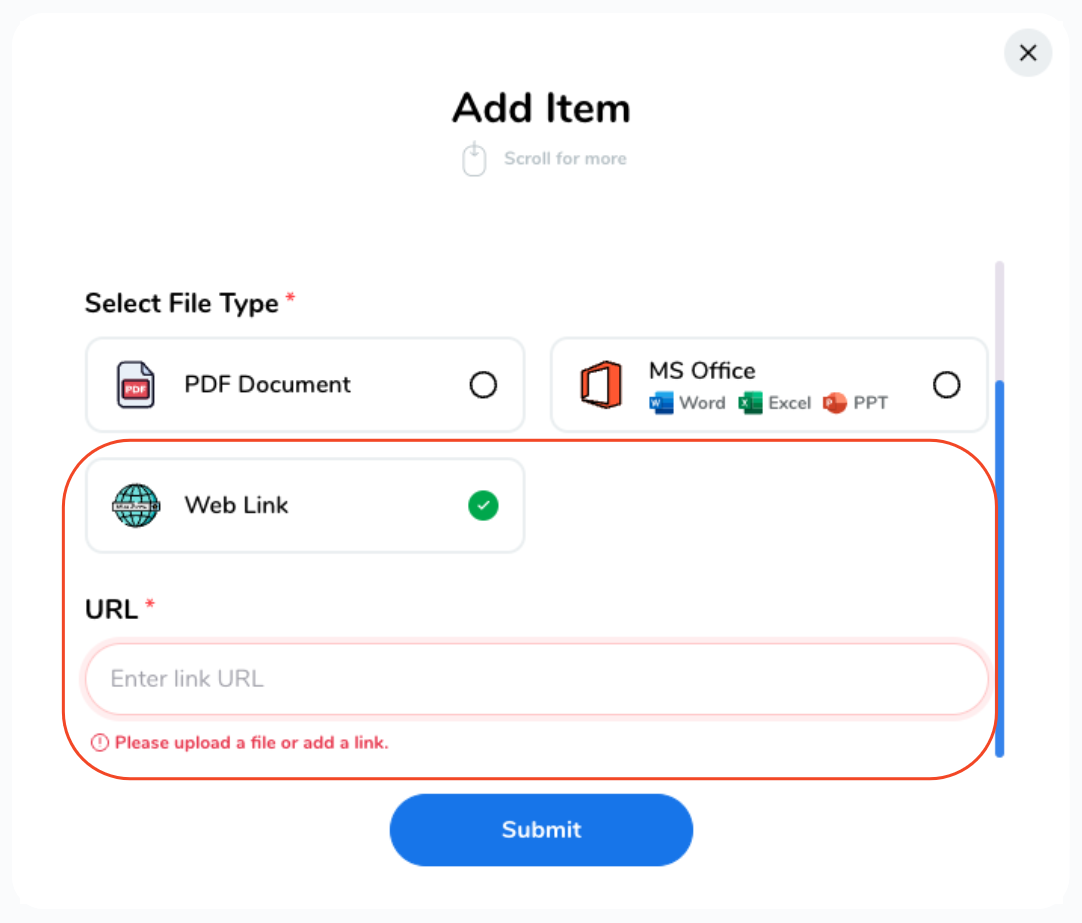
Web Links. If your department's work schedule is hosted online, such as on Teams or Google Drive, you can simply provide a web link to the schedule. This ensures that department users can access the most up-to-date roster without the need for repeated file uploads.
-
Finally, click "Submit" to upload your schedule.
Begin by clicking on "Schedule/Roster" or the customised section name you've assigned.
You will be directed to the 'Schedule' page, where you can start the file upload process.
Click on "Add New Item".

In the pop-up window, enter a name for your file.
Then, choose the file type you wish to upload. You have two options:
PDF Documents / MS Office Files containing the roster information. This option is convenient if your schedule is created offline and needs to be stored and distributed as a static document.
-
To upload a PDF Document or MS Office File, select the option accordingly and click "Browse Files" to select a file from your local device.
To upload a PDF Document or MS Office File, select the option accordingly and click "Browse Files" to select a file from your local device.

Web Links. If your department's work schedule is hosted online, such as on Teams or Google Drive, you can simply provide a web link to the schedule. This ensures that department users can access the most up-to-date roster without the need for repeated file uploads.
-
To add a web link, select this option and enter the URL.
To add a web link, select this option and enter the URL.

Finally, click "Submit" to upload your schedule.
And ta-da! Your schedule has been added and is ready to go! 🎉


