Reviewing and Managing Completed Checklists. | Eolas Medical | Help Center
Discover efficient techniques for reviewing and managing completed checklists to streamline your workflow.
Checklists are really handy for keeping track of what tasks medical staff, like equipment checks, have tackled—they're like little accountability heroes!
Once you've crafted your checklists and your team is using them day in and day out, you can give them a quick review every now and then, just to make sure everything's on track and ready for any checks or audits that might come up.
Managing completed Checklists.
To access your completed checklists, follow these simple steps:
-
Head over to the "Admin Panel".
-
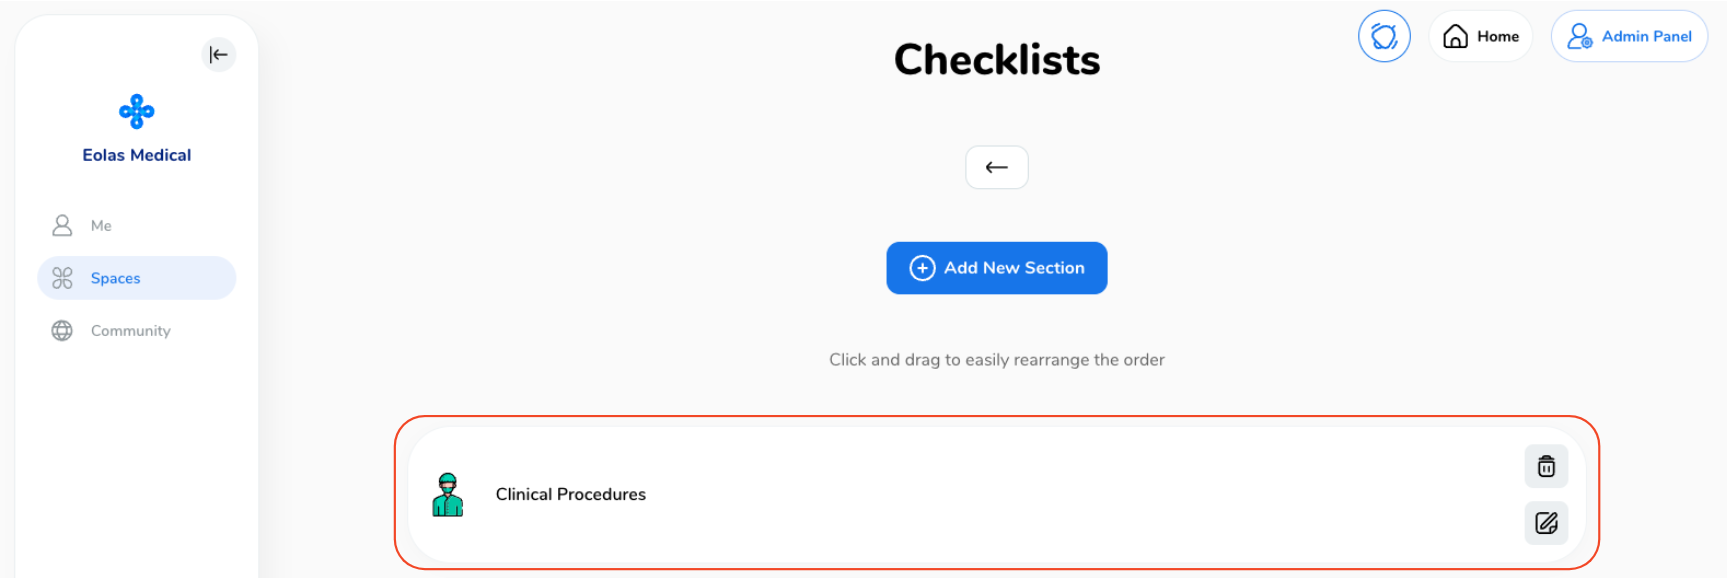
Click on "Content Management" and then select "Checklists".
-
Find the section that holds the specific checklist you want to review.
-
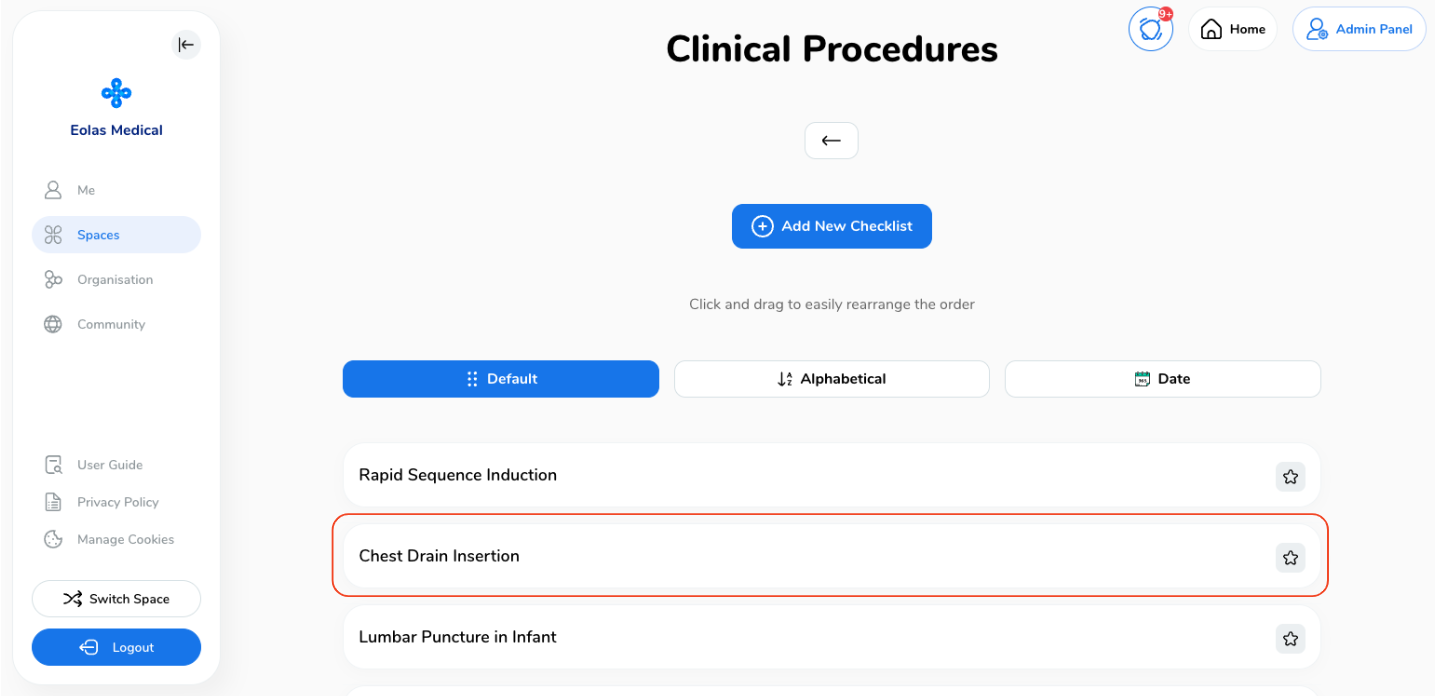
Choose the checklist you're interested in and click on it.
-
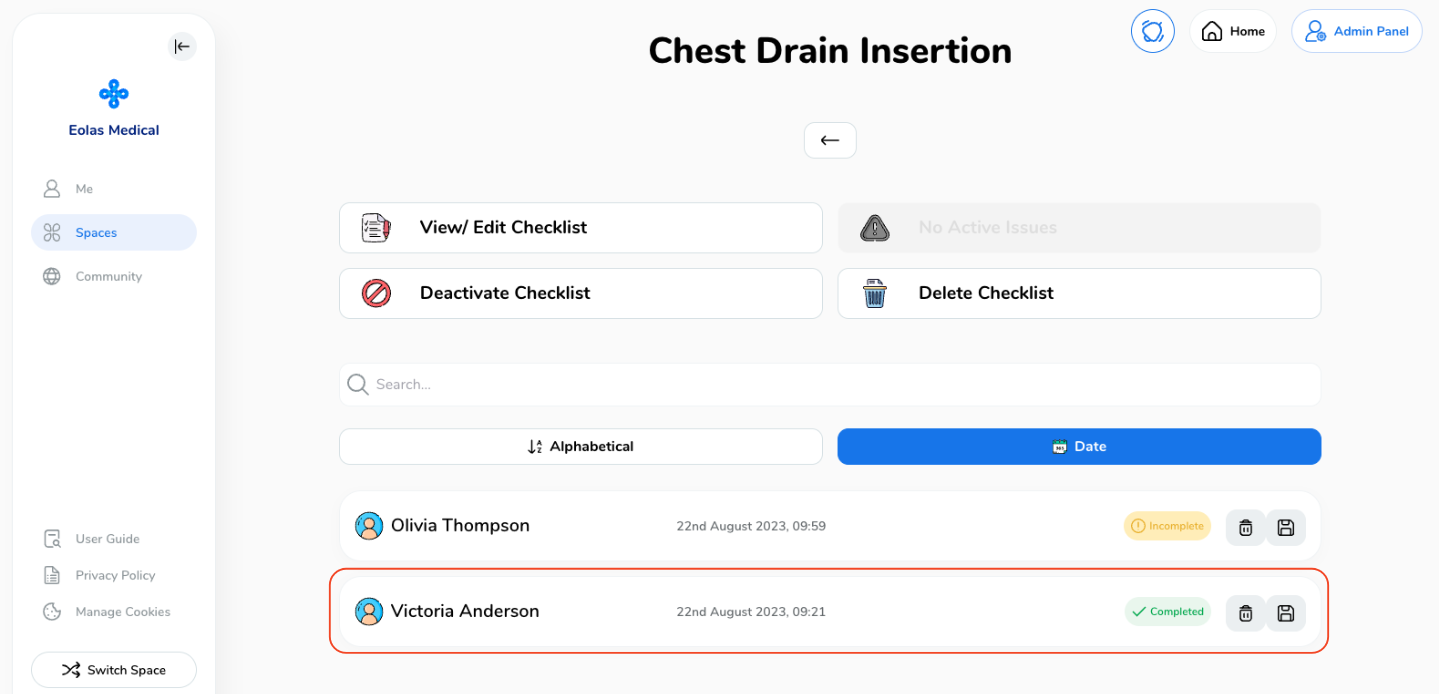
You'll find yourself on the checklist management page, where you can dive into various tasks like editing checklists or deactivating them, to name a few.
Continuing down the page, you'll come across a list of all submitted checklists, regardless of whether they're marked as complete or incomplete.
Keep an eye out for the friendly green "completed" label on the right side.-
Additionally, you have the option to search through the list using the search bar. Just enter the name or date in the search bar, and you'll be able to view the corresponding results.
-
For added organization, the list can be sorted in two ways: alphabetically or by date.
-
-
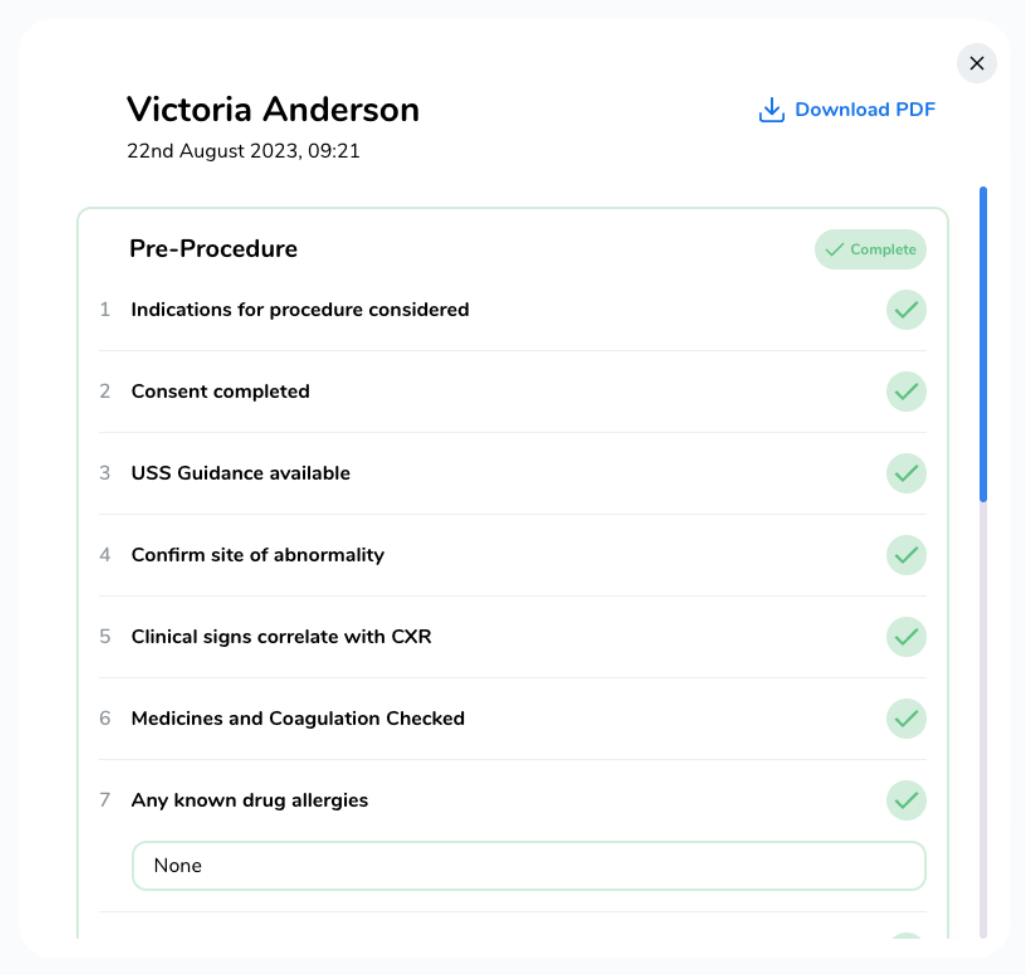
For a checklist review, just click on it. This will trigger a pop-up window where you can choose to either review the checklist or download it as a PDF.
Head over to the "Admin Panel".
Click on "Content Management" and then select "Checklists".
Find the section that holds the specific checklist you want to review.

Choose the checklist you're interested in and click on it.

You'll find yourself on the checklist management page, where you can dive into various tasks like editing checklists or deactivating them, to name a few.
Continuing down the page, you'll come across a list of all submitted checklists, regardless of whether they're marked as complete or incomplete.
Keep an eye out for the friendly green "completed" label on the right side.

-
Additionally, you have the option to search through the list using the search bar. Just enter the name or date in the search bar, and you'll be able to view the corresponding results.
Additionally, you have the option to search through the list using the search bar. Just enter the name or date in the search bar, and you'll be able to view the corresponding results.
-
For added organization, the list can be sorted in two ways: alphabetically or by date.
For added organization, the list can be sorted in two ways: alphabetically or by date.
For a checklist review, just click on it. This will trigger a pop-up window where you can choose to either review the checklist or download it as a PDF.

Storing a Completed Checklist.
-
To save a checklist, all you need to do is click on the "Floppy Disk" icon.
To save a checklist, all you need to do is click on the "Floppy Disk" icon.

Removing a Completed Checklist.
-
Deleting a checklist is as simple as clicking the "Bin" icon.
-
Don't worry if you hit it accidentally; there's a confirmation step. Just choose the "X" in the upper right corner of the pop-up to go back.
-
Deleting a checklist is as simple as clicking the "Bin" icon.

-
Don't worry if you hit it accidentally; there's a confirmation step. Just choose the "X" in the upper right corner of the pop-up to go back.
Don't worry if you hit it accidentally; there's a confirmation step. Just choose the "X" in the upper right corner of the pop-up to go back.


