Managing Your Contacts: Updating and Deleting Contact Details | Eolas Medical | Help Center
Contact information can change, and we understand the importance of staying organised and keeping your Contacts current. That's why we've made it super easy for you to keep everything up-to-date and manage your Contacts hassle-free.
Managing your Contacts is simple, and we're here to guide you every step of the way. Here's how to do it:
Editing Your Contacts.
If you're looking to edit a contact, just follow these simple steps:
-
Start by navigating to the "Admin Panel", then click on "Content Management" and choose the "Contacts" section.
-
Once you're on the contacts page, look for the section that contains the number, email, or other details you wish to update, and simply click on it.
-
Now, find the specific contact you want to edit. Over on the far right of their information, you'll spot a "Pen and Paper/Edit" icon. Go ahead and give it a click to kickstart the editing process.
-
A handy pop-up will appear, allowing you to update the contact details. You can change a name, add a new number, adjust keywords, or even amend the contact type. Be sure to scroll down to access additional options.
-
Once you've made all the desired edits, click "Update Contact" to save your changes.
-
Your Contact is now updated and good to go for your users.
Start by navigating to the "Admin Panel", then click on "Content Management" and choose the "Contacts" section.
Once you're on the contacts page, look for the section that contains the number, email, or other details you wish to update, and simply click on it.
Now, find the specific contact you want to edit. Over on the far right of their information, you'll spot a "Pen and Paper/Edit" icon. Go ahead and give it a click to kickstart the editing process.
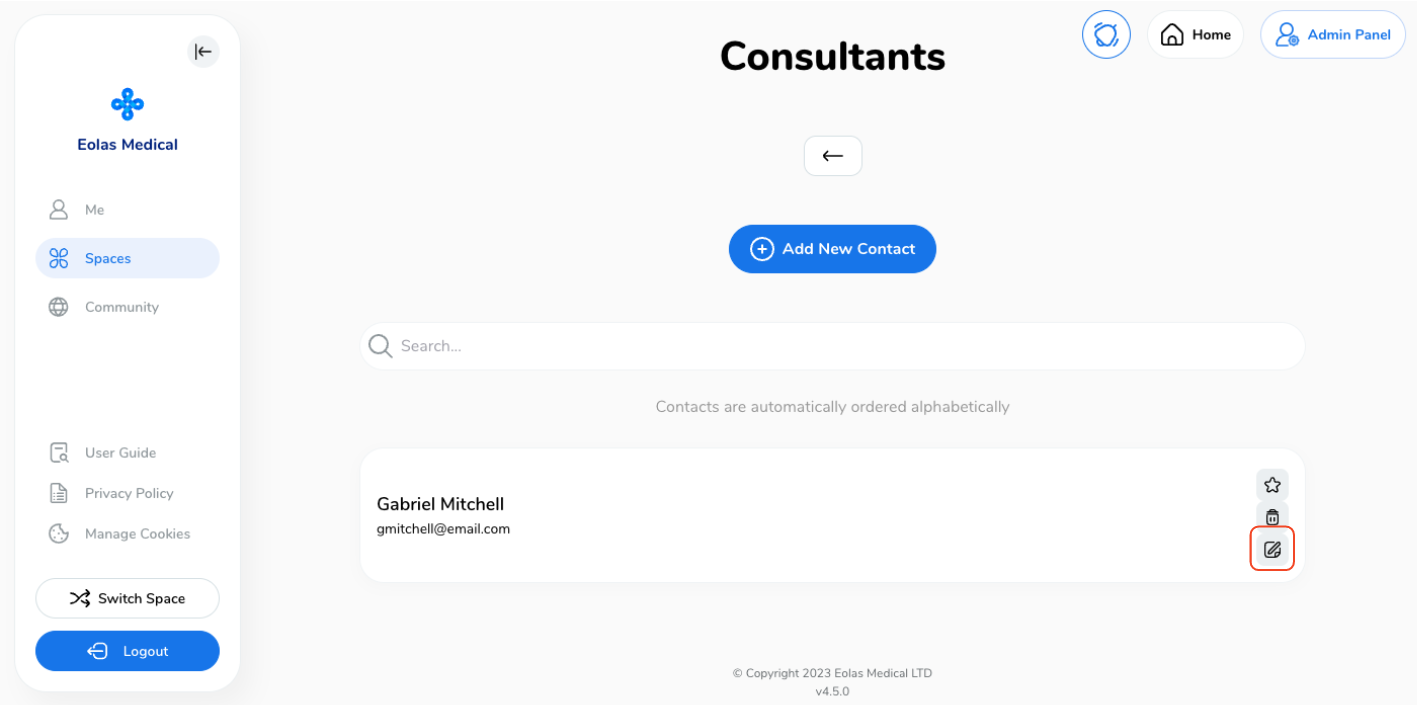
A handy pop-up will appear, allowing you to update the contact details. You can change a name, add a new number, adjust keywords, or even amend the contact type. Be sure to scroll down to access additional options.
Once you've made all the desired edits, click "Update Contact" to save your changes.
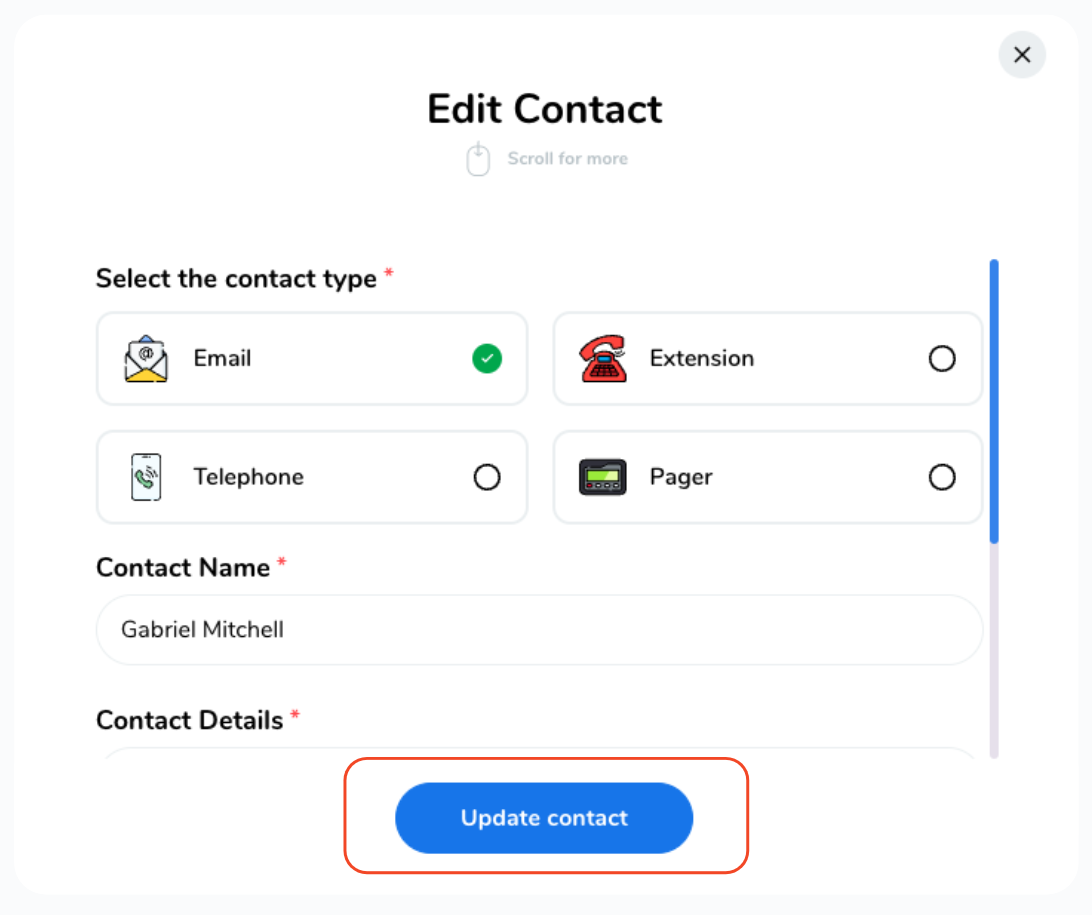
Your Contact is now updated and good to go for your users.
Deleting Your Contacts.
To remove a contact, simply follow this steps:
-
Let's navigate to the section where your contact is stored.
-
Find the contact you want to say goodbye to. On the far right of their contact info, there's a "Bin/Delete" button. Click it to start the deletion process.
-
A confirmation pop-up will appear; to proceed with the deletion, click "Delete".
-
In case you accidentally clicked "Delete" and had a change of heart, no problem! You can easily cancel by clicking the "X" in the top right corner.
-
And that's it! Your contact is officially deleted.
Let's navigate to the section where your contact is stored.
Find the contact you want to say goodbye to. On the far right of their contact info, there's a "Bin/Delete" button. Click it to start the deletion process.
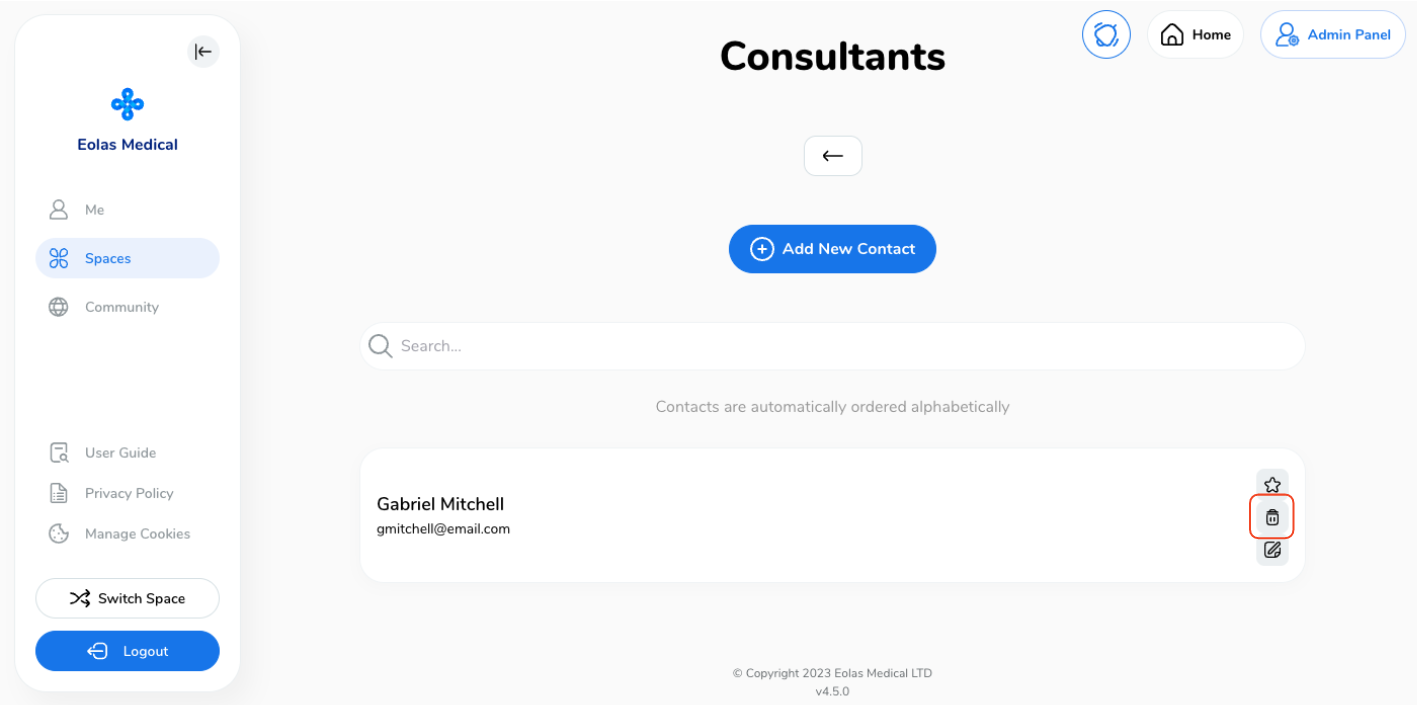
A confirmation pop-up will appear; to proceed with the deletion, click "Delete".
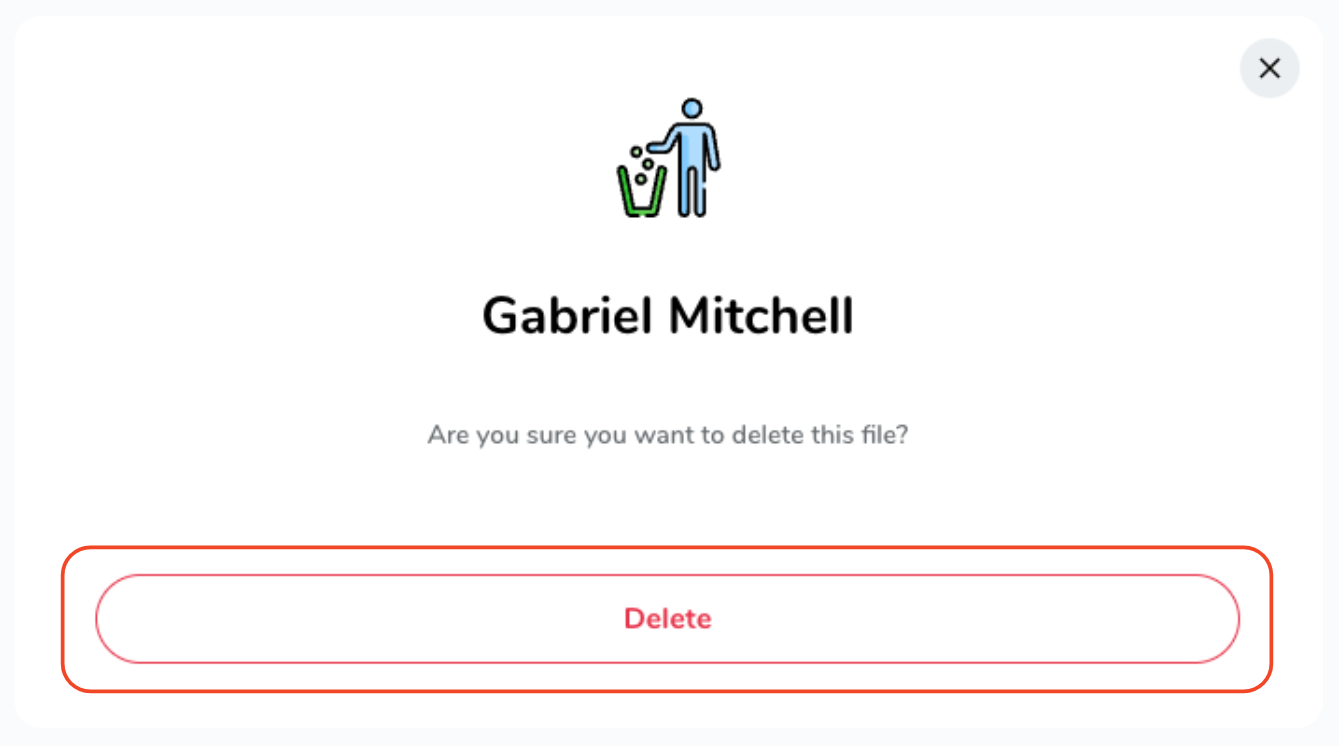
In case you accidentally clicked "Delete" and had a change of heart, no problem! You can easily cancel by clicking the "X" in the top right corner.
And that's it! Your contact is officially deleted.
Highlighting Contacts.
Highlighting a contact is a fun way to make them stand out, you can do it by:
-
Locate the Contact you want to shine a spotlight on. On the far right of their info, there's a Star Icon. Click it to make them a highlight superstar!
-
By clicking the star icon, the notification will now be featured as a highlight in the 'Highlights' section of your space
-
To remove the Highlight, just click on the "Star" again so it's no longer highlighted in black. Easy-peasy! 🌟
Locate the Contact you want to shine a spotlight on. On the far right of their info, there's a Star Icon. Click it to make them a highlight superstar!
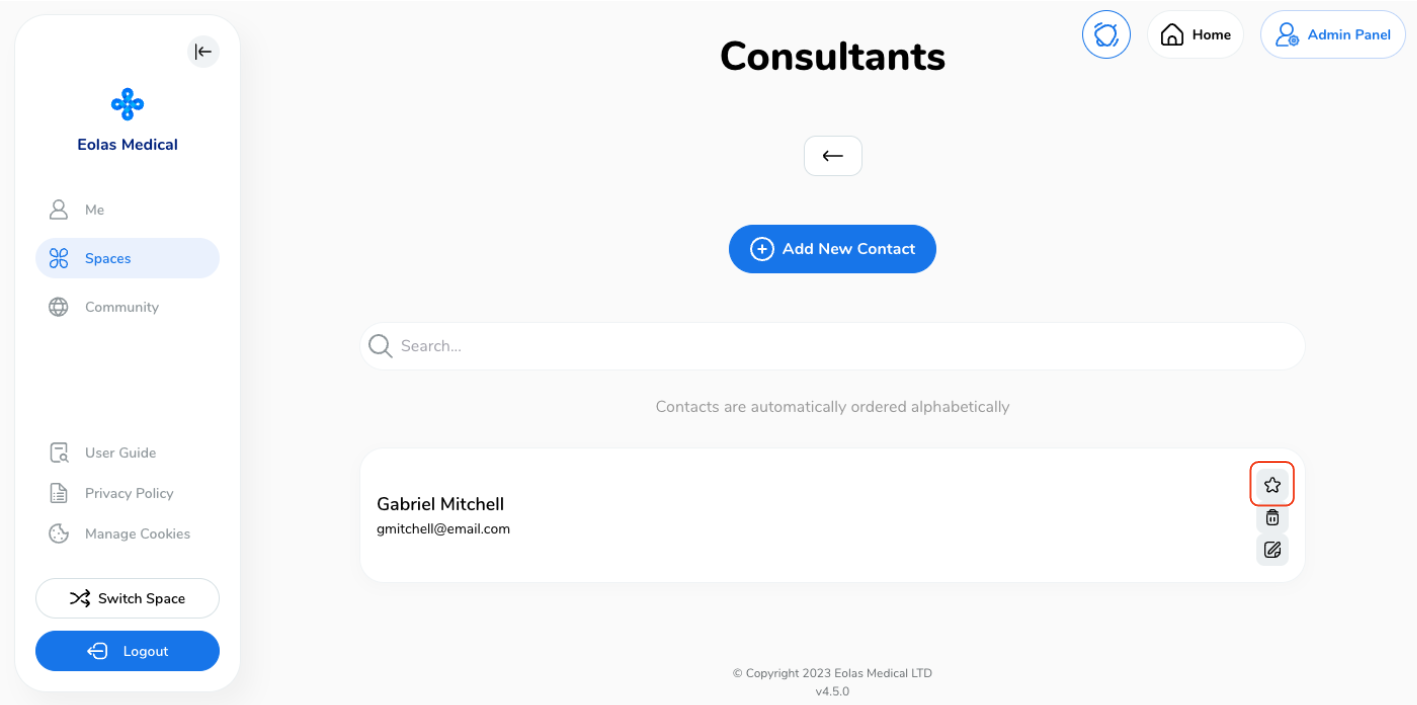
By clicking the star icon, the notification will now be featured as a highlight in the 'Highlights' section of your space
To remove the Highlight, just click on the "Star" again so it's no longer highlighted in black. Easy-peasy! 🌟

Stay organised and keep your contacts up-to-date with these simple steps. Managing your contacts is simple, ensuring smooth communication for your team. Happy managing!


