Managing Your Channel Settings. | Eolas Medical | Help Center
Make adjustments to specific channel settings, such as updating the name, icon, or managing members or invite additional members.
If you need to make changes to a specific channel, like updating the name, icon, or inviting more members, follow these simple steps:
-
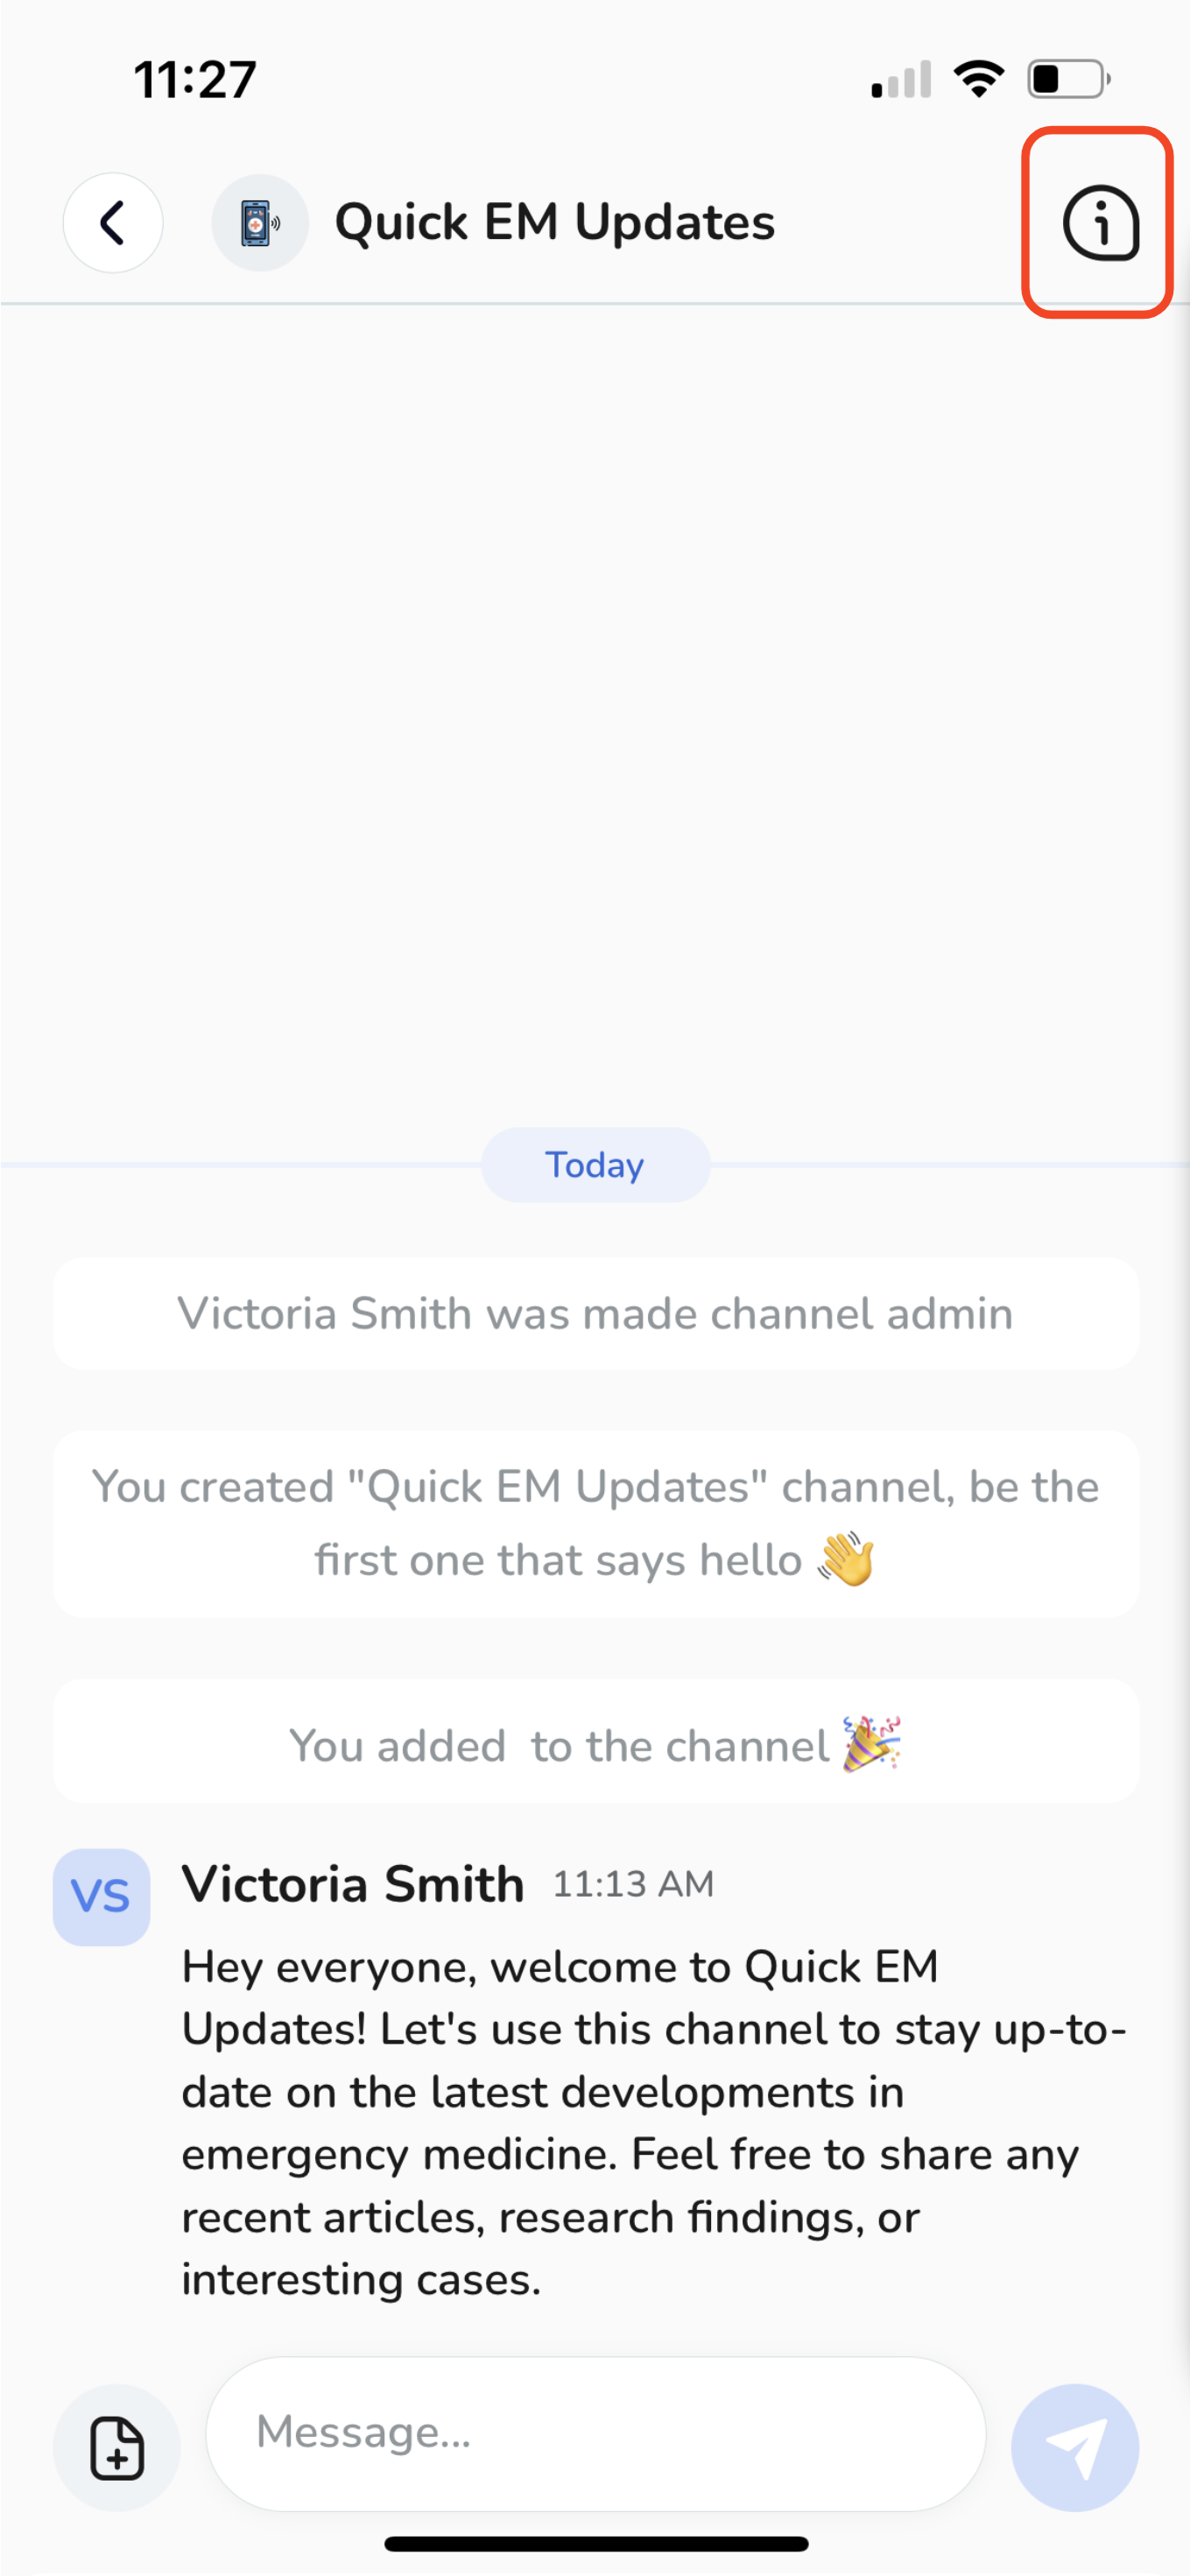
Click on the "Bubble Info" icon located in the top right corner of the channel.
-
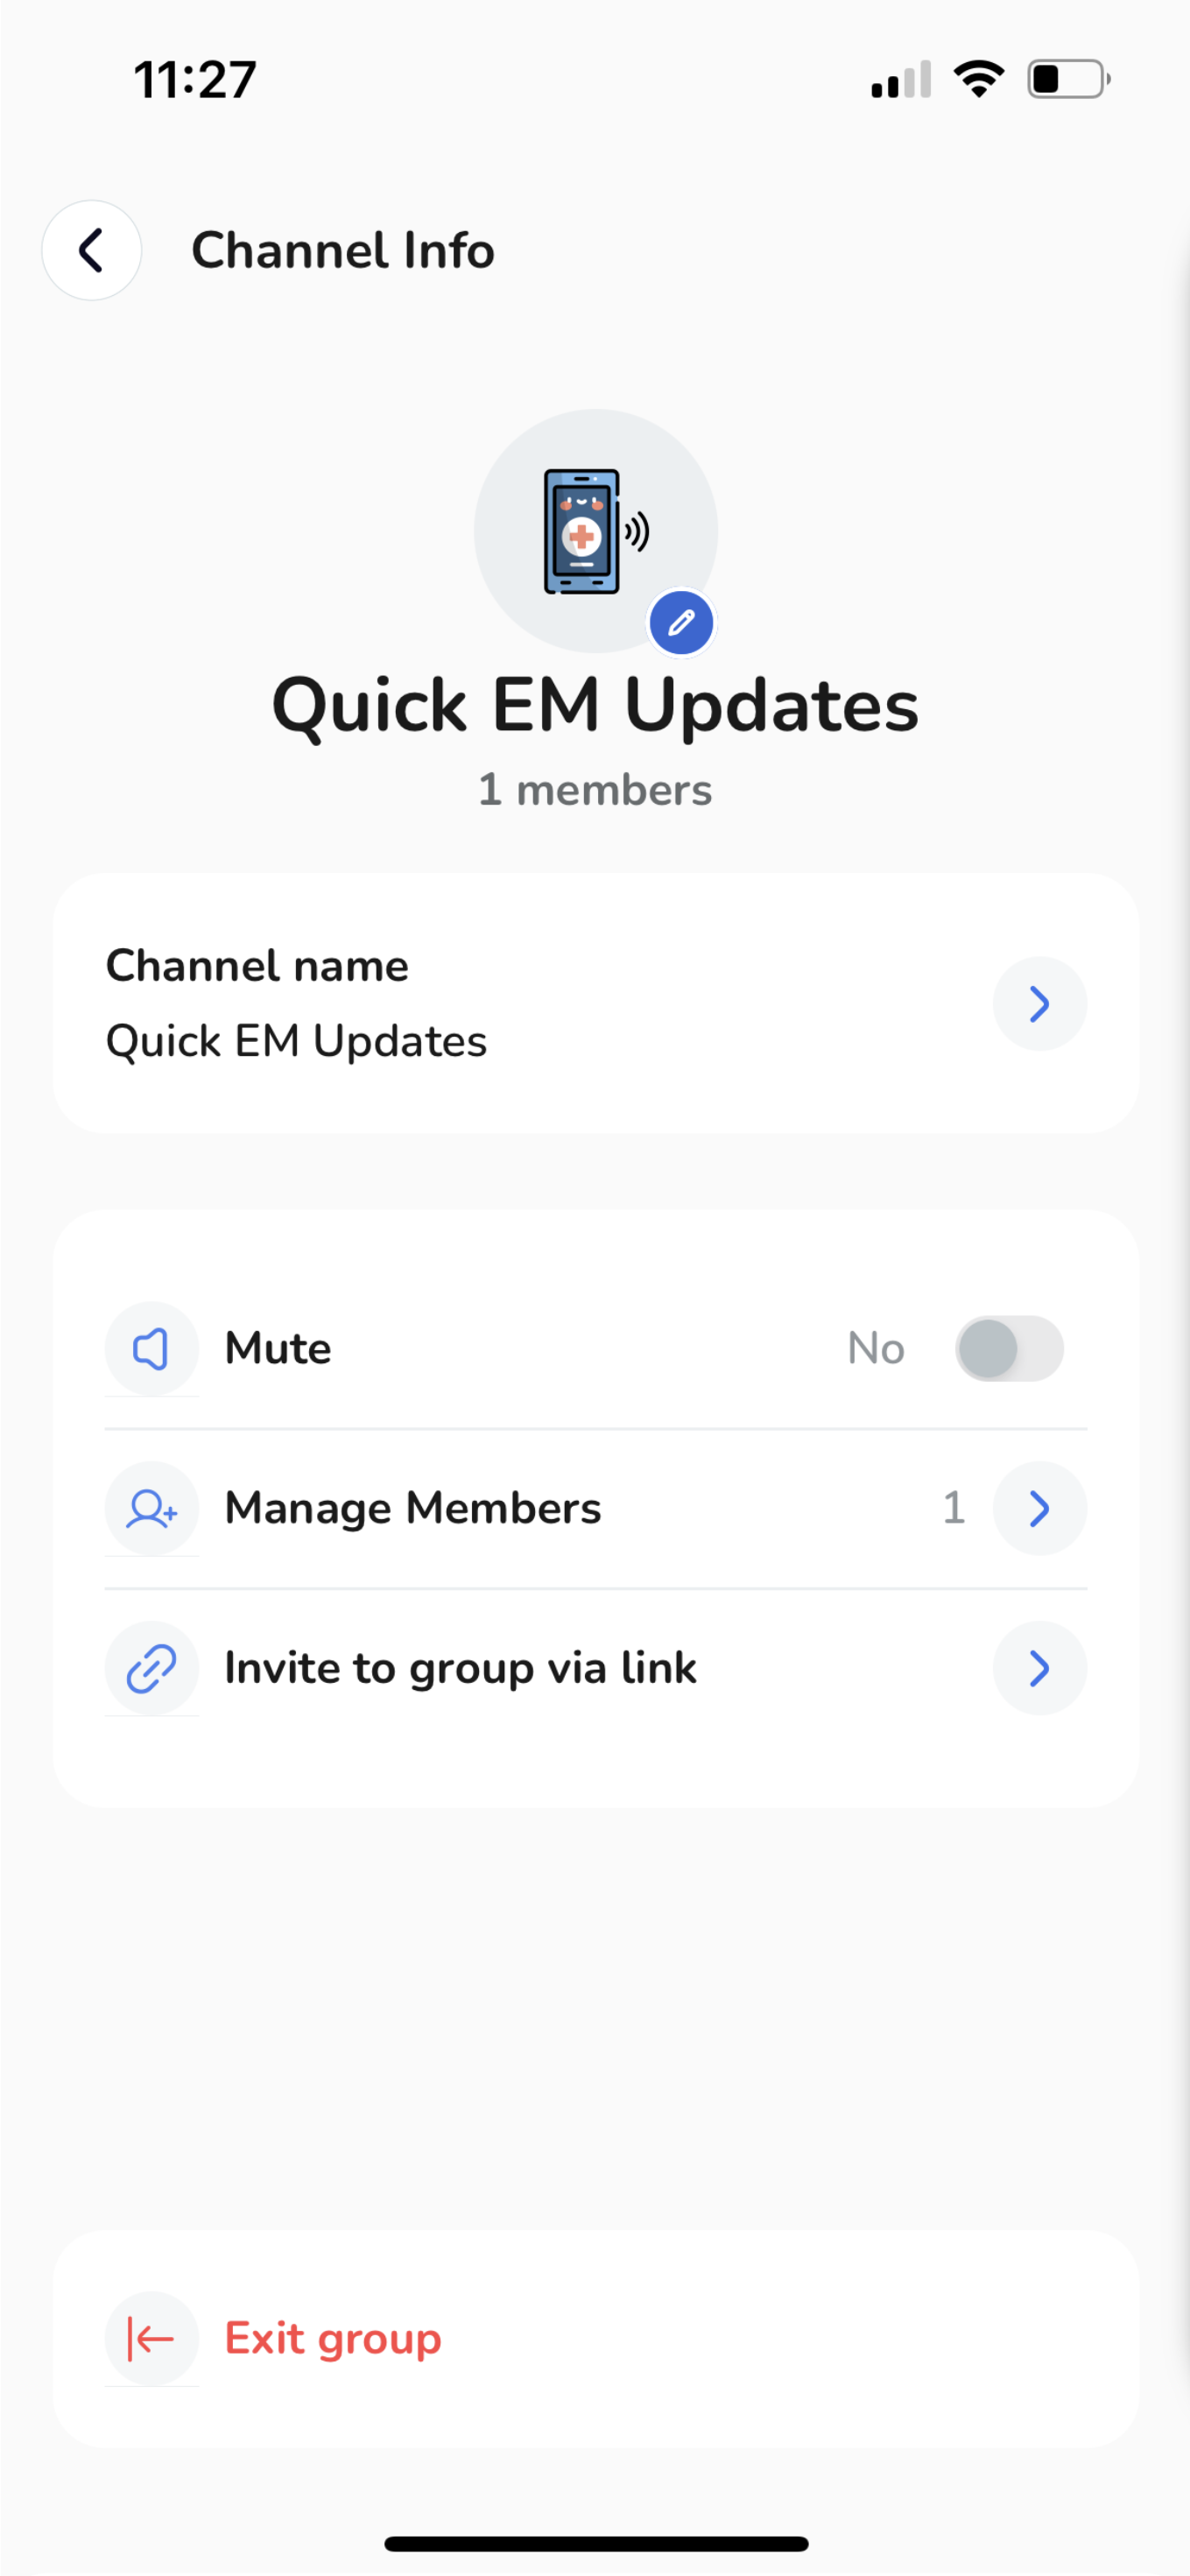
You will be directed to the channel info page, where you can perform various actions, including:
-
Modify the channel icon to better represent its purpose.
-
Edit the channel name for clarity and relevance.
-
Choose to mute the channel if you prefer not to receive notifications.
-
Efficiently manage your channel members by adding or removing them.
-
Leave the group if you no longer wish to be a part of it.
-
Easily invite more members by sharing a link.
-
Click on the "Bubble Info" icon located in the top right corner of the channel.
You will be directed to the channel info page, where you can perform various actions, including:
-
Modify the channel icon to better represent its purpose.
Modify the channel icon to better represent its purpose.
-
Edit the channel name for clarity and relevance.
Edit the channel name for clarity and relevance.
-
Choose to mute the channel if you prefer not to receive notifications.
Choose to mute the channel if you prefer not to receive notifications.
-
Efficiently manage your channel members by adding or removing them.
Efficiently manage your channel members by adding or removing them.
-
Leave the group if you no longer wish to be a part of it.
Leave the group if you no longer wish to be a part of it.
-
Easily invite more members by sharing a link.
Easily invite more members by sharing a link.
Change the Channel Icon.
-
Click on the "Icon" button.
-
Select your new icon.
-
Click "Done".
Click on the "Icon" button.
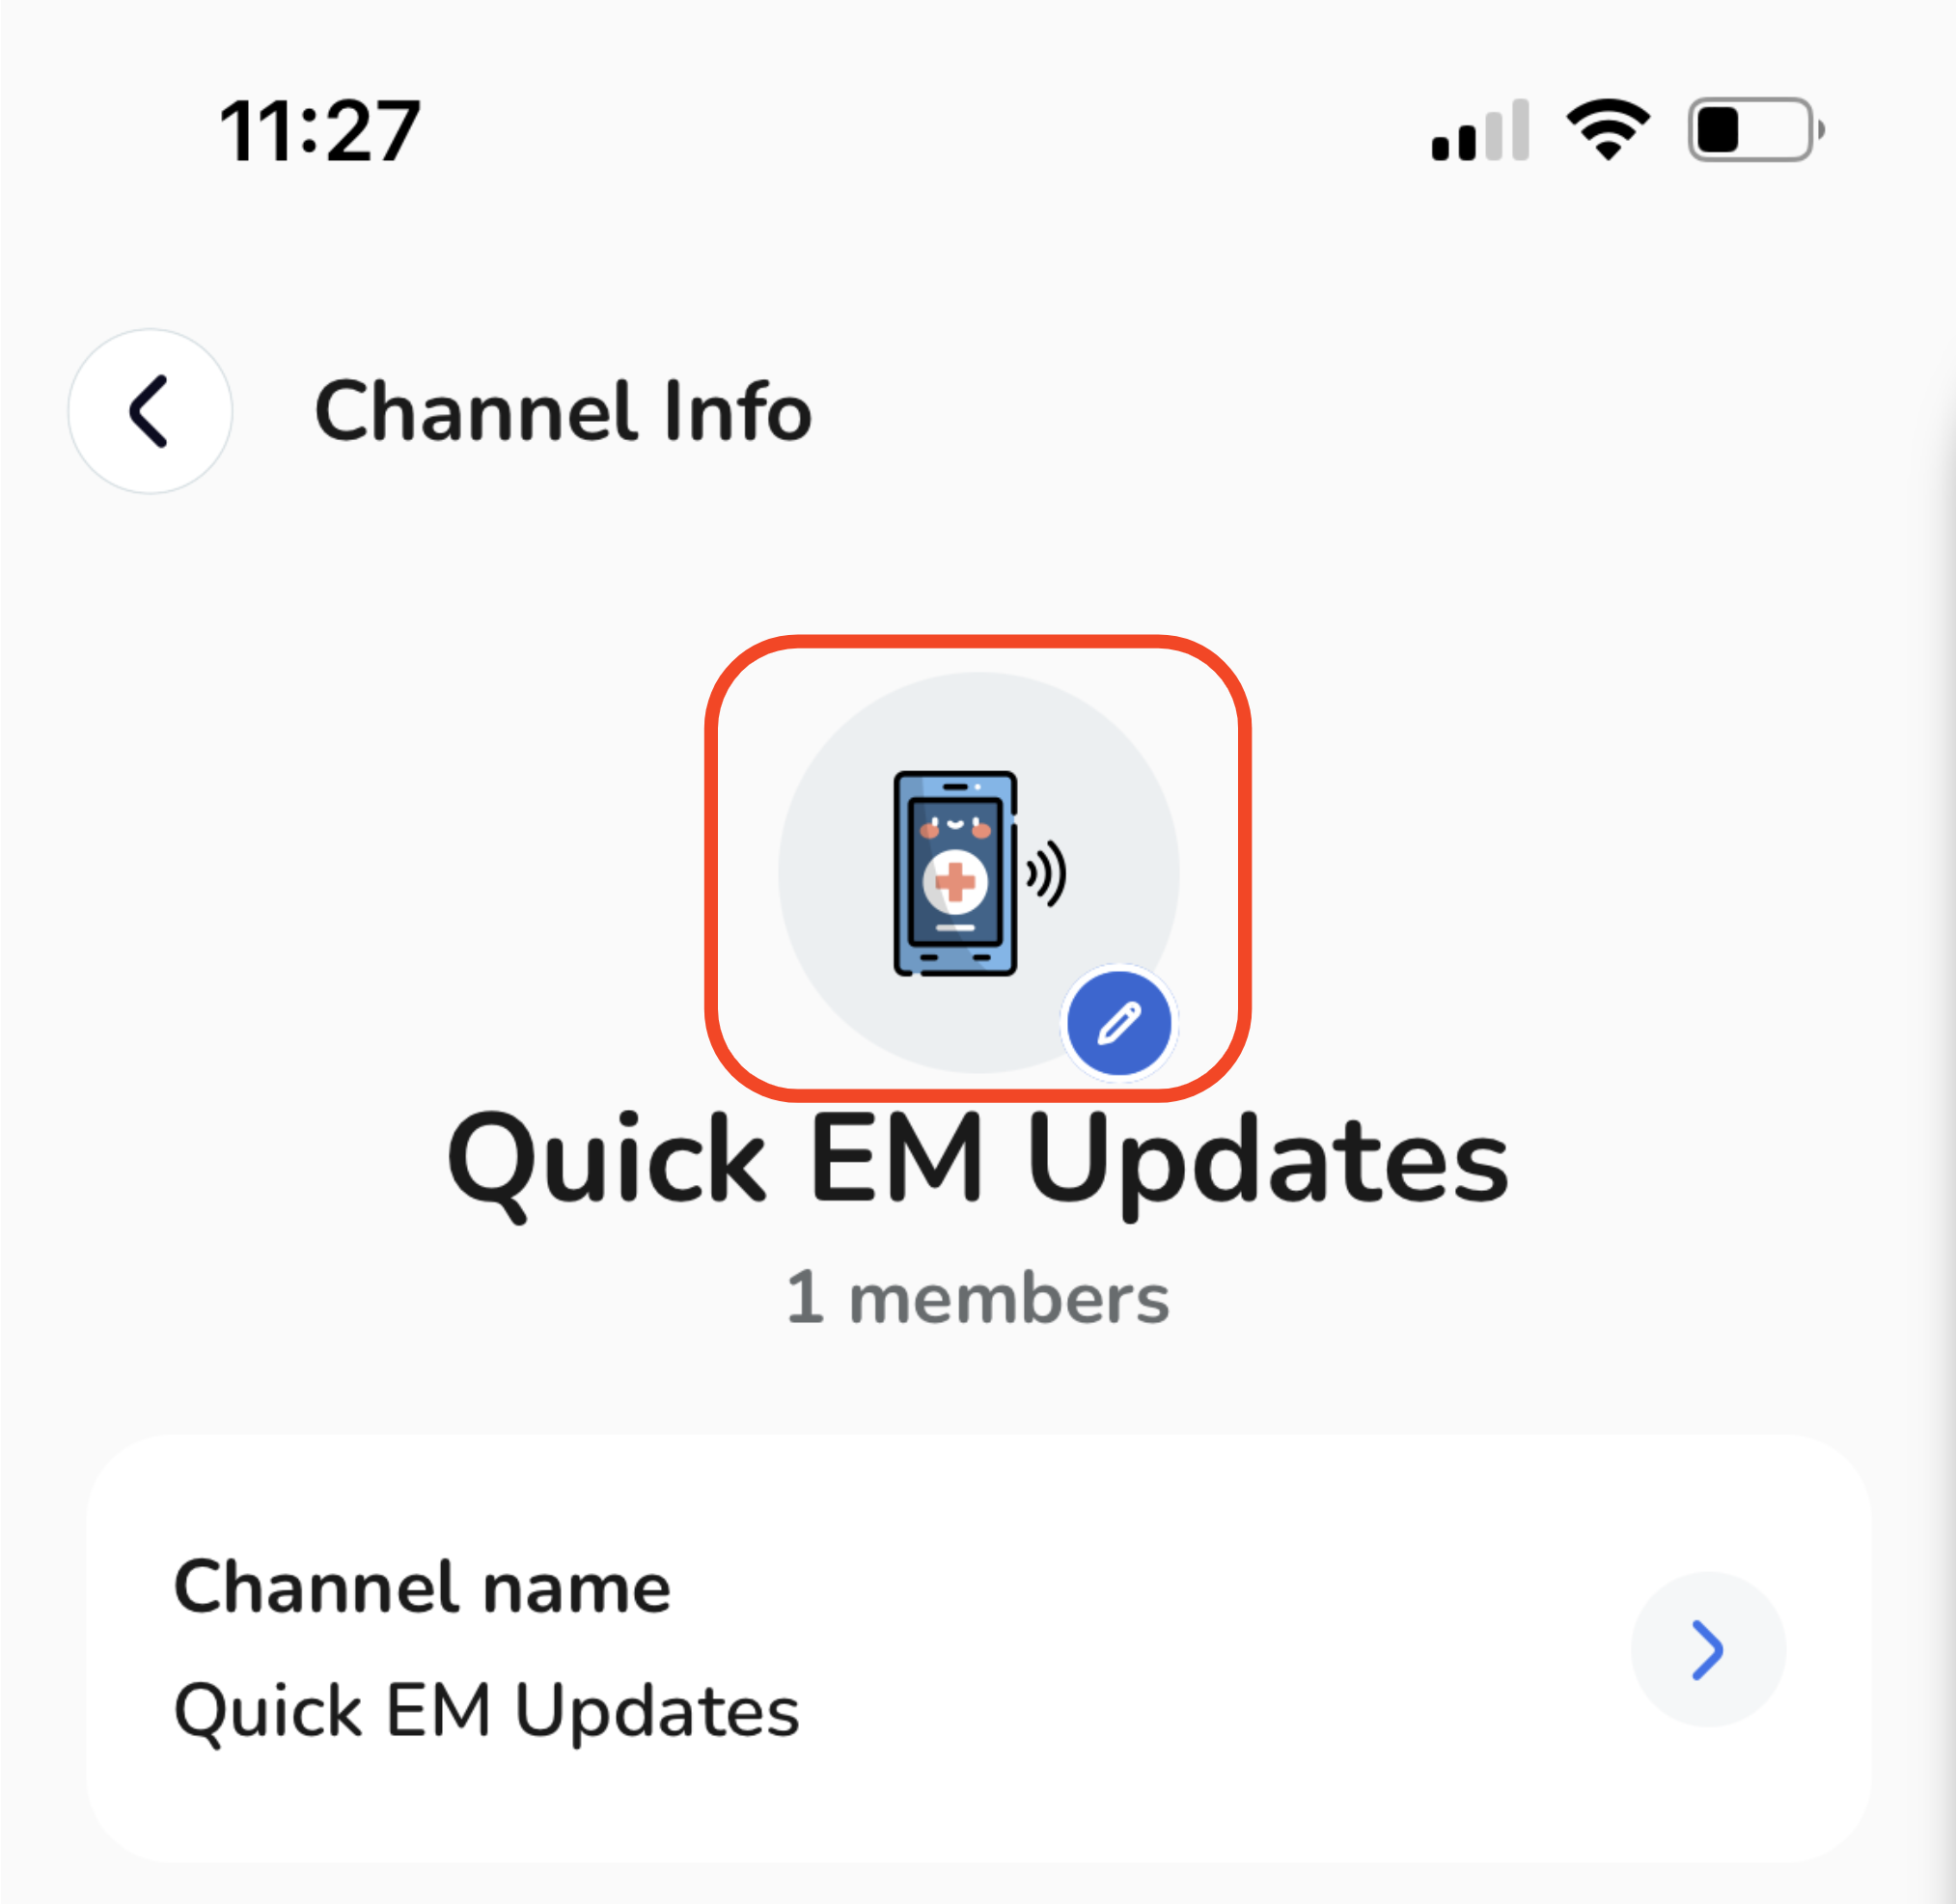
Select your new icon.
Click "Done".
Edit the channel name.
-
Tap on the channel name itself.
-
A pop-up window will appear, enabling you to edit the name.
-
Once you have made the desired changes, tap "Done" to save your edits.
Tap on the channel name itself.
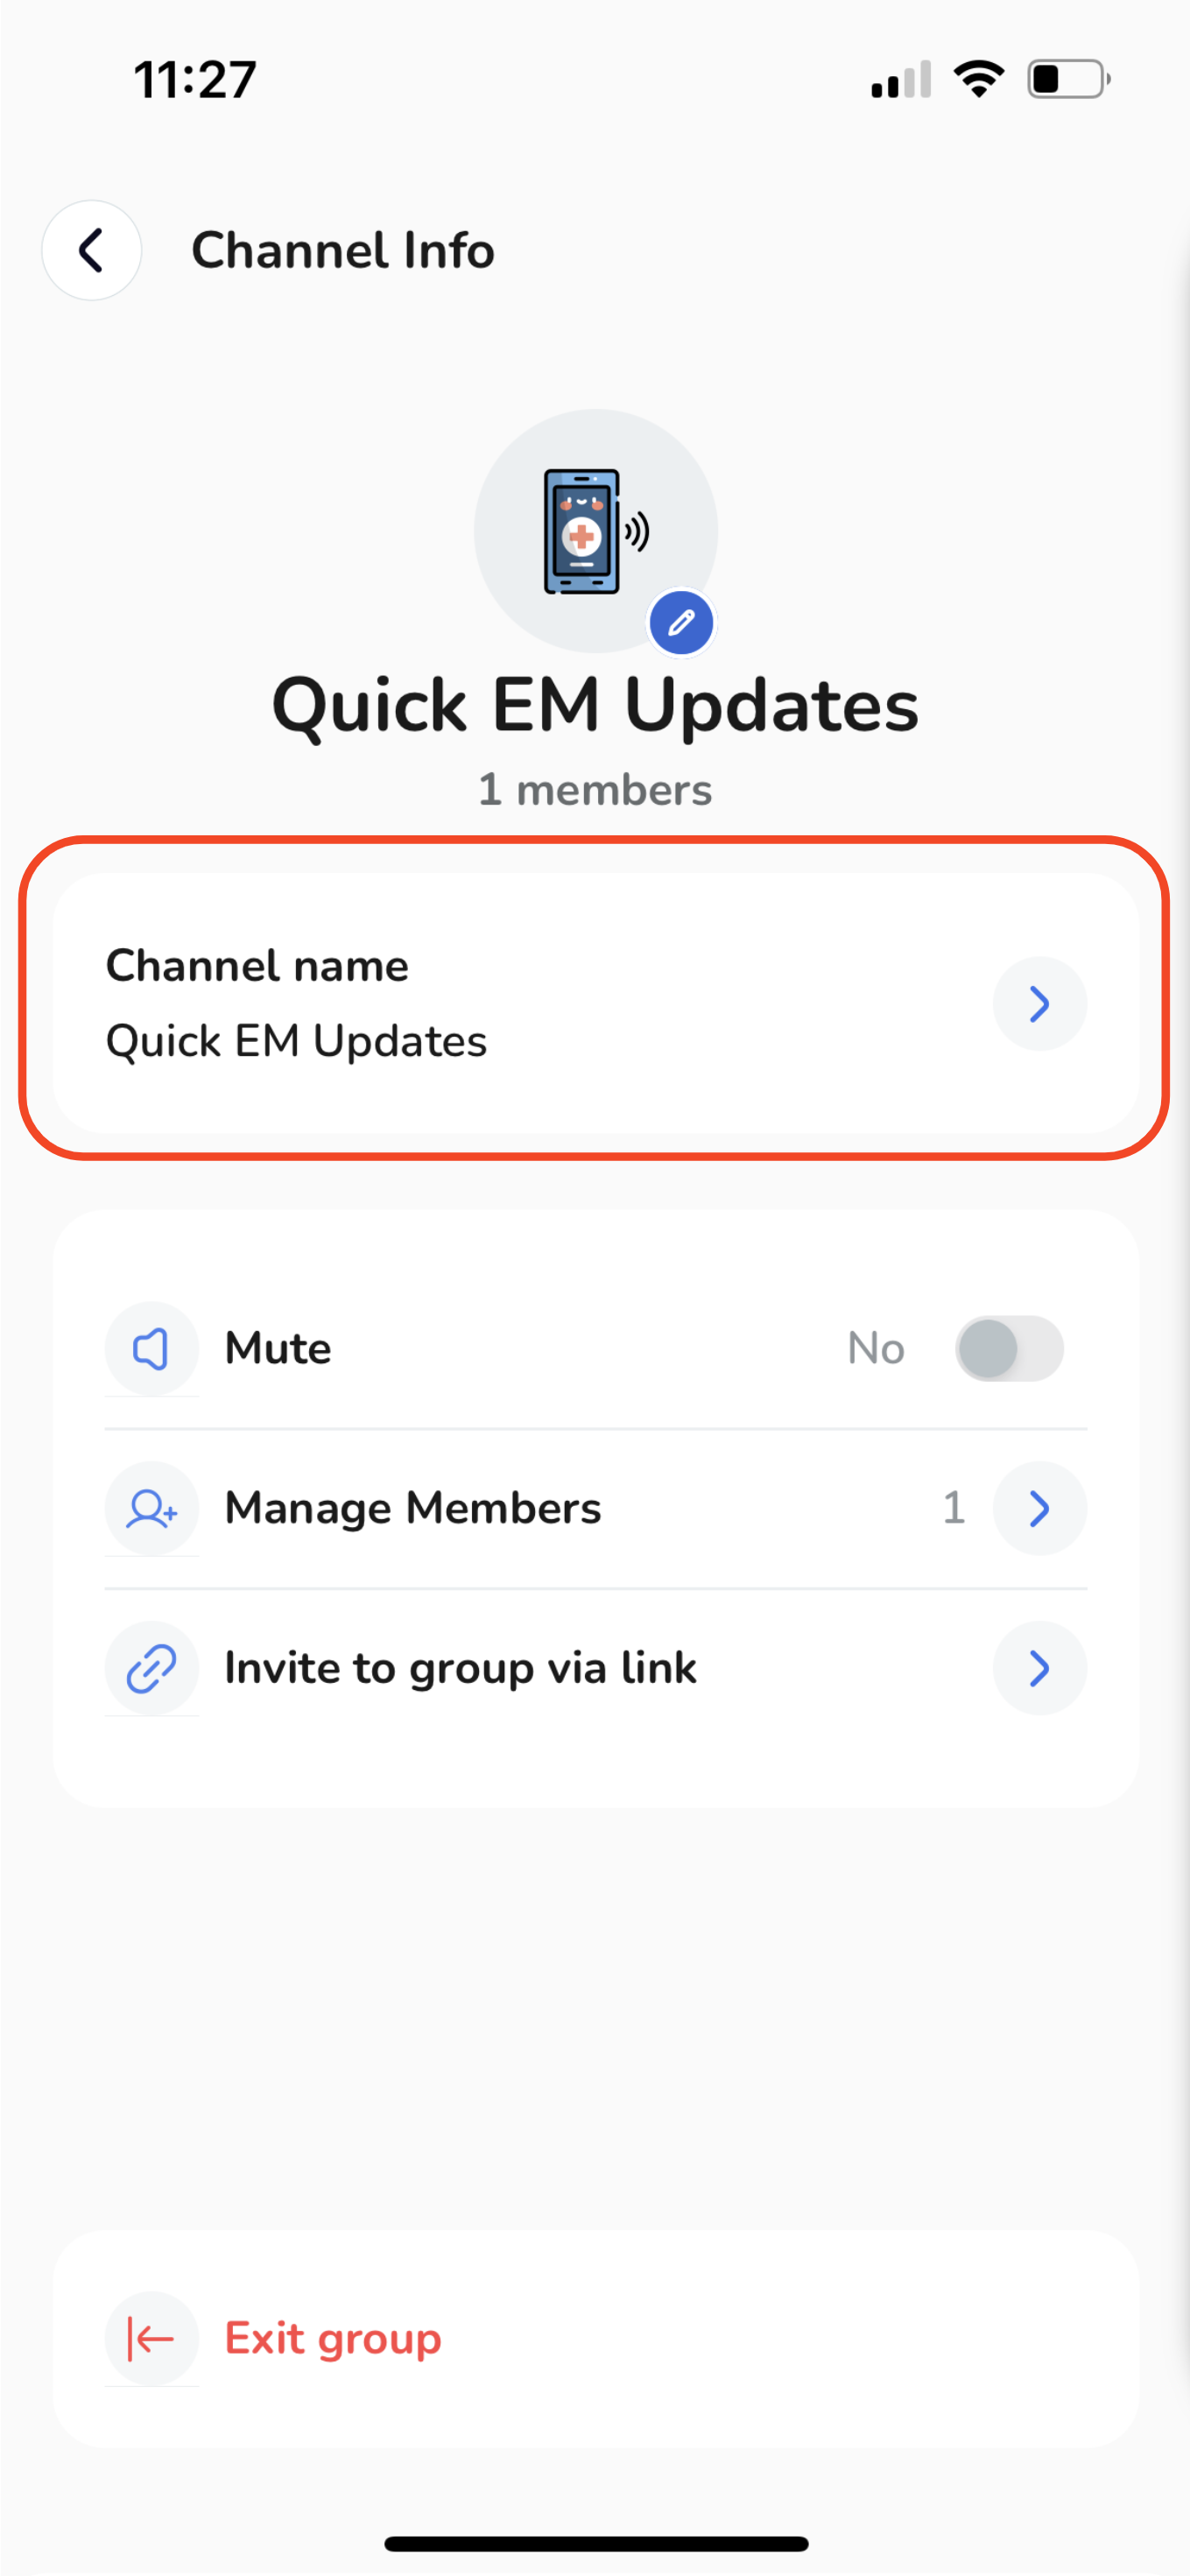
A pop-up window will appear, enabling you to edit the name.
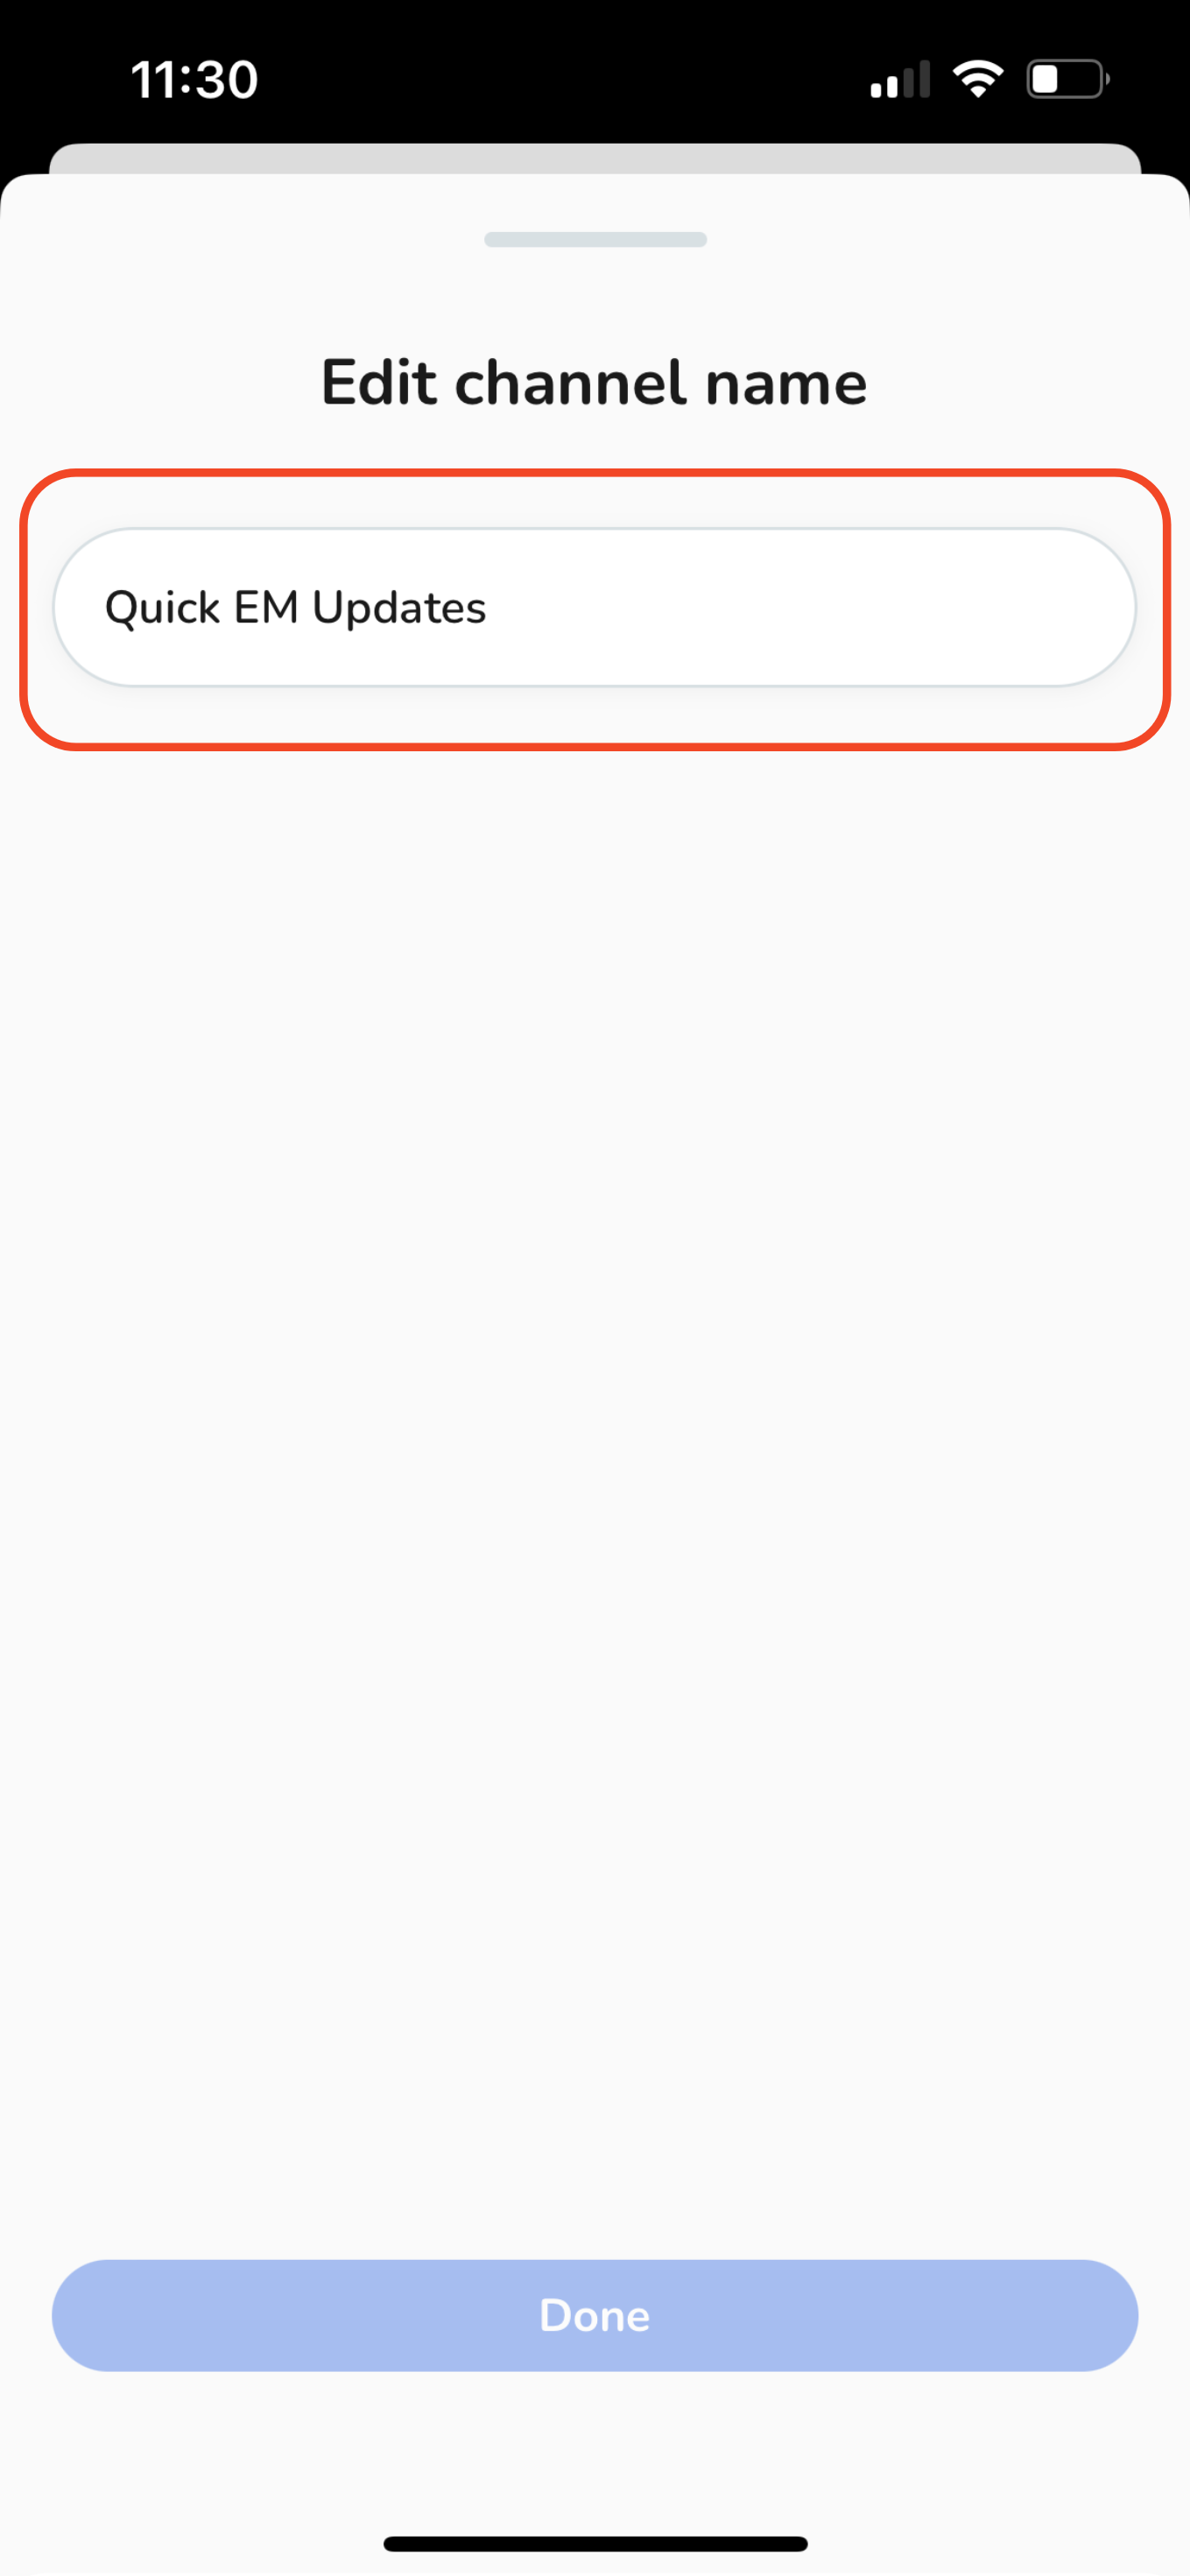
Once you have made the desired changes, tap "Done" to save your edits.
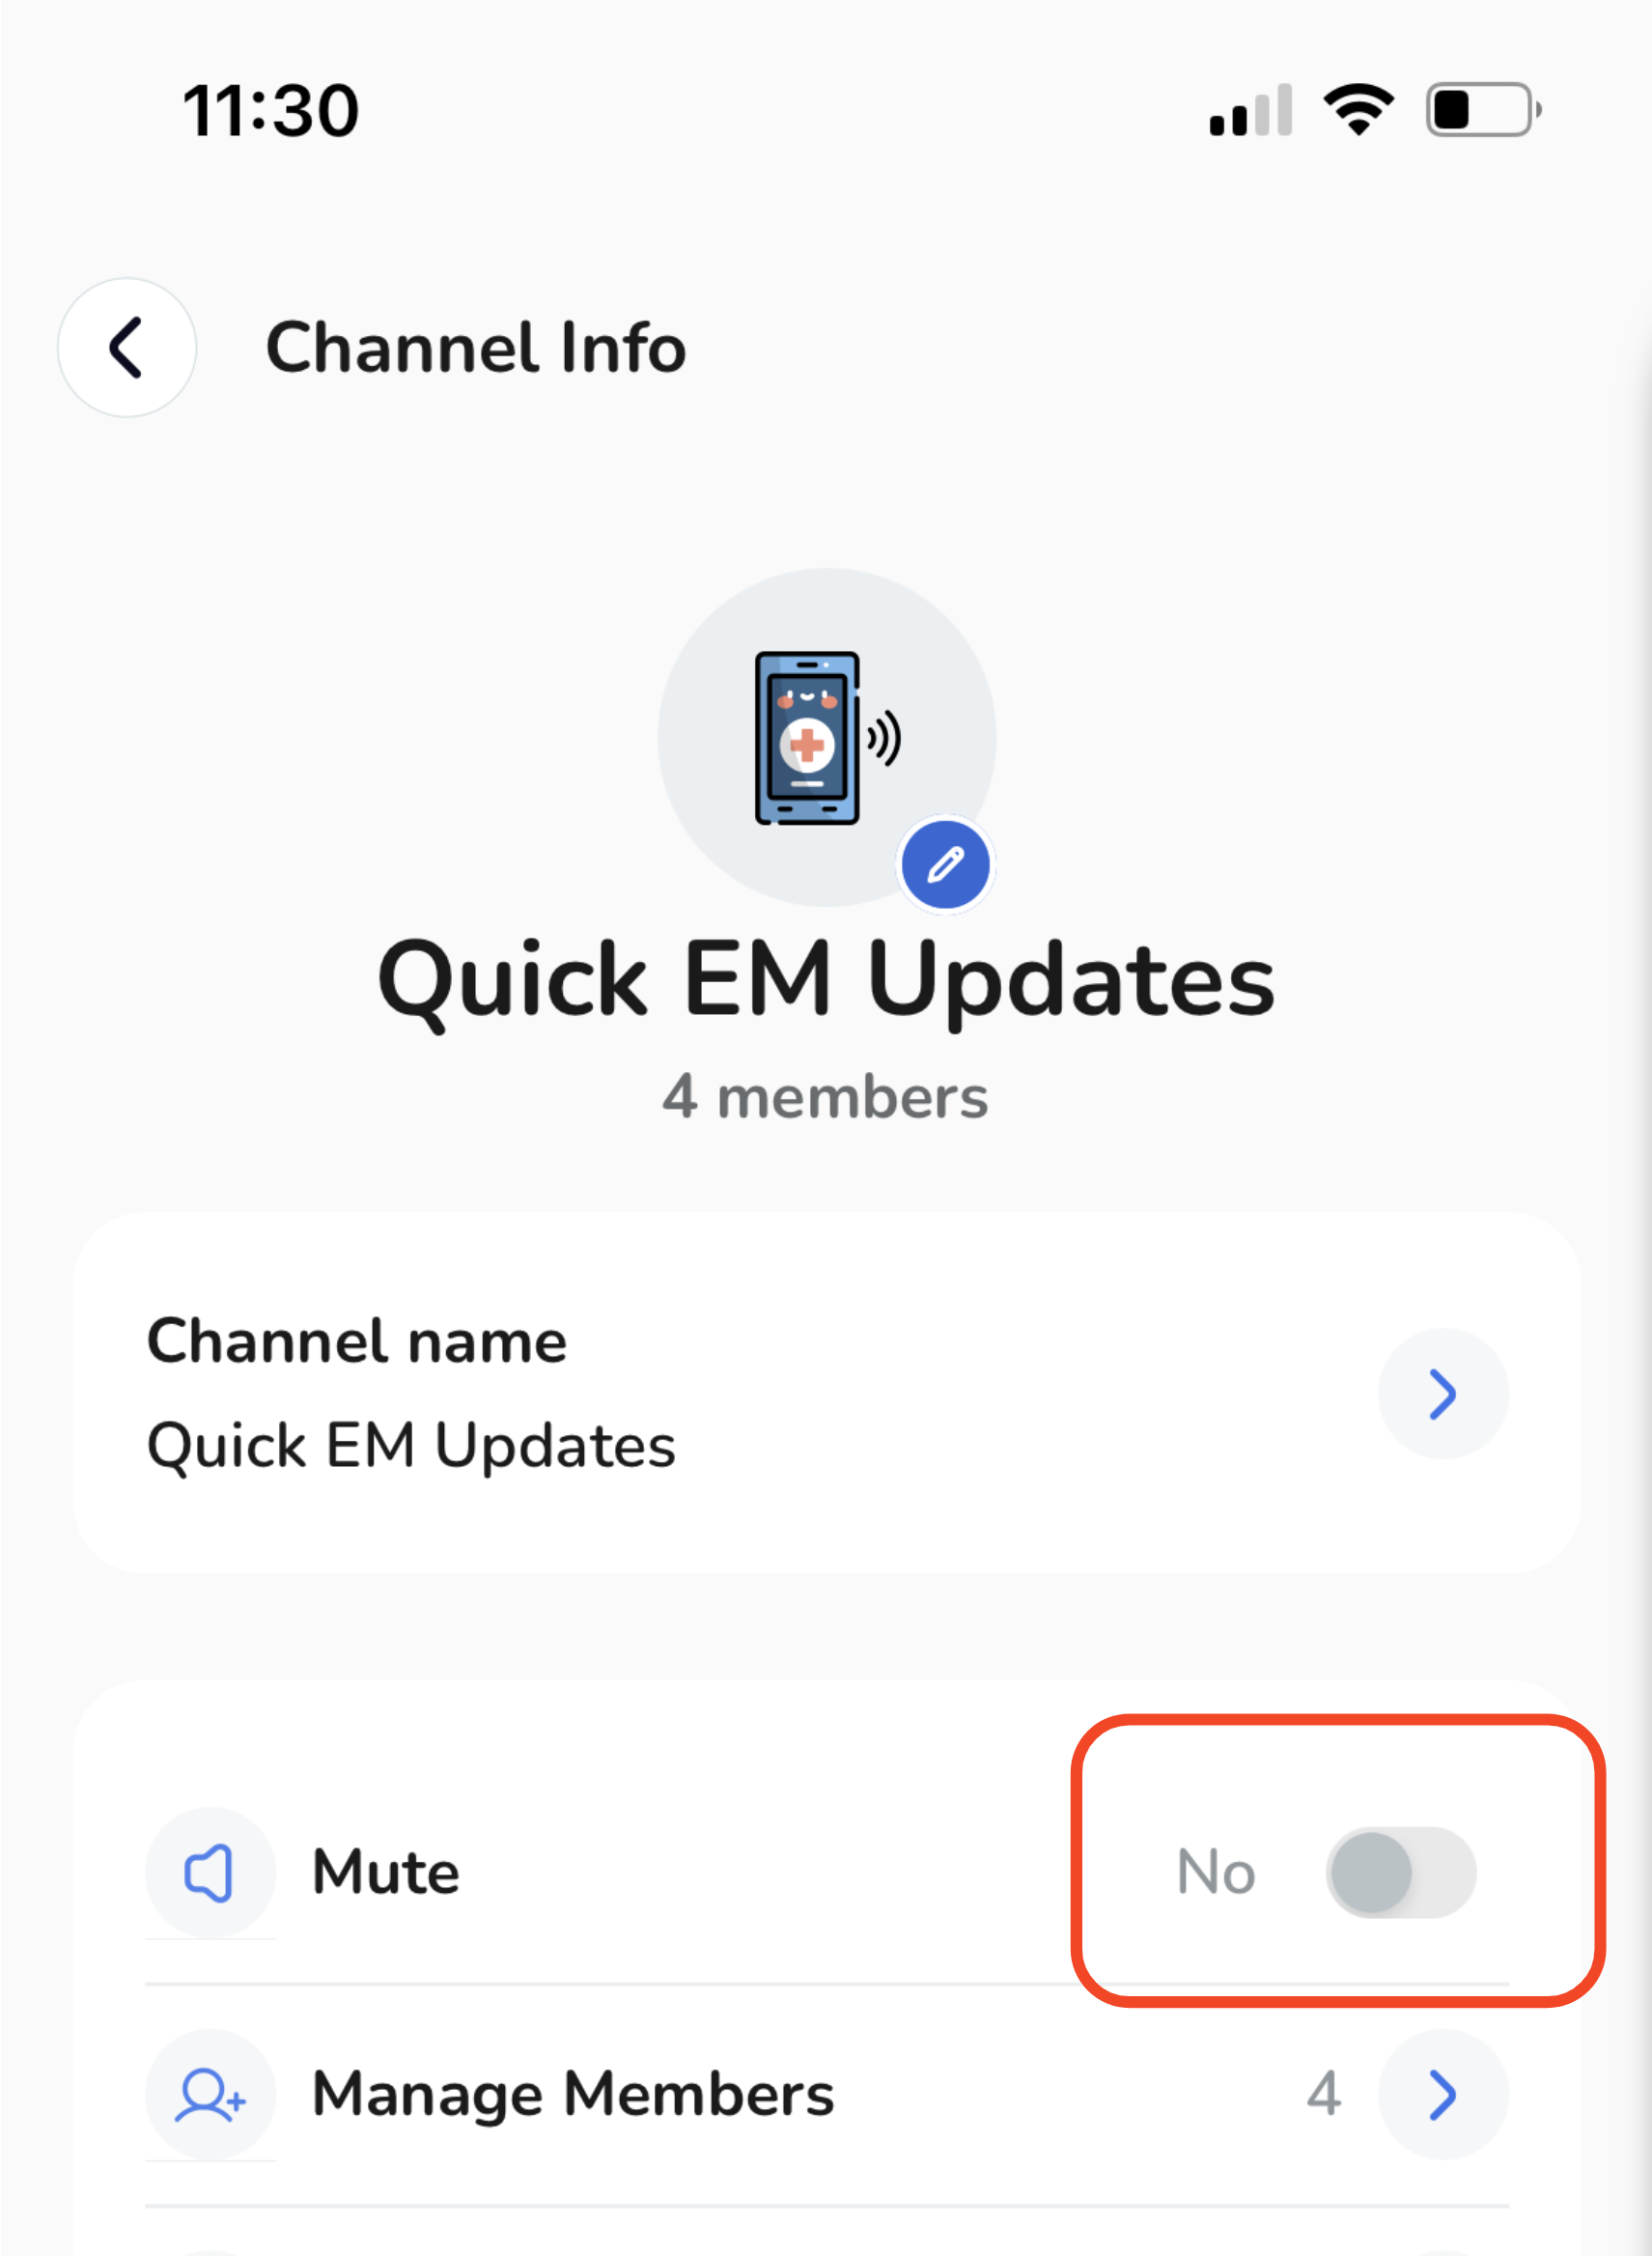
Muting the channel.
To silence notifications from the channel, just toggle the mute button on.
Managing Channel Members.
To oversee and control your channel members, follow these steps:
-
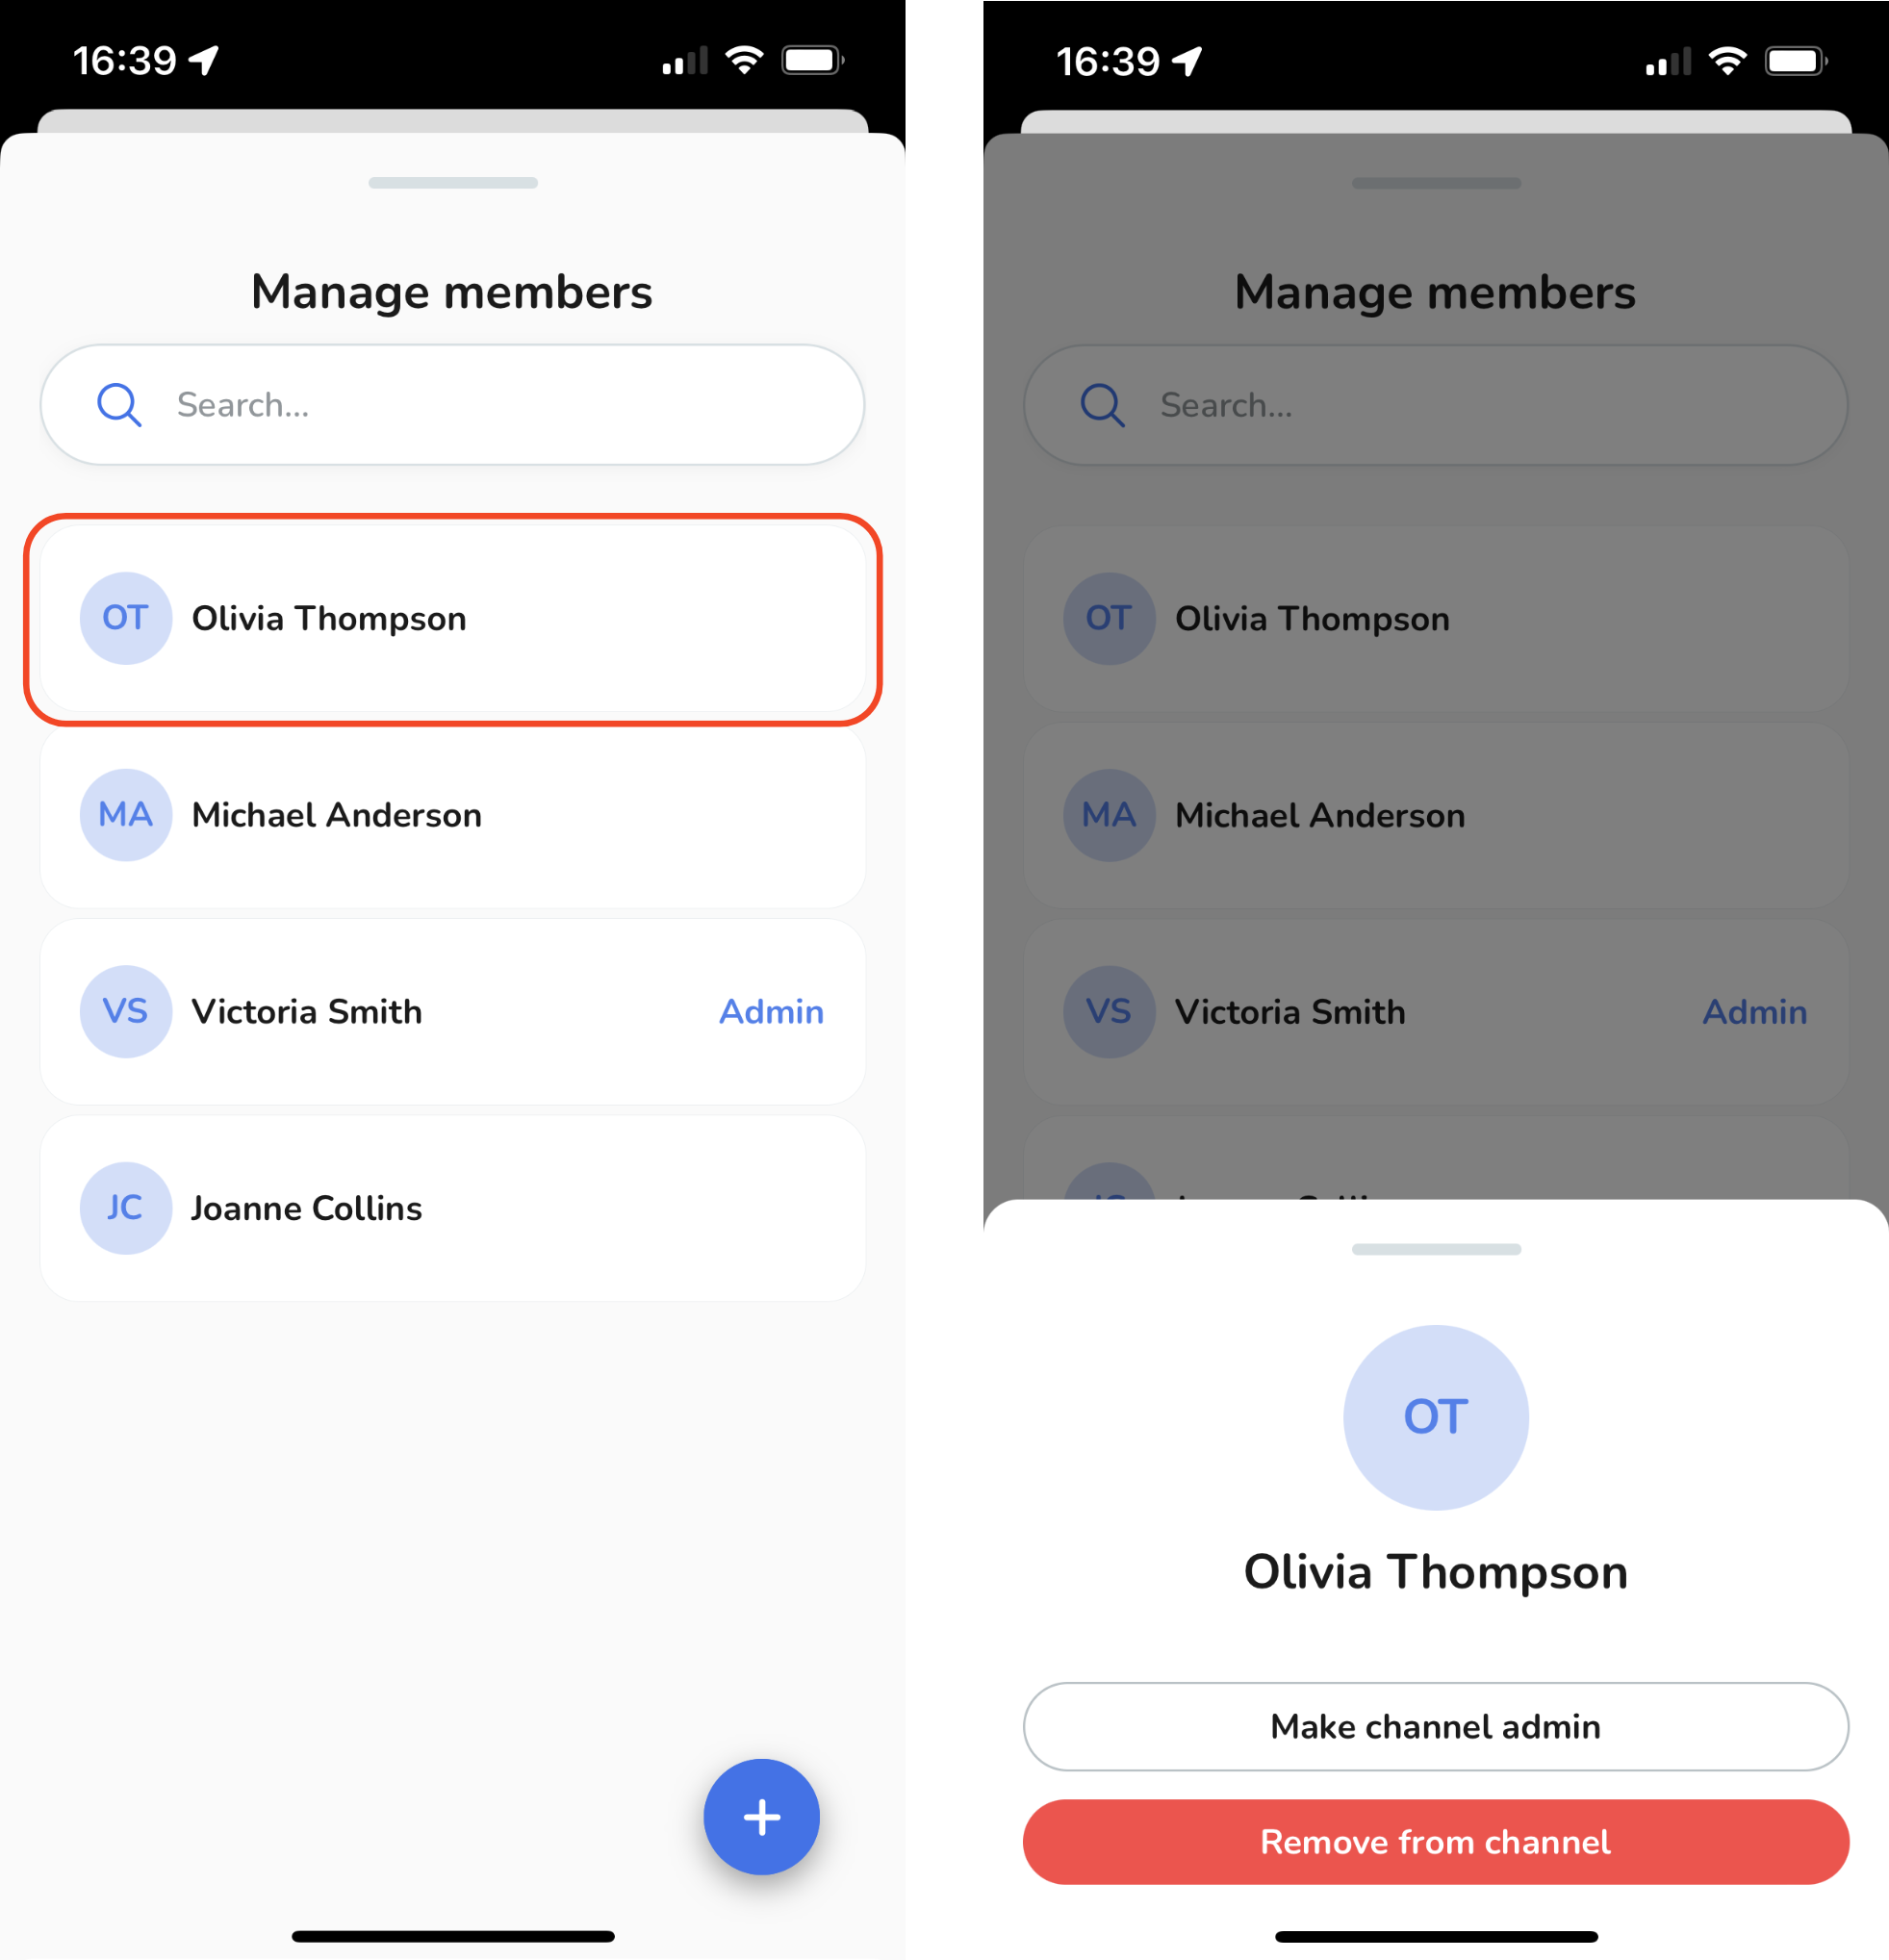
Tap on "Manage Members".
-
A pop-up window will appear, presenting a list of the current channel members.
-
To include a new member, just tap the blue "+" button. And, If applicable, select from the available list of members to extend invitations, then tap "Add Members".
-
To remove a member or designate someone as a channel admin, tap on their name. A pop-up will appear, enabling you to make your selection accordingly.
Tap on "Manage Members".
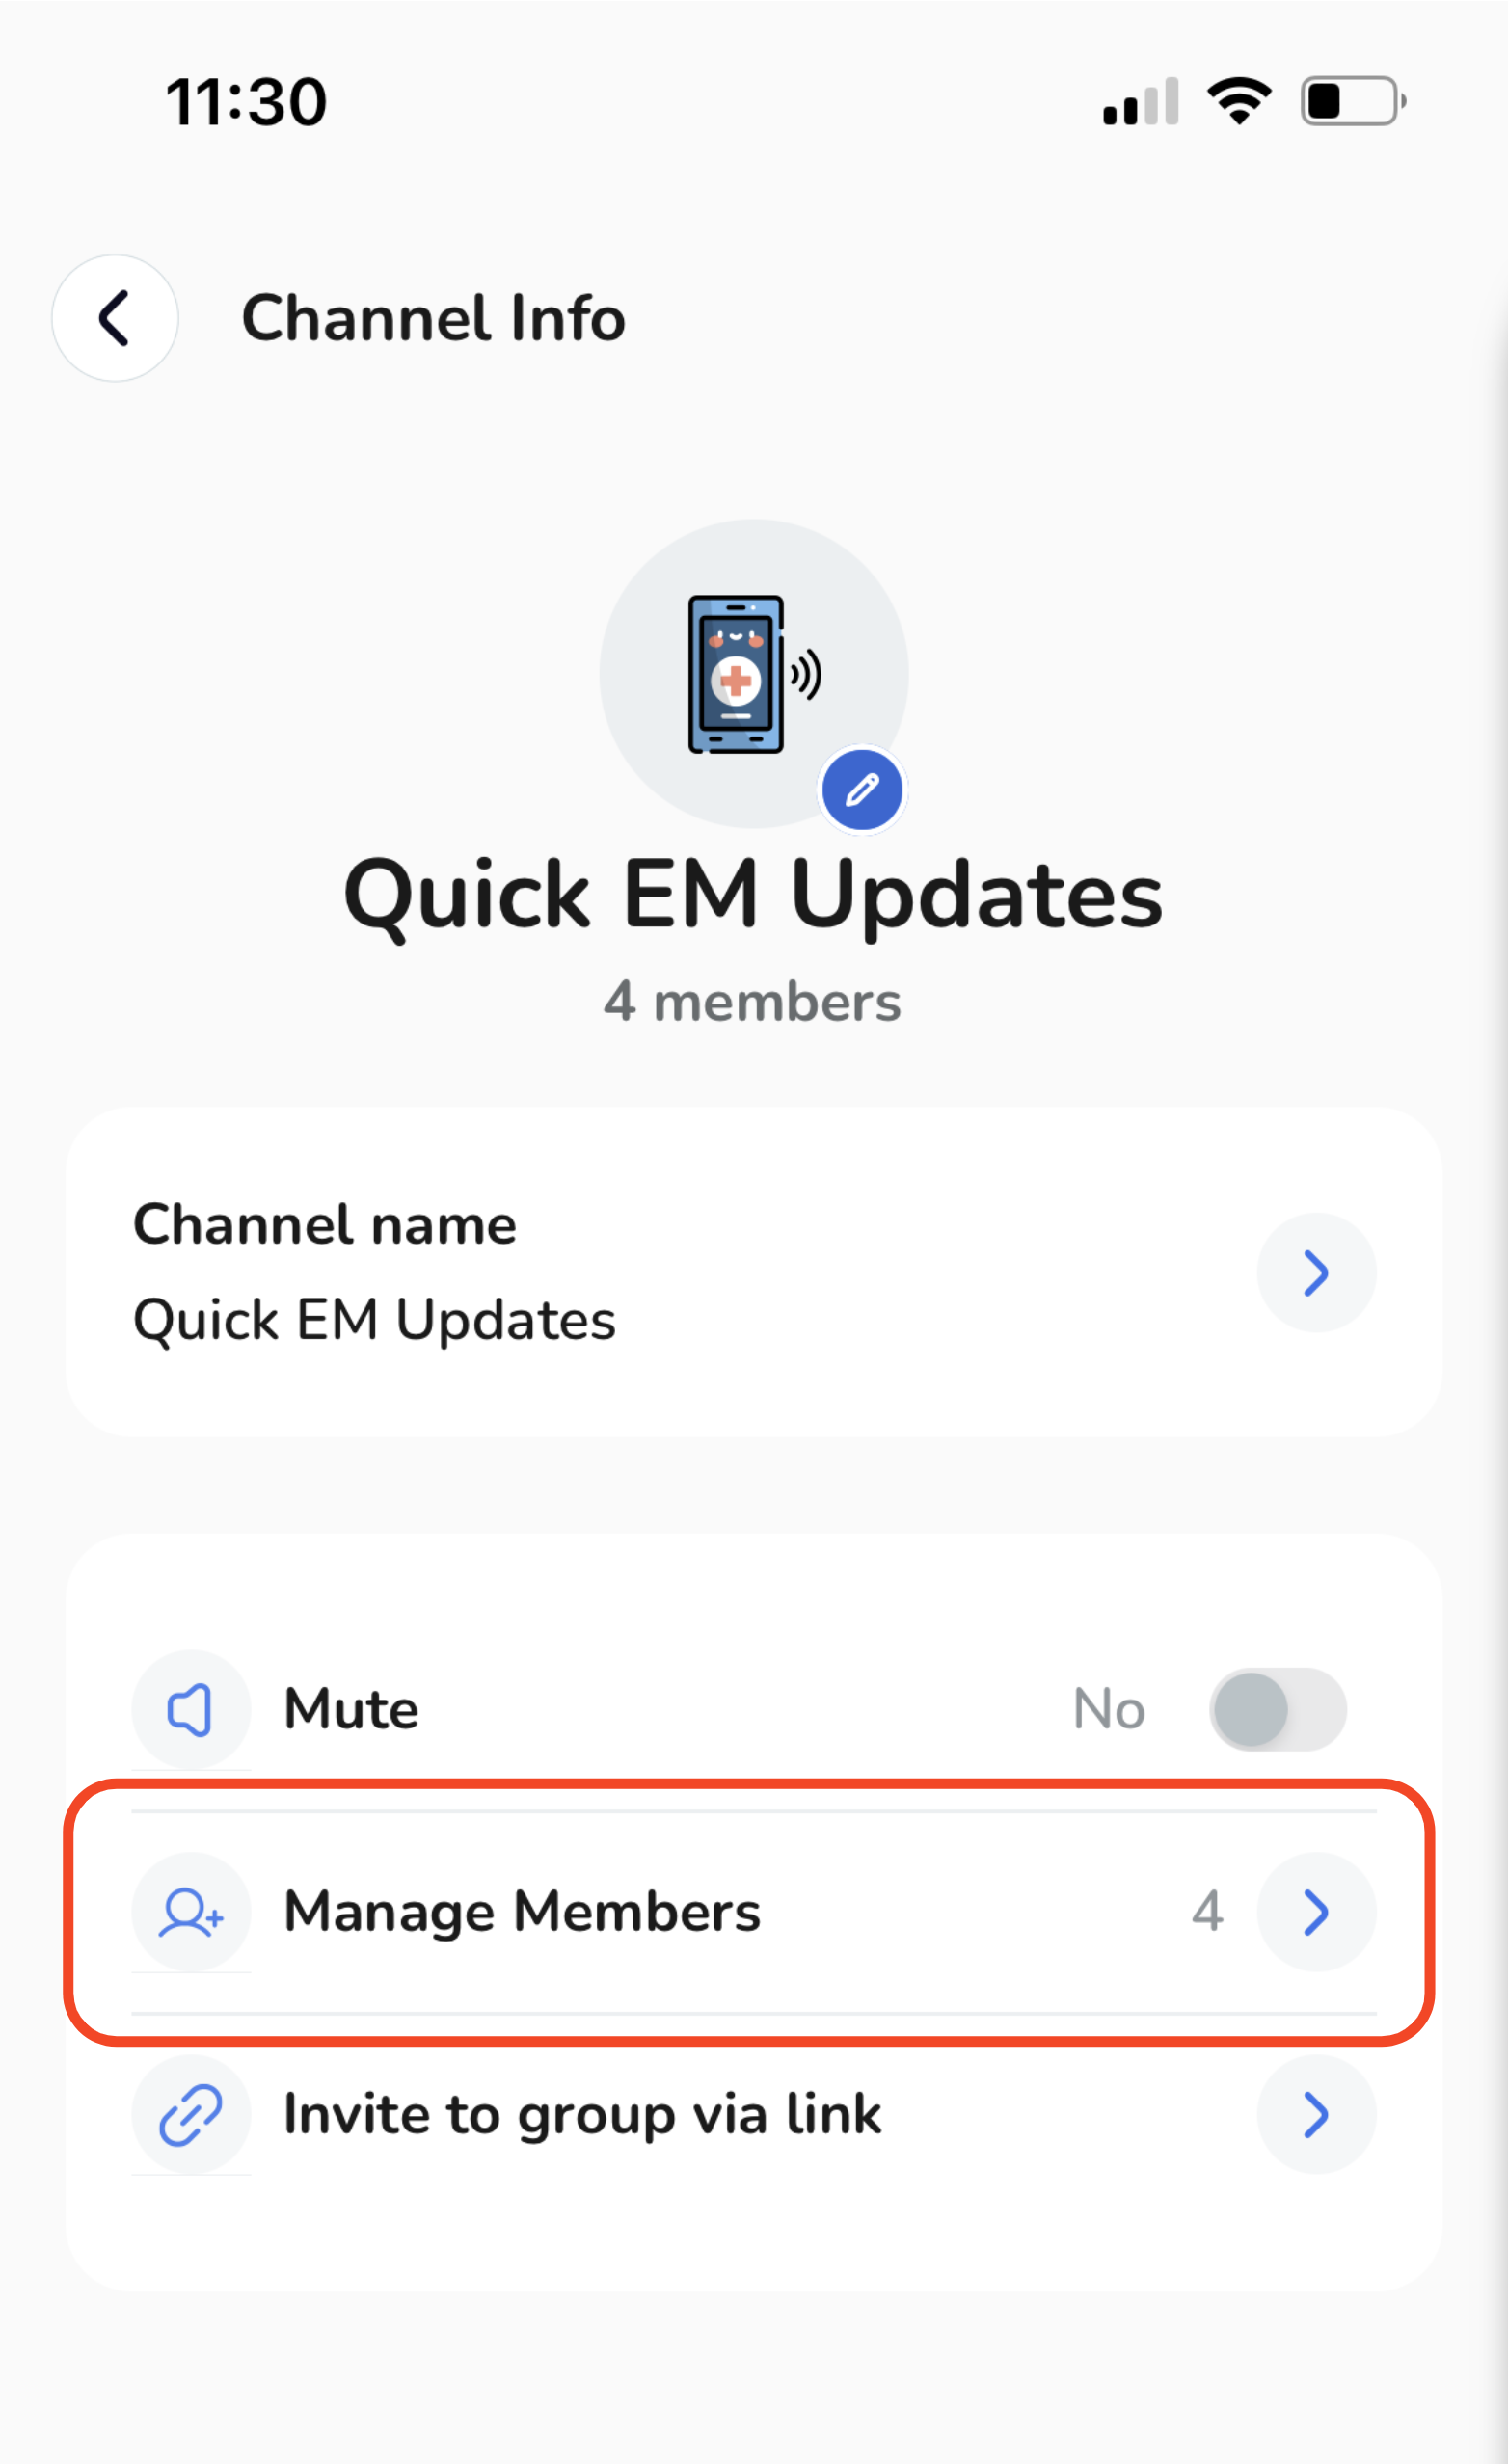
A pop-up window will appear, presenting a list of the current channel members.
To include a new member, just tap the blue "+" button. And, If applicable, select from the available list of members to extend invitations, then tap "Add Members".
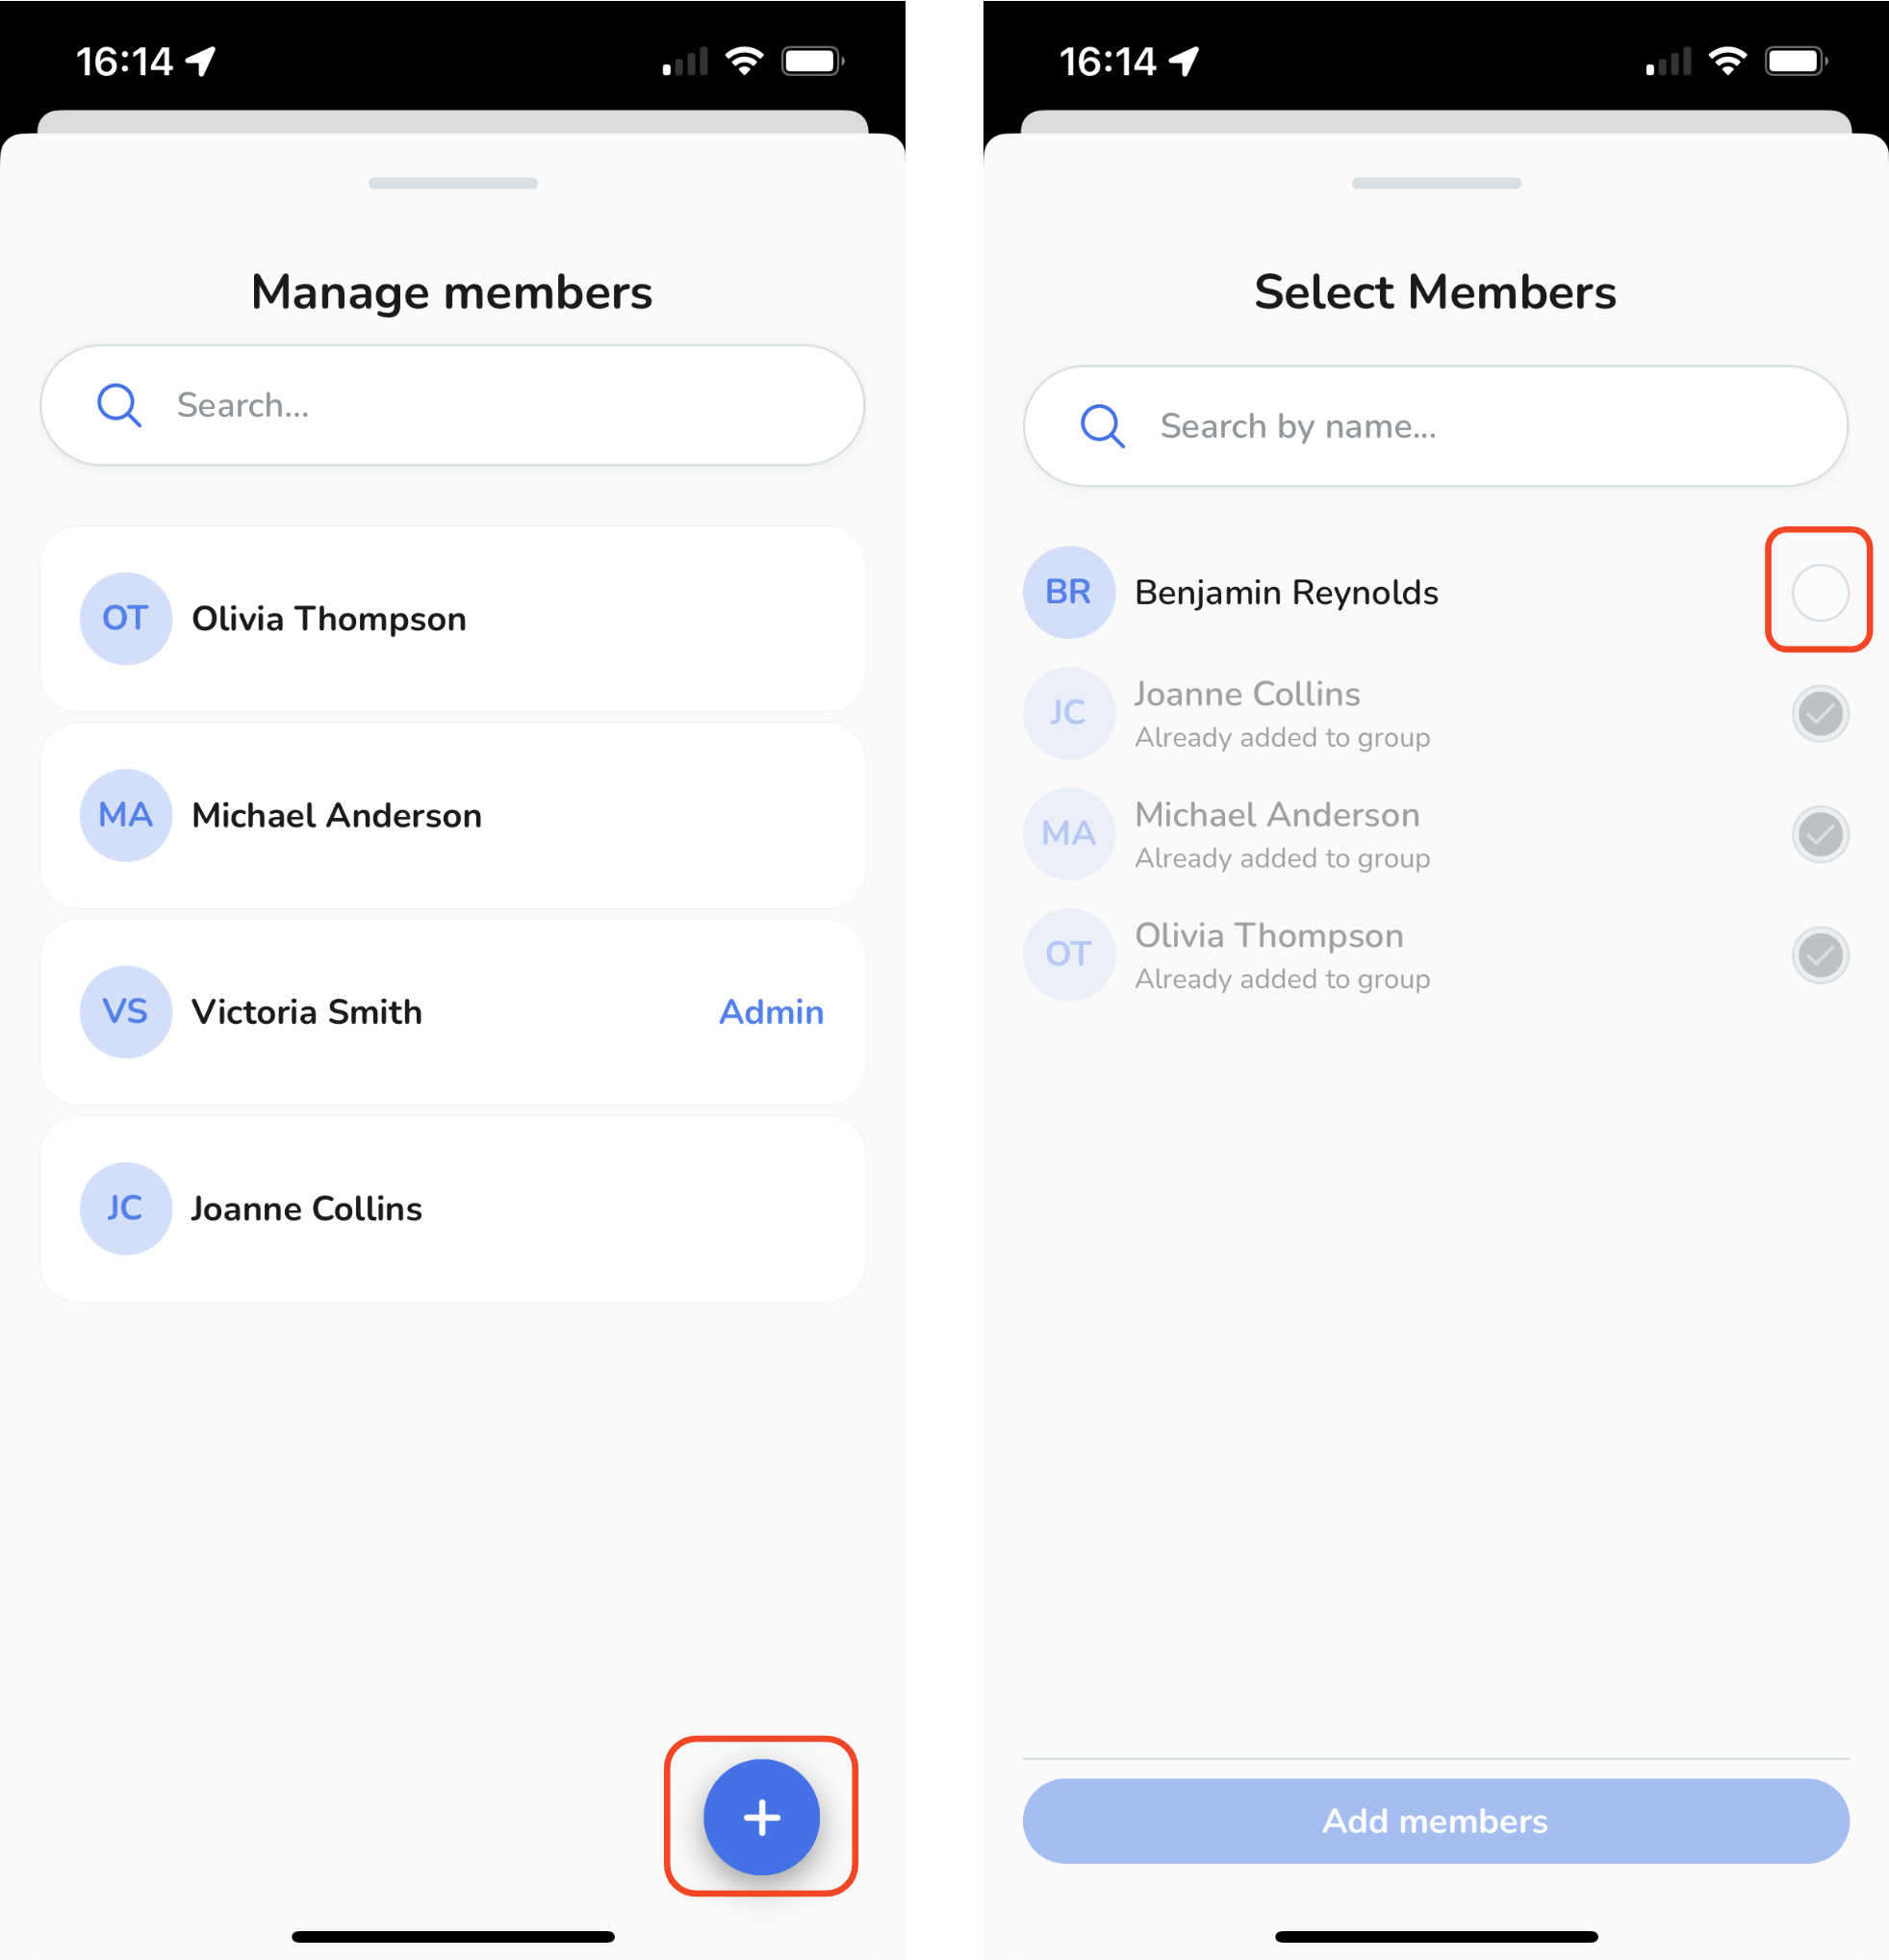
To remove a member or designate someone as a channel admin, tap on their name. A pop-up will appear, enabling you to make your selection accordingly.
Inviting More Members to Your Channel.
To invite additional members to your channel, use the following method:
-
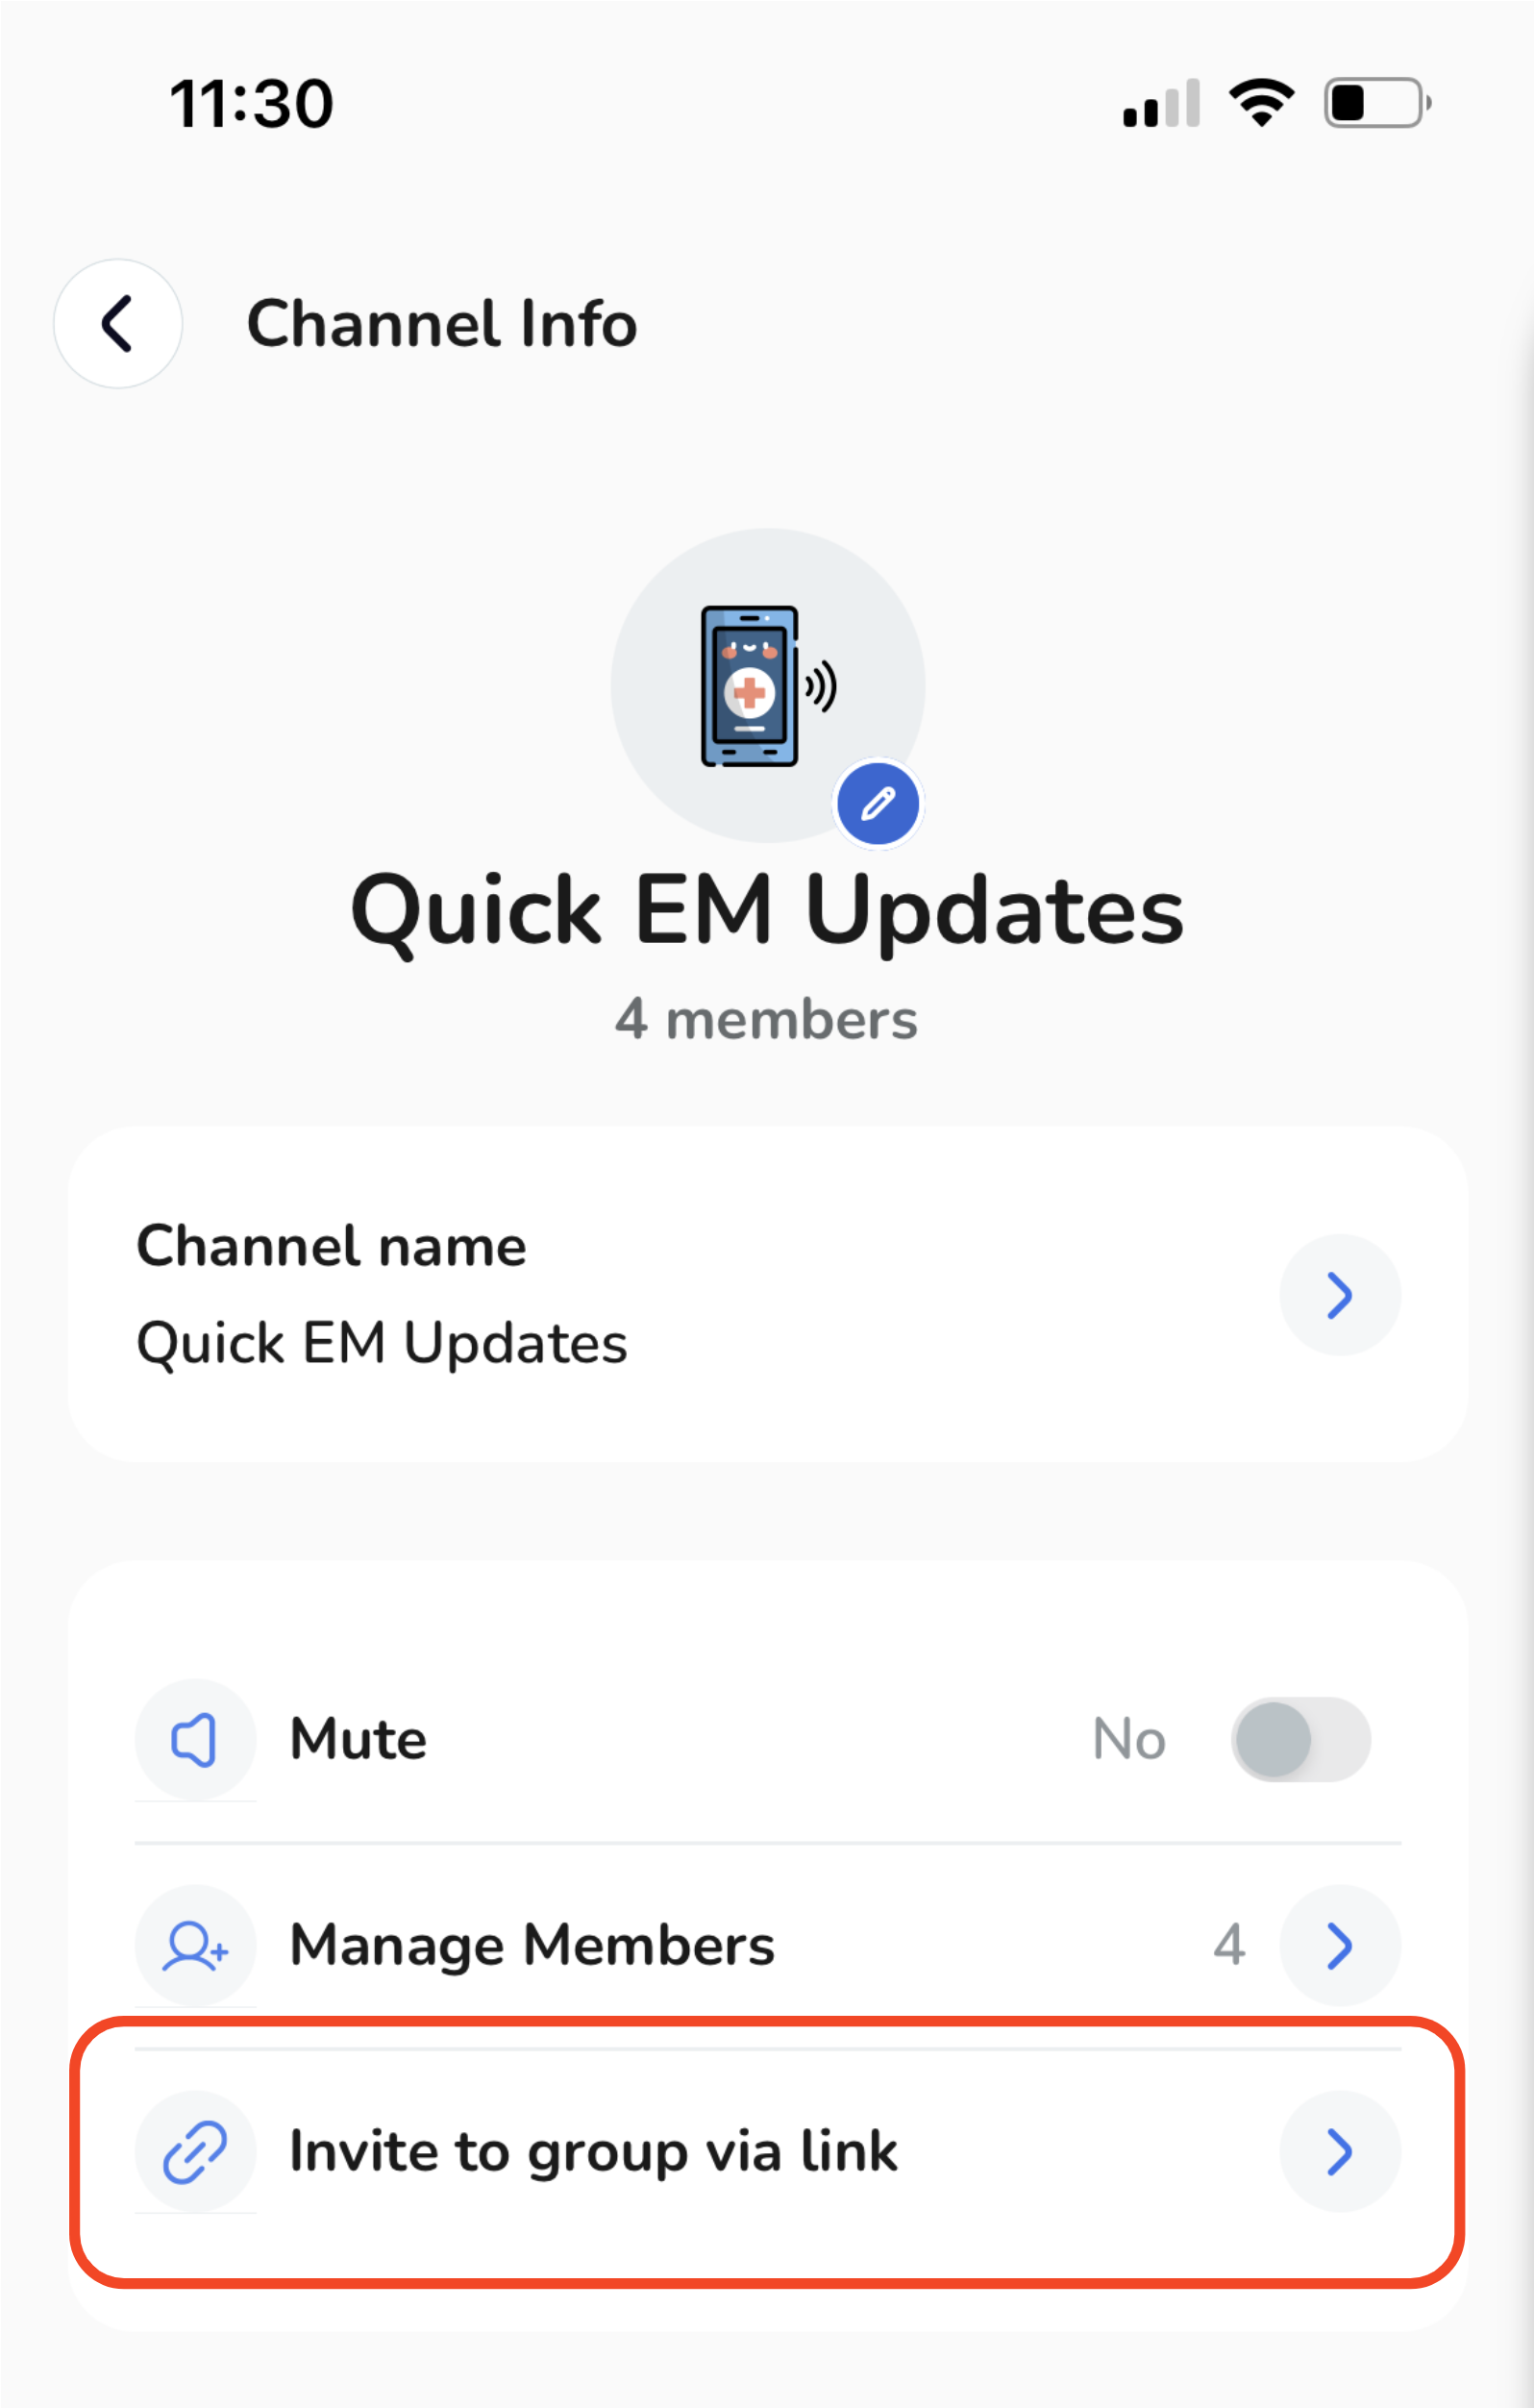
Select "Invite Group via Link".
-
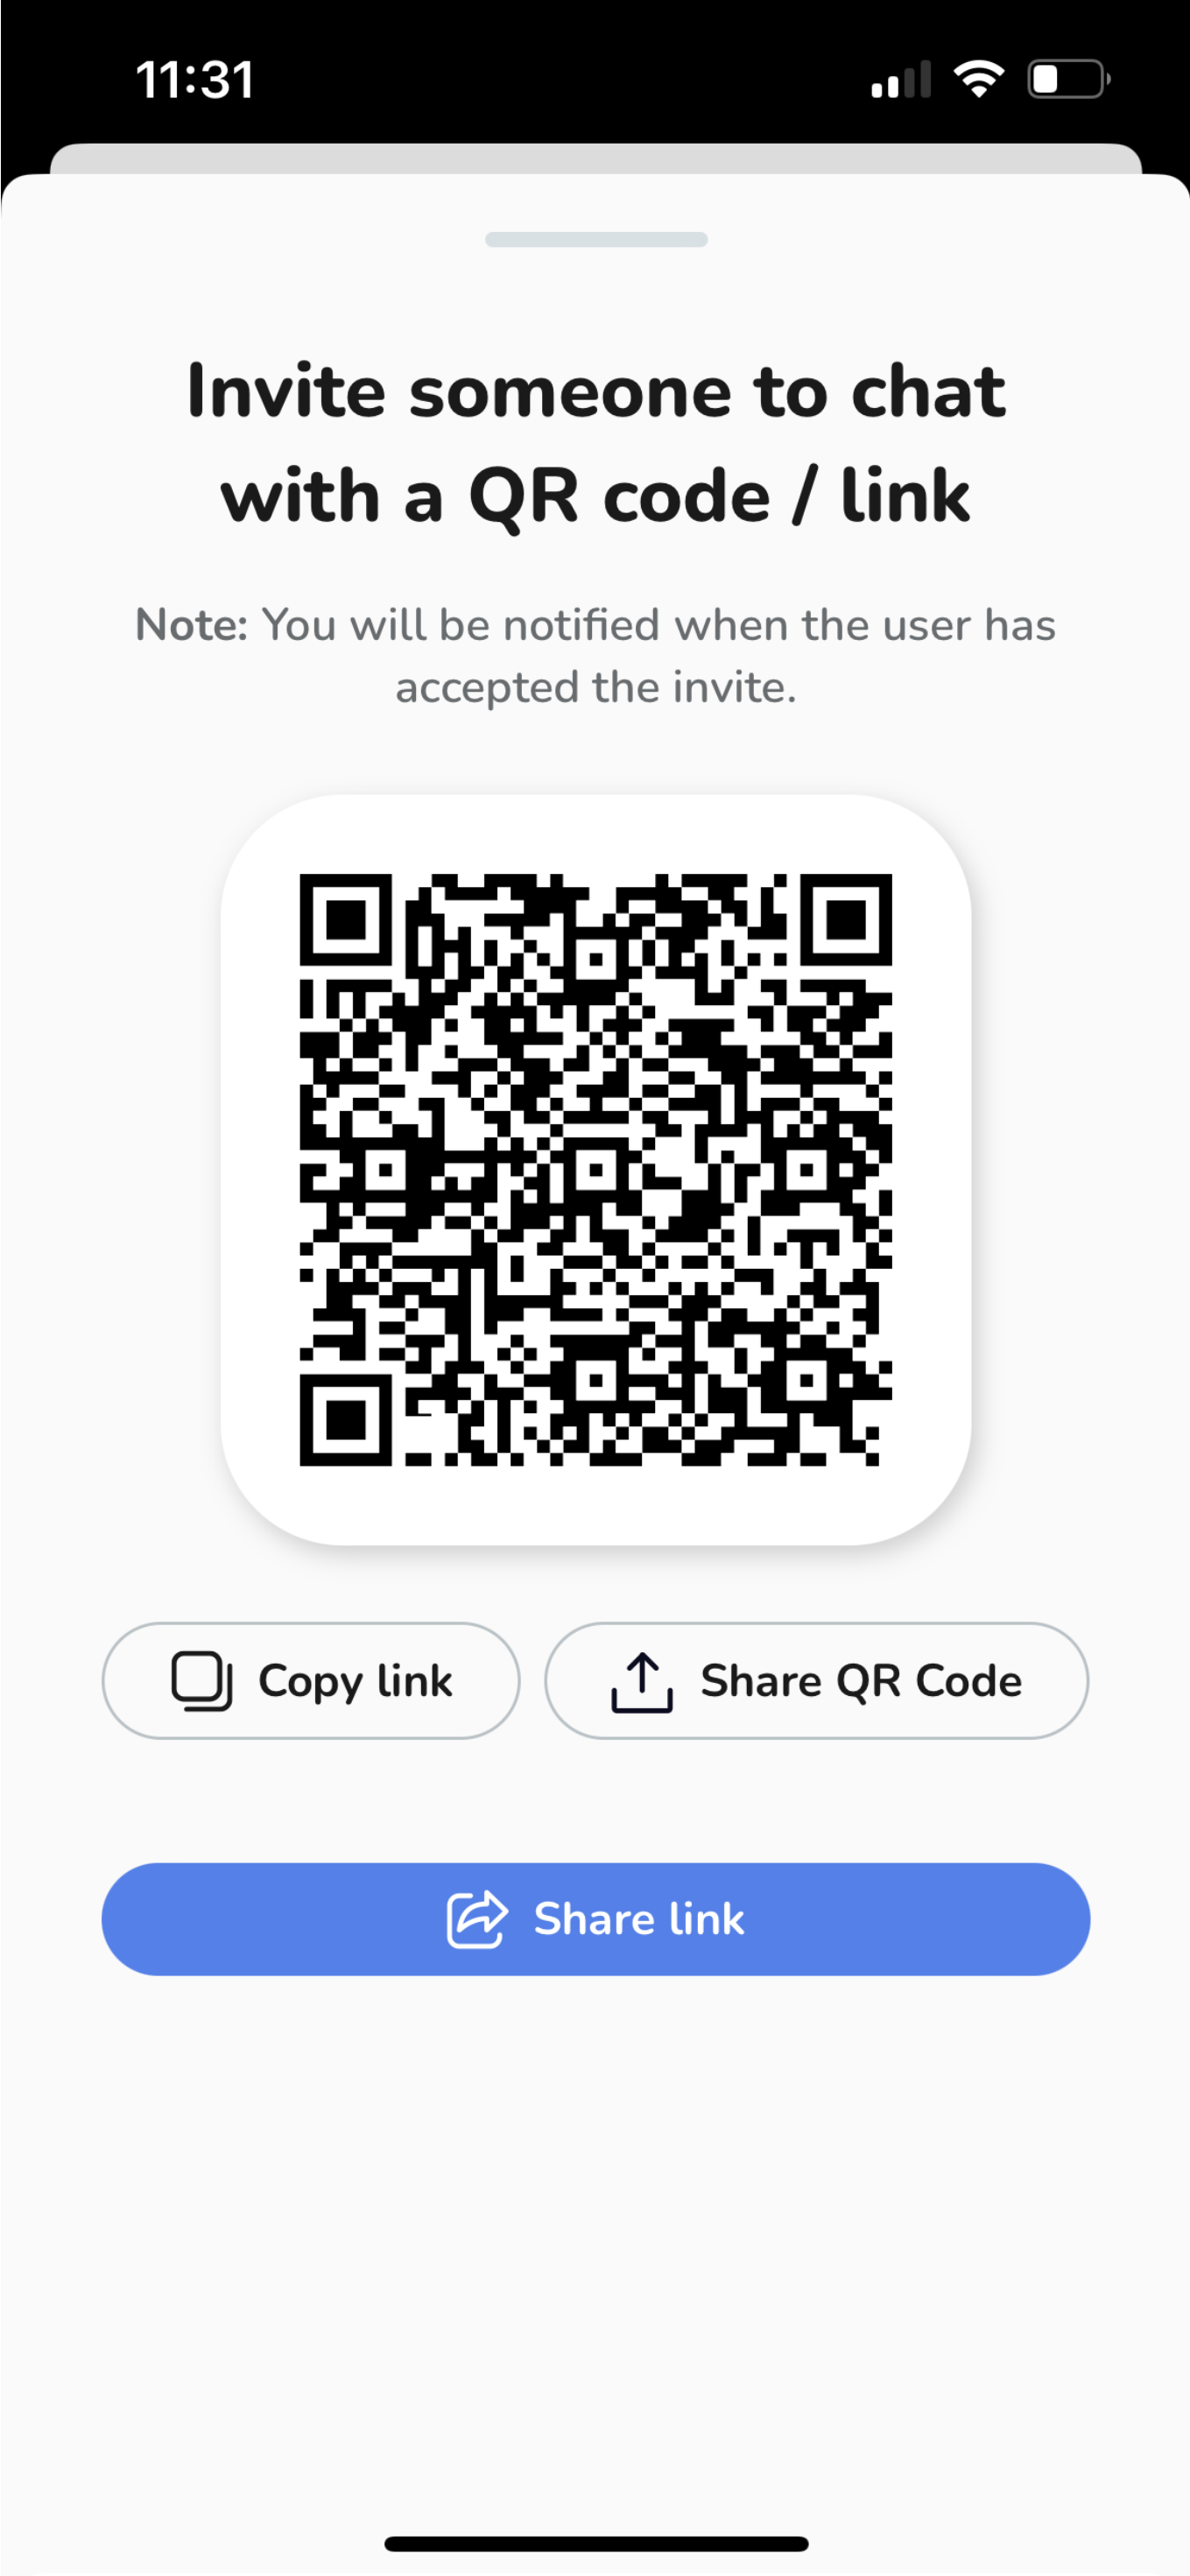
A QR code/link will be generated for you to share with your team or healthcare community.
Select "Invite Group via Link".
A QR code/link will be generated for you to share with your team or healthcare community.
Exiting the Channel - When Needed.
If you decide to leave the channel, follow these steps:
-
Simply click on "Exit Group".
-
Keep in mind that if you are the sole admin of the channel, you'll need to designate another member within the group as the new admin before you can exit.
Simply click on "Exit Group".
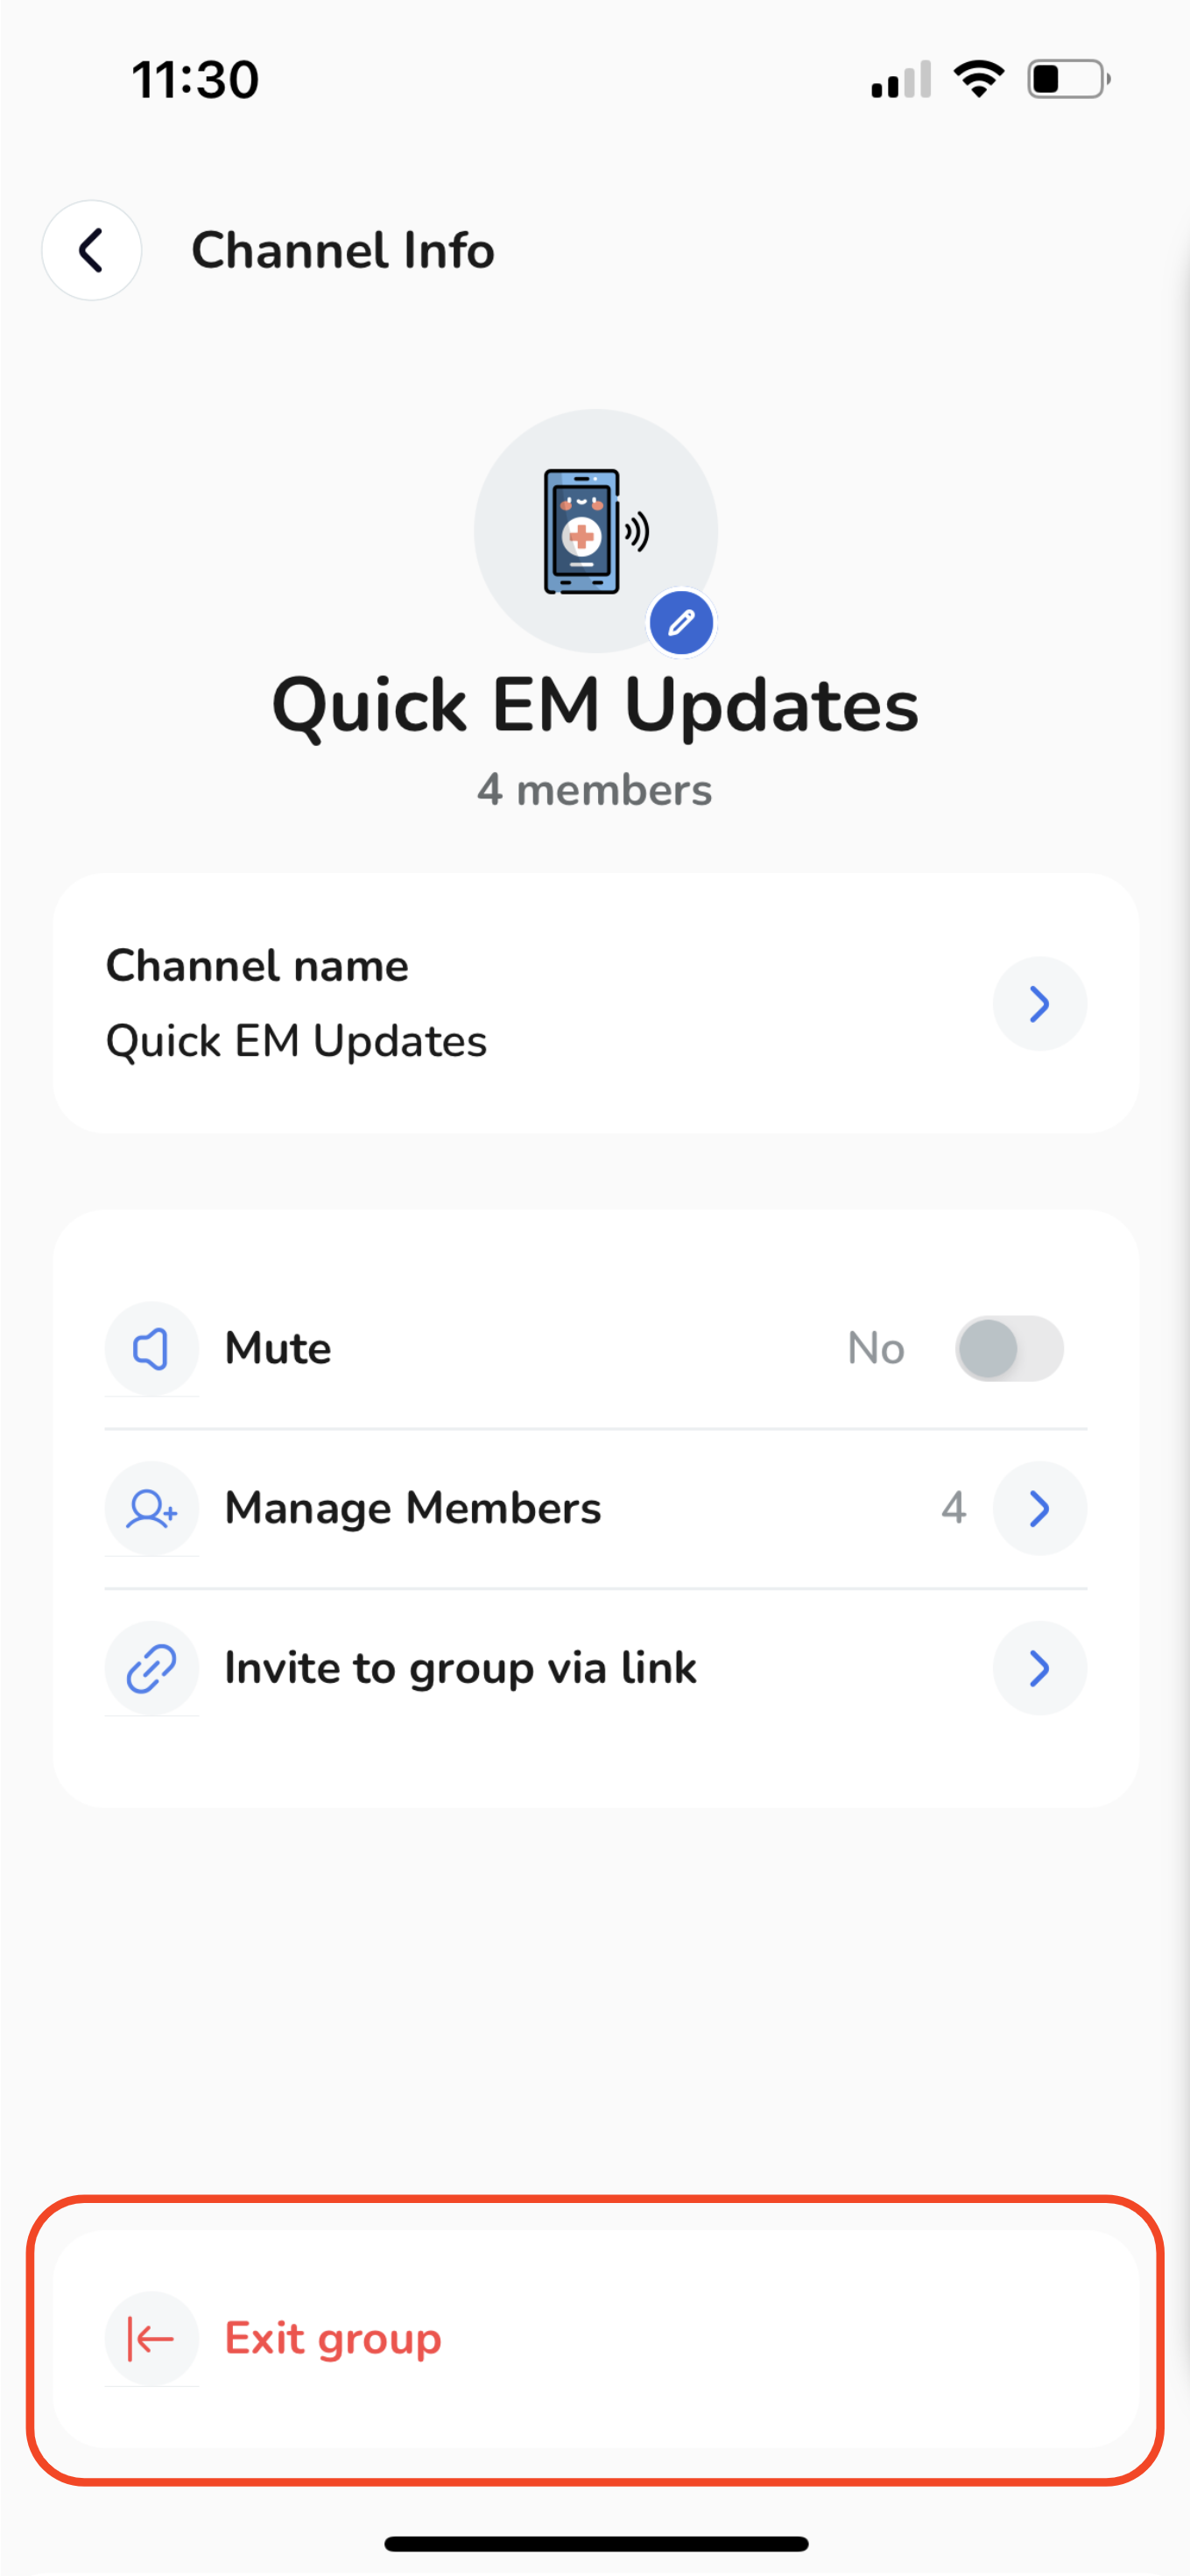
Keep in mind that if you are the sole admin of the channel, you'll need to designate another member within the group as the new admin before you can exit.
With these settings, you can fine-tune your channel to precisely match your communication and collaboration needs.


