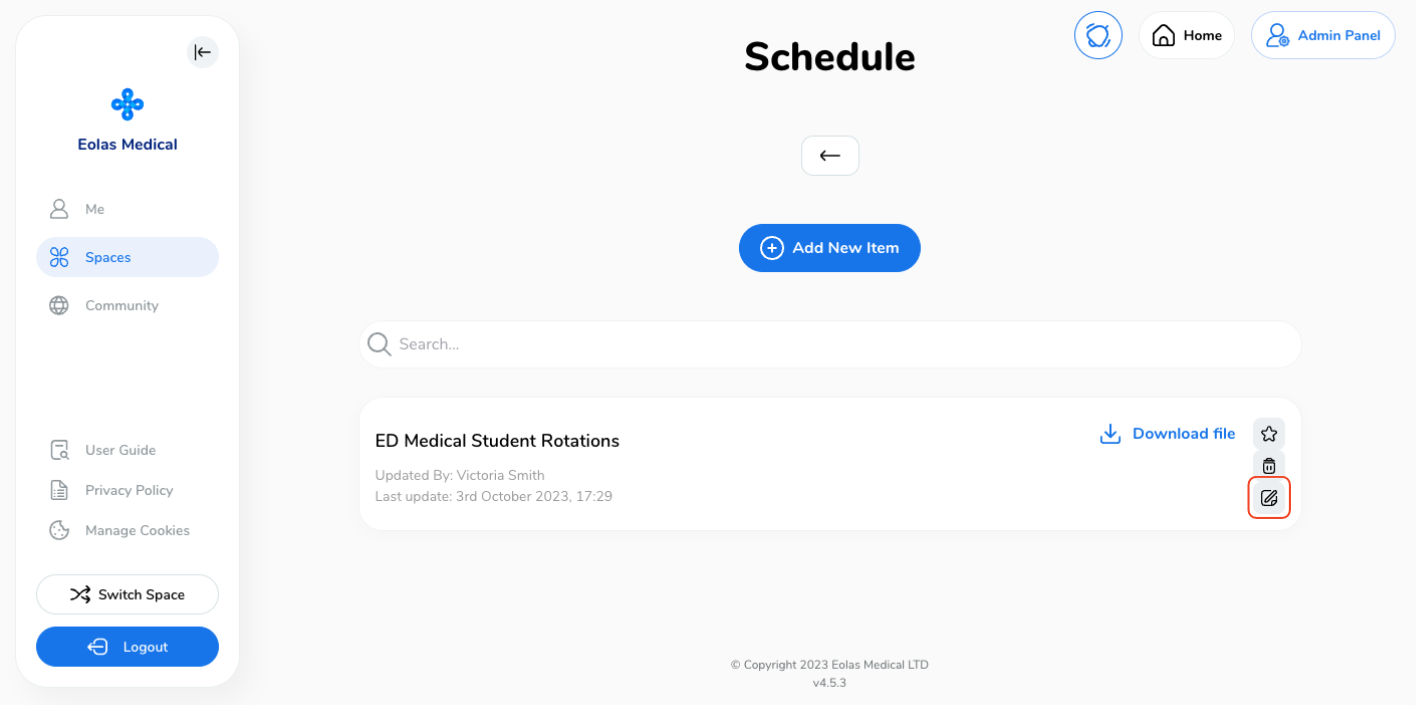
Manage your schedule files including deletion, editing, and highlighting.
-
Start by navigating to the "Admin Panel", then click on "Content Management" and head to the "Schedule/Roster" section.
Start by navigating to the "Admin Panel", then click on "Content Management" and head to the "Schedule/Roster" section.
Editing or Updating a File.
-
On the Schedule/Roster page, find the schedule you want to amend.
-
Click on the "Pen and Paper/Edit" icon located to the right of the file.
-
A pop-up window will open, you can now make changes to the File Name and File Type as needed.
-
Once you've made your updates, select "Submit" to save the changes, and voilà! Your schedule has been updated and ready for action!
On the Schedule/Roster page, find the schedule you want to amend.
Click on the "Pen and Paper/Edit" icon located to the right of the file.

A pop-up window will open, you can now make changes to the File Name and File Type as needed.
Once you've made your updates, select "Submit" to save the changes, and voilà! Your schedule has been updated and ready for action!
Deleting a file.
If you ever need to remove a schedule file, just follow these steps:
-
Head to the Schedule/Roster page.
-
To delete a file, first, identify the Rota or File you wish to remove.
-
Next, locate the "Bin/Delete" icon positioned to the right of the file.
-
Select "Delete" to confirm the removal of the file.
-
Pro Tip: In case of accidental deletion, simply click the "X" in the top-right corner to cancel the operation.
-
Head to the Schedule/Roster page.
To delete a file, first, identify the Rota or File you wish to remove.
Next, locate the "Bin/Delete" icon positioned to the right of the file.

Select "Delete" to confirm the removal of the file.
-
Pro Tip: In case of accidental deletion, simply click the "X" in the top-right corner to cancel the operation.
Pro Tip: In case of accidental deletion, simply click the "X" in the top-right corner to cancel the operation.
Highlighting a file.
Highlighting a schedule is a powerful method to increase its visibility. You can achieve this by:
-
To highlight a file, first, locate the rota file you wish to emphasise and look to the far right of their information, and you'll spot a "Star" Icon. Click it to give them the spotlight they deserve!
-
By clicking the star icon, this schedule file will be prominently showcased in the welcome section for your Space members.
-
To remove the Highlight, just click on the "Star" again so it's no longer highlighted.
To highlight a file, first, locate the rota file you wish to emphasise and look to the far right of their information, and you'll spot a "Star" Icon. Click it to give them the spotlight they deserve!

By clicking the star icon, this schedule file will be prominently showcased in the welcome section for your Space members.
To remove the Highlight, just click on the "Star" again so it's no longer highlighted.
Managing your uploaded files in the Schedule/Roster section is a breeze with these simple steps. Whether you need to delete outdated files, update information, or emphasise critical documents, you can now efficiently maintain your schedule files to keep your department organised and informed.


