How to Add Content to your Educational Portal. | Eolas Medical | Help Center
Learn how to upload/add content to you Educational Portal.
You've taken the first step by creating an Education Portal Section - if you haven't, check out our guide on Optimising Your Education Portal: A Guide to Creating, Editing, and Deleting Sections.
Now, it's time to provide valuable educational content to your users. Here's a step-by-step guide on how to add content to your Education Portal.
Adding Content to the Education Portal.
-
Start by navigating to the "Admin Panel" and select "Content Management", then "Education Portal".
-
Choose the specific Section where you want to upload/add your educational content and give it a click.
Note: If the Section is empty, don't worry; we'll add content shortly.
-
You will then navigate to the section page, you can easily spot the section name featured at the top of the window."
-
Click on "Add New File".
-
When a pop-up window appear , you'll encounter a range of options. This window is quite extensive, so be sure to scroll down to view all of them.
-
Setting Competency Expiry: You have the option to set a time duration for competency. Enter a duration between 1 and 12 months. For example, if you set it to 6 months, users will be reminded to revisit the material after 6 months.
-
After choosing to set a competency expiry, an input field will become visible. Here, you can specify a duration ranging from 1 to 12 months. For instance, if you select 6 months, users will receive a reminder to review the material after this 6-month period.
-
Provide a clear and descriptive file name and file description. This information is crucial for users when searching for content within the app.
-
Next, you'll need to select the file type you want to upload. If you can't locate this option, please ensure to scroll down within the pop-up window.
Choose from the following options:
PDF - Document: For standard document files.
MP4 Video - A locally made/shared video: Ideal for video content.
Web Link - A link to YouTube or any other website:
MS Office - Word, Excel & PPT: For Microsoft Office files.
-
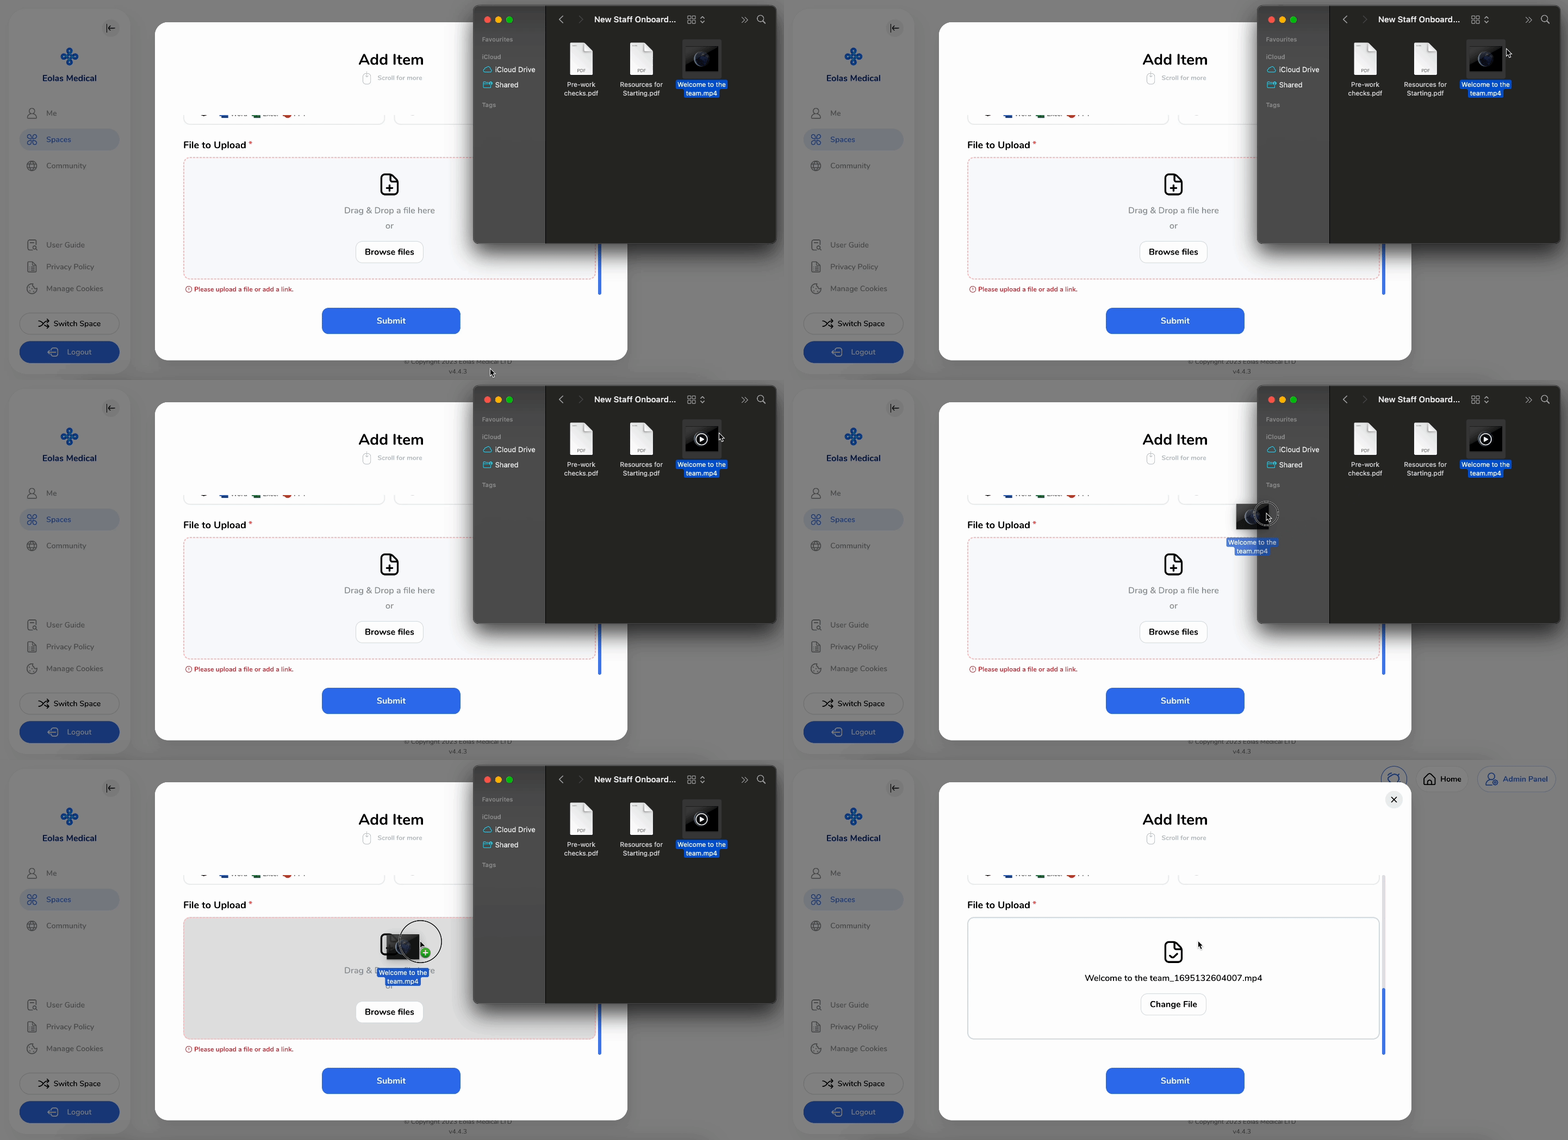
If you're uploading a PDF document, MS Office file, or a video, please choose the appropriate option. You can then either drag and drop the file into the "File to Upload" box or click on "Browse Files" to select it from your computer's documents folder.
-
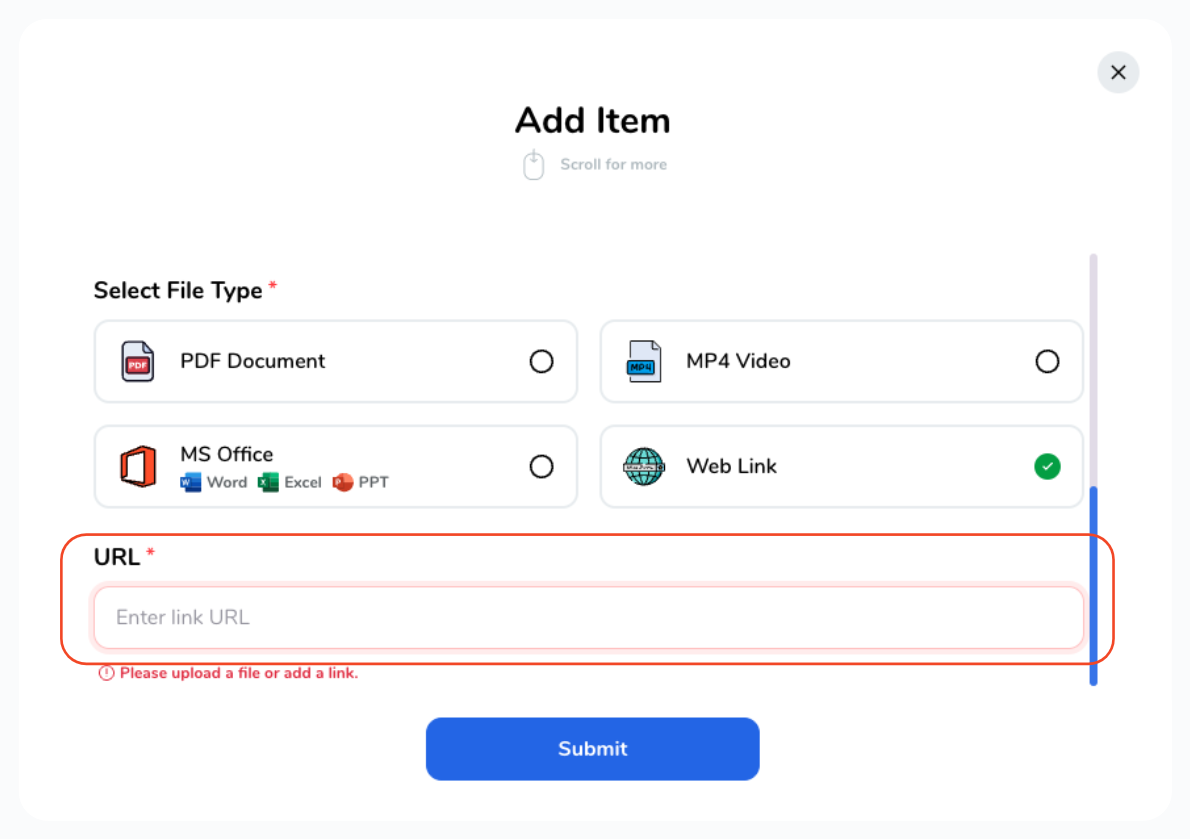
For a Web Link, select the "Web Link Document" type and paste the URL link in the URL field.
Ensure that it's a web browser link, such as HTTPS://WWW... This link can direct users to a web page or a video streaming platform like YouTube."
-
-
Once you've uploaded your chosen material, click "Submit".
-
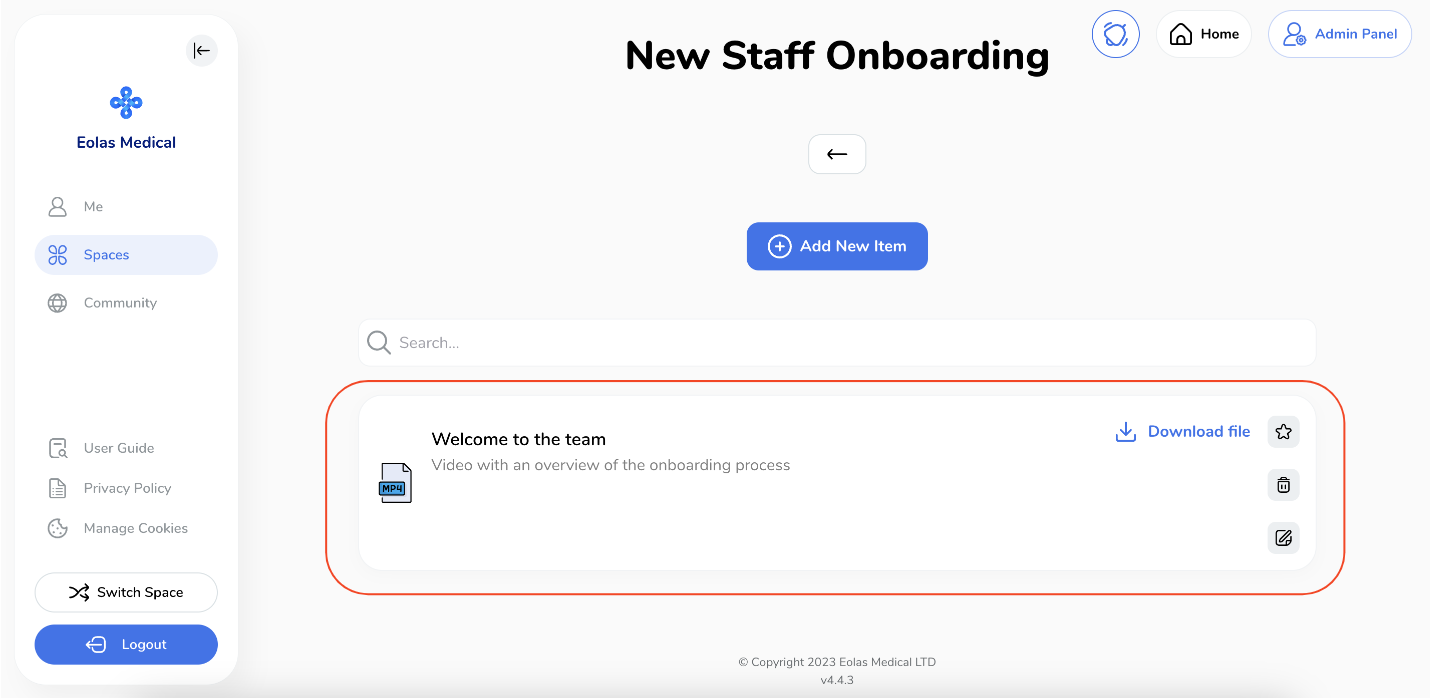
Your content is now uploaded and available for users to access and view.
Start by navigating to the "Admin Panel" and select "Content Management", then "Education Portal".
Choose the specific Section where you want to upload/add your educational content and give it a click.
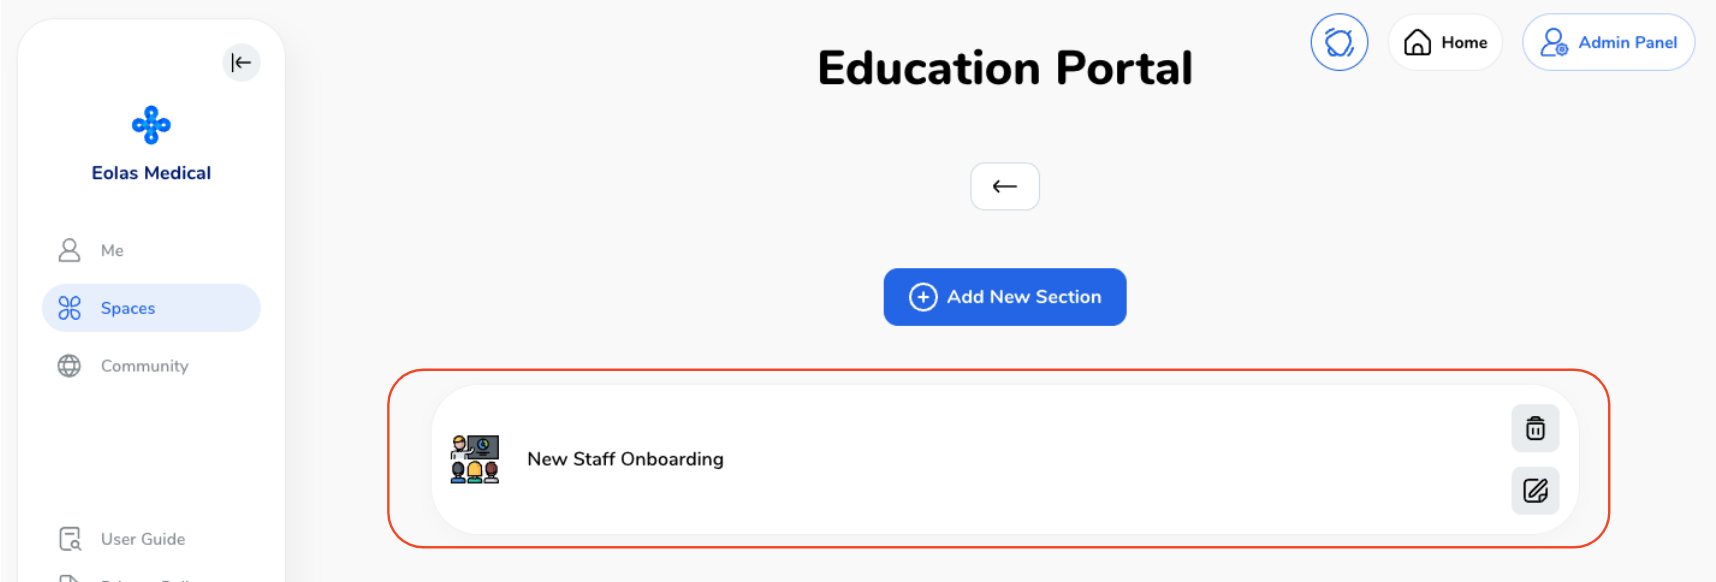
Note: If the Section is empty, don't worry; we'll add content shortly.
You will then navigate to the section page, you can easily spot the section name featured at the top of the window."
Click on "Add New File".

When a pop-up window appear , you'll encounter a range of options. This window is quite extensive, so be sure to scroll down to view all of them.
Setting Competency Expiry: You have the option to set a time duration for competency. Enter a duration between 1 and 12 months. For example, if you set it to 6 months, users will be reminded to revisit the material after 6 months.
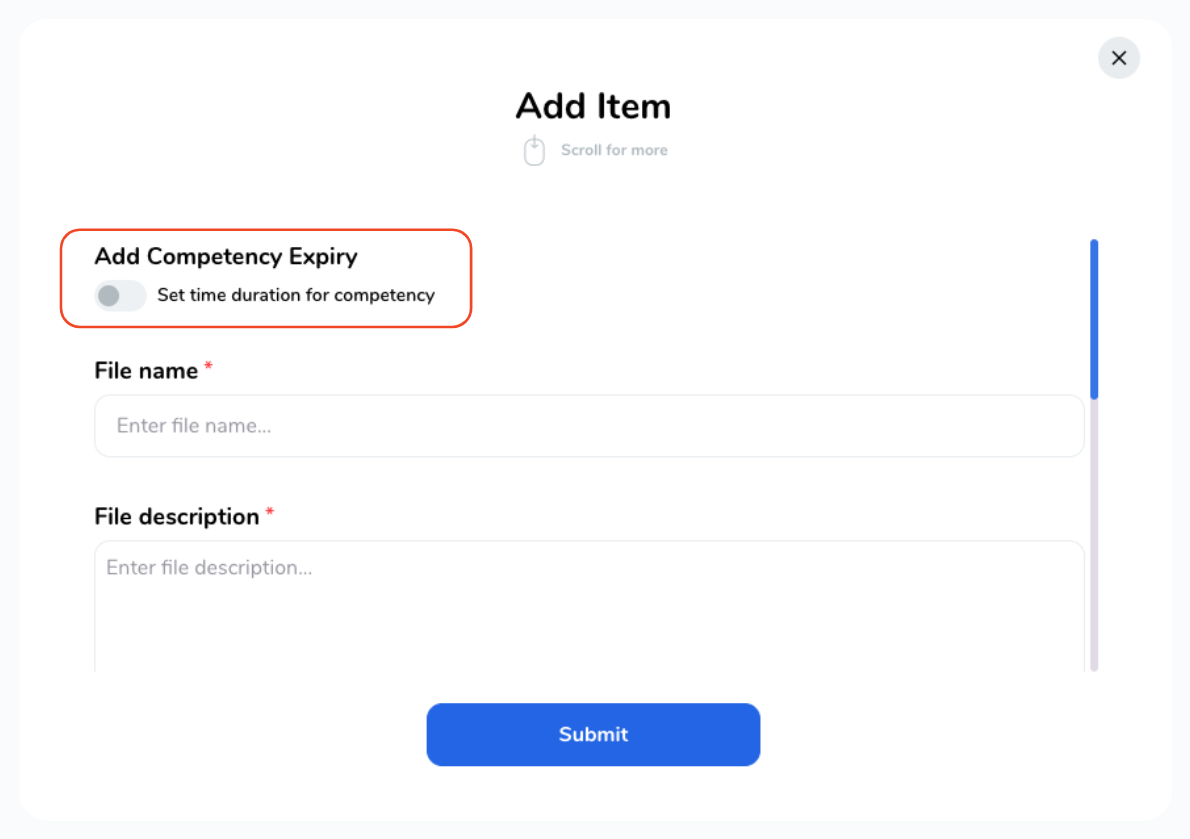
After choosing to set a competency expiry, an input field will become visible. Here, you can specify a duration ranging from 1 to 12 months. For instance, if you select 6 months, users will receive a reminder to review the material after this 6-month period.
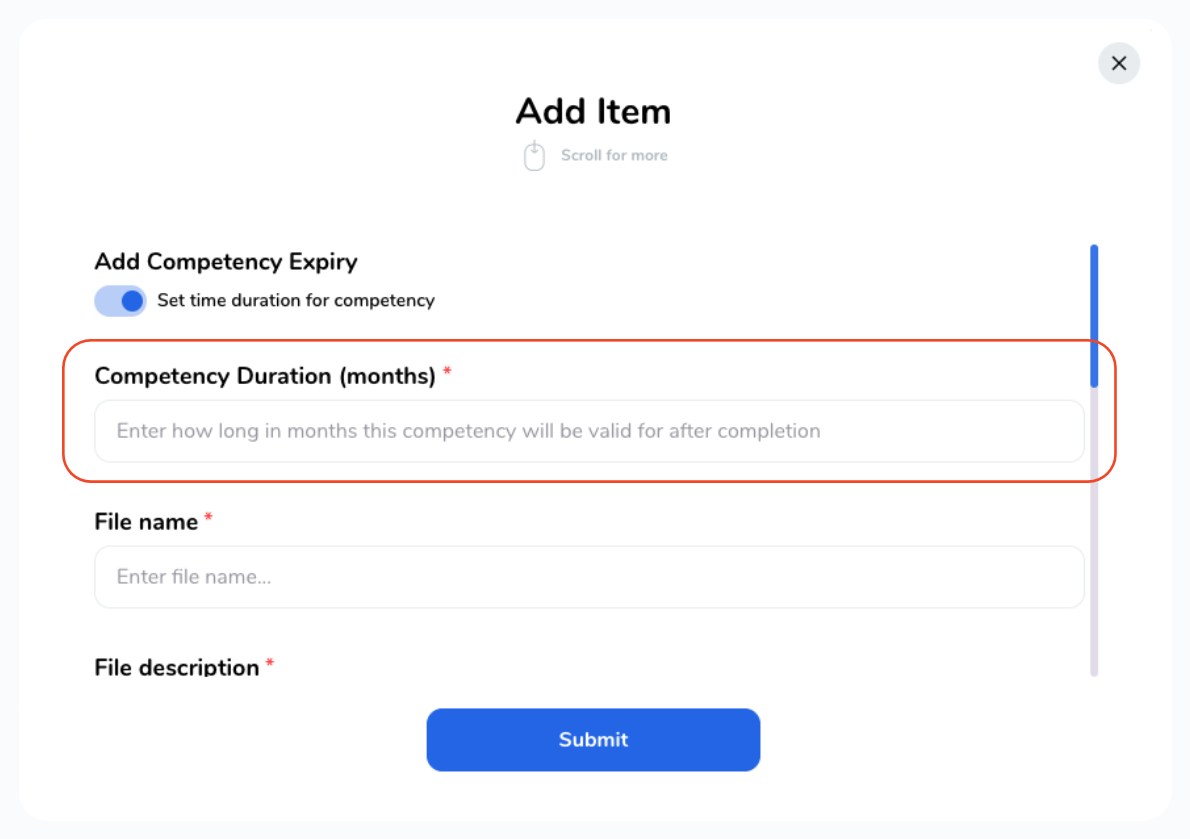
Provide a clear and descriptive file name and file description. This information is crucial for users when searching for content within the app.
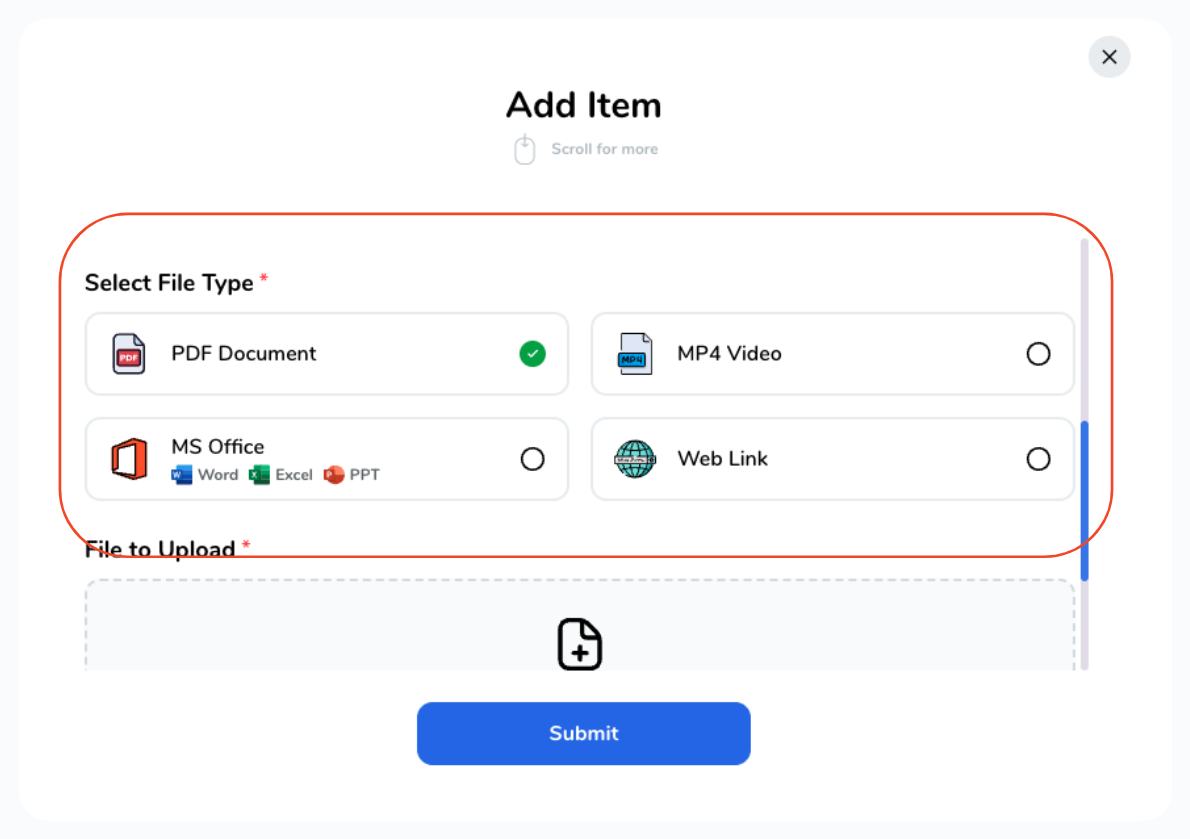
Next, you'll need to select the file type you want to upload. If you can't locate this option, please ensure to scroll down within the pop-up window.
Choose from the following options:
PDF - Document: For standard document files.
MP4 Video - A locally made/shared video: Ideal for video content.
Web Link - A link to YouTube or any other website:
MS Office - Word, Excel & PPT: For Microsoft Office files.
-
If you're uploading a PDF document, MS Office file, or a video, please choose the appropriate option. You can then either drag and drop the file into the "File to Upload" box or click on "Browse Files" to select it from your computer's documents folder.
If you're uploading a PDF document, MS Office file, or a video, please choose the appropriate option. You can then either drag and drop the file into the "File to Upload" box or click on "Browse Files" to select it from your computer's documents folder.
-
For a Web Link, select the "Web Link Document" type and paste the URL link in the URL field.
Ensure that it's a web browser link, such as HTTPS://WWW... This link can direct users to a web page or a video streaming platform like YouTube."
For a Web Link, select the "Web Link Document" type and paste the URL link in the URL field.
Ensure that it's a web browser link, such as HTTPS://WWW... This link can direct users to a web page or a video streaming platform like YouTube."
Once you've uploaded your chosen material, click "Submit".
Your content is now uploaded and available for users to access and view.
By following these steps, you can effortlessly enrich your Education Portal with valuable educational content for your users.


