How Can You View or Edit an Existing Checklist?
Editing your clinical and operational checklists on Eolas just got super easy.
How do I change, edit or update an existing Checklist?
If you're looking to make changes to your checklist, just go through these steps:
-
Navigate to the "Admin Panel".
-
Click on "Content Management" and then choose "Checklists".
-
Locate the section containing the specific checklist you want to review and click on it.
-
Select the checklist and give it a click.
-
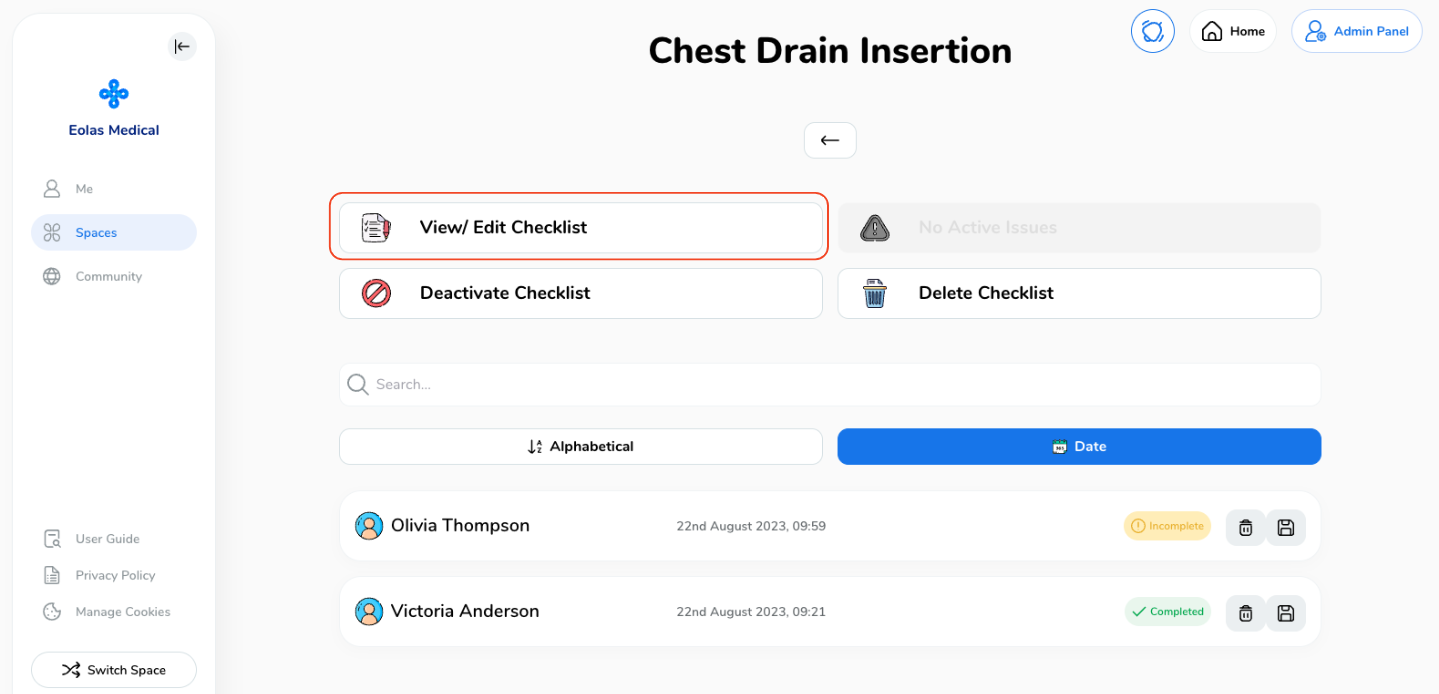
This will take you to the checklist management page, where you can either view or edit the existing checklist. Simply click on "View/Edit Checklist".
-
By taking this action, the checklist will be accessible for the Admin to modify or update as needed.
-
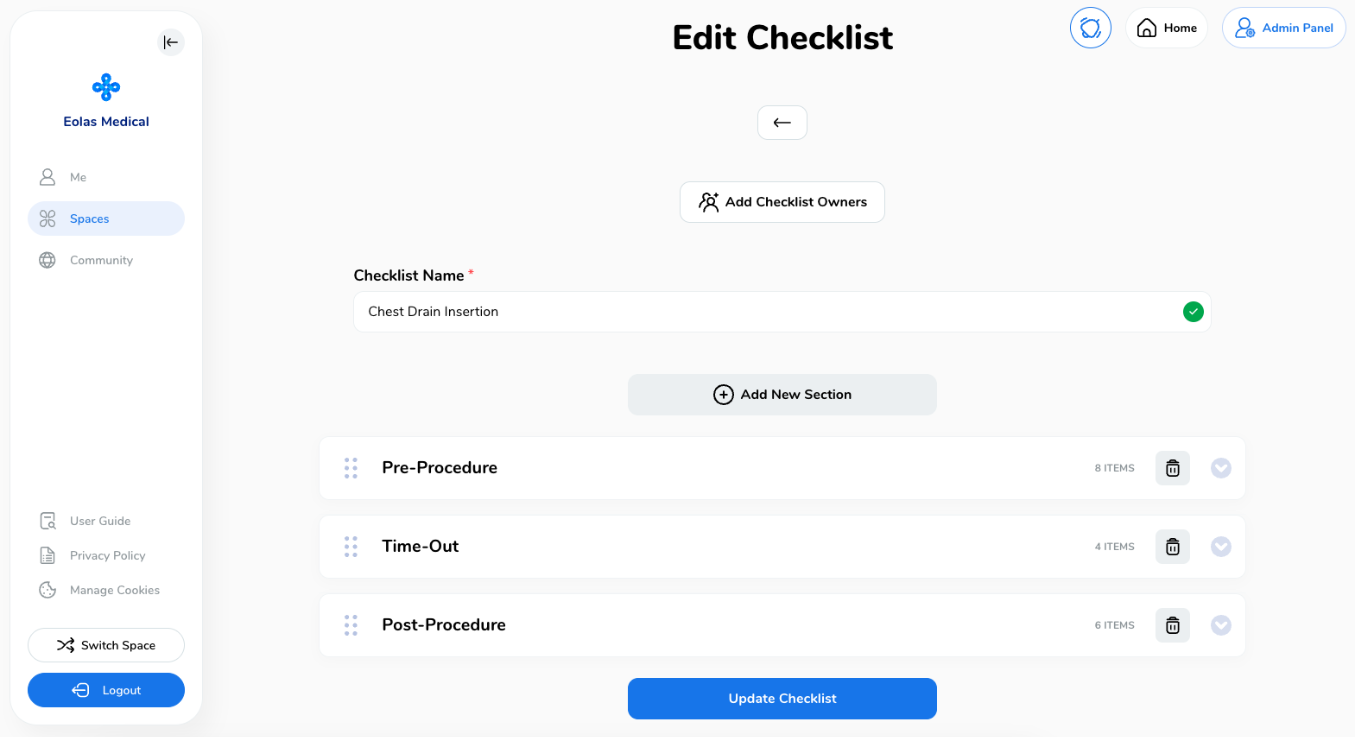
To delete a section within the checklist simply click on the "Bin" icon. (Delete).
-
To edit a section click on the "Down Arrow" icon to expand.
-
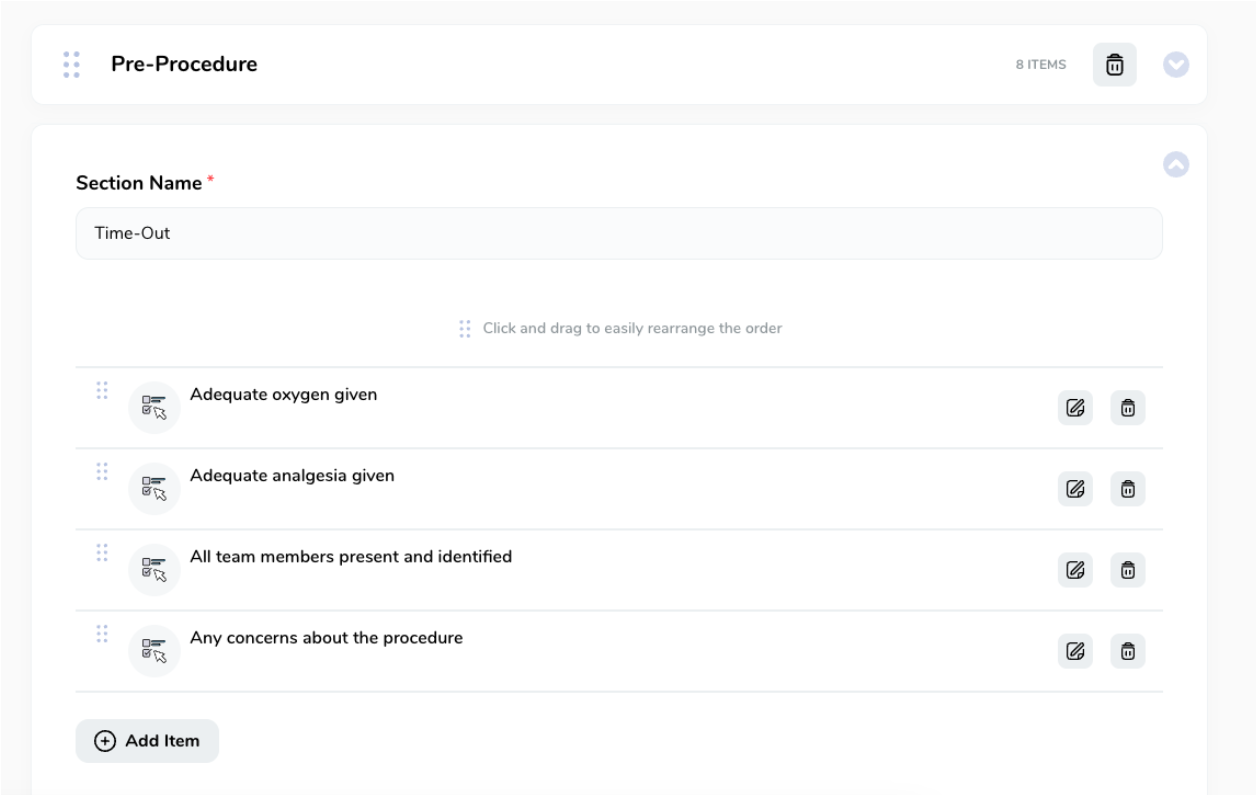
Once the section is expanded, you can perform necessary modifications. This involves changing the section name, reordering task sequences, editing or removing existing tasks, and introducing new items to the list.
-
To delete an item click on the "Bin" icon. (Delete).
-
To edit an item click on the "Paper & Pen" icon (Edit).
-
To introduce new items/tasks to the list click on "Add Item".
-
-
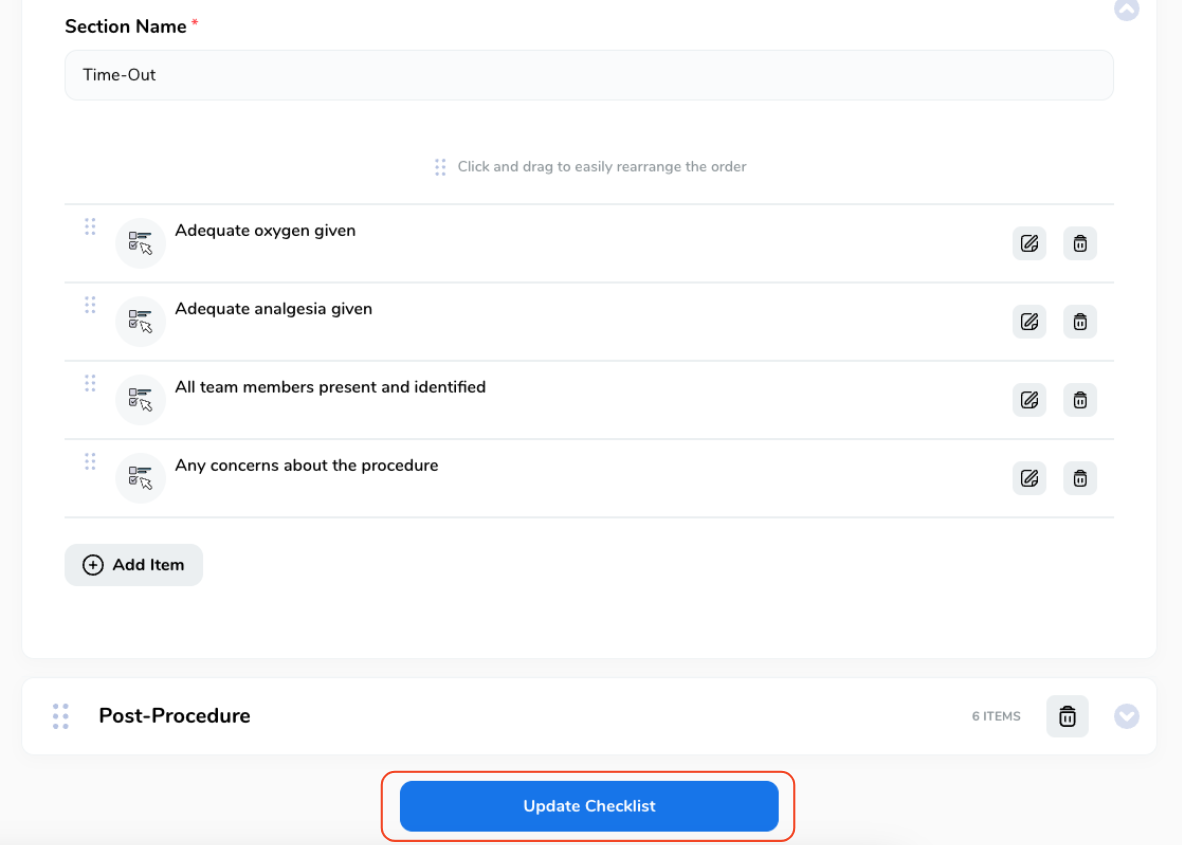
After you've made the necessary changes, remember to click on "Update Checklist" to ensure the changes are saved.
If you're looking for additional guidance on building a checklist, take a look at our guide titled Creating a New Checklist.
Navigate to the "Admin Panel".
Click on "Content Management" and then choose "Checklists".
Locate the section containing the specific checklist you want to review and click on it.
Select the checklist and give it a click.
This will take you to the checklist management page, where you can either view or edit the existing checklist. Simply click on "View/Edit Checklist".

By taking this action, the checklist will be accessible for the Admin to modify or update as needed.

To delete a section within the checklist simply click on the "Bin" icon. (Delete).

To edit a section click on the "Down Arrow" icon to expand.

Once the section is expanded, you can perform necessary modifications. This involves changing the section name, reordering task sequences, editing or removing existing tasks, and introducing new items to the list.

-
To delete an item click on the "Bin" icon. (Delete).
To delete an item click on the "Bin" icon. (Delete).
-
To edit an item click on the "Paper & Pen" icon (Edit).
To edit an item click on the "Paper & Pen" icon (Edit).
-
To introduce new items/tasks to the list click on "Add Item".
To introduce new items/tasks to the list click on "Add Item".
After you've made the necessary changes, remember to click on "Update Checklist" to ensure the changes are saved.

If you're looking for additional guidance on building a checklist, take a look at our guide titled creating a checklist.


