Exploring the Benefits of Contacts in the Eolas App.
Learn how to get started with contacts and how to create a section.
Contacts are a vital feature that facilitates the organised storage and management of your Space's essential contact information.
Versatile Sectioning.
Contacts offer a versatile system for categorising and storing different forms of communication and contact methods. This feature empowers users to efficiently manage and access vital contact details.
Creating Multiple Sections.
Within the Contacts feature, you can create and customize multiple sections to better align with your Department's specific needs. These sections provide a structured way to group contacts based on communication methods or other relevant criteria.
Effortless Search.
Whether you need to find a contact's beeper number, mobile number, or email address, our master search function simplifies the process. This powerful search tool ensures that all contact methods are readily accessible, enhancing the efficiency of your Department's communication network.
Getting Started with Contacts.
Organising and adding contacts is easy! But before you start adding any contacts, you'll need to create a section or choose an existing one to add your new contact to to keep things tidy and organised.
Few things to keep in mind:
-
You need to be an Administrator to add contacts to your Space. If you created a Space, you automatically have admin rights.
If you're not part of one, refer to our guide on Create Spaces to Collaborate with Your Healthcare Community. -
Access the application via a web browser on a desktop computer and log in to your account.
You need to be an Administrator to add contacts to your Space. If you created a Space, you automatically have admin rights.
If you're not part of one, refer to our guide on Create Spaces to Collaborate with Your Healthcare Community.
Access the application via a web browser on a desktop computer and log in to your account.
Now, let's quickly recap the steps to get to the Content Management page:
-
Log into the Space you wish to manage.
-
Click on the "Admin Panel" button located at the top right corner.
-
Then, click on "Content Management".
Log into the Space you wish to manage.
Click on the "Admin Panel" button located at the top right corner.
Then, click on "Content Management".
For detailed instructions, check out our guide on Admin - Content Management Overview
Creating your New Contacts Section.
-
Once you've reached the Content Management page, you'll notice a list of features. Look for the "Contacts" tab and click on it.
Once you've reached the Content Management page, you'll notice a list of features. Look for the "Contacts" tab and click on it.
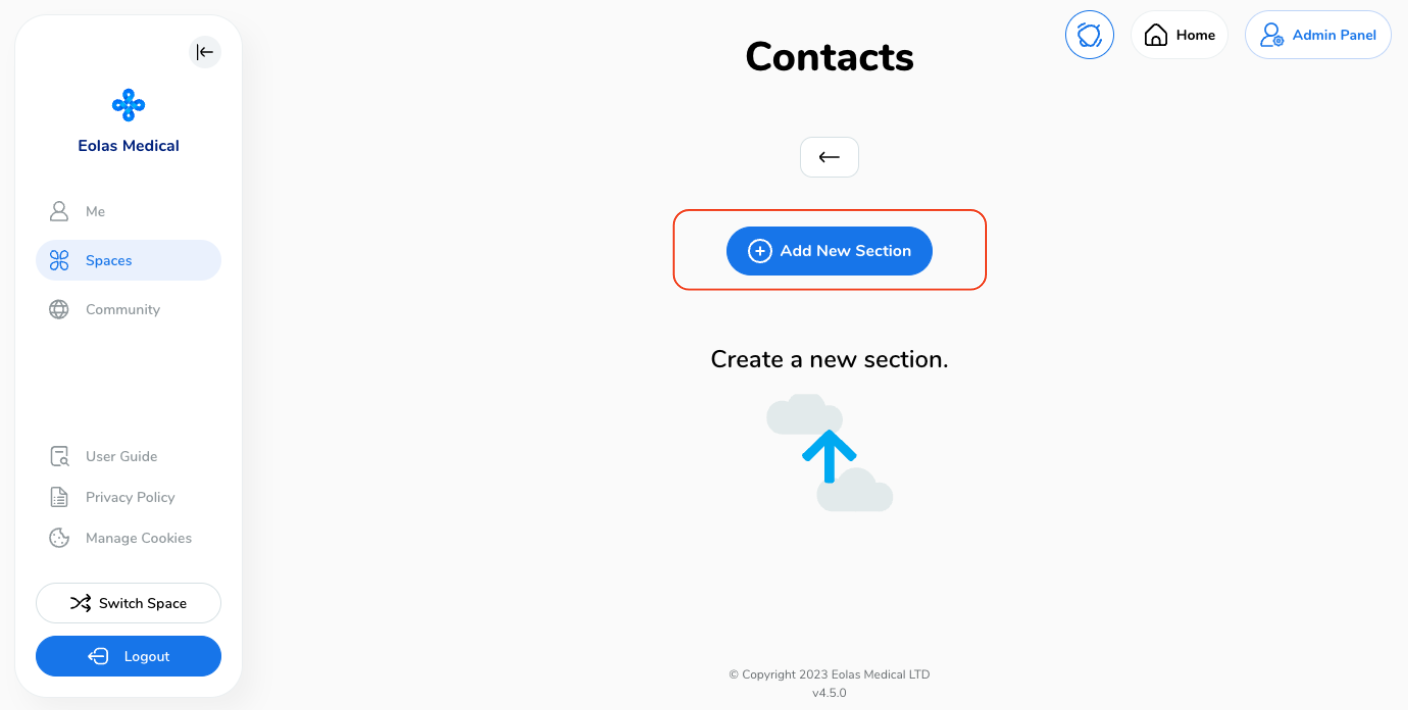
You will be redirected to the Contacts page, where you'll need a section to add a new contact. If you don't see any sections available, don't worry! Creating one is super easy. Just follow these steps to create a new section and get started.
-
Start by clicking on the "Add New Section" button.
-
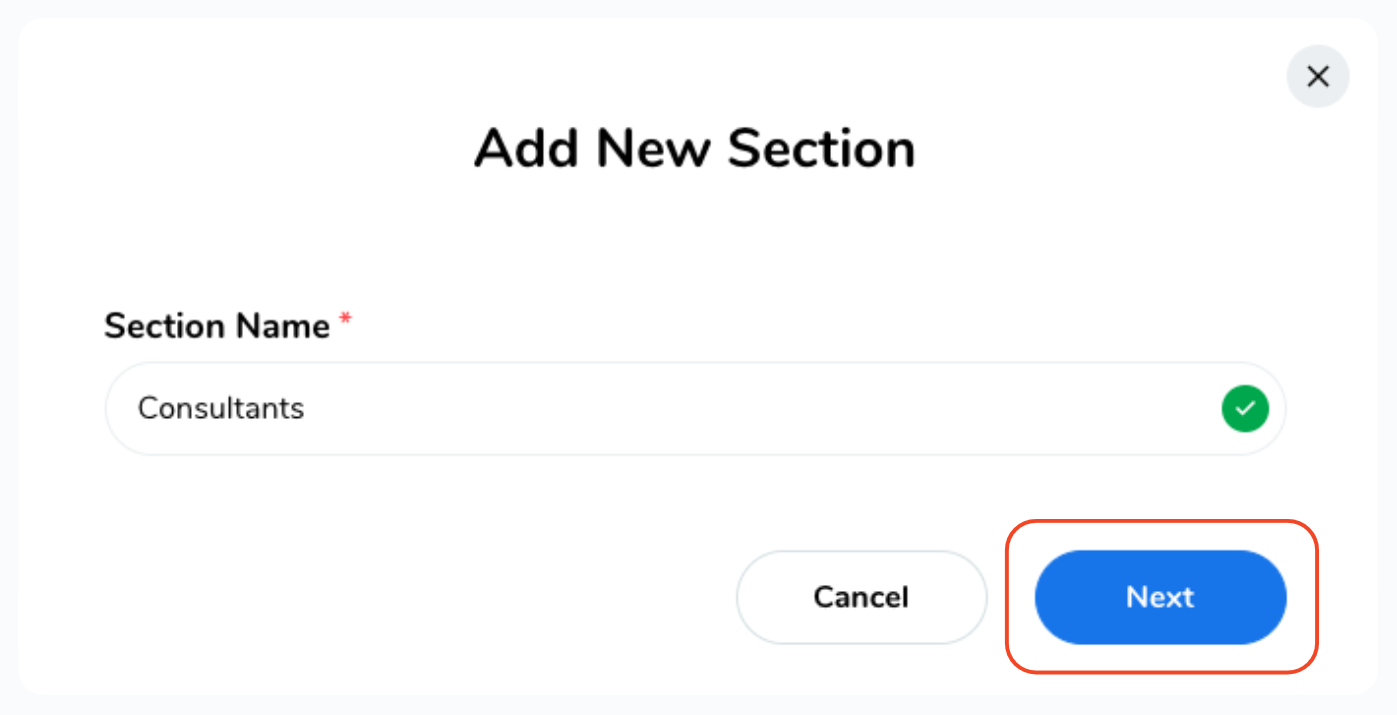
Give your new section a name that makes sense and is easy to understand, then click "Next."
-
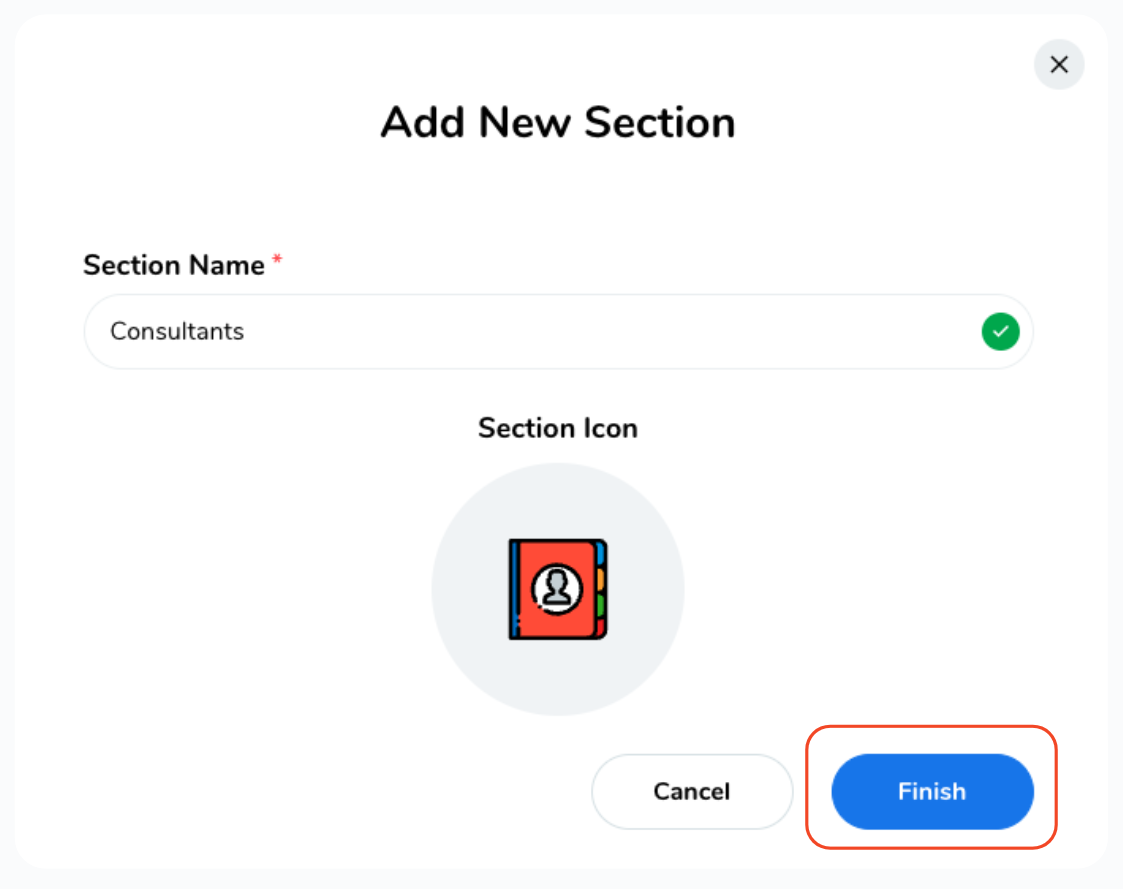
Choose an icon that represents your section well, something that resonates with its purpose.
-
To wrap it up, click the "Finish" button, and you're all set!
Start by clicking on the "Add New Section" button.

Give your new section a name that makes sense and is easy to understand, then click "Next."

Choose an icon that represents your section well, something that resonates with its purpose.
To wrap it up, click the "Finish" button, and you're all set!

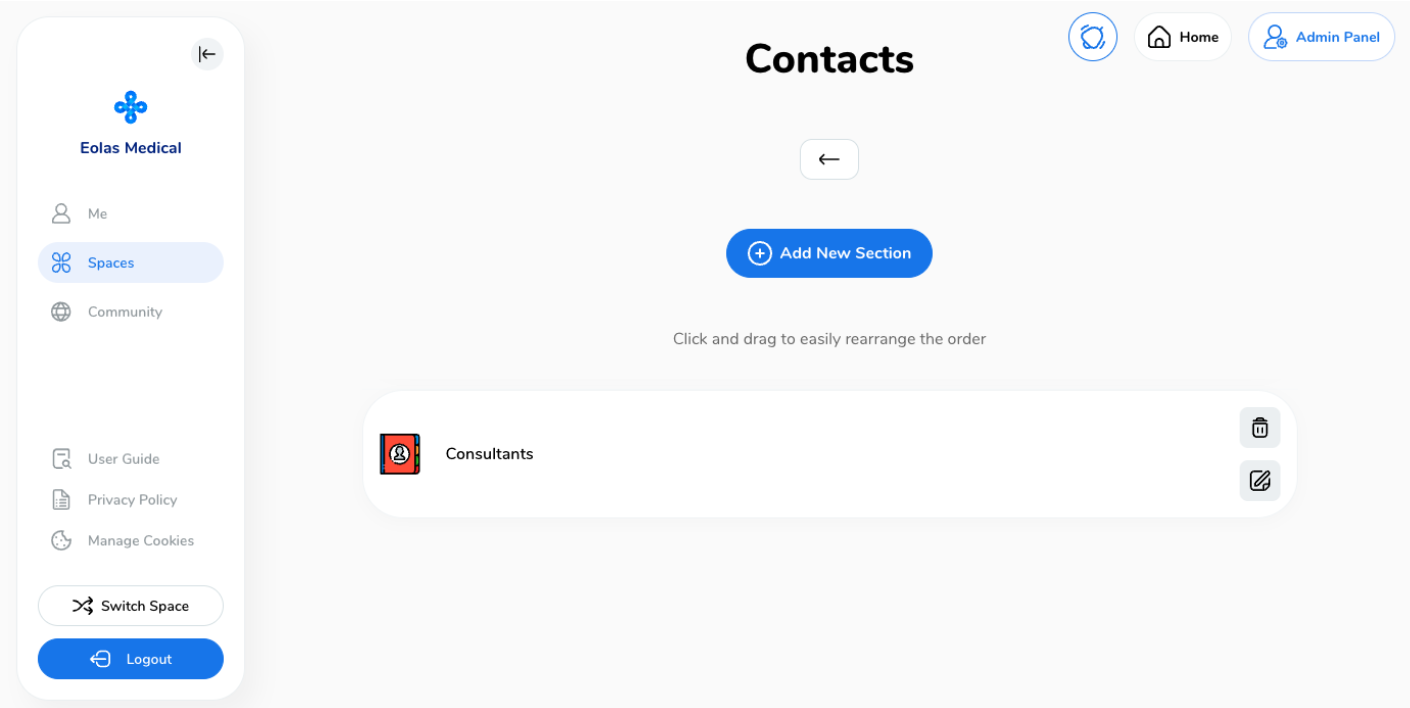
Great job! You've just created a new section, and now you're ready to dive in and start adding your contacts.

Editing your Contact Section.
If you're looking to make some changes to an existing section, like giving it a new name or a fresh icon, you can easily do so.
-
Find your way to the section you'd like to edit. Over on the right-hand side of that section, there are two icons: one that looks like a trash can for "Delete" and another one with a pencil and paper for "Edit."
-
Click on the "Pen & Paper" icon (Edit).
-
You're in control now! You can change the section's name or pick a new icon.
-
Once you're happy with the changes, simply hit "Finish" to save them.
Find your way to the section you'd like to edit. Over on the right-hand side of that section, there are two icons: one that looks like a trash can for "Delete" and another one with a pencil and paper for "Edit."
Click on the "Pen & Paper" icon (Edit).

You're in control now! You can change the section's name or pick a new icon.
Once you're happy with the changes, simply hit "Finish" to save them.
Deleting your Contact Section.
If you find yourself not needing a section anymore, no worries – you can easily delete it with these friendly steps:
-
Find the section you'd like to say goodbye to.
-
Click on the "Bin" icon (Delete).
-
We just want to make sure you're absolutely certain! A confirmation prompt will pop up. If you're ready to say goodbye, just click that "Delete" button.
Find the section you'd like to say goodbye to.

Click on the "Bin" icon (Delete).
We just want to make sure you're absolutely certain! A confirmation prompt will pop up. If you're ready to say goodbye, just click that "Delete" button.
Please remember, confirming the deletion means the section and all the contacts within it will be waved goodbye forever.


