Deleting an Existing Checklist. | Eolas Medical | Help Center
Discover how to remove an existing checklist with our step-by-step guide.
If you're ready to completely delete an existing checklist, just follow these steps:
⚠️ Please note that this action will result in the permanent removal of all stored data and submitted checklists.
-
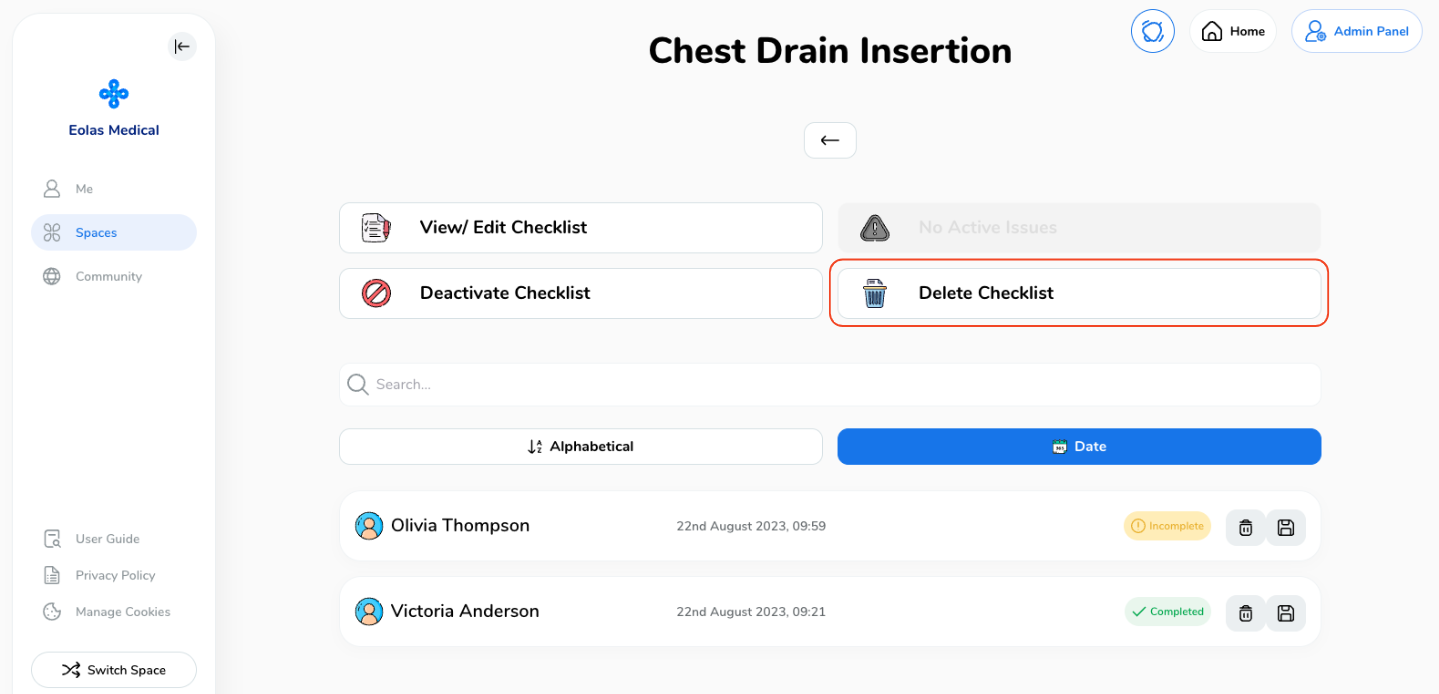
Click on "Delete Checklist"
-
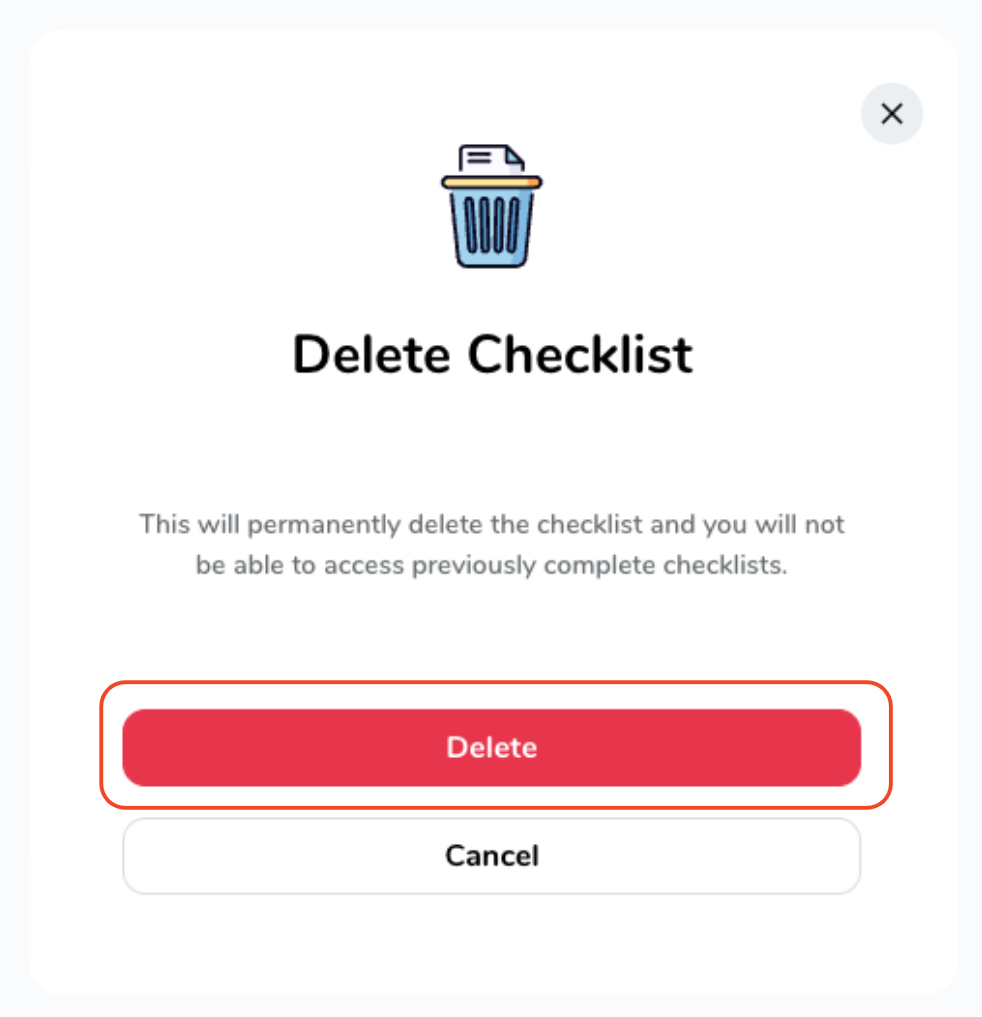
When the confirmation pop-up appears, click on "Delete"
-
If you've chosen it by accident or changed your mind, opt for "Cancel" instead.
Click on "Delete Checklist"

When the confirmation pop-up appears, click on "Delete"

If you've chosen it by accident or changed your mind, opt for "Cancel" instead.
Taking the step to delete a checklist is a significant decision, so be sure to consider the implications carefully. We also recommend downloading the submitted checklists to have them on hand in case they are needed in the future.


