Deactivating and Activating Checklists: A How-To Guide. | Eolas Medical | Help Center
Deactivating (hiding) and reactivating Checklists without the need for deletion.
You have the flexibility to disable (deactivate) a Checklist temporarily, then reactivate it rather than deleting and rebuilding!
Deactivate a Checklist
Ready to give your checklist a break? Just follow these steps to disable it:
-
Click on "Content Management" and then select "Checklists".
-
Find the Section where your Checklist is located and click on it.
-
Locate the specific Checklist you want to deactivate and click on it.
-
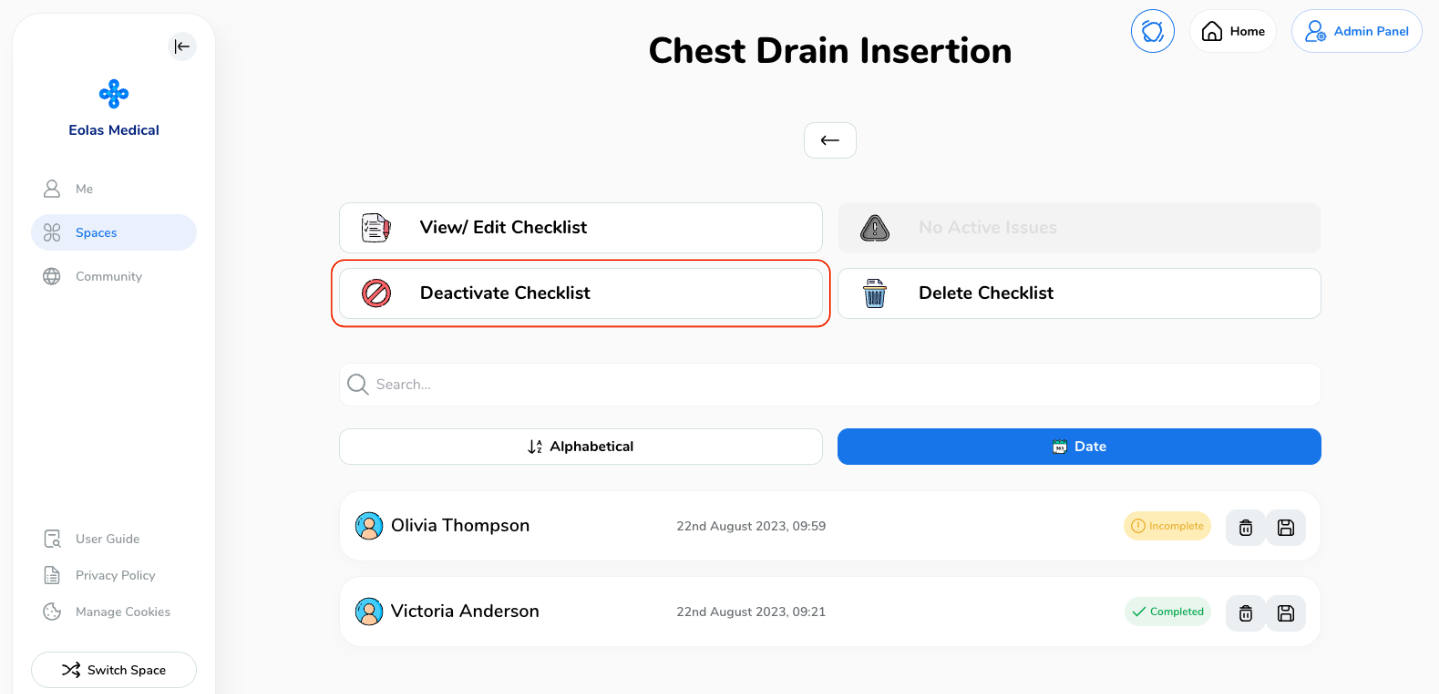
On the checklist management page, you'll find the option to "Deactivate Checklist". Simply give it a click.
-
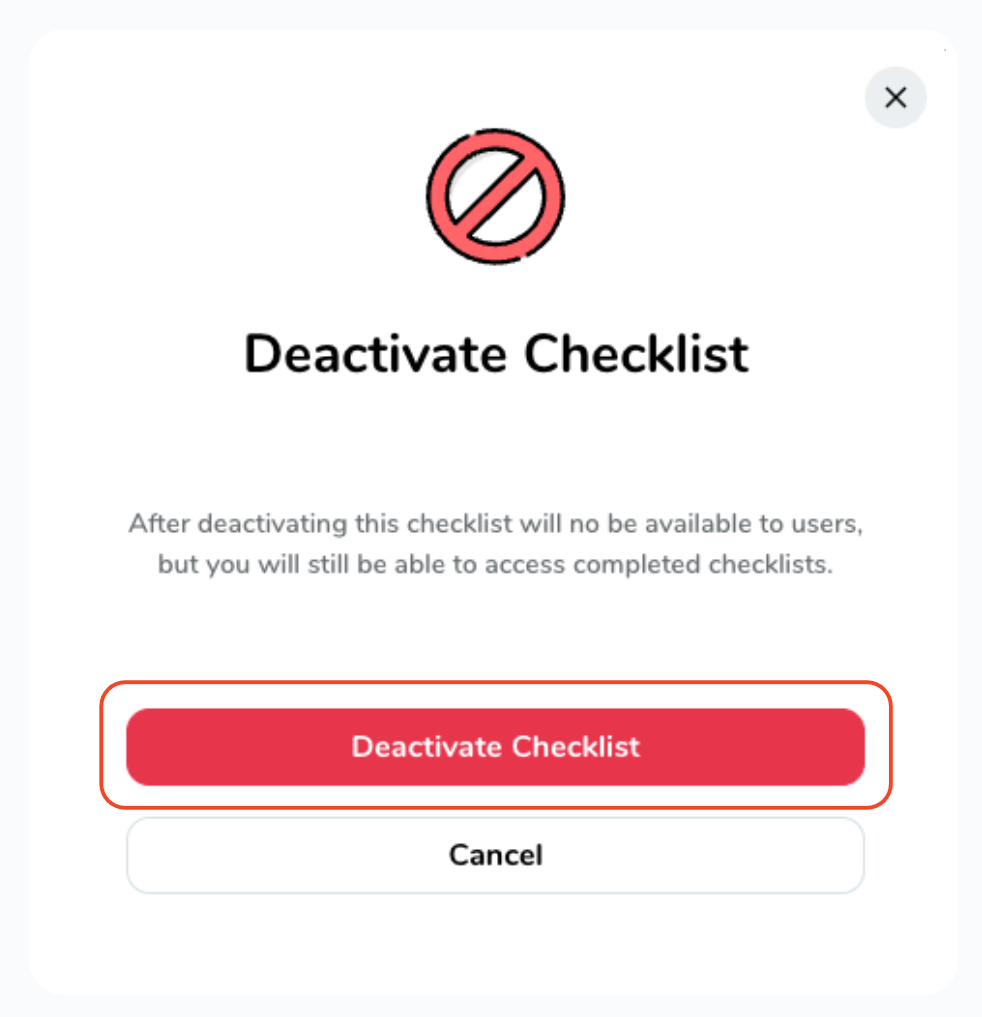
A confirmation pop-up will appear; simply click "Deactivate Checklist."
Click on "Content Management" and then select "Checklists".
Find the Section where your Checklist is located and click on it.
Locate the specific Checklist you want to deactivate and click on it.
On the checklist management page, you'll find the option to "Deactivate Checklist". Simply give it a click.

A confirmation pop-up will appear; simply click "Deactivate Checklist."

Your checklist will be taking a break in no time!
How do I activate a deactivated Checklist?
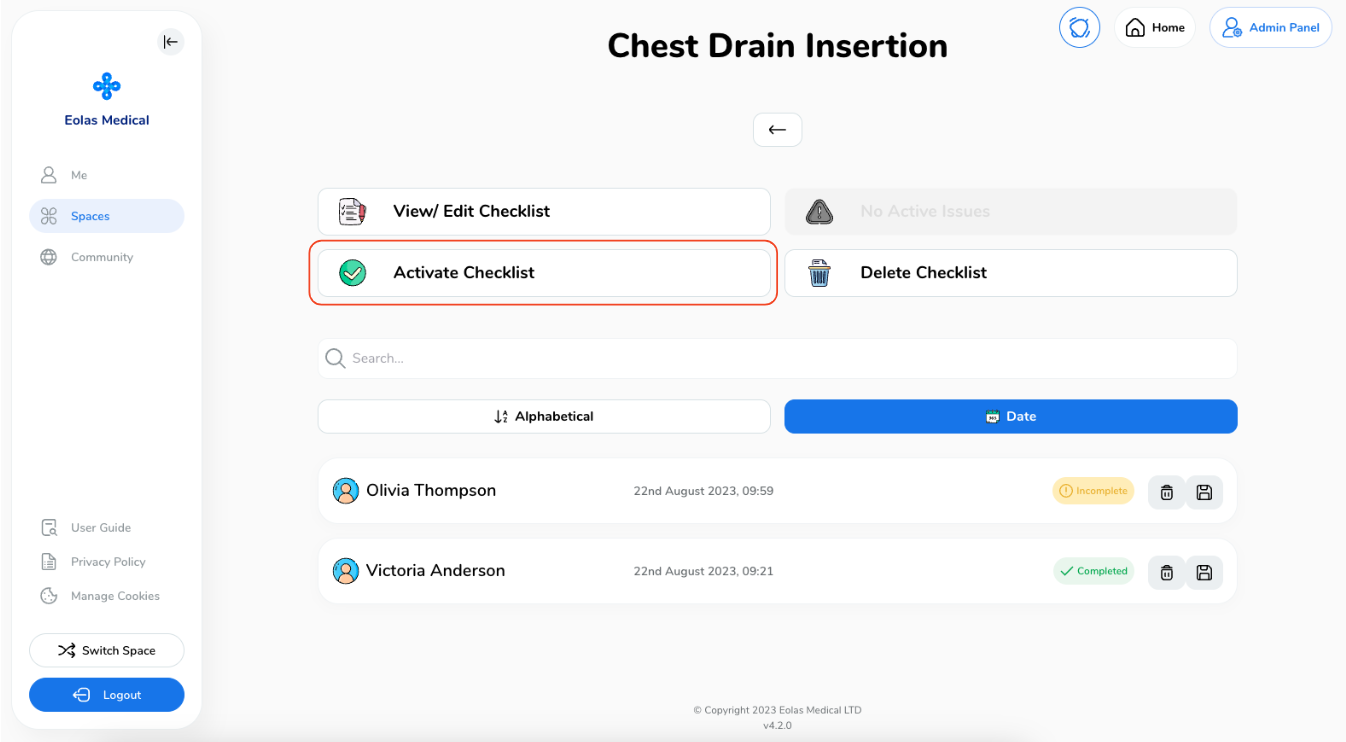
If you've previously deactivated a Checklist, simply navigate to that Checklist and click on "Activate Checklist".

This will bring the Checklist back to an active state, making it visible and usable for users.


