How to Create, Delete, or Edit a Guidelines Section
Organising your Guidelines is easy! But before you start uploading any Guidelines, you'll need to create a section or choose an existing one to upload your new Guidelines to.
Few things to keep in mind:
-
You need to be an Administrator to upload Guidelines to your Space. If you created a Space, you automatically have admin rights.
If you're not part of one, refer to our guide on Create Spaces to Collaborate with Your Healthcare Community.
-
Access the application via a web browser on a desktop computer and log in to your account.
You need to be an Administrator to upload Guidelines to your Space. If you created a Space, you automatically have admin rights.
If you're not part of one, refer to our guide on Create Spaces to Collaborate with Your Healthcare Community.
Access the application via a web browser on a desktop computer and log in to your account.
Now, let's quickly recap the steps to get to the Content Management page:
-
Log into your Space.
-
Click on the "Admin Panel" button located at the top right corner.
-
Then, click on "Content Management".
Log into your Space.
Click on the "Admin Panel" button located at the top right corner.
Then, click on "Content Management".
For detailed instructions, check out our guide on Admin - Content Management Overview
Creating a New Guideline Section.
Once you've reached the Content Management page, you'll notice a list of features. Look for the "Guidelines" tab and just click on it.
You will be redirected to the Guidelines page, where you'll need a section to add a new guideline. If you don't see any sections available, don't worry! Creating one is super easy. Just follow these steps to create a new section and get started.
-
Click on the "Add New Section" button.
-
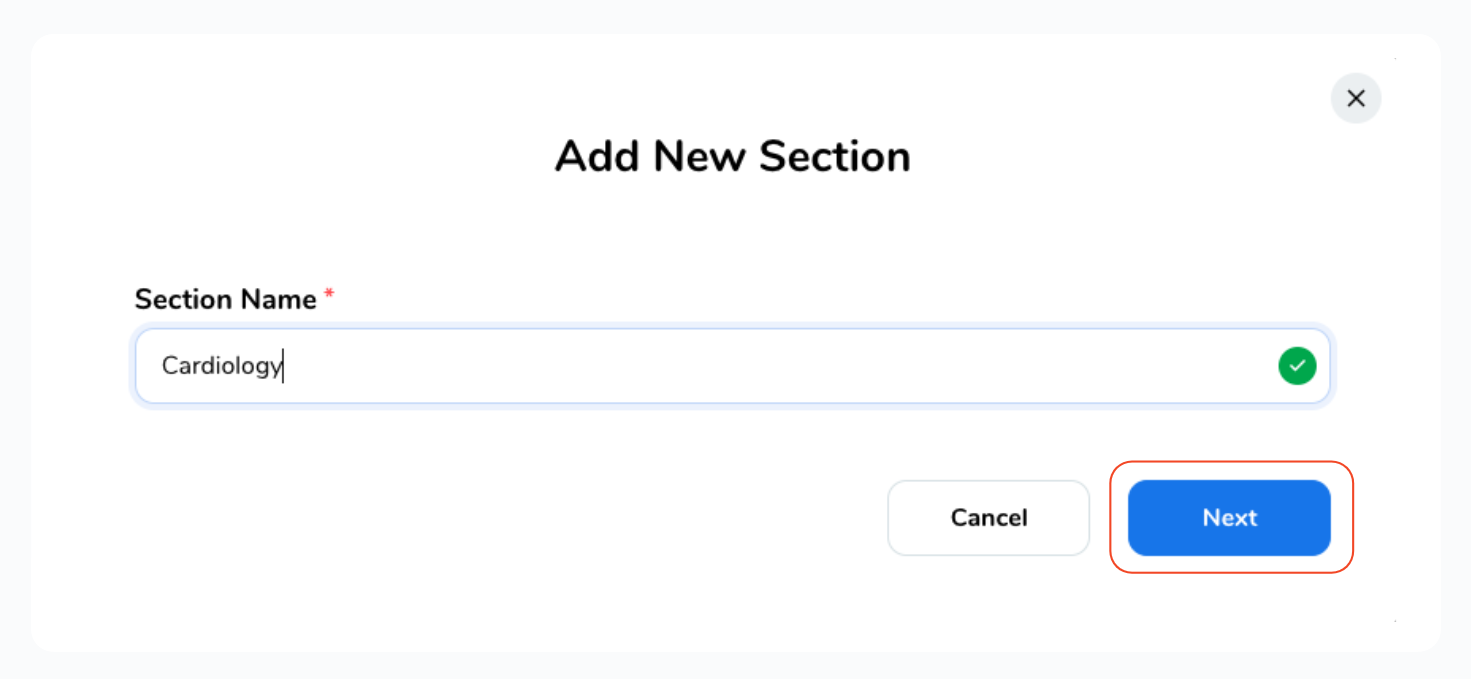
Give your new section a clear and meaningful name, then click "Next".
-
Choose an icon that best represents your section.
-
Click on the "Finish" button to complete the section creation.
Click on the "Add New Section" button.

Give your new section a clear and meaningful name, then click "Next".

Choose an icon that best represents your section.
Click on the "Finish" button to complete the section creation.
-
If you change your mind during this process, no worries! You can always select "Cancel" to start again. Additionally, you can update the section name or change the icon by selecting them.
If you change your mind during this process, no worries! You can always select "Cancel" to start again. Additionally, you can update the section name or change the icon by selecting them.
Now, you're all set! You've successfully created a section, and you're ready to start uploading your guidelines.
Editing a Guideline Section.
If you want to make changes to an existing Section, such as renaming it or updating its icon, you can easily do so.
-
Navigate to the section you want to edit. To the right of the selected section, you'll see two icons: a bin for "Delete", and a paper & pen for "Edit".
-
Click on the "paper & pen" icon (Edit).
-
You can now re-name the section or change its icon by selecting a new one.
-
Once you've made the desired changes, click "Finish" to save them.
Navigate to the section you want to edit. To the right of the selected section, you'll see two icons: a bin for "Delete", and a paper & pen for "Edit".
Click on the "paper & pen" icon (Edit).

You can now re-name the section or change its icon by selecting a new one.
Once you've made the desired changes, click "Finish" to save them.
Deleting a Guideline Section.
If you no longer need a Section, you can delete by following the next steps:
-
Locate the section you want to delete.
-
Click on the "bin" icon (Delete).
-
A confirmation prompt will appear to confirm the deletion. If you want to go ahead click on the "Delete" button
Locate the section you want to delete.
Click on the "bin" icon (Delete).

A confirmation prompt will appear to confirm the deletion. If you want to go ahead click on the "Delete" button
Please note that by confirming the deletion, the Section and all Guidelines in it will be permanently removed.


