Creating a New Checklist. | Eolas Medical | Help Center
How do I create a new checklist?
Before you begin the process of crafting your new checklist, it's crucial to have designated sections in place to maintain organization.
If you require guidance in forming a section, refer to the guide on Creating a New Checklist Section
Now, let's kick things off! Follow these straightforward steps to create your checklist.
Adding a New Checklist to a Section.
Now, let's dive right into the process of adding a Checklist. No need to worry – it's as simple as pie! Just follow these straightforward steps:
-
Click on the desired section.
You'll be taken to the section page, with the section name displayed at the top.
-
Click "Add New Checklist".
-
Name Your Checklist - Ensure the name is clear and distinctive for easy recognition and efficient search results.
Remember, Checklists can be divided into sections to facilitate the categorisation of various stages within the list.
For instance, consider an ED Safety Checklist with multiple sections such as "1st hour," "2nd hour," and so on. This structuring can be replicated using our Checklist builder, particularly in a digital format.
-
Click "Add New Section" to create a subsection within the checklist.
A new tab will expand, allowing you to build that particular section of the checklist.
-
Give the section a name.
-
Click "Add Item" - these are the 'tasks' within your checklist.
-
A pop-up window will appear, providing the option to choose the format (checkbox or text input).
-
Provide a title for the checkbox or text input and add any additional information if necessary. Remember, these details define the task.
-
Click "Add Item".
-
You'll be directed back to the checklist, where your newly created task will be visible.
-
Keep adding checklist items within the section until you're done, then choose "Save".
Click on the desired section.

You'll be taken to the section page, with the section name displayed at the top.
Click "Add New Checklist".

Name Your Checklist - Ensure the name is clear and distinctive for easy recognition and efficient search results.
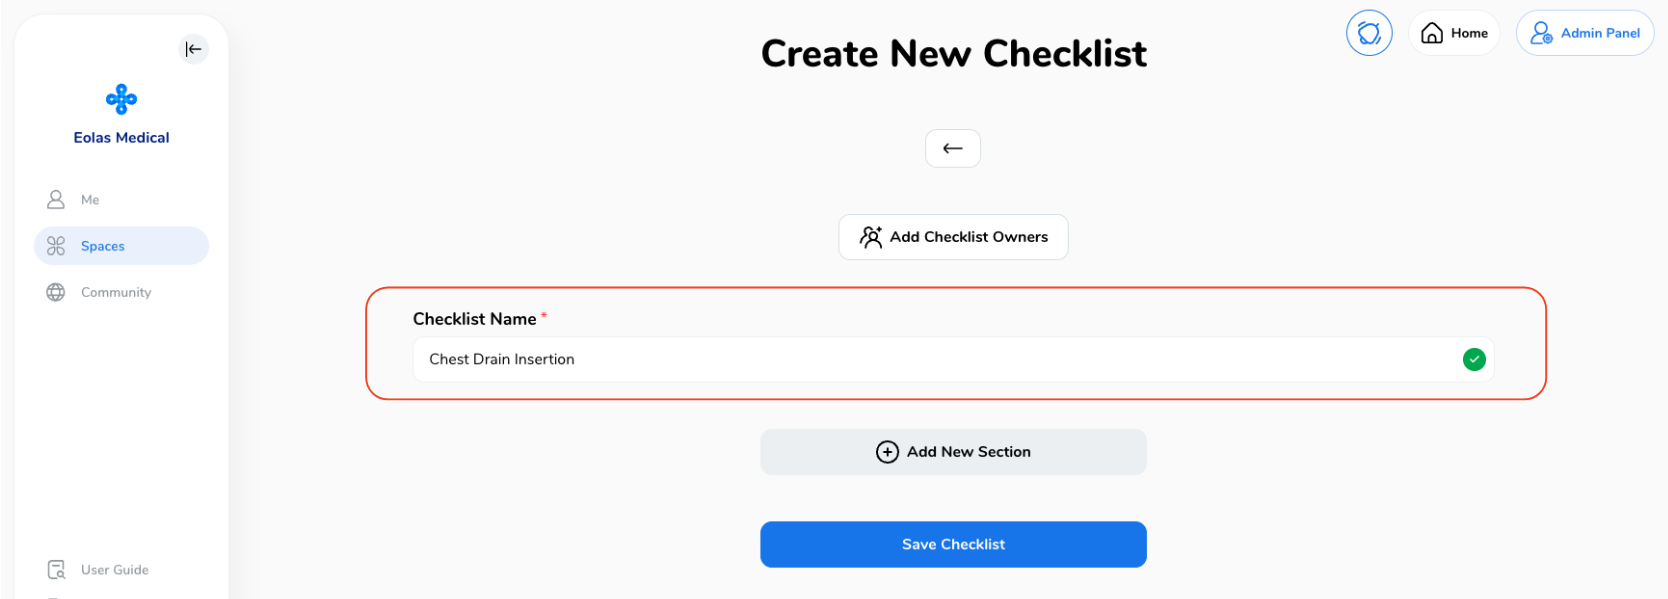
Remember, Checklists can be divided into sections to facilitate the categorisation of various stages within the list.
For instance, consider an ED Safety Checklist with multiple sections such as "1st hour," "2nd hour," and so on. This structuring can be replicated using our Checklist builder, particularly in a digital format.
Click "Add New Section" to create a subsection within the checklist.
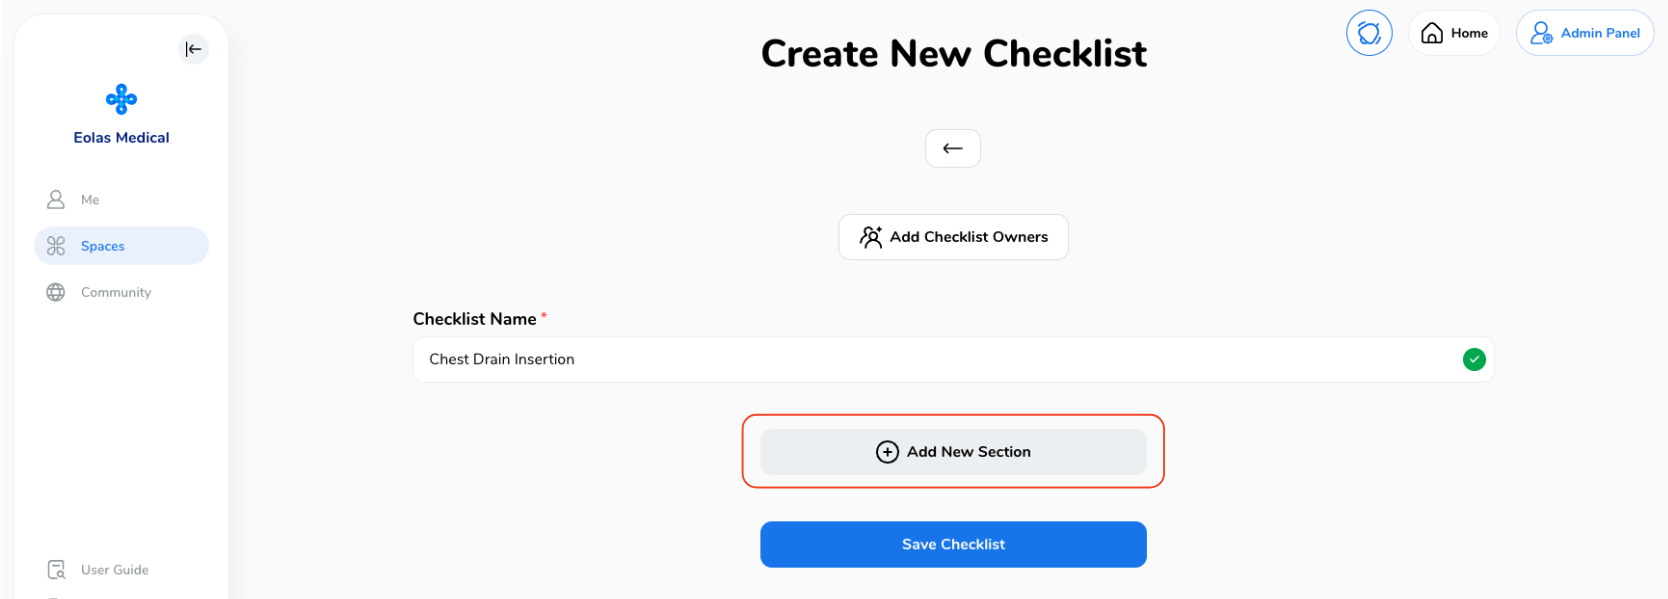
A new tab will expand, allowing you to build that particular section of the checklist.
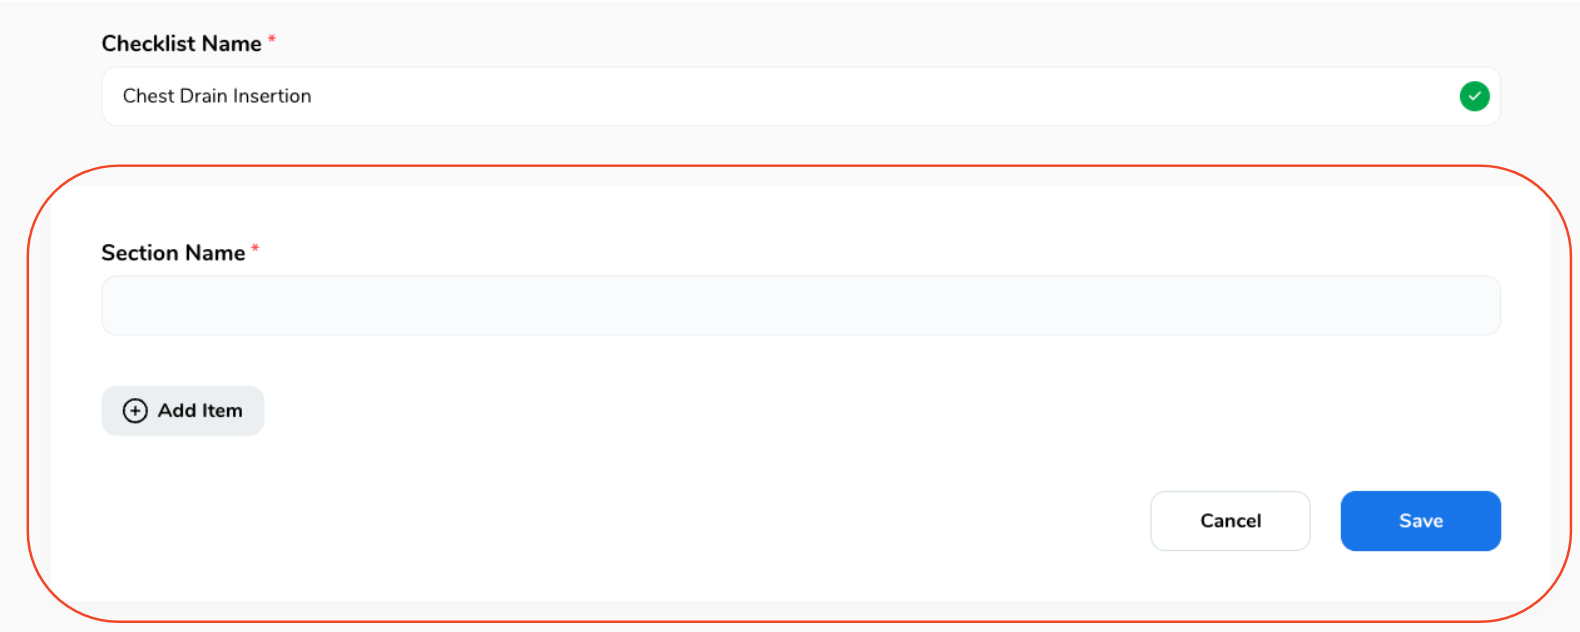
Give the section a name.
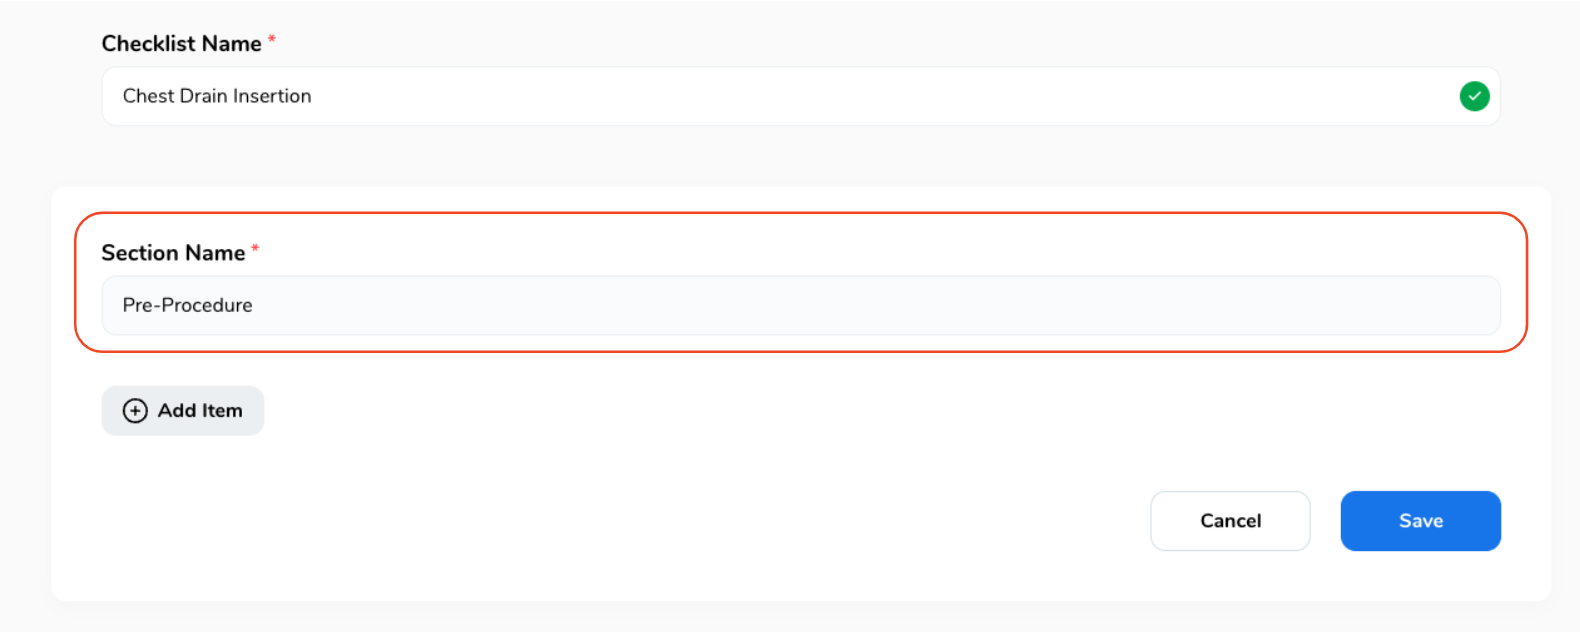
Click "Add Item" - these are the 'tasks' within your checklist.
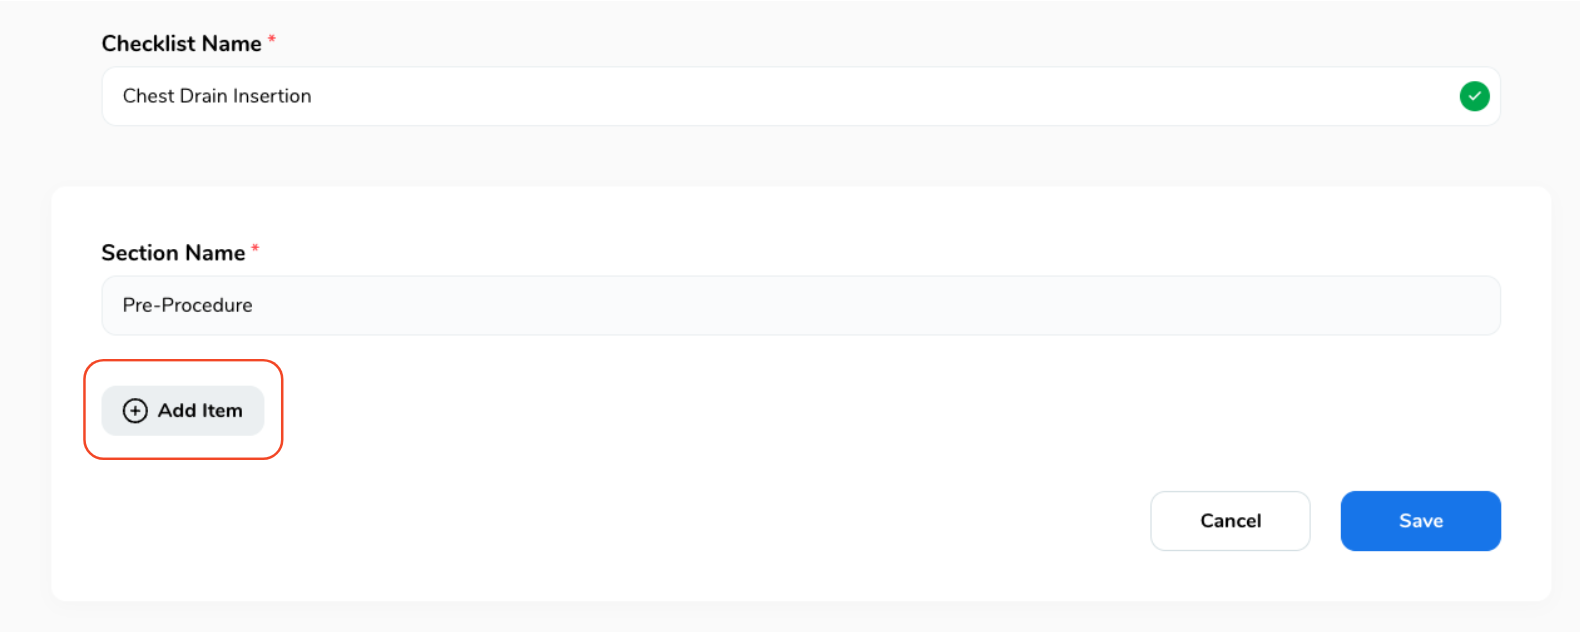
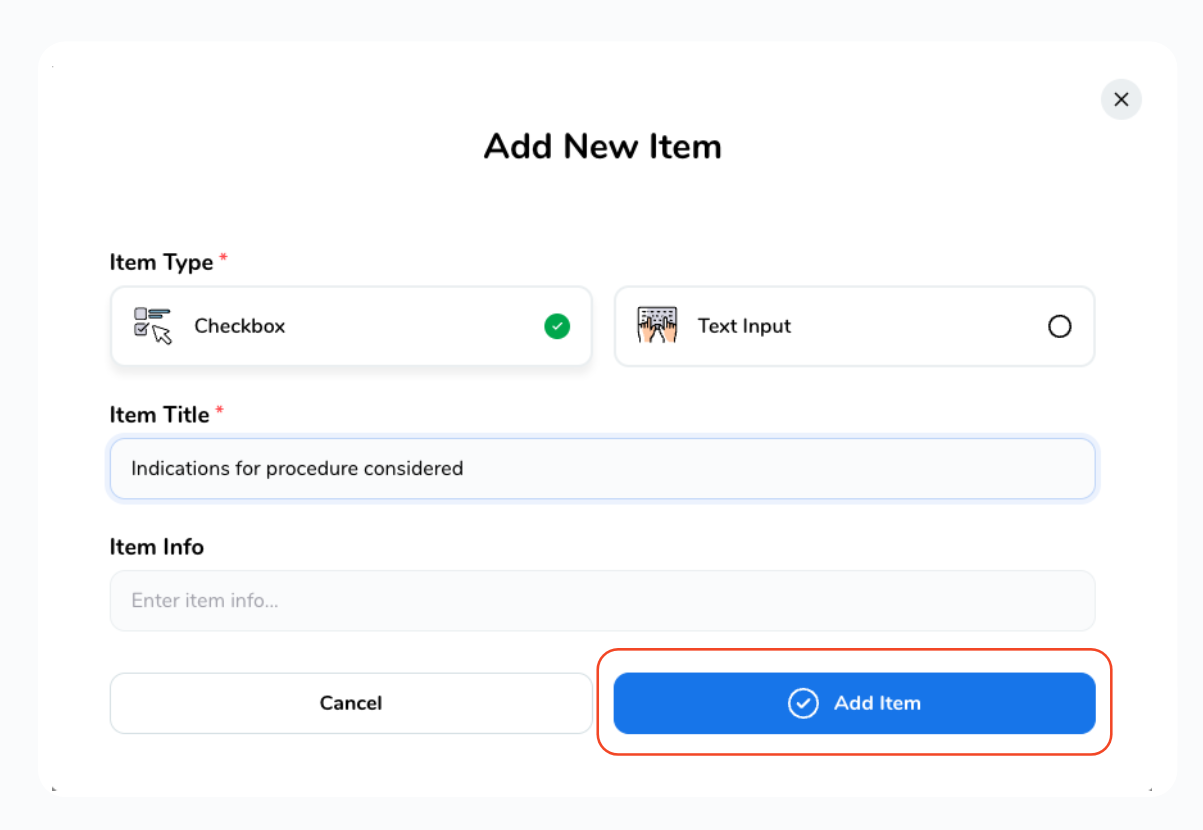
A pop-up window will appear, providing the option to choose the format (checkbox or text input).
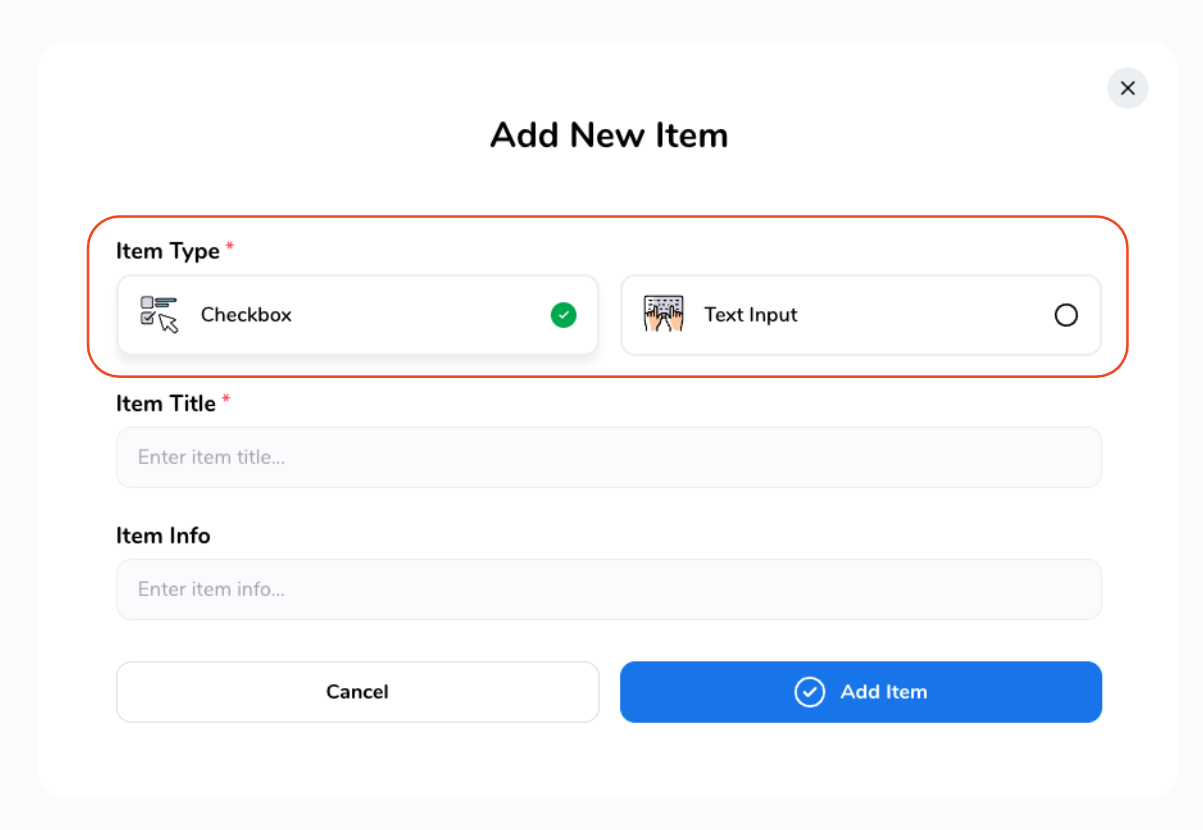
Provide a title for the checkbox or text input and add any additional information if necessary. Remember, these details define the task.
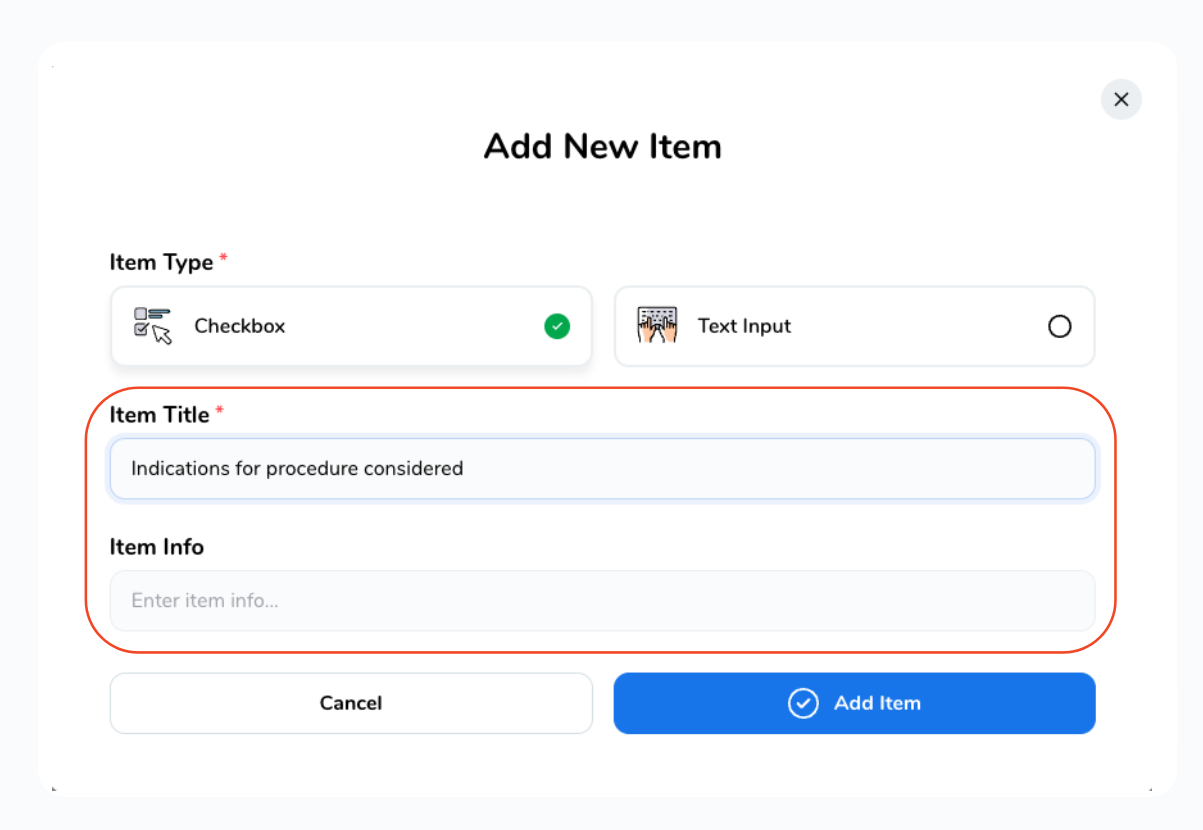
Click "Add Item".
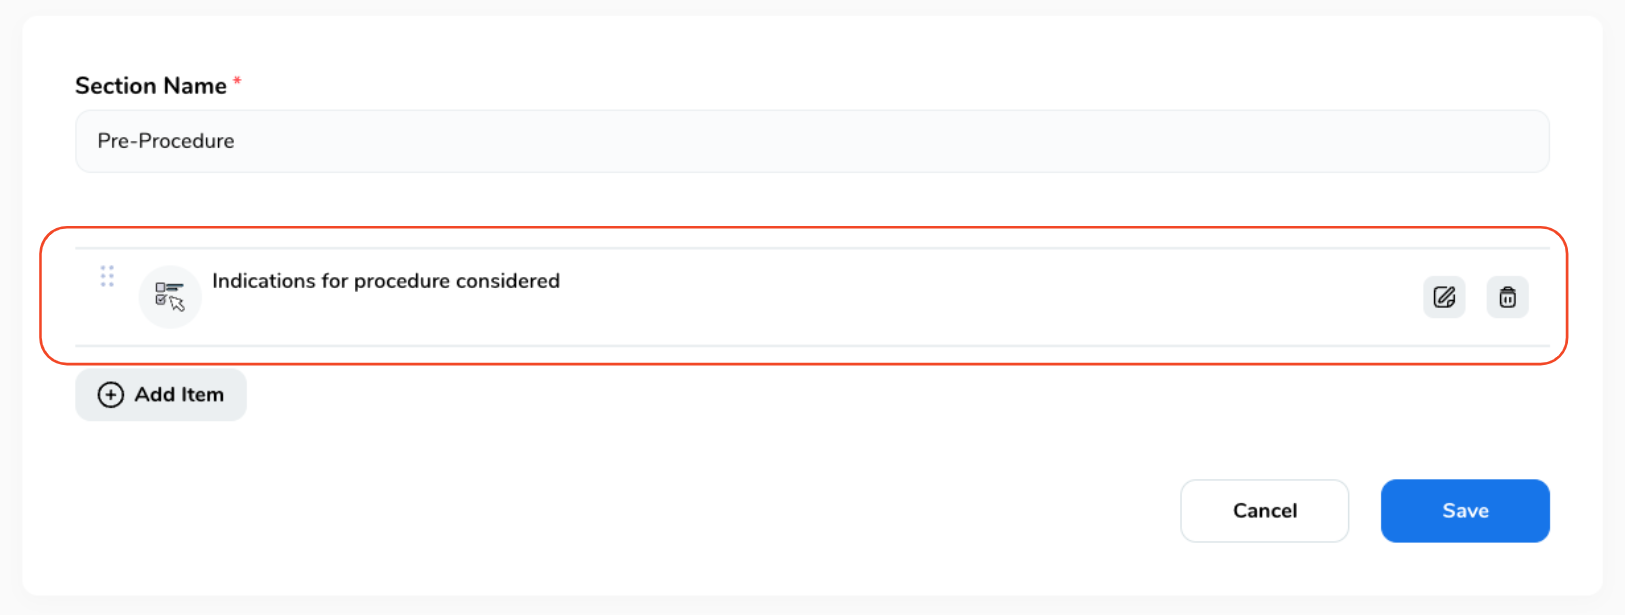
You'll be directed back to the checklist, where your newly created task will be visible.
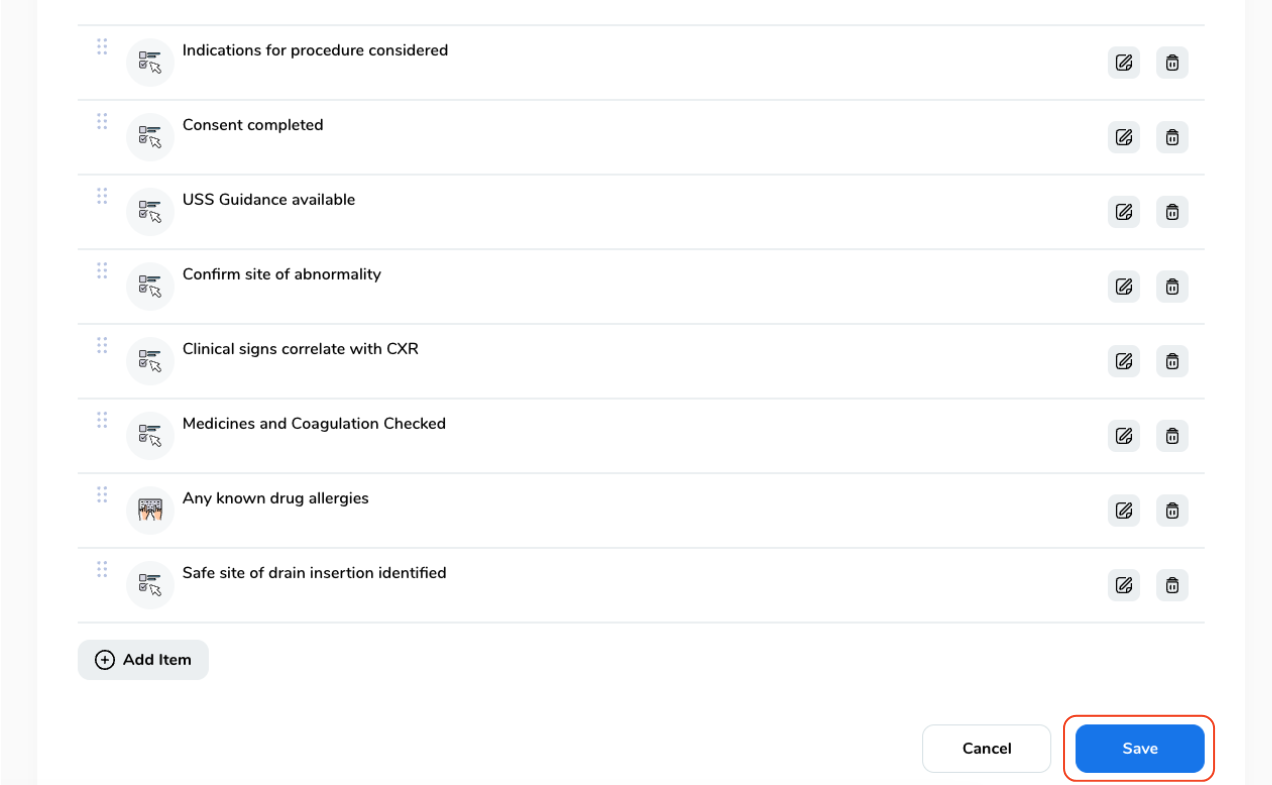
Keep adding checklist items within the section until you're done, then choose "Save".
Editing and Managing a Checklist Item.
If you need to make changes or want to remove the Checklist item simply:
-
Select the "Pen & Paper" icon to edit the Checklist item.
Select the "Pen & Paper" icon to edit the Checklist item.

-
Select the "Bin" icon to delete the Checklist item.
Select the "Bin" icon to delete the Checklist item.

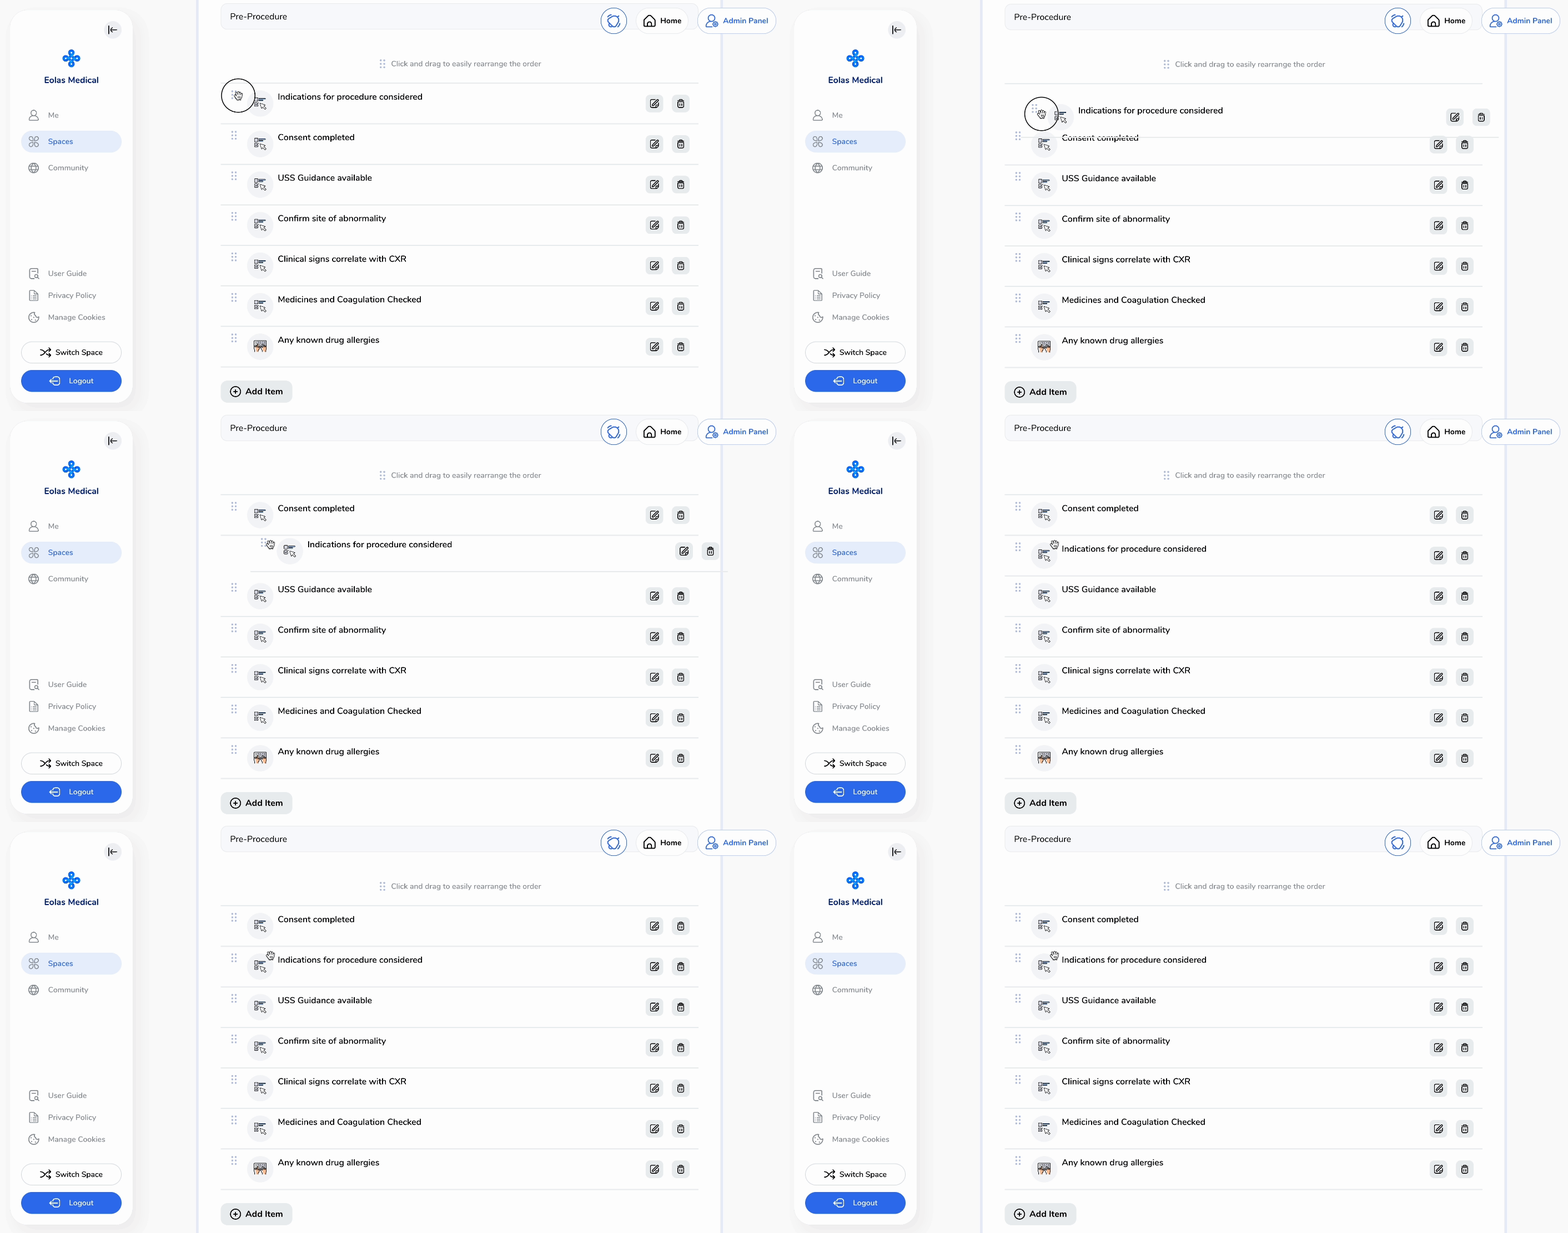
Additionally, you have the power to rearrange the order of items with a straightforward drag-and-drop action. Just grab the Checklist item and move it to its new spot!
Add an additional section.
-
To include another section, all you need to do is click on "Add New Section"
-
Name your new section
-
Then follow the same steps mentioned above.
-
Click "Save"
To include another section, all you need to do is click on "Add New Section"

Name your new section
Then follow the same steps mentioned above.
Click "Save"
The new Section will be added after the first.

Deleting or Removing a Section.
-
Deleting a section is as simple as clicking the "Bin" icon.
-
In case you accidentally hit the Bin icon, no need to fret – a confirmation step is in place. Just select the "X" in the upper right corner of the pop-up to go back.
-
Deleting a section is as simple as clicking the "Bin" icon.

-
In case you accidentally hit the Bin icon, no need to fret – a confirmation step is in place. Just select the "X" in the upper right corner of the pop-up to go back.
In case you accidentally hit the Bin icon, no need to fret – a confirmation step is in place. Just select the "X" in the upper right corner of the pop-up to go back.
Expanding a Section.
-
Moreover, you can expand the section to review the Checklist tasks/items by clicking on the "Down Arrow" icon.
Moreover, you can expand the section to review the Checklist tasks/items by clicking on the "Down Arrow" icon.

Finishing Up.
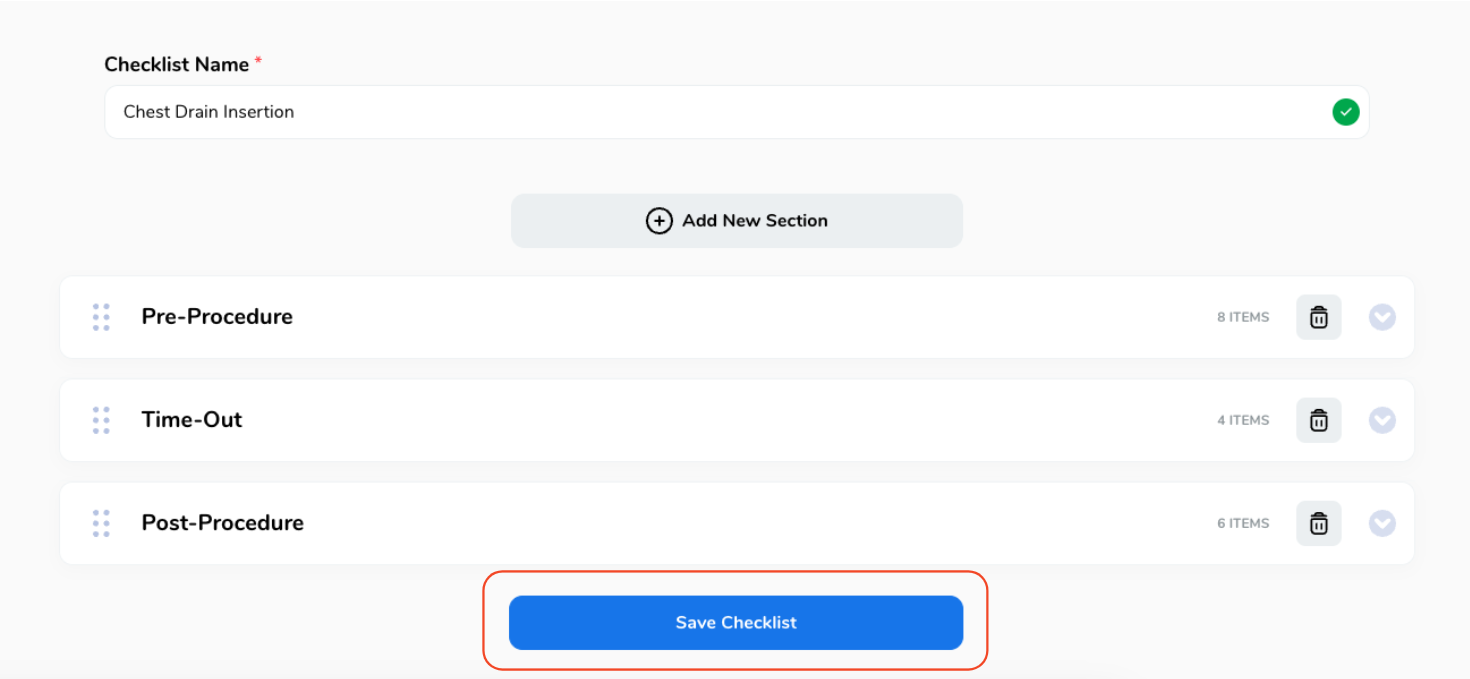
Once you have created your Checklist and all the different Sections select "Save Checklist" at the bottom.
