Adding a New Teaching Delivery Event to Your Portfolio. | Eolas Medical | Help Center
Learn how to add a Teaching Delivery event to your portfolio, attach support evidence, request feedback, and submit the event.
Updated over a week ago Table of contents
Introducing the Teaching Delivery event, designed to enhance your teaching experience gain valuable insights with these key features:
Collect feedback in seconds with a QR Code or Link.
Whether you’re delivering a lecture to an audience of 300, or ad-hoc teaching to a small group, simply share a QR code and let anyone you choose provide feedback. No need to wait for paper forms or handle hundreds of email addresses.
Evidence every teaching session you deliver.
Understand exactly what's working, what needs improvement, and document your progression.
Understand Your Teaching Style.
Get a clear picture of your strengths and weaknesses, and focus your efforts where they'll make the biggest impact.
To create a teaching delivery event simply follow this steps:
Web - Add a Teaching Delivery event.
-
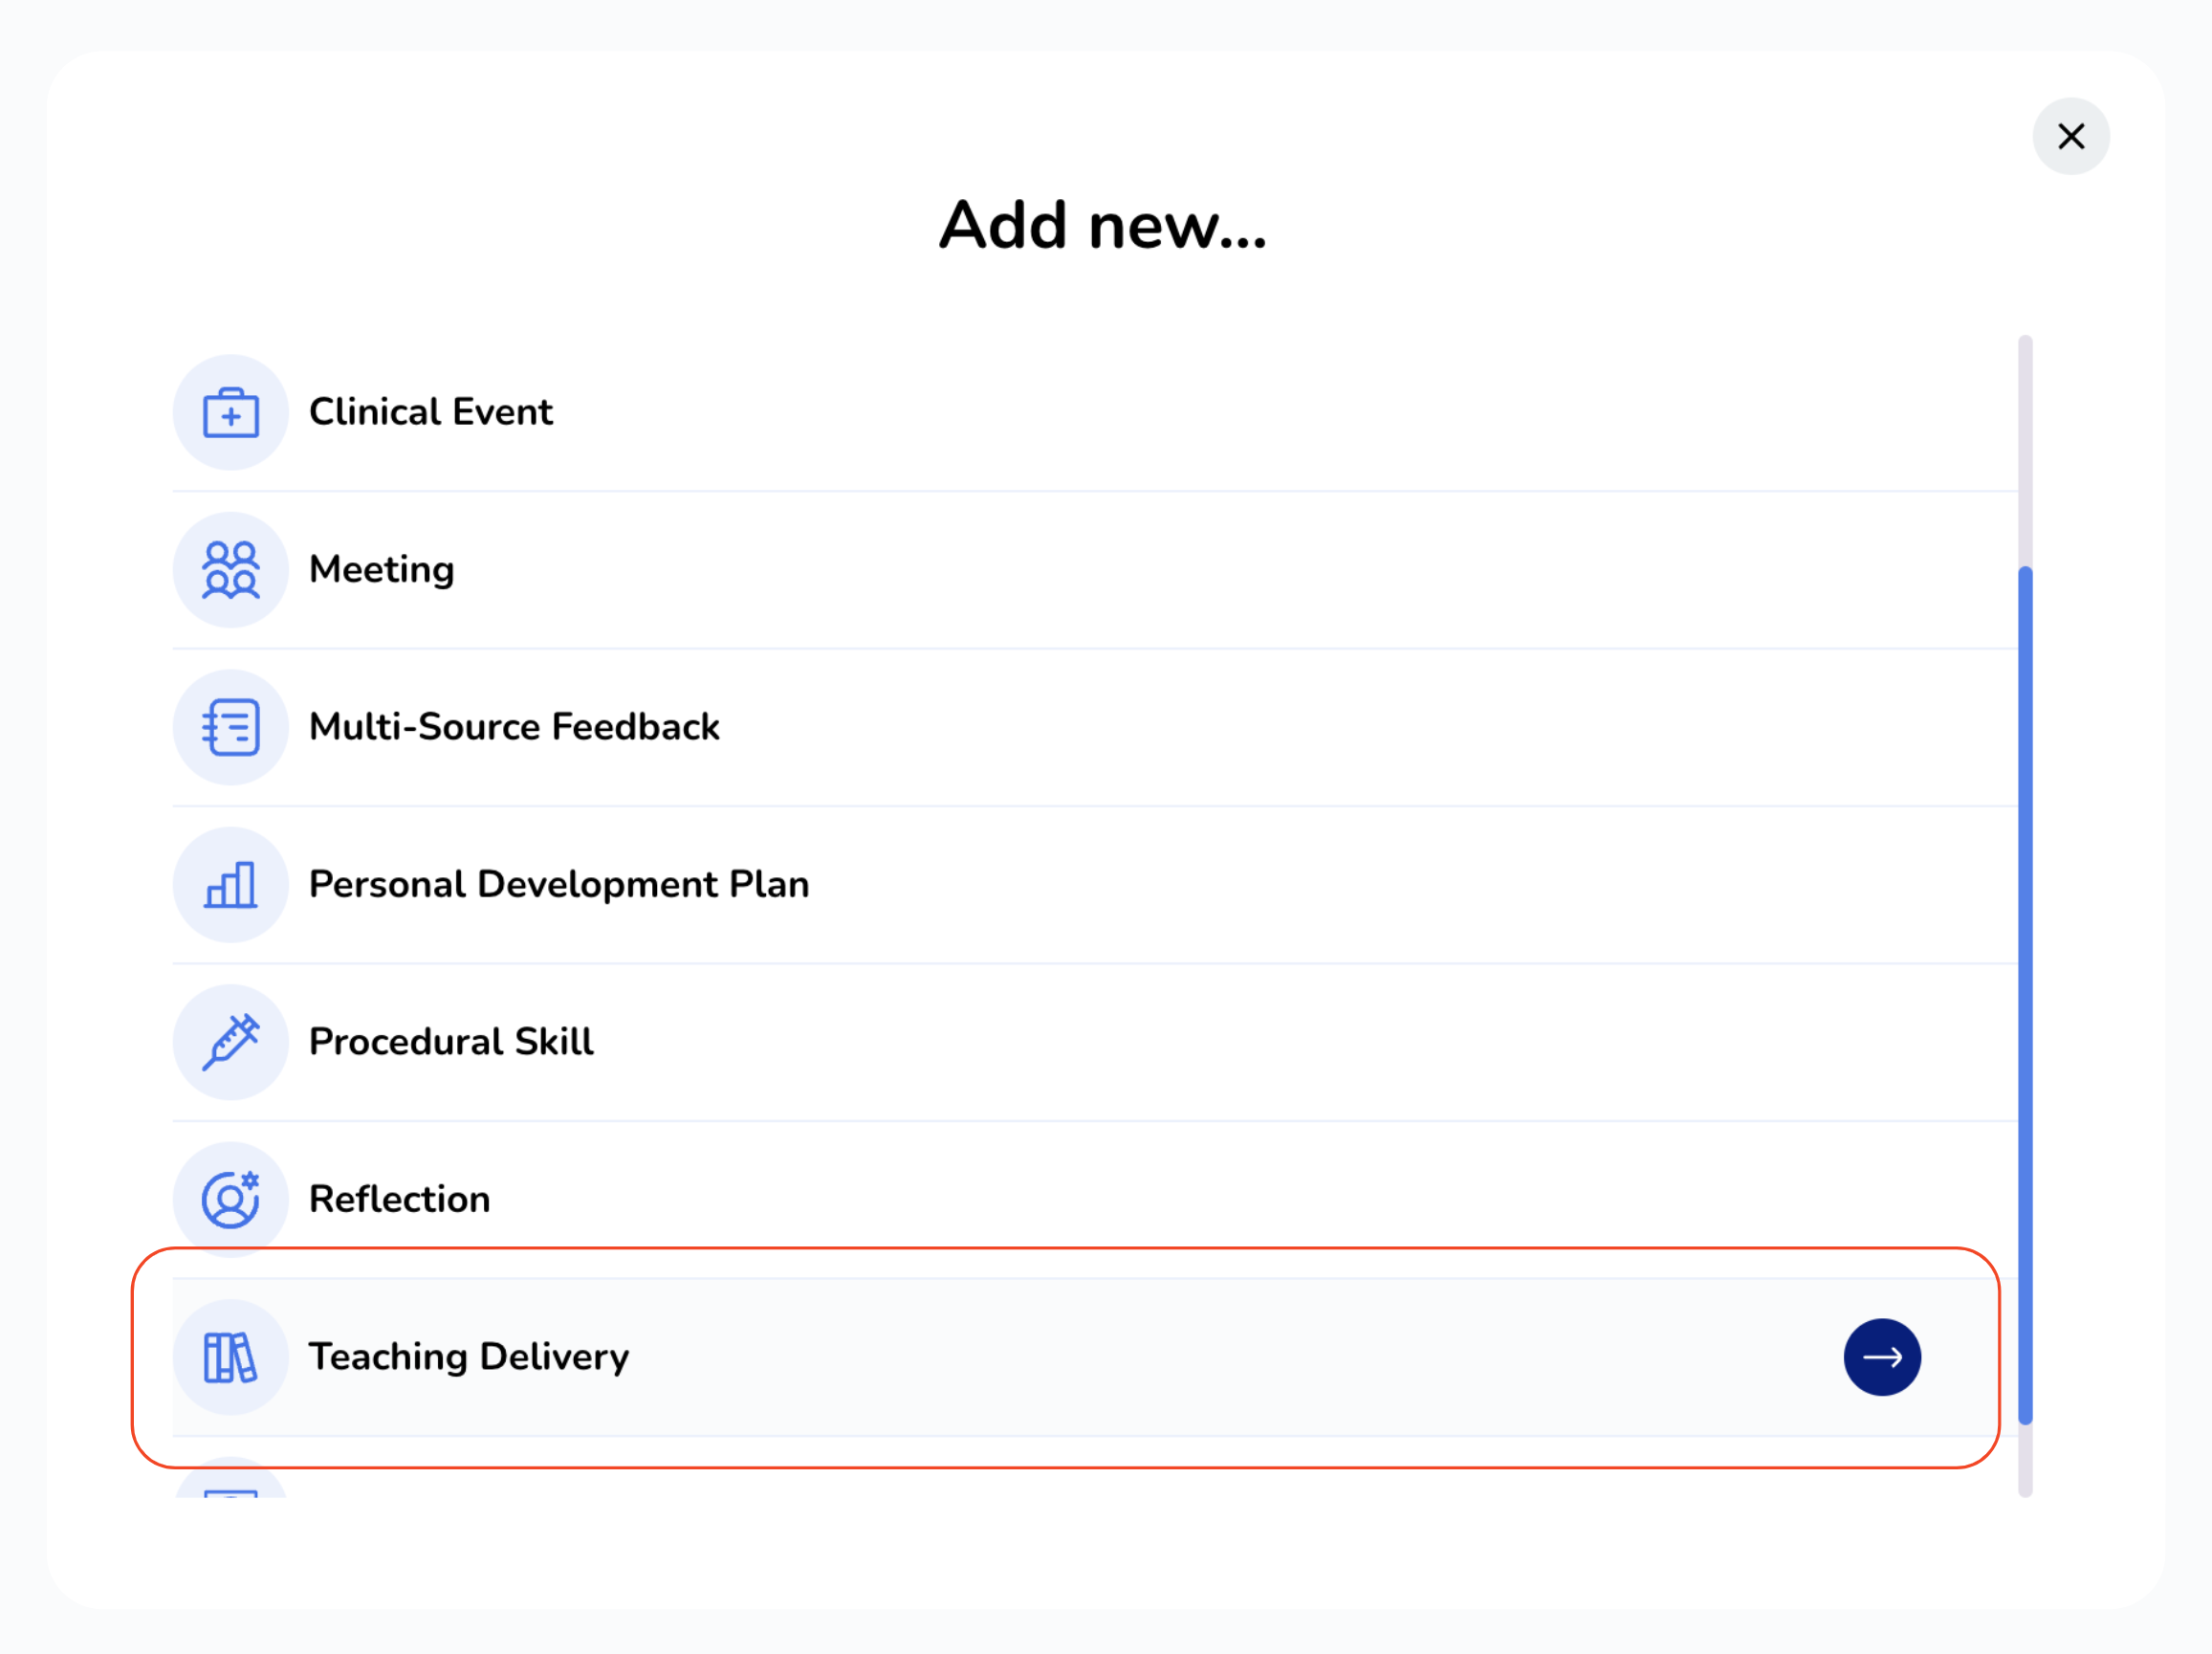
When adding a new portfolio event, select "Teaching Delivery" from the results list. It's your go-to option for creating engaging teaching sessions.
-
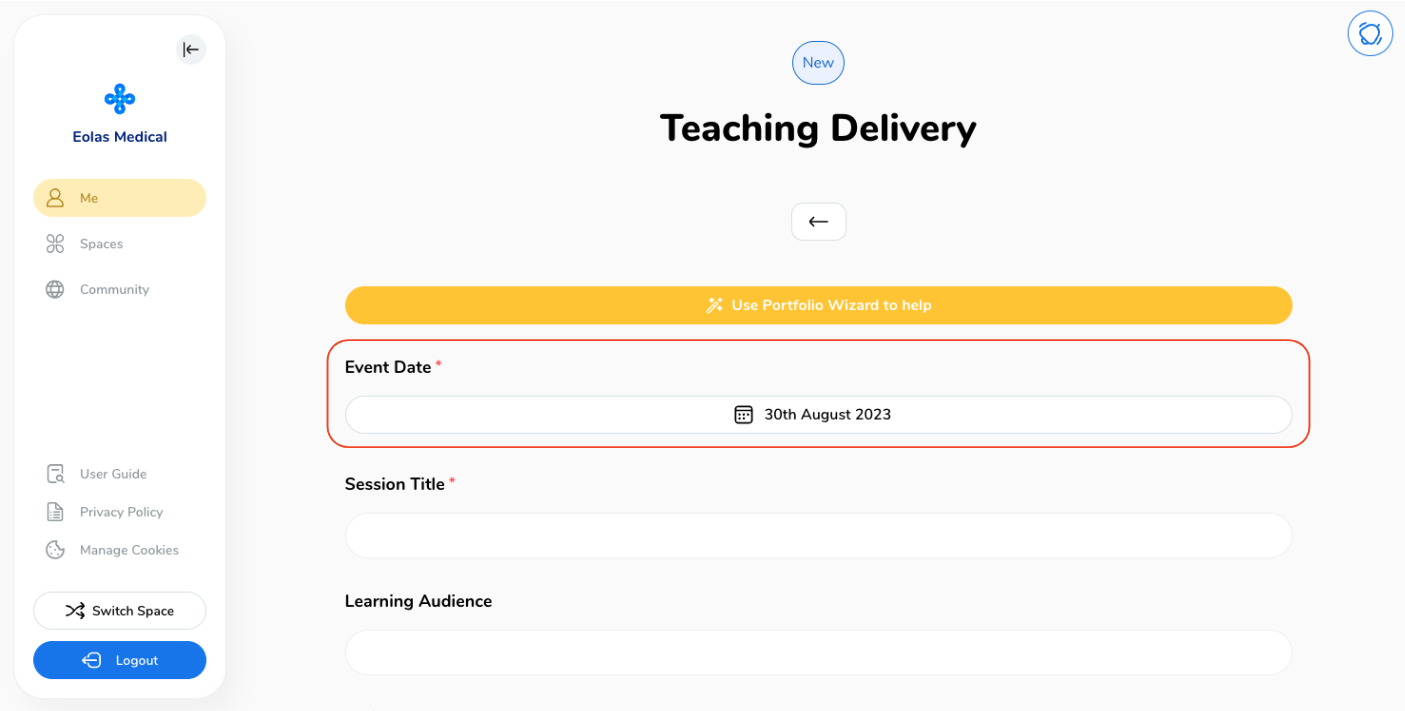
Choose the date for your event. Don't worry, the default selection will show the current date. But if you want to change it, simply click on the "Date" button and pick the desired date.
-
Type in your session title. Give your session a catchy and informative title. This will make it easier for you and your audience to remember what it's all about.
-
Define who your target Learning Audience is. By specifying this, you can tailor your teaching approach to suit their needs.
-
Feel free to add any extra comments or details that you think are important. It's your chance to provide additional context or share specific instructions.
-
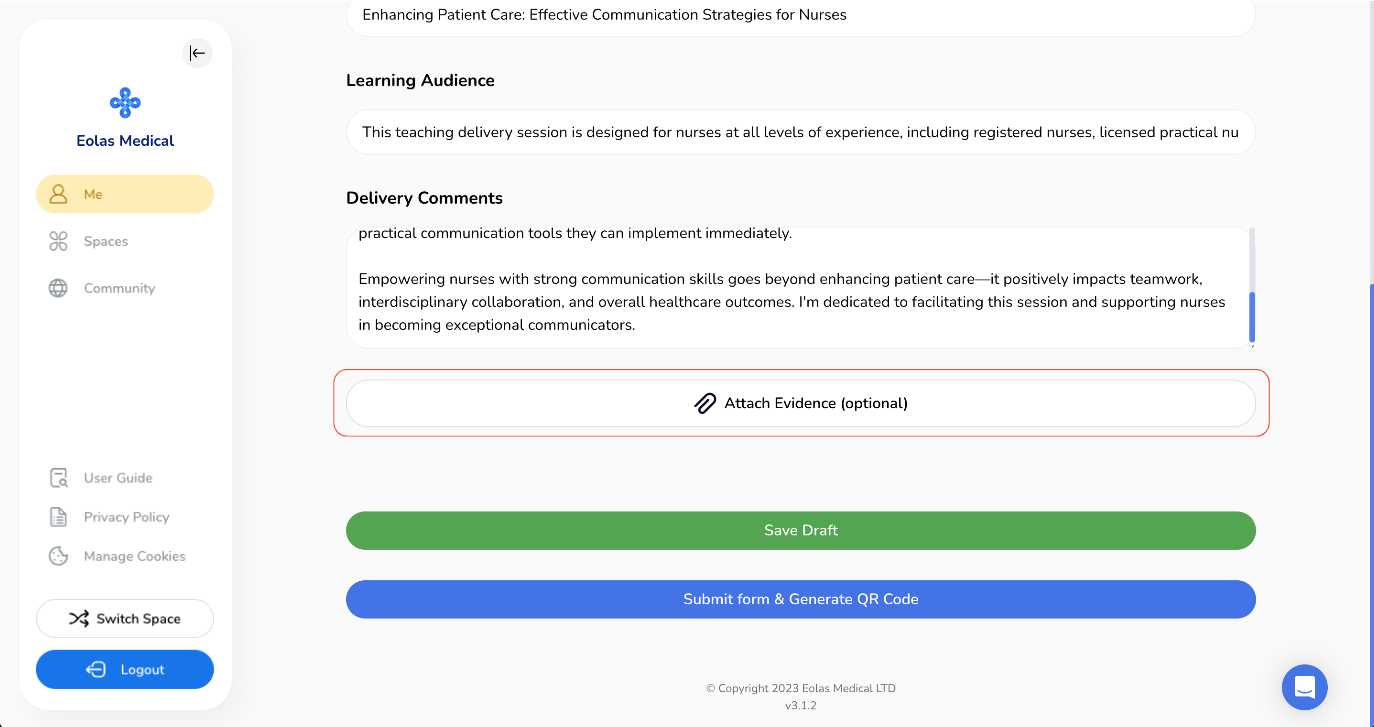
If you want to take it a step further and document your session, click on the "Attach Evidence" option. This way, you can keep a record of your teaching journey and showcase your amazing work.
-
A pop-up window will appear. You can either choose from your existing files or upload a new one from your device.
-
To upload a new file, select "Add New File".
-
Depending on your needs, you can upload various file types like MS Office documents, PDFs, images, videos and web links.
-
To upload a new file,
-
Select "Files", then click on "Browse Files"
-
Select a file from your device, then click "Next".
-
Finally, give your file a name and click "Save"
-
-
To add a weblink,
-
Your file will now be attached, If you wish to add multiple files, simply click on "Attach Evidence" once more and follow the same process again.
-
Once you're ready, you have two options:
-
Upon clicking "Submit form & Generate QR Code", a confirmation pop-up will appear. Just click the "Submit" button.
When adding a new portfolio event, select "Teaching Delivery" from the results list. It's your go-to option for creating engaging teaching sessions.
Choose the date for your event. Don't worry, the default selection will show the current date. But if you want to change it, simply click on the "Date" button and pick the desired date.
Type in your session title. Give your session a catchy and informative title. This will make it easier for you and your audience to remember what it's all about.
Define who your target Learning Audience is. By specifying this, you can tailor your teaching approach to suit their needs.
Feel free to add any extra comments or details that you think are important. It's your chance to provide additional context or share specific instructions.
If you want to take it a step further and document your session, click on the "Attach Evidence" option. This way, you can keep a record of your teaching journey and showcase your amazing work.
A pop-up window will appear. You can either choose from your existing files or upload a new one from your device.
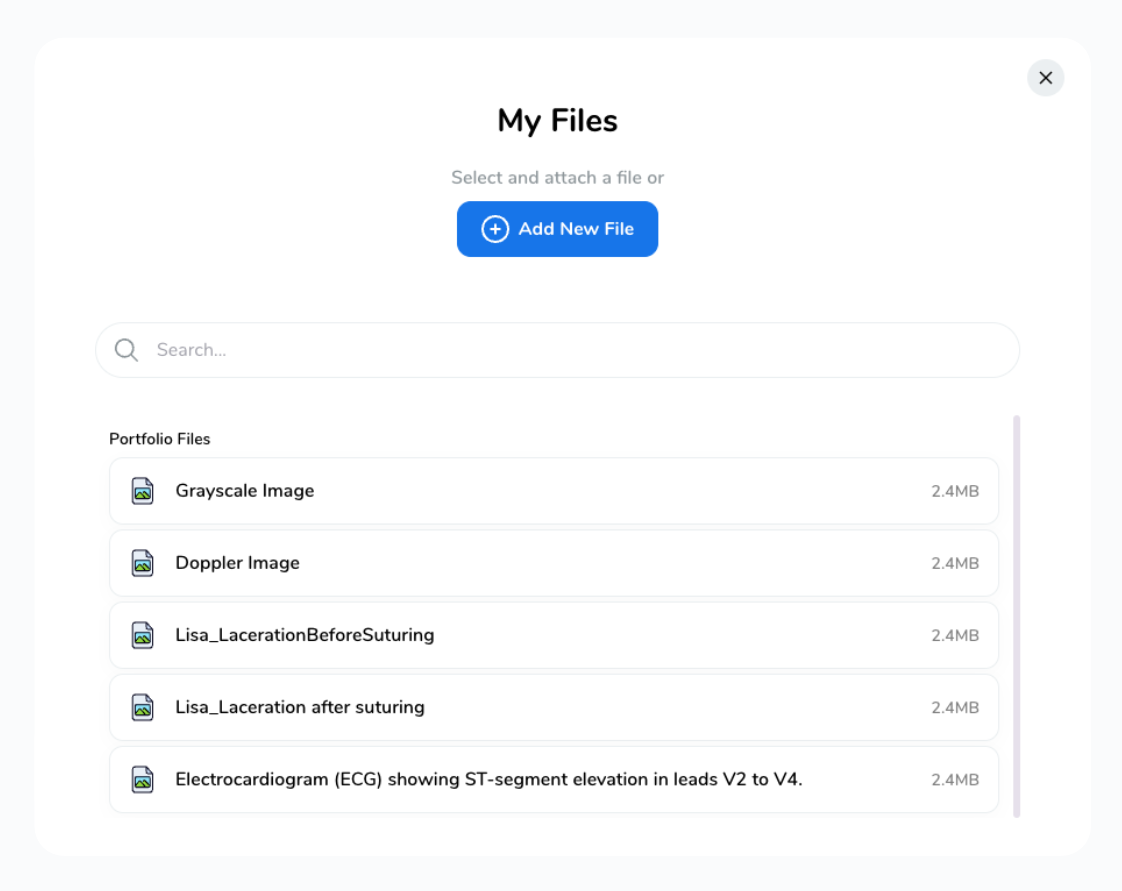
To upload a new file, select "Add New File".
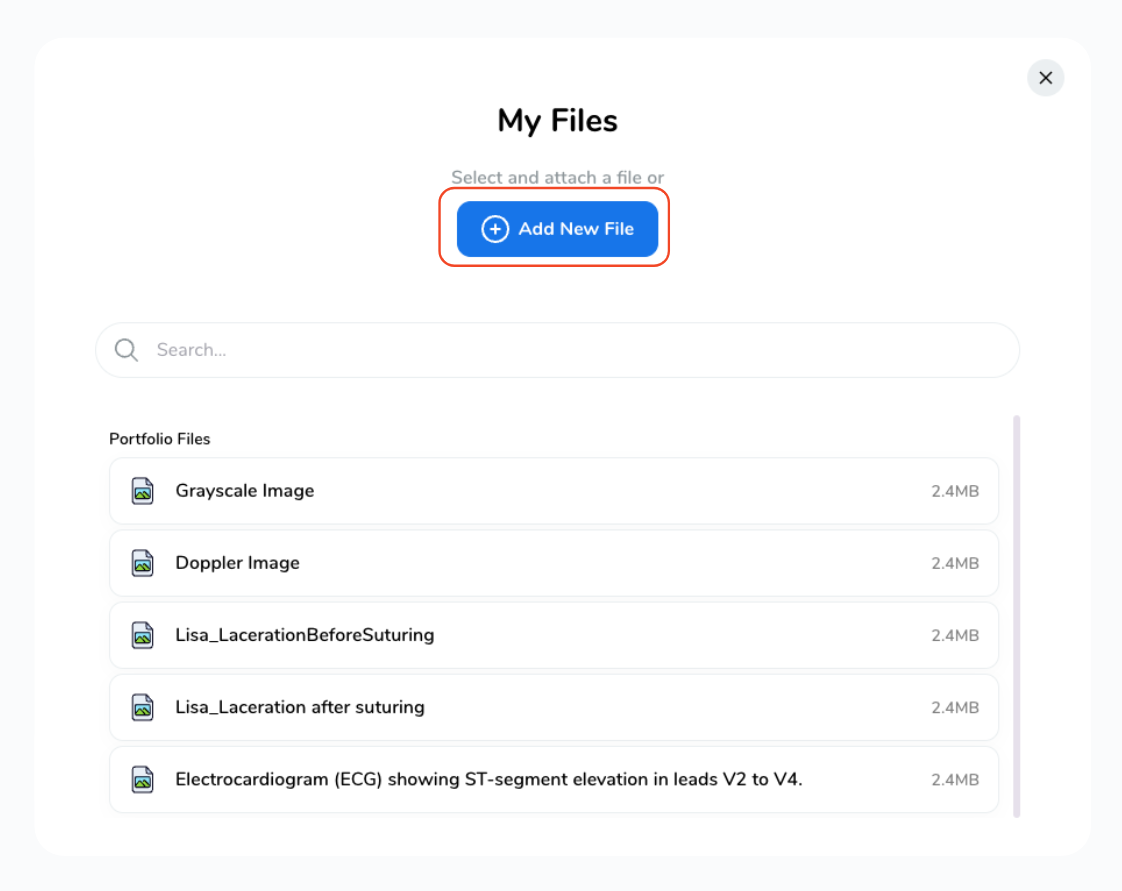
Depending on your needs, you can upload various file types like MS Office documents, PDFs, images, videos and web links.
To upload a new file,
-
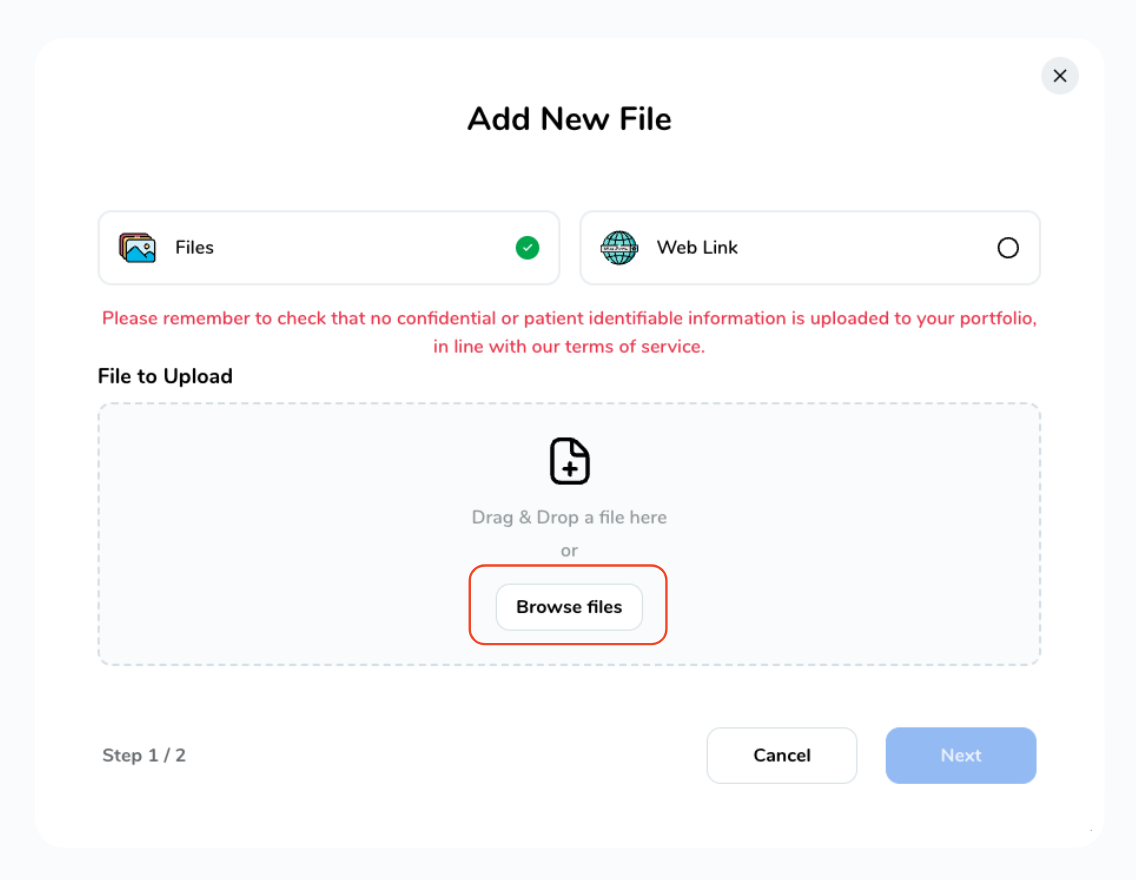
Select "Files", then click on "Browse Files"
Select "Files", then click on "Browse Files"
-
Select a file from your device, then click "Next".
Select a file from your device, then click "Next".
-
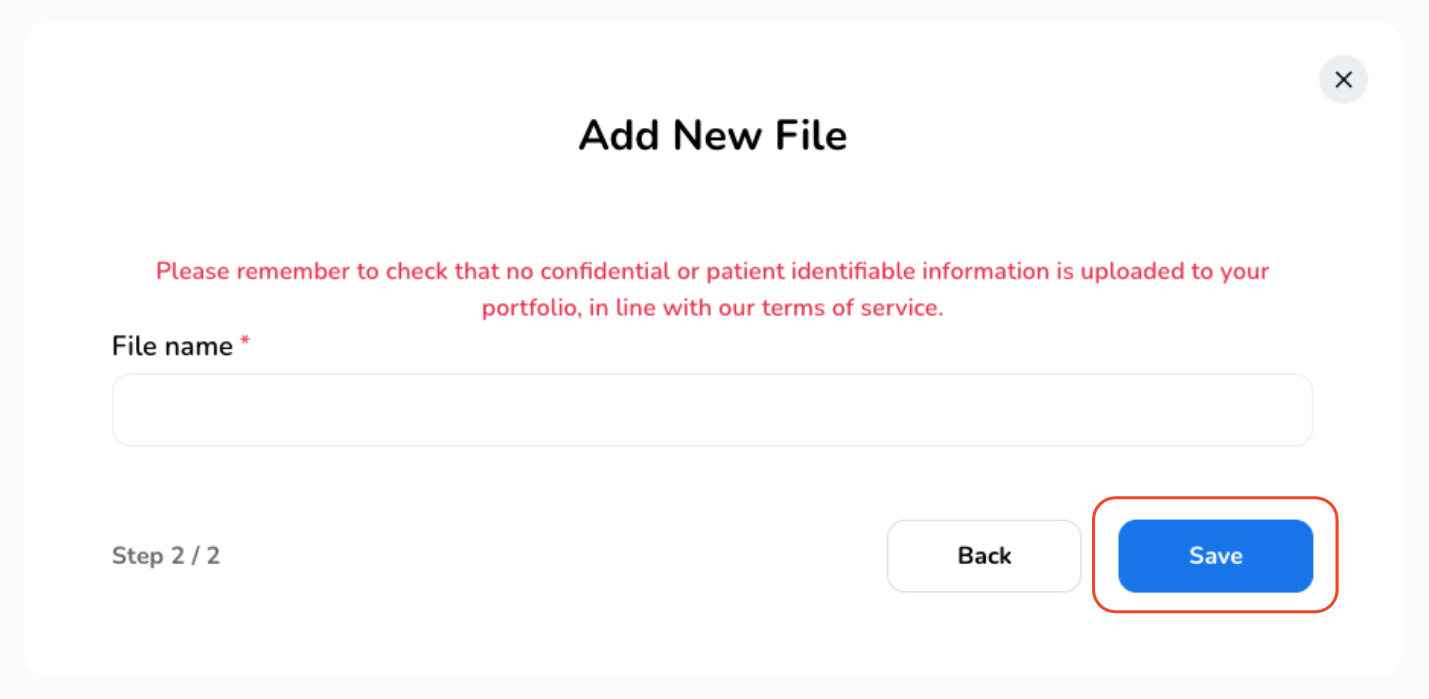
Finally, give your file a name and click "Save"
Finally, give your file a name and click "Save"
To add a weblink,
-
Select "Web Link", enter the URL link and a File Name, then click "Save".
Select "Web Link", enter the URL link and a File Name, then click "Save".
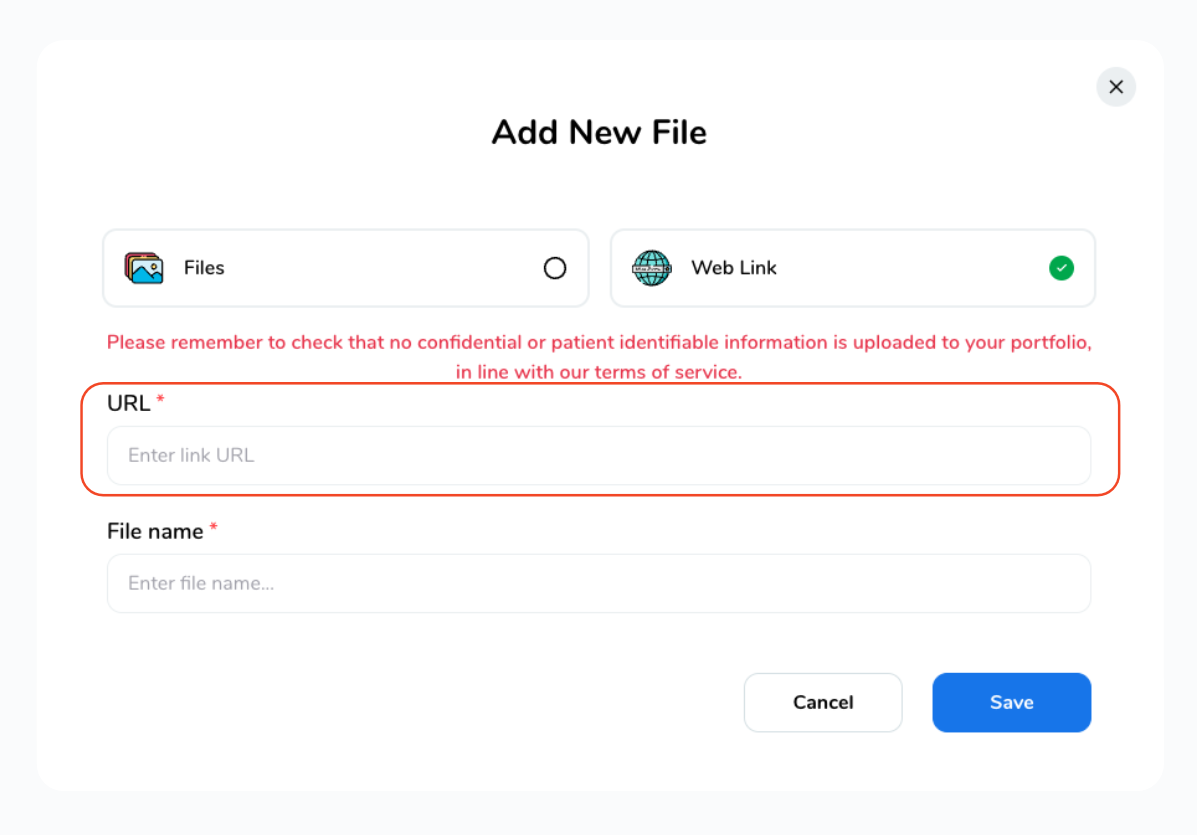
Your file will now be attached, If you wish to add multiple files, simply click on "Attach Evidence" once more and follow the same process again.
Once you're ready, you have two options:
-
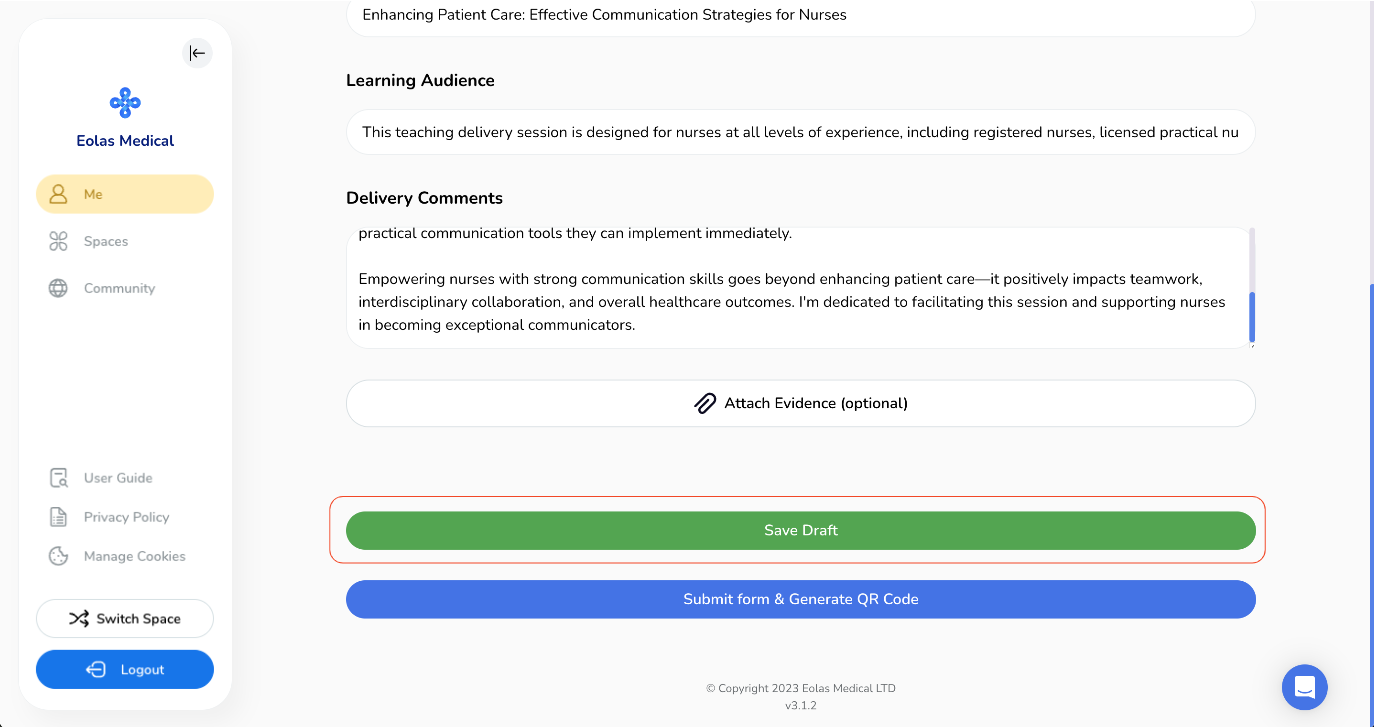
Save your session as a draft to come back to it later and make any tweaks,
Save your session as a draft to come back to it later and make any tweaks,
-
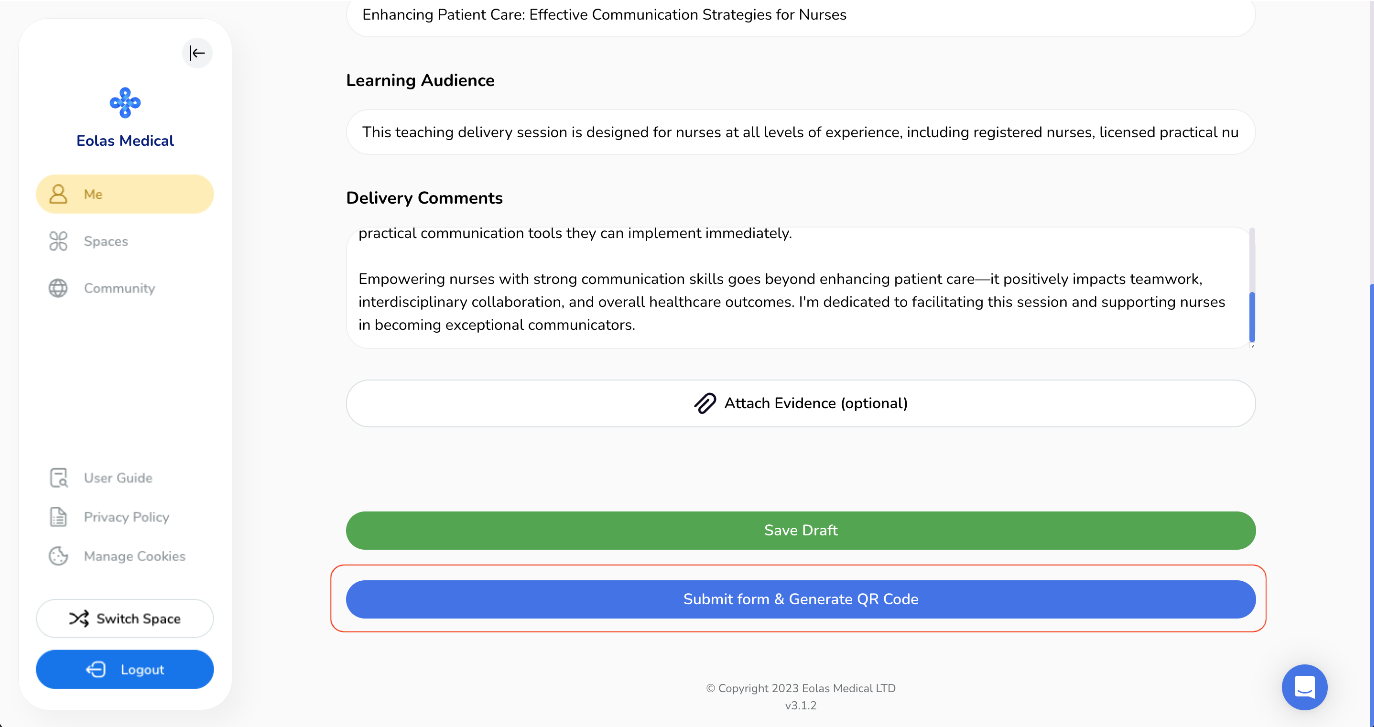
Or, click that exciting "Submit form & Generate QR Code" button.
Or, click that exciting "Submit form & Generate QR Code" button.
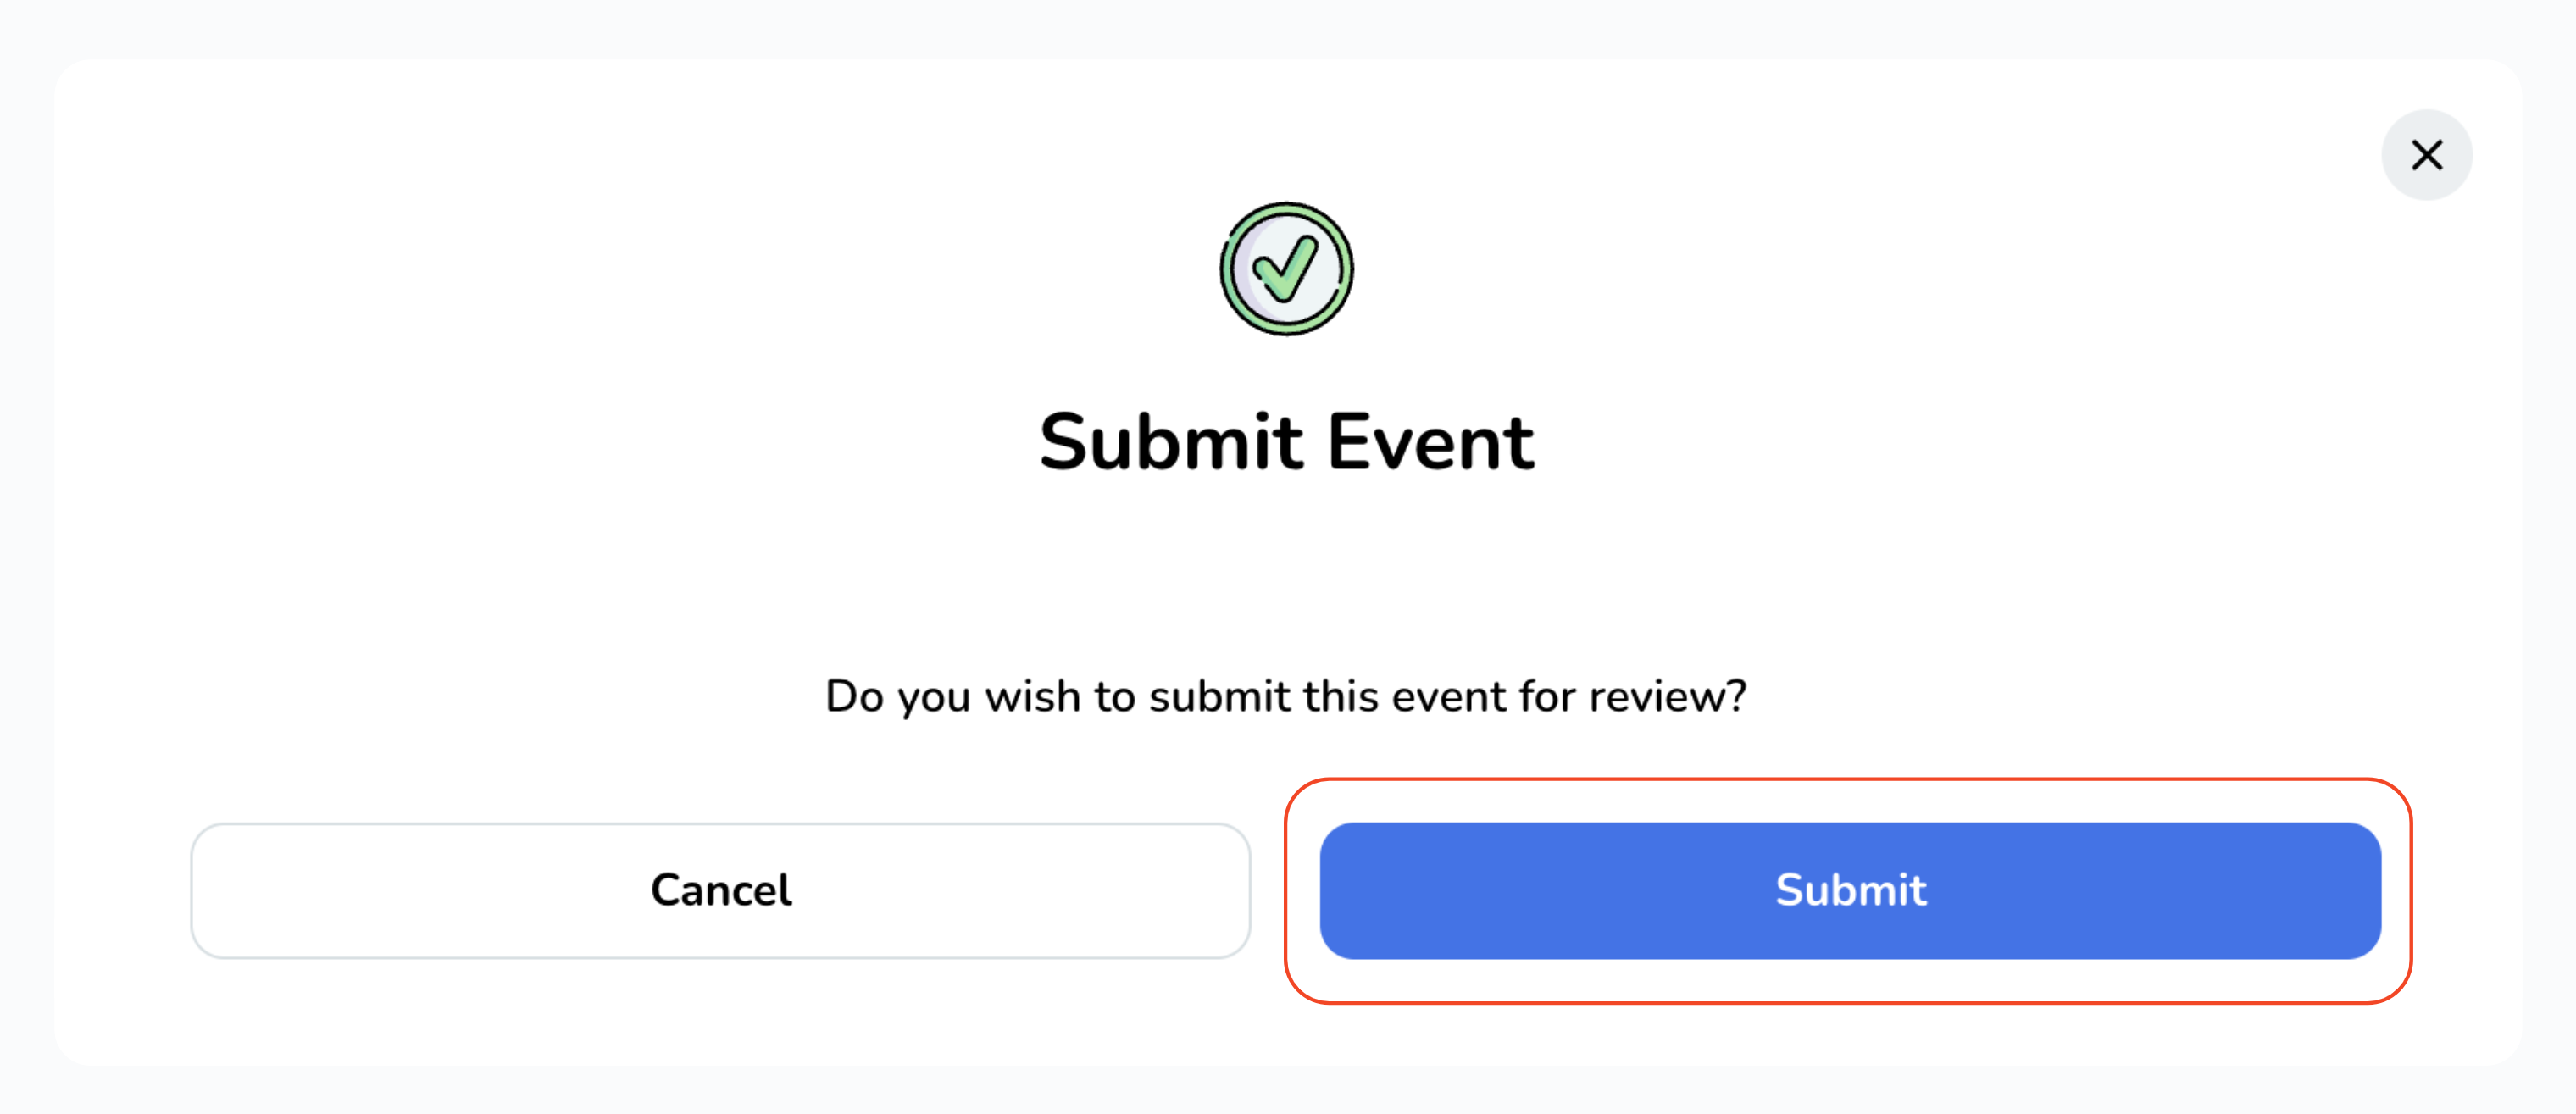
Upon clicking "Submit form & Generate QR Code", a confirmation pop-up will appear. Just click the "Submit" button.
Generating a QR Code for sharing and collecting feedback.
-
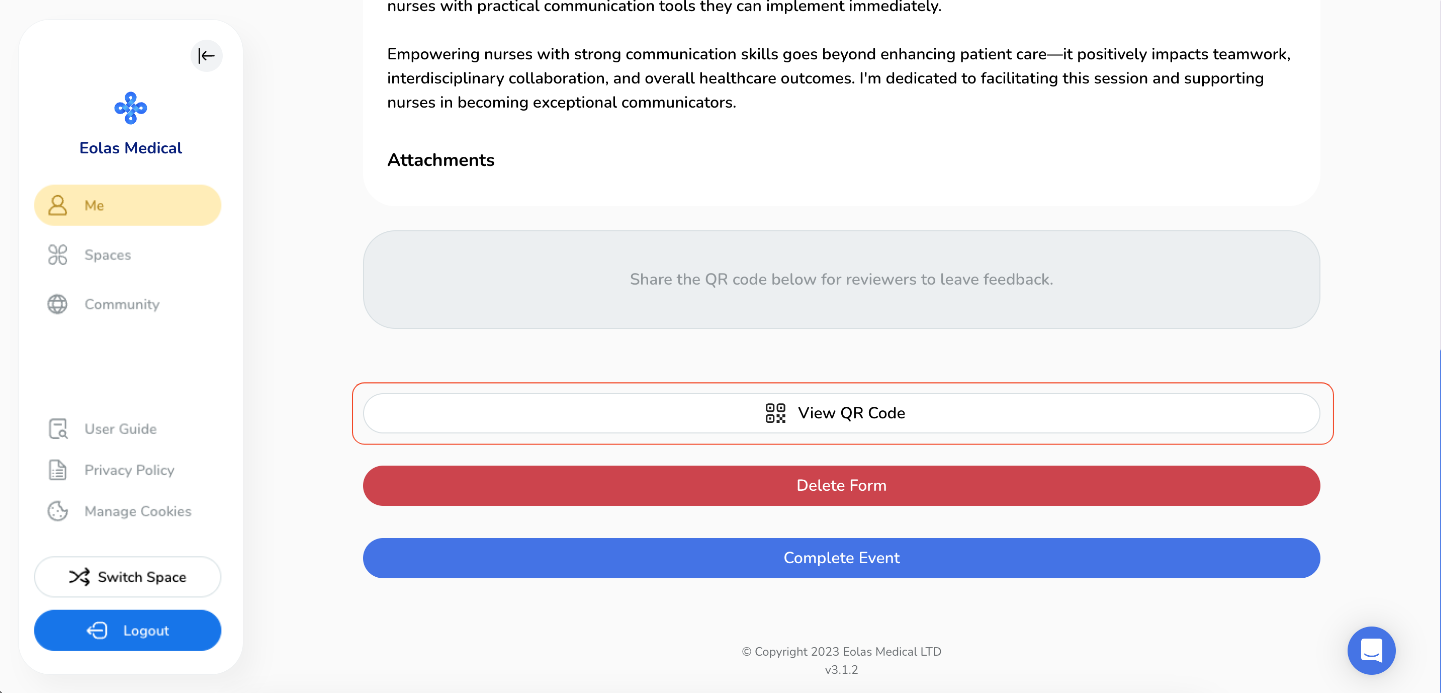
Upon submission, a QR code will be generated, providing a convenient way to gather valuable insights and feedback. To access and distribute the code, just click on "View QR Code."
-
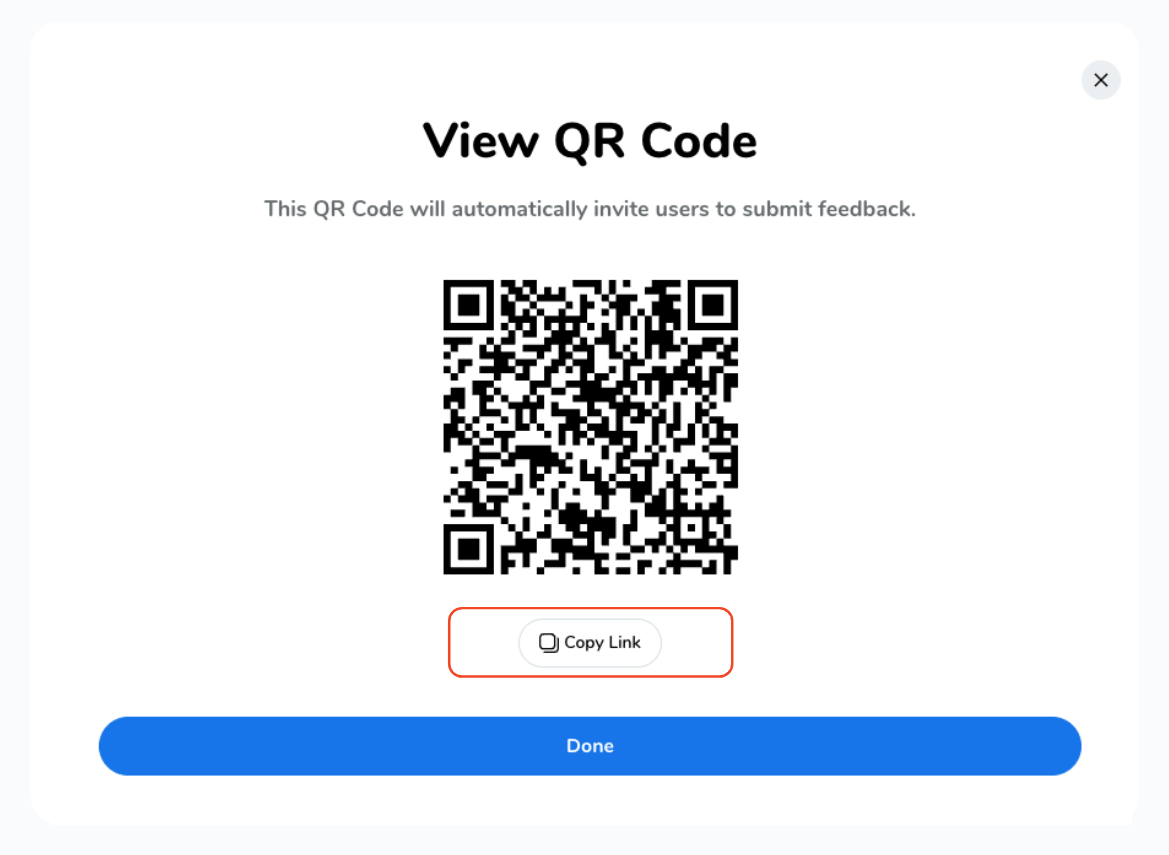
A pop-up will display the QR code. To share it, copy the link by clicking the "Copy Link" button, and send it to your audience. You can then distribute this link to as many people as necessary.
-
When someone scans the QR code or clicks on the shared link, they will be directed to a page where they can provide feedback, all they need to do is fill out the form and submit it to share their feedback with you - Give it a try and scan the above QR code! 😉
-
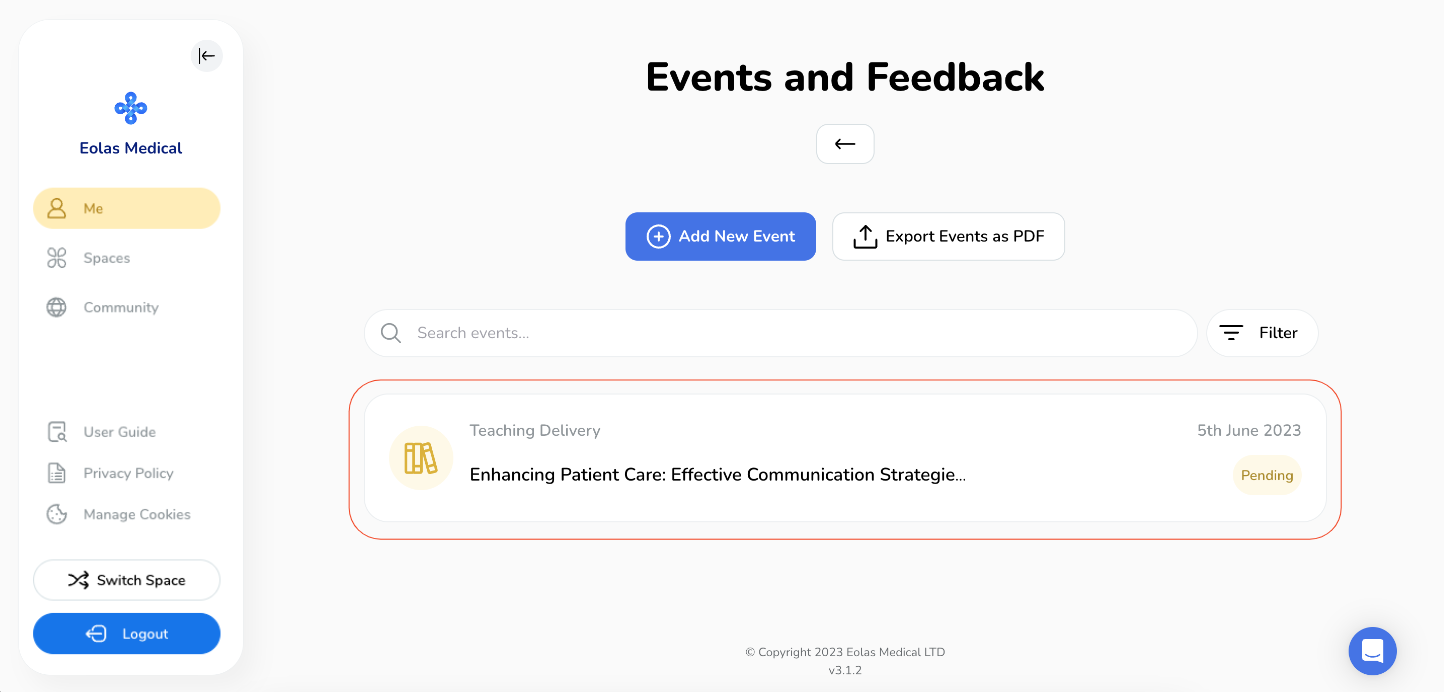
After sharing the QR code, you will notice your event labelled as "Pending" with a yellow indicator. Once you have received the desired number of responses, you can view them by clicking on the event itself.
-
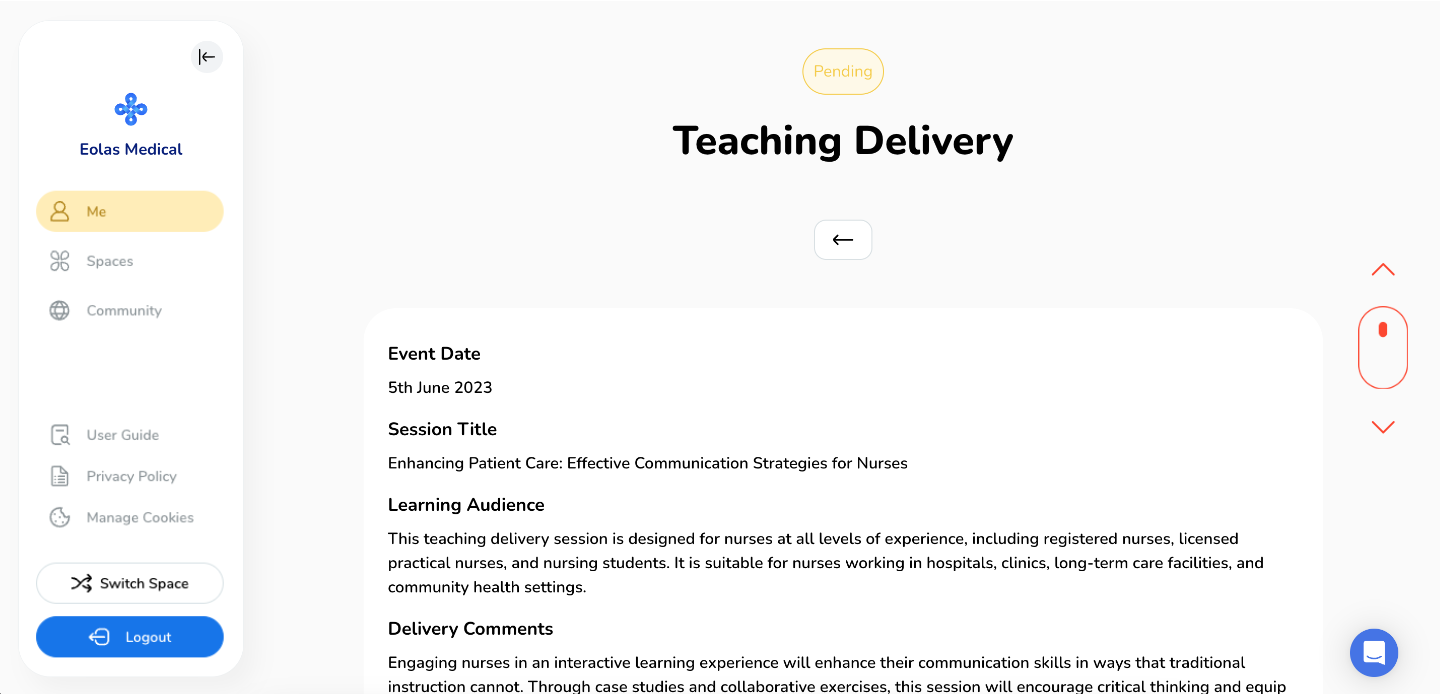
Upon clicking, you will be directed to the event page where you can scroll down to find a list of feedback forms that have been submitted.
Upon submission, a QR code will be generated, providing a convenient way to gather valuable insights and feedback. To access and distribute the code, just click on "View QR Code."
A pop-up will display the QR code. To share it, copy the link by clicking the "Copy Link" button, and send it to your audience. You can then distribute this link to as many people as necessary.
When someone scans the QR code or clicks on the shared link, they will be directed to a page where they can provide feedback, all they need to do is fill out the form and submit it to share their feedback with you - Give it a try and scan the above QR code! 😉
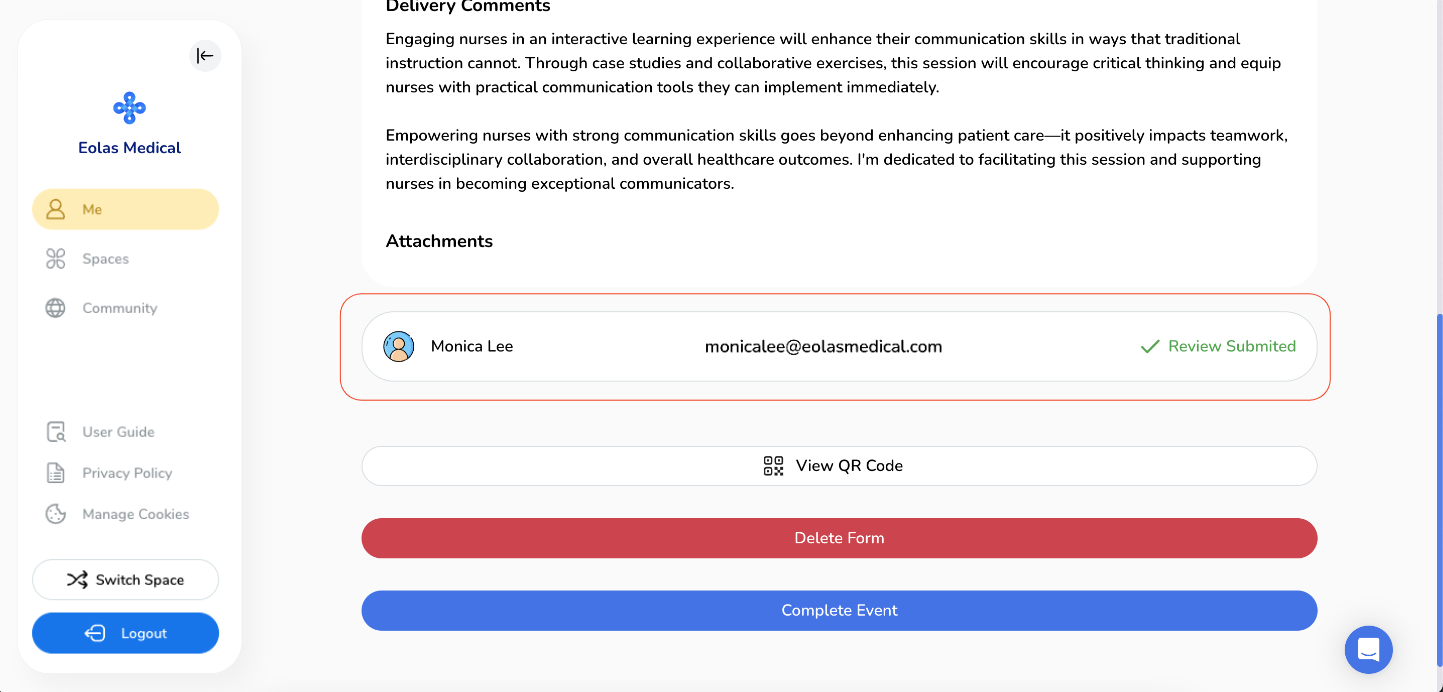
After sharing the QR code, you will notice your event labelled as "Pending" with a yellow indicator. Once you have received the desired number of responses, you can view them by clicking on the event itself.
Upon clicking, you will be directed to the event page where you can scroll down to find a list of feedback forms that have been submitted.
Reviewing the Feedback.
-
Once all respondents have submitted their feedback, you can view the feedback by closing the event. Simply click on the "Complete Event" button.
-
A pop-up will appear, and to view the feedback, click on the "Yes, View Feedback" button.
-
Subsequently, you will be able to see the feedback overview along with any additional comments posted by your audience.
-
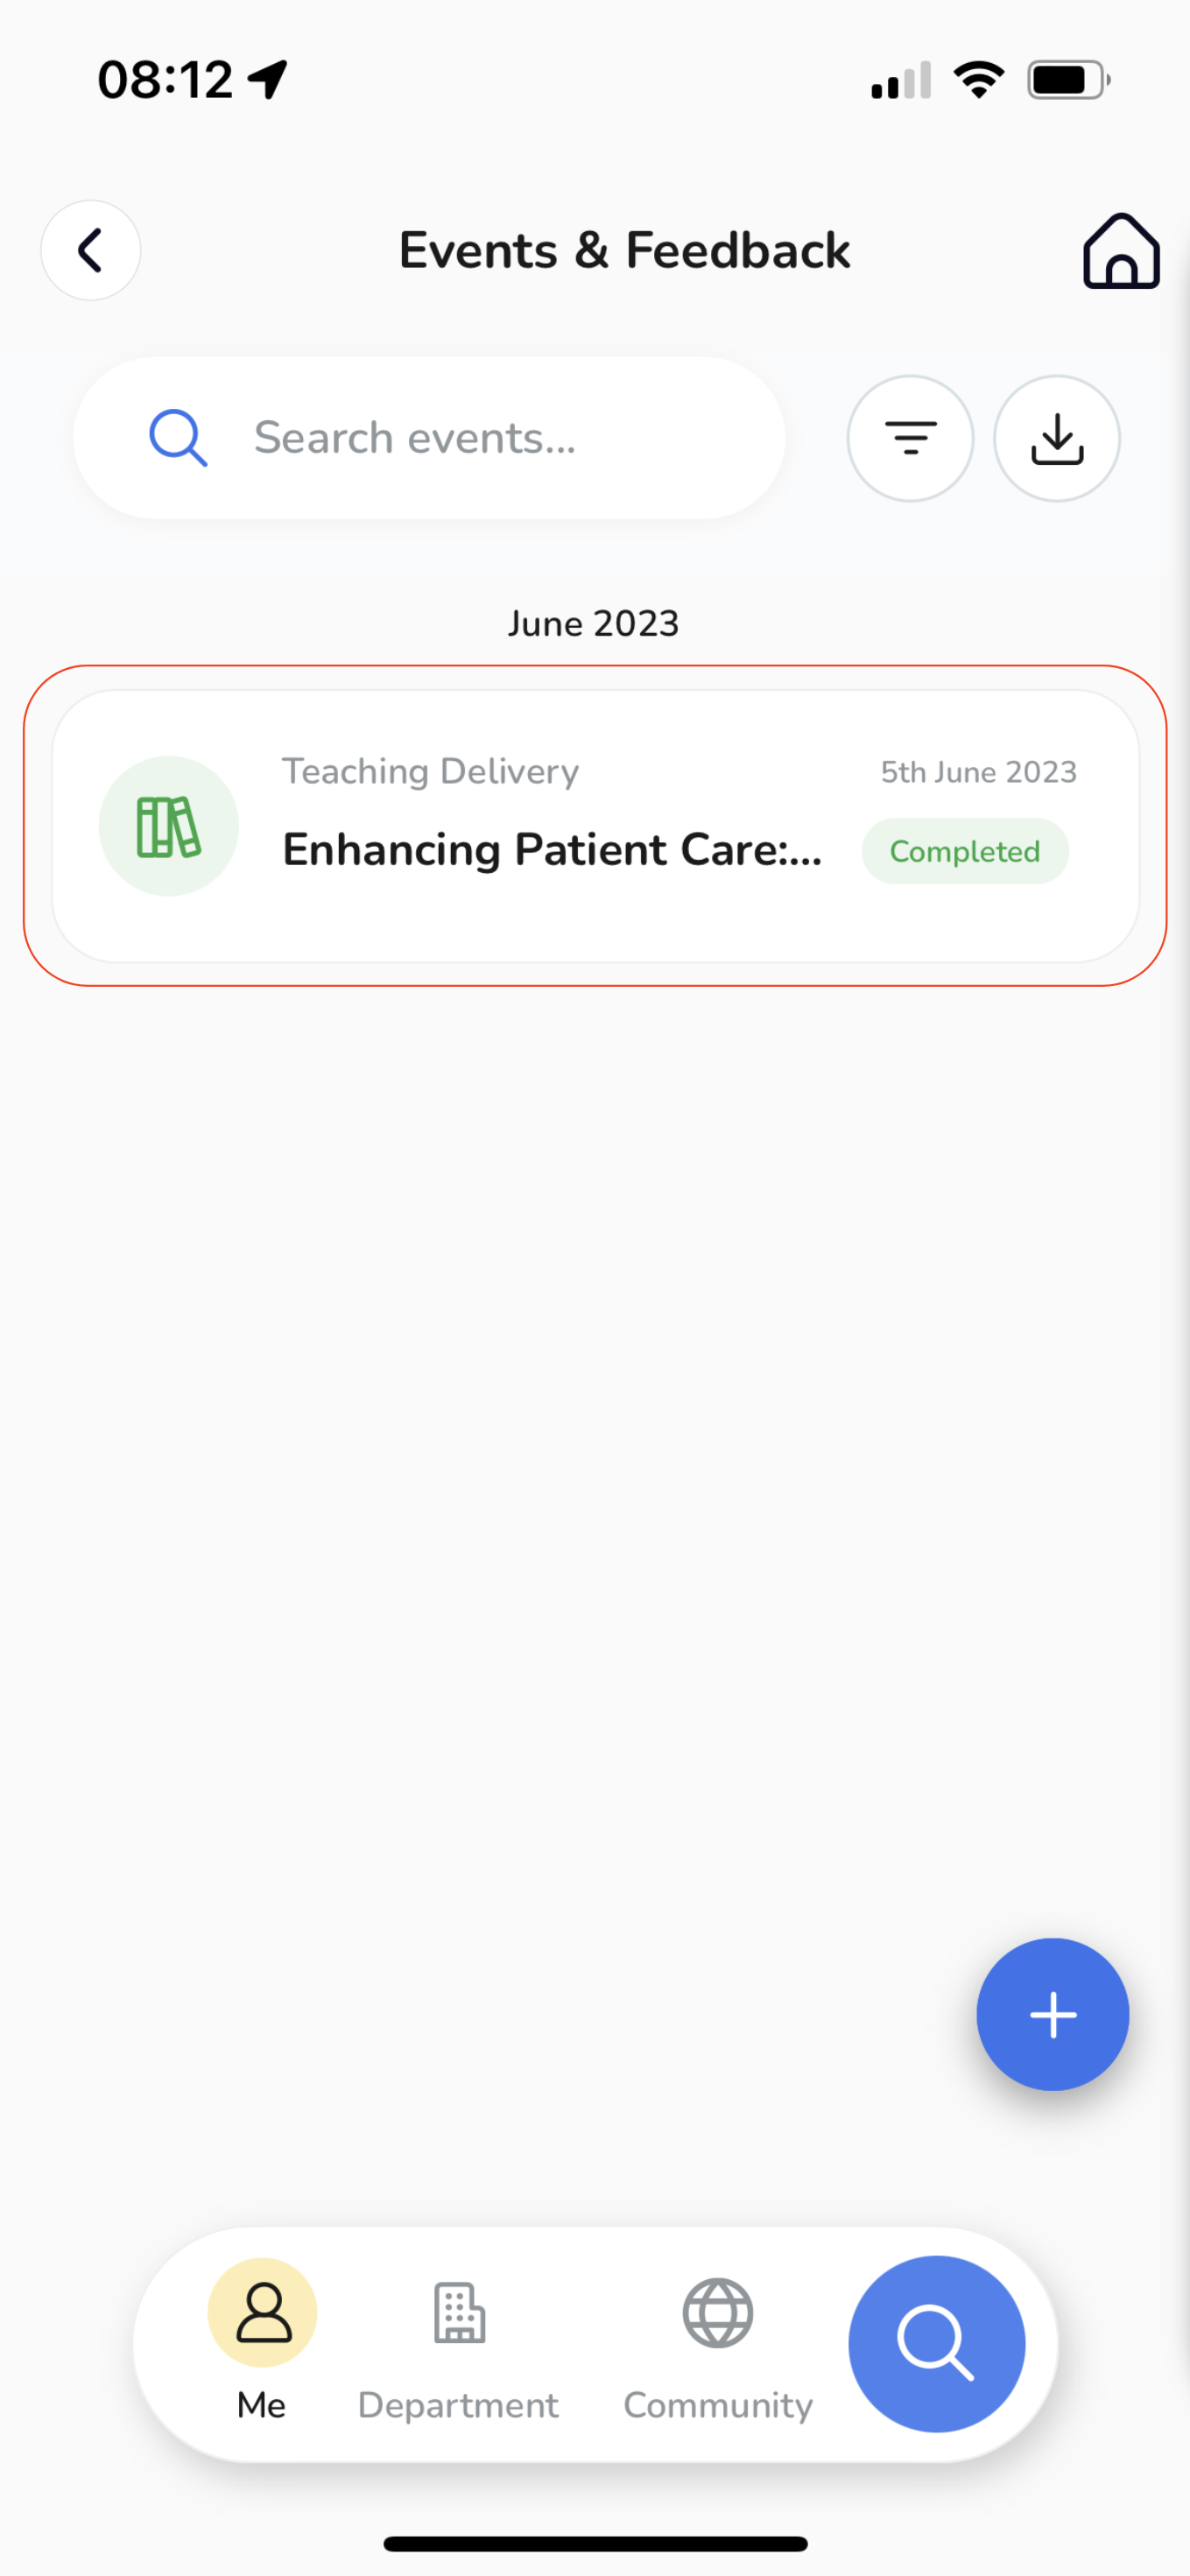
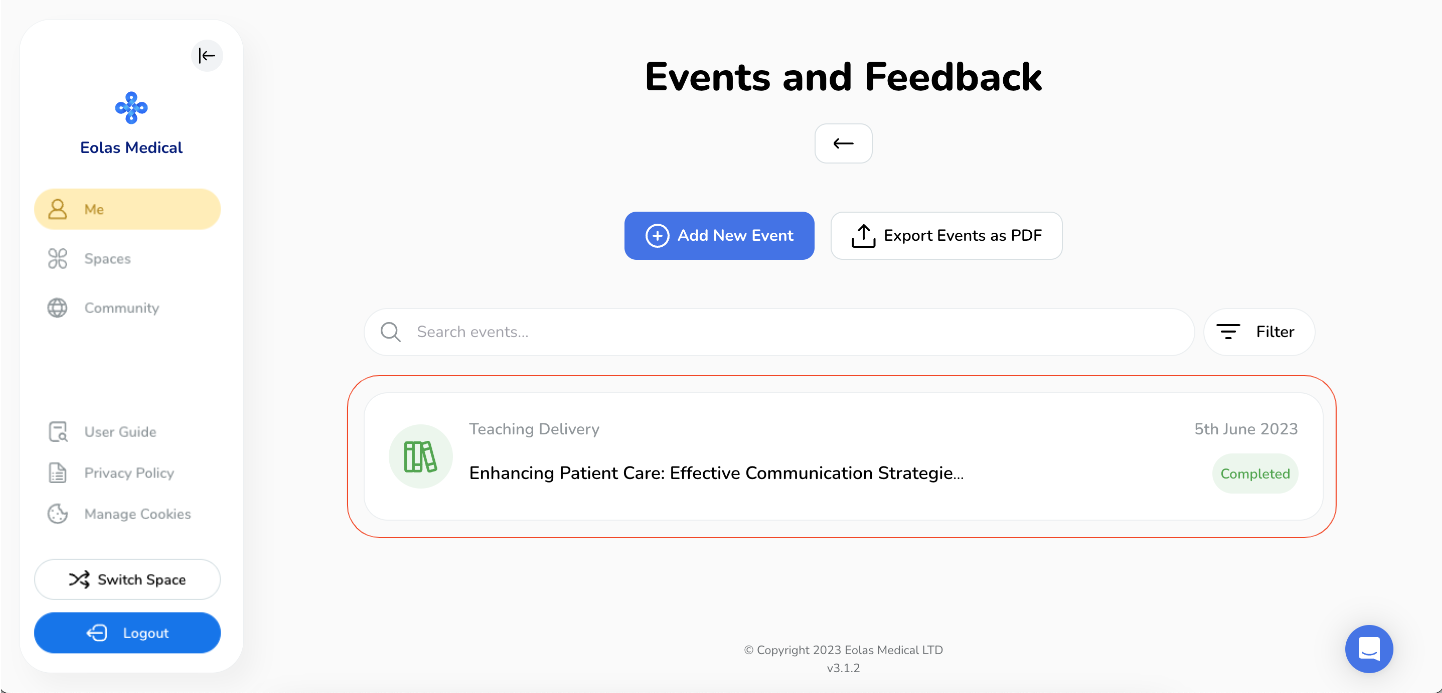
Returning to the Events & Feedback page, you will notice that the event is marked as "Complete" with a green label.
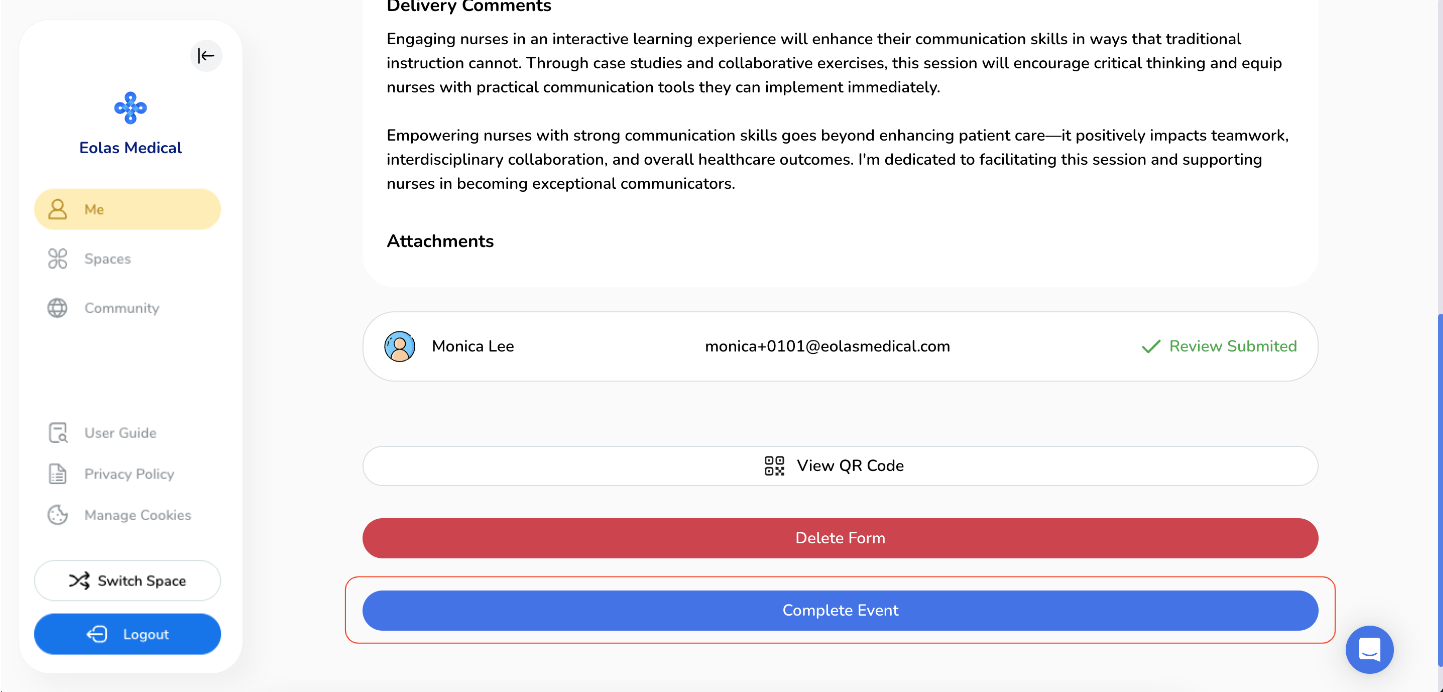
Once all respondents have submitted their feedback, you can view the feedback by closing the event. Simply click on the "Complete Event" button.
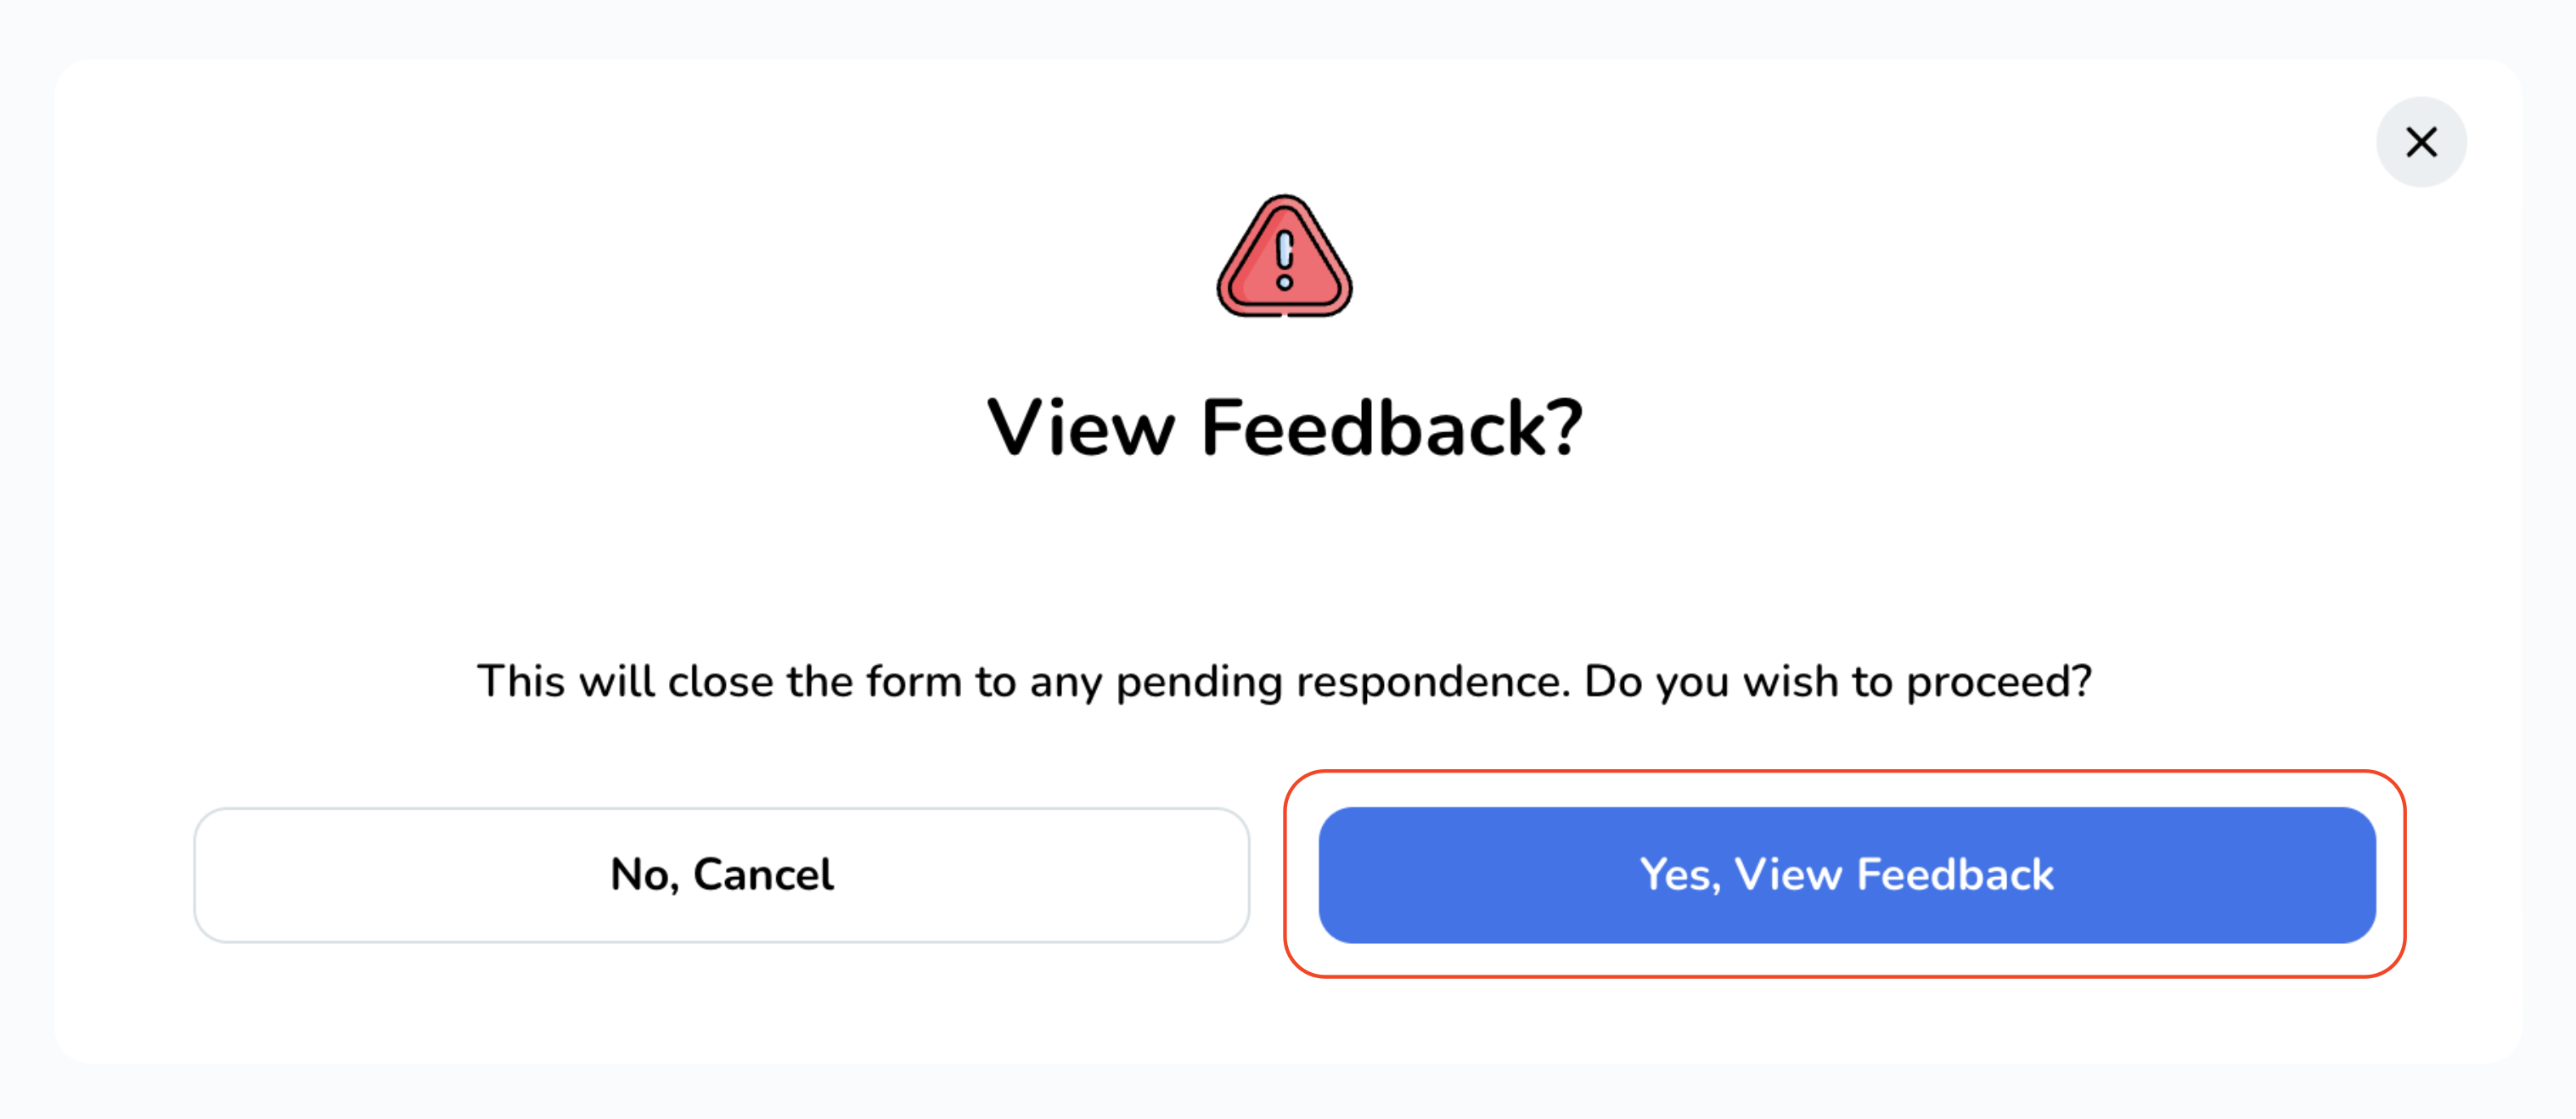
A pop-up will appear, and to view the feedback, click on the "Yes, View Feedback" button.
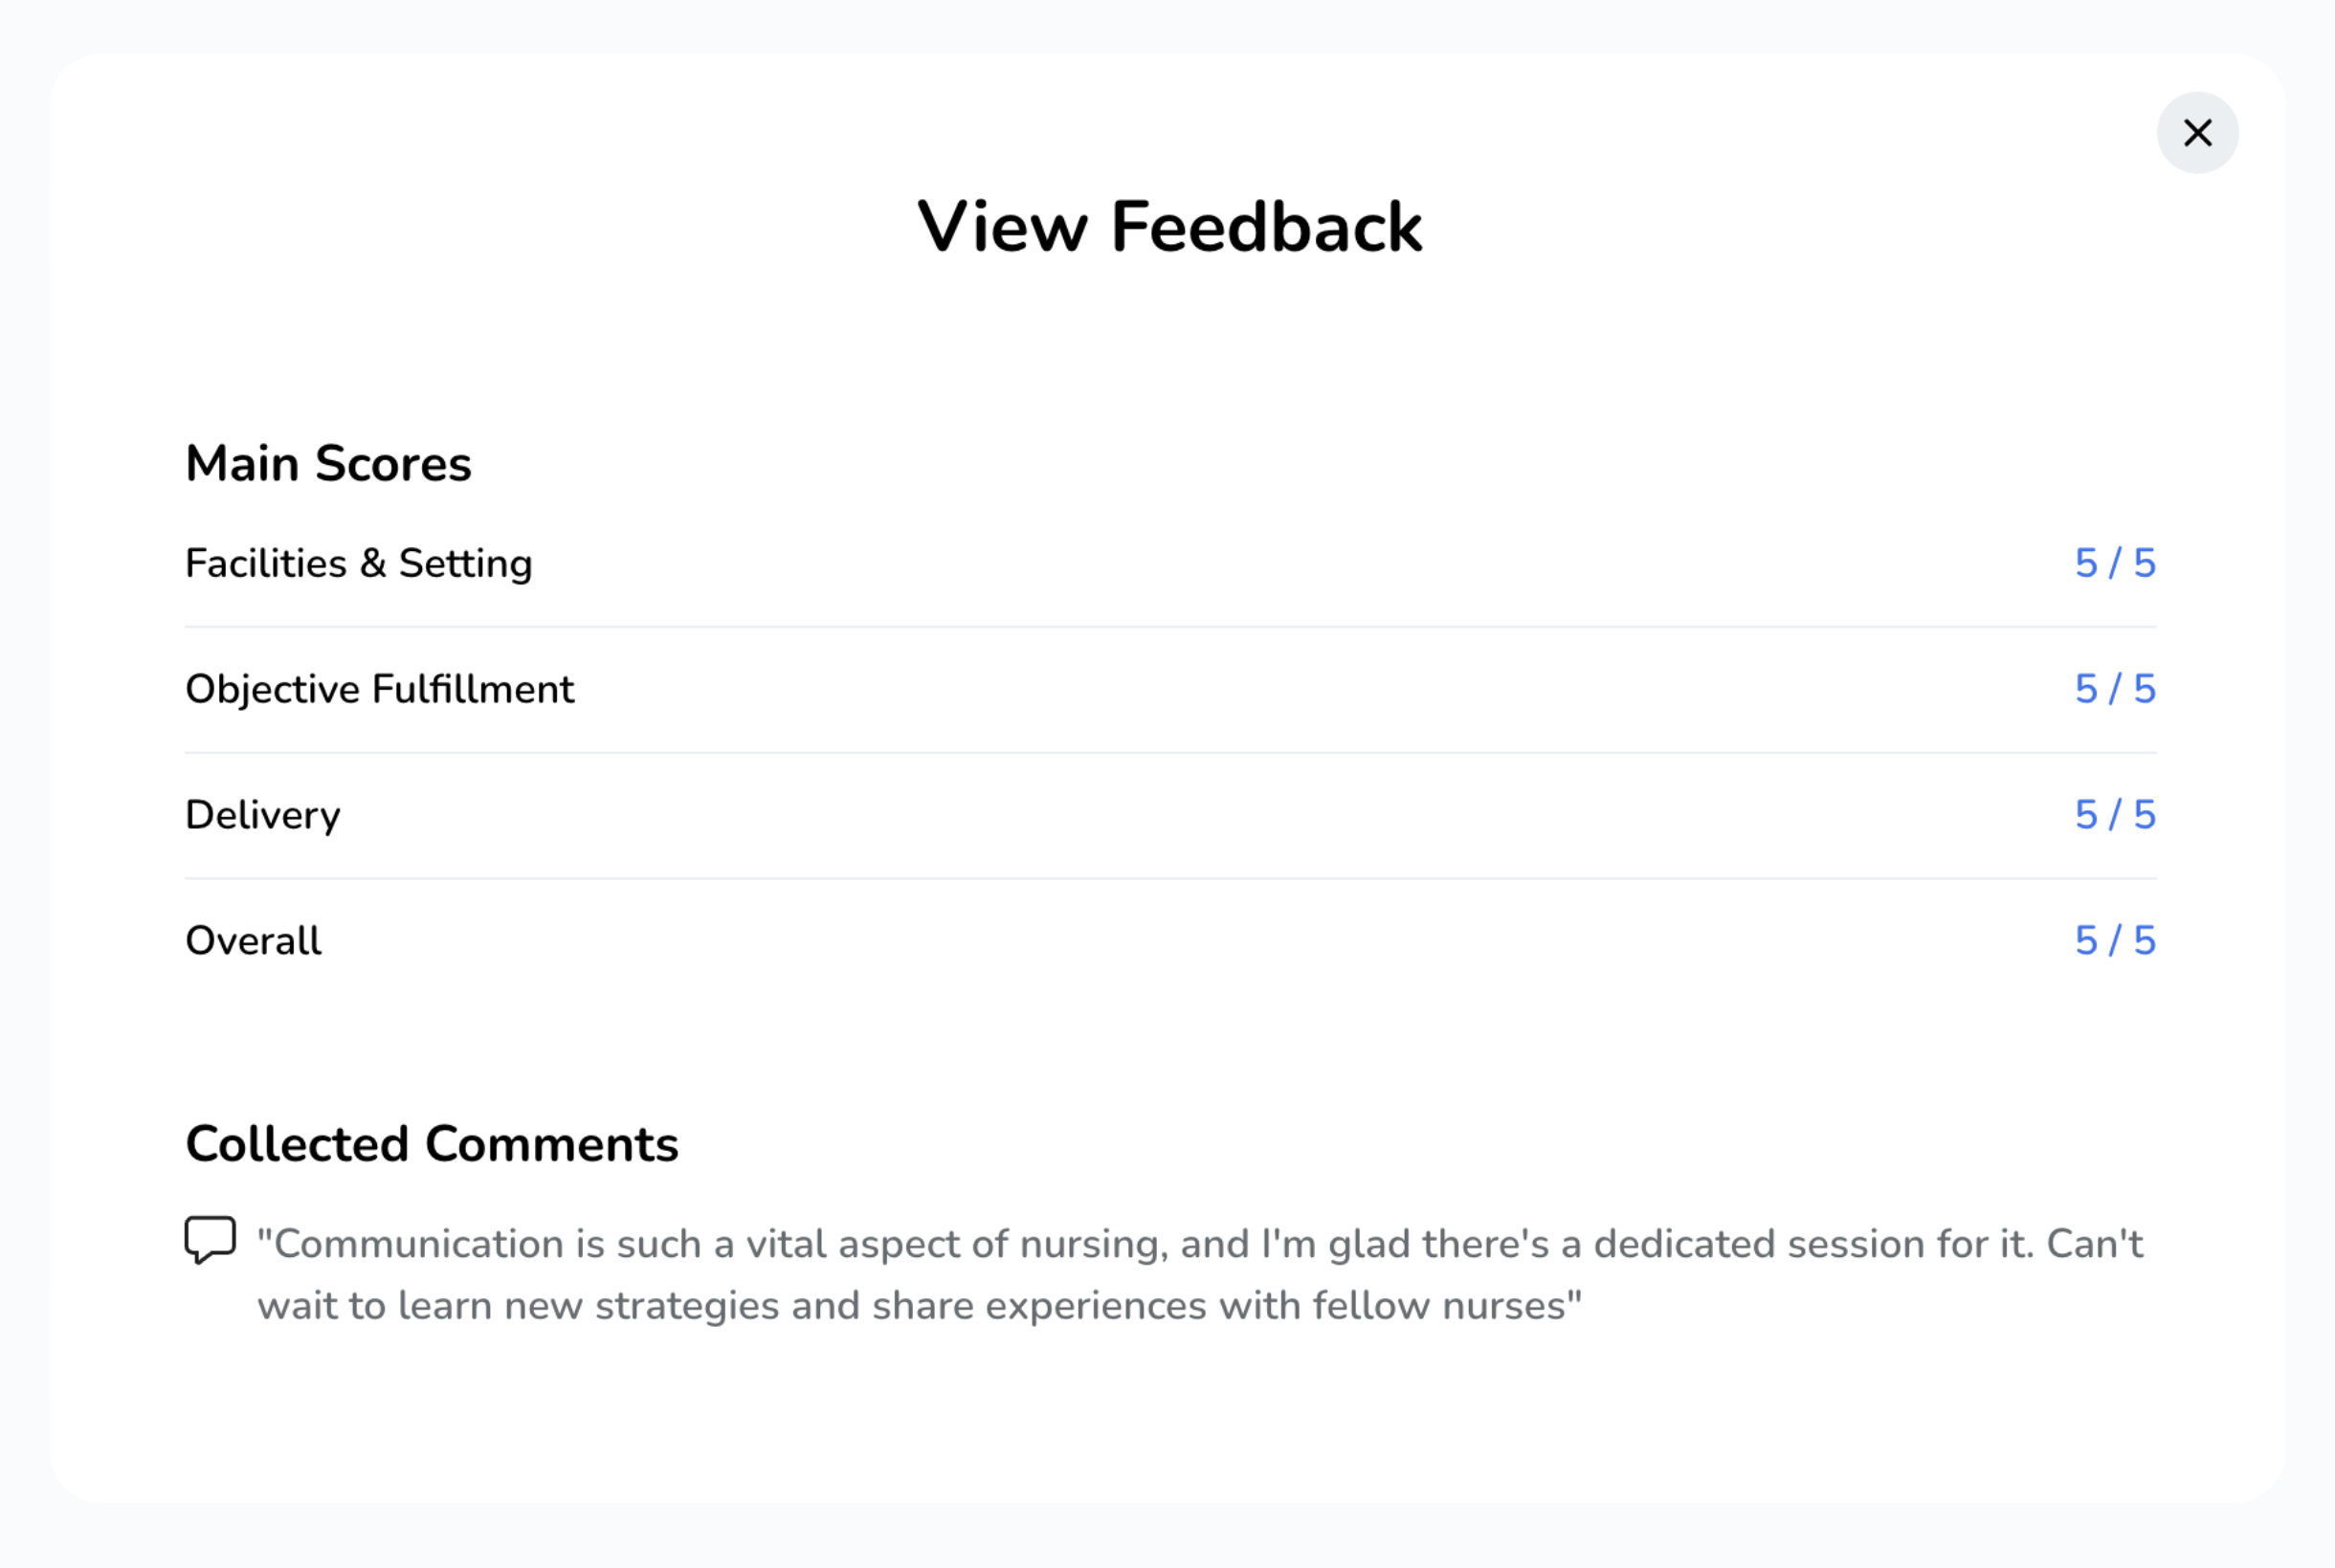
Subsequently, you will be able to see the feedback overview along with any additional comments posted by your audience.
Returning to the Events & Feedback page, you will notice that the event is marked as "Complete" with a green label.
Mobile - Add a Teaching Delivery event.
-
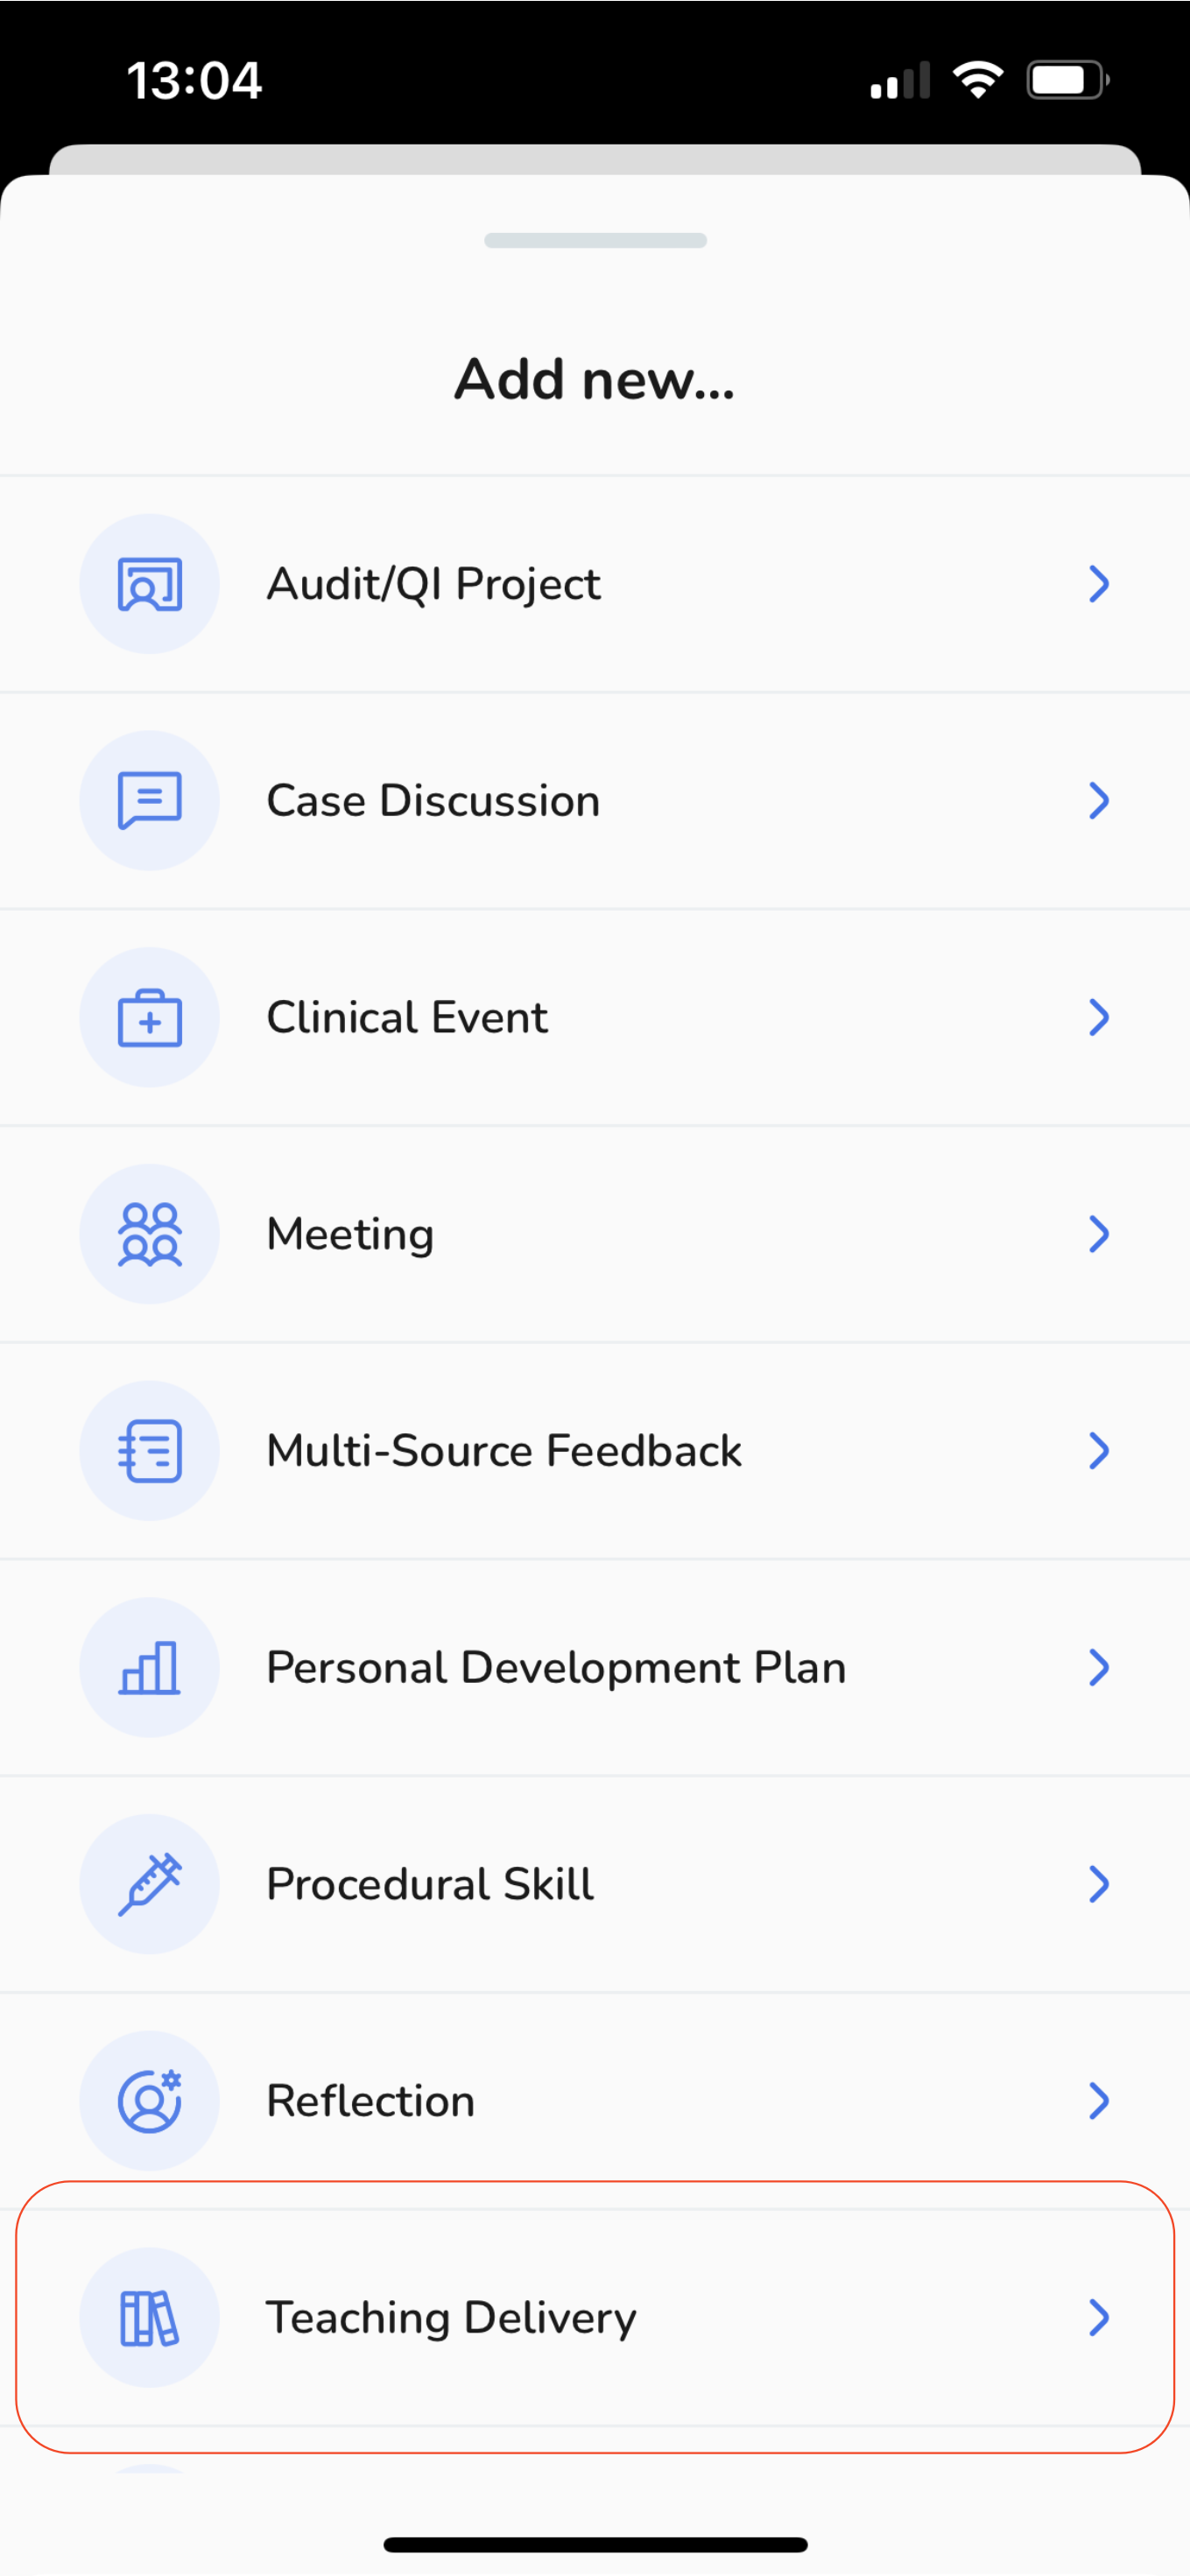
When adding a new portfolio event, make sure to select "Teaching Delivery" from the events list. It's your go-to option for creating engaging teaching sessions.
-
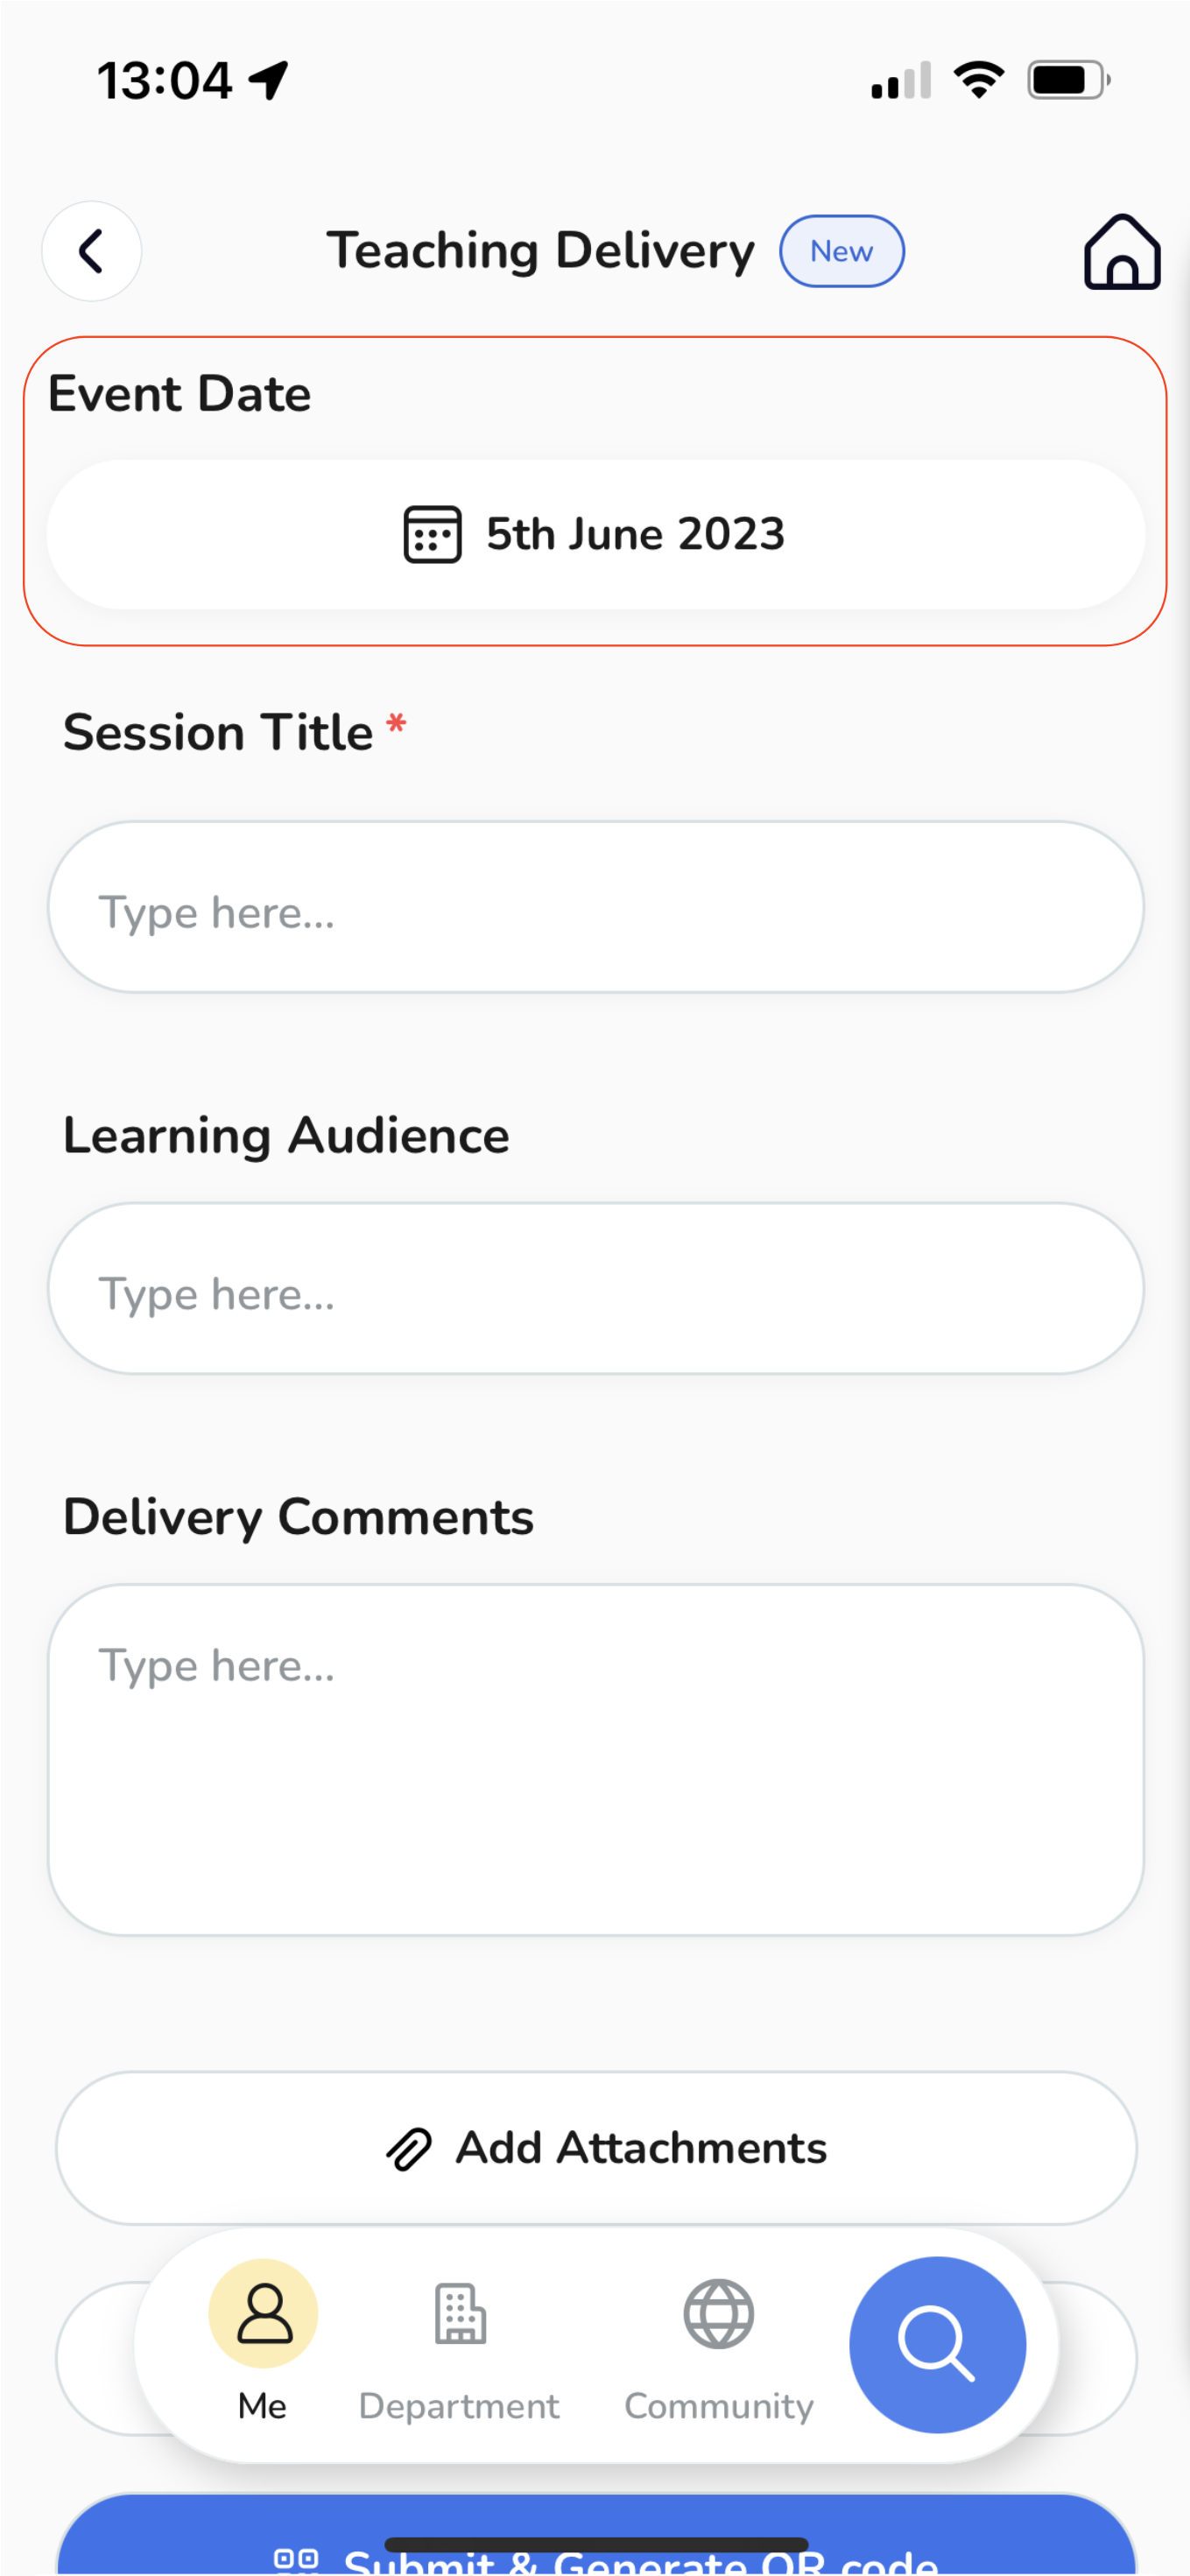
Choose the date for your event. Don't worry, the default selection will show the current date. But if you want to change it, simply tap on the "Date" button and pick the desired date.
-
Type in your session title. Give your session a catchy and informative title. This will make it easier for you and your audience to remember what it's all about.
-
Let us know who your target Learning Audience is. By specifying this, you can tailor your teaching approach to suit their needs.
-
Feel free to add any extra comments or details that you think are important. It's your chance to provide additional context or share specific instructions.
-
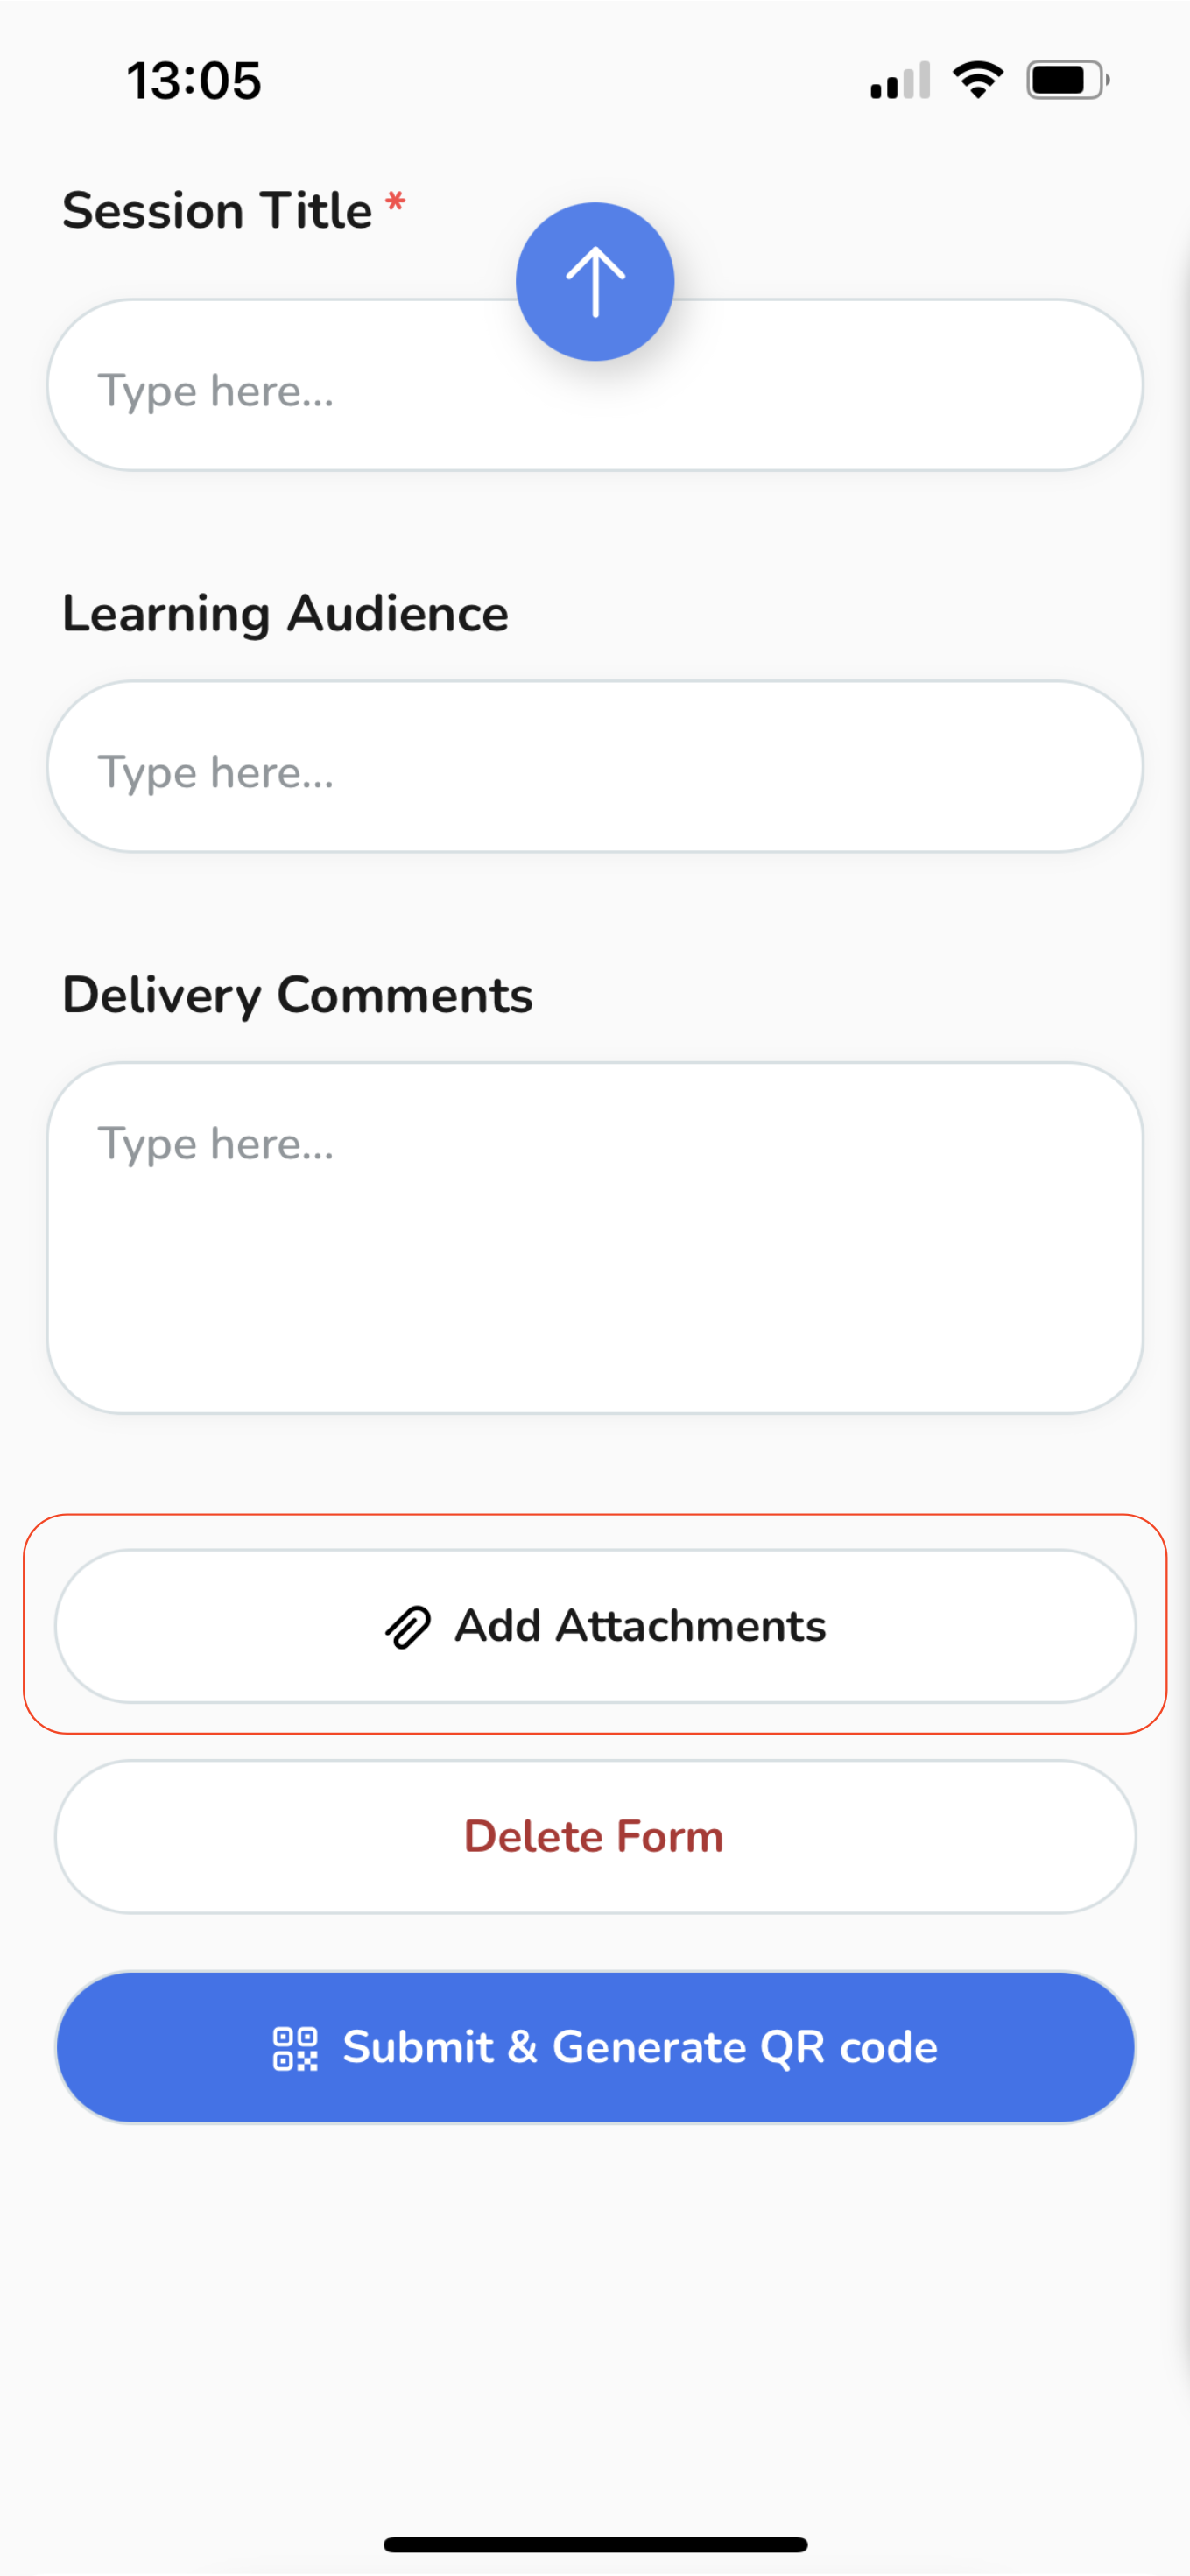
If you want to take it a step further and document your session, tap the "Add Attachments" option. This way, you can keep a record of your teaching journey and showcase your amazing work.
-
A pop-up window will appear, offering you the choice to either select from your existing files or upload a new one from your device.
-
To upload a new file, select "Add New File".
-
Depending on your needs, you can upload various file types like MS Office documents, PDFs, images, videos, and web links.
-
For a new file upload,
-
Select "Files" and then tap on "Browse Files",
-
Select the desired file from your device, give it a name and then tap "Done".
-
The recently added file will join your personal storage files. Simply tap "Attach File" to incorporate it into your event.
-
-
To add a weblink, select "Web Link",
-
If you wish to attach multiple files, simply click on "Add Attachments" once more and follow the same process.
-
To access the recently uploaded file, download it or to remove it in case of an error, just click on the "file" box.
-
Once you're ready, you have two options:
-
Upon clicking, a confirmation pop-up will appear. Just tap the "Submit" button.
When adding a new portfolio event, make sure to select "Teaching Delivery" from the events list. It's your go-to option for creating engaging teaching sessions.
Choose the date for your event. Don't worry, the default selection will show the current date. But if you want to change it, simply tap on the "Date" button and pick the desired date.
Type in your session title. Give your session a catchy and informative title. This will make it easier for you and your audience to remember what it's all about.
Let us know who your target Learning Audience is. By specifying this, you can tailor your teaching approach to suit their needs.
Feel free to add any extra comments or details that you think are important. It's your chance to provide additional context or share specific instructions.
If you want to take it a step further and document your session, tap the "Add Attachments" option. This way, you can keep a record of your teaching journey and showcase your amazing work.
A pop-up window will appear, offering you the choice to either select from your existing files or upload a new one from your device.
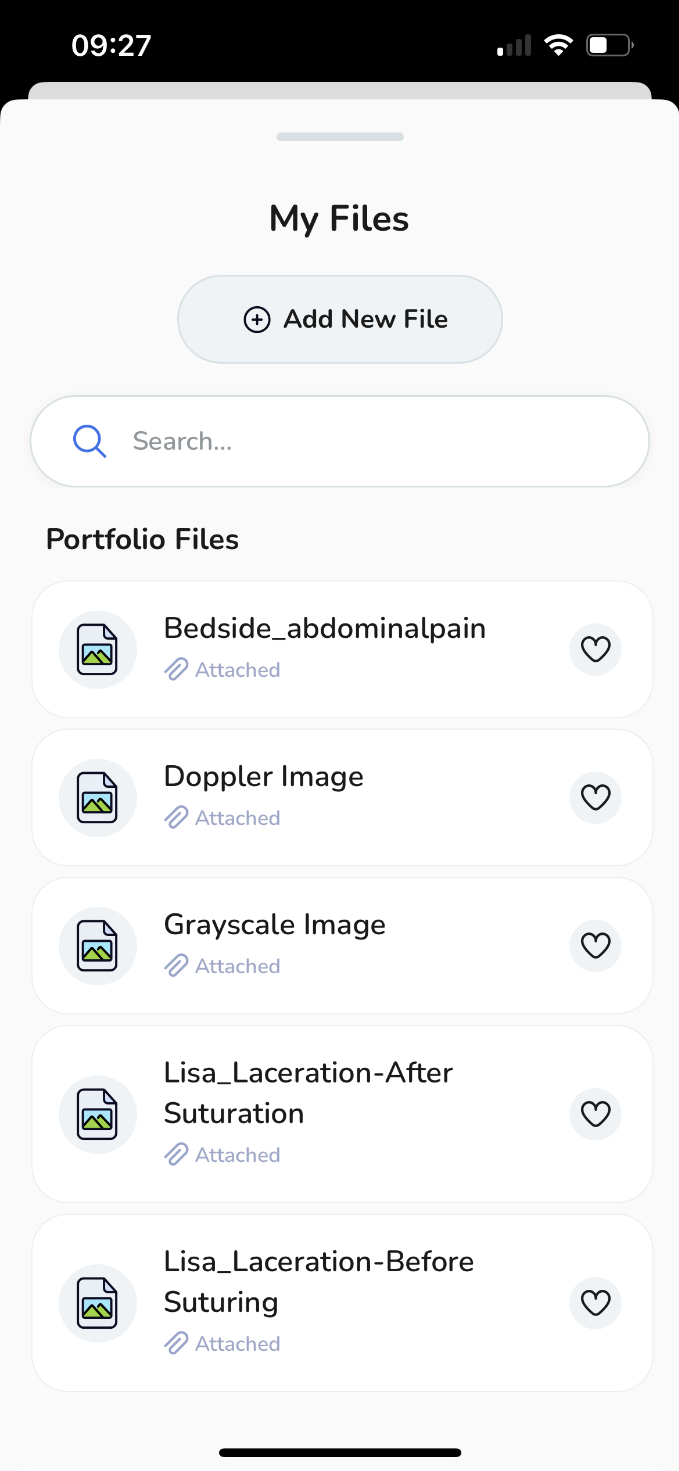
To upload a new file, select "Add New File".
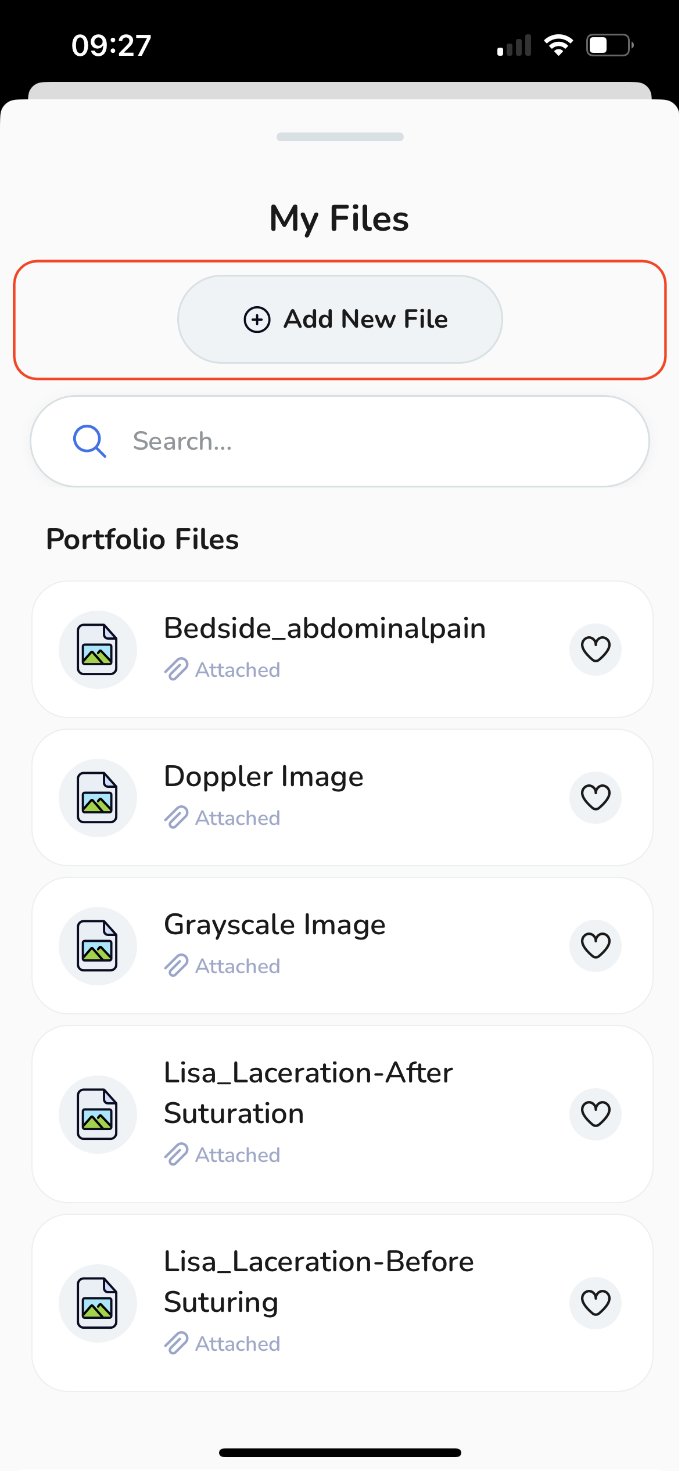
Depending on your needs, you can upload various file types like MS Office documents, PDFs, images, videos, and web links.
For a new file upload,
-
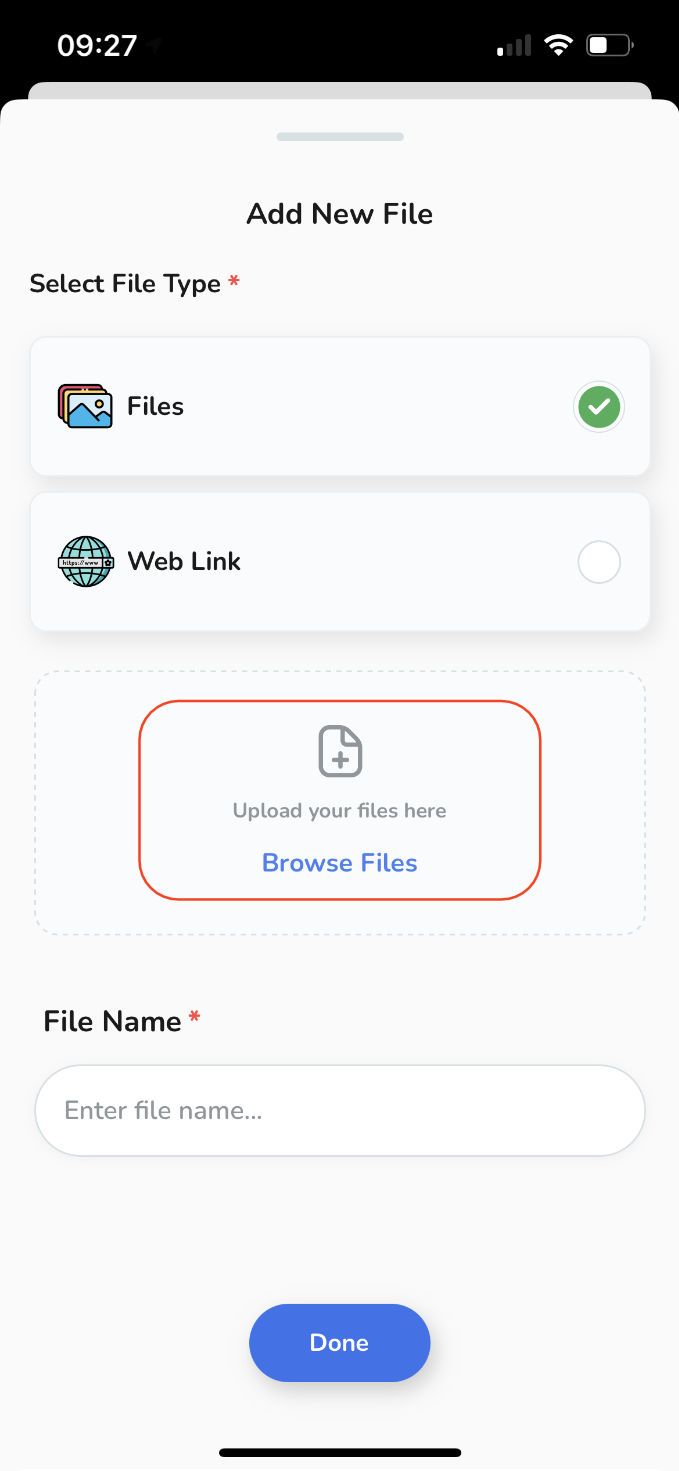
Select "Files" and then tap on "Browse Files",
Select "Files" and then tap on "Browse Files",
-
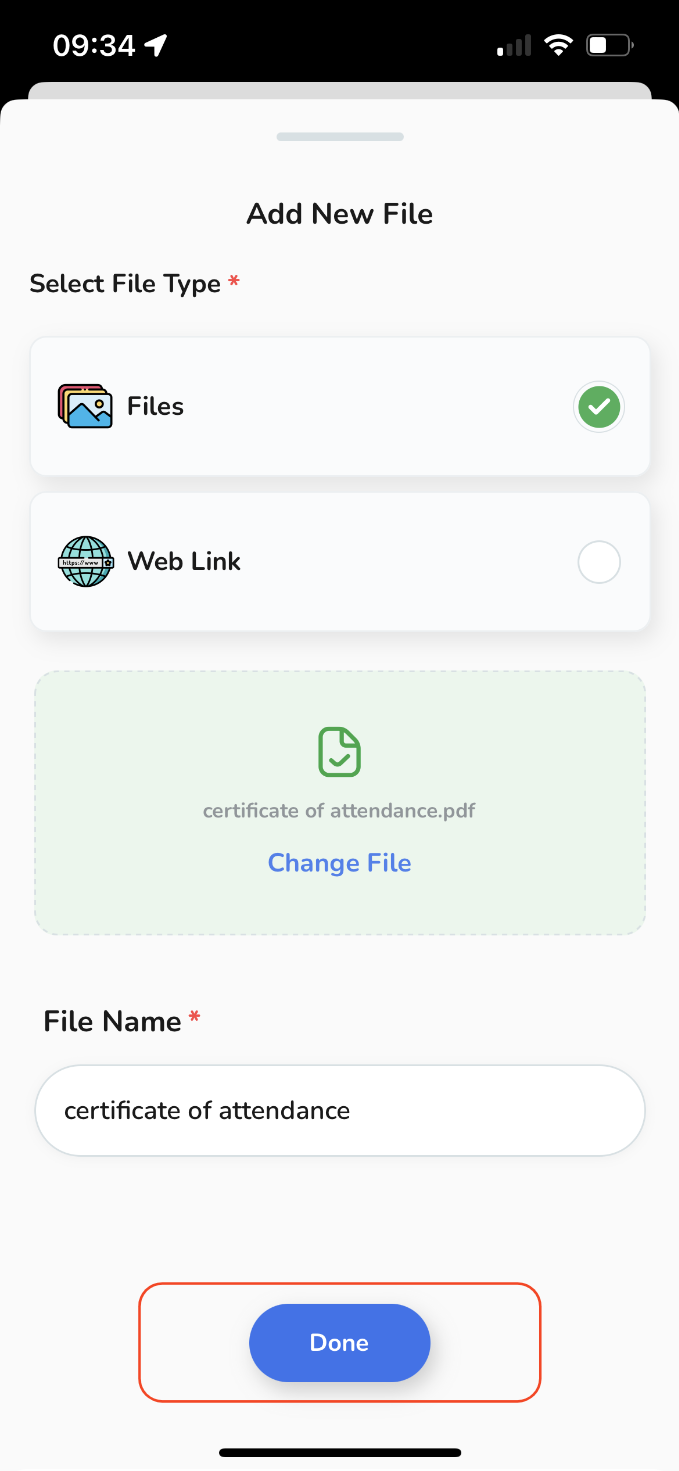
Select the desired file from your device, give it a name and then tap "Done".
Select the desired file from your device, give it a name and then tap "Done".
-
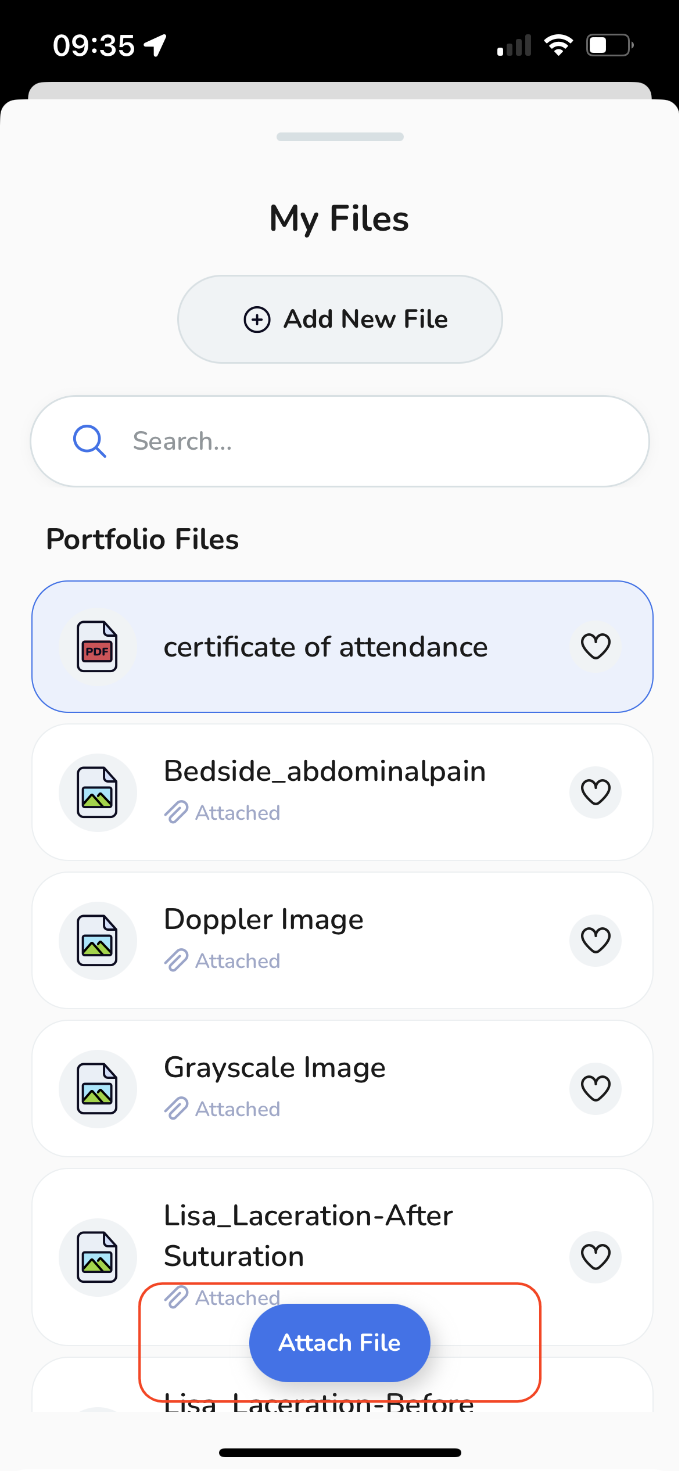
The recently added file will join your personal storage files. Simply tap "Attach File" to incorporate it into your event.
The recently added file will join your personal storage files. Simply tap "Attach File" to incorporate it into your event.
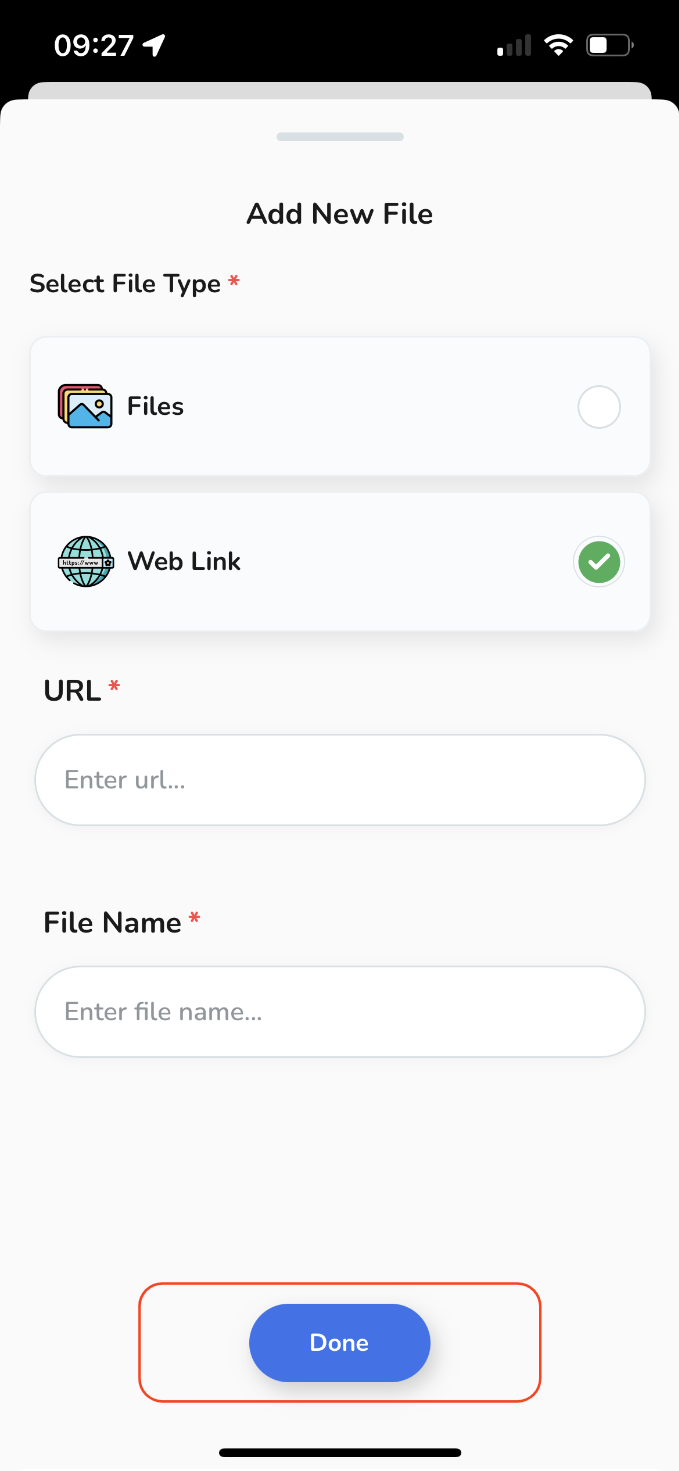
To add a weblink, select "Web Link",
-
Provide the URL link along with a File Name, and then tap "Done"
Provide the URL link along with a File Name, and then tap "Done"
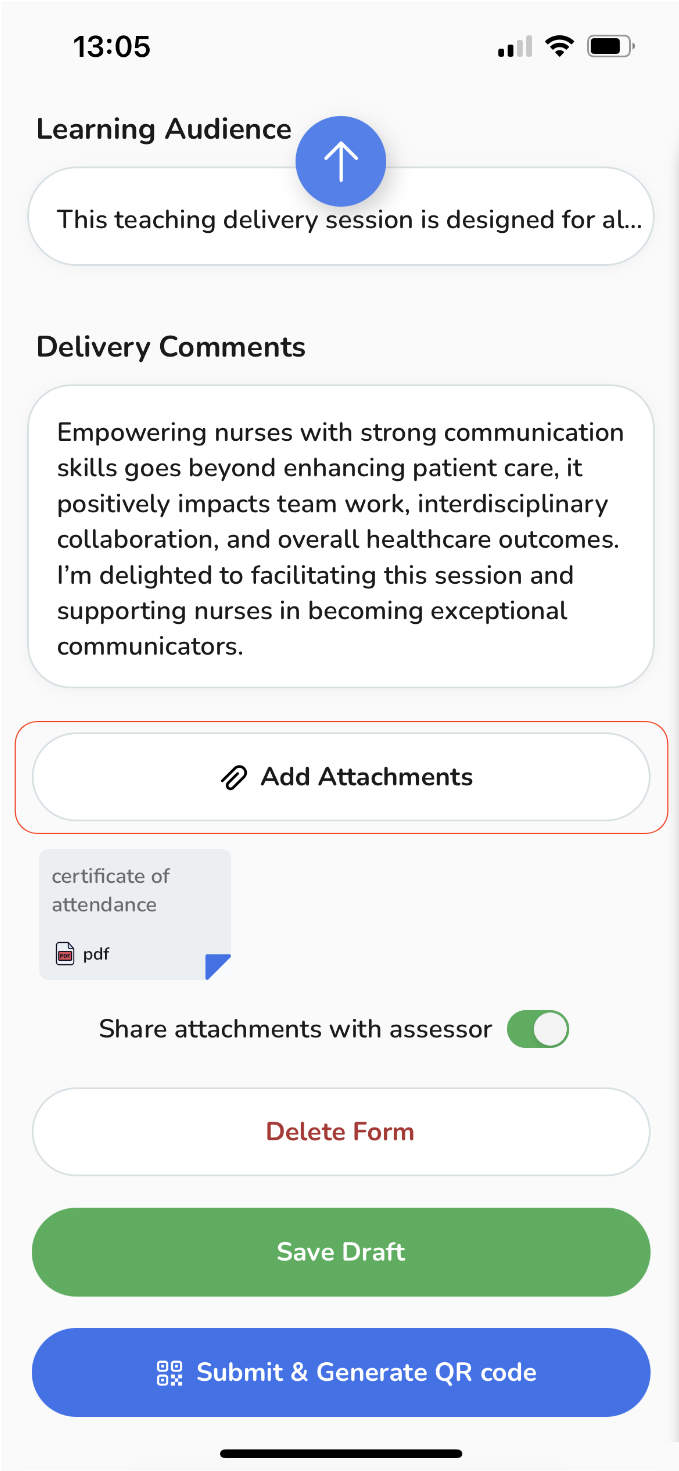
If you wish to attach multiple files, simply click on "Add Attachments" once more and follow the same process.
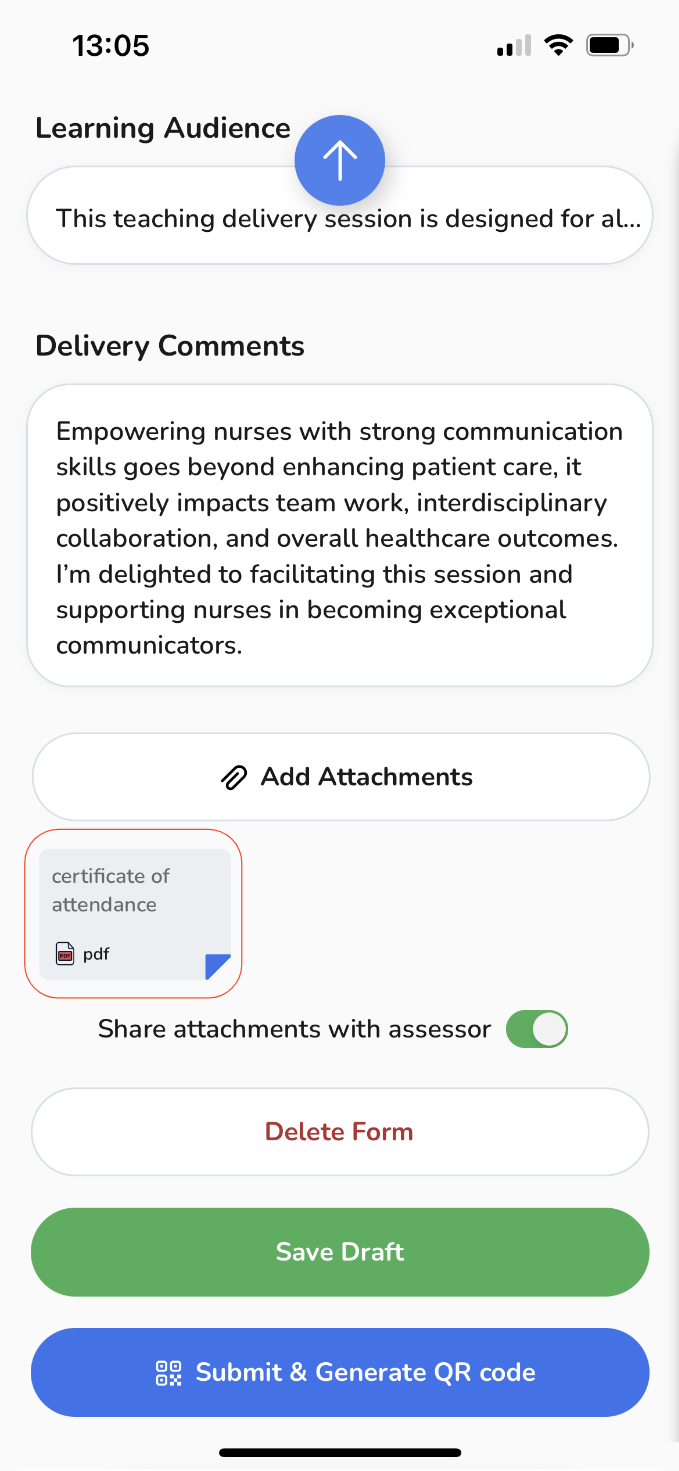
To access the recently uploaded file, download it or to remove it in case of an error, just click on the "file" box.
Once you're ready, you have two options:
-
Save your session as a draft to come back to it later and make any tweaks,
Save your session as a draft to come back to it later and make any tweaks,
-
Or, tap on that exciting "Submit form & Generate QR Code" button.
Or, tap on that exciting "Submit form & Generate QR Code" button.
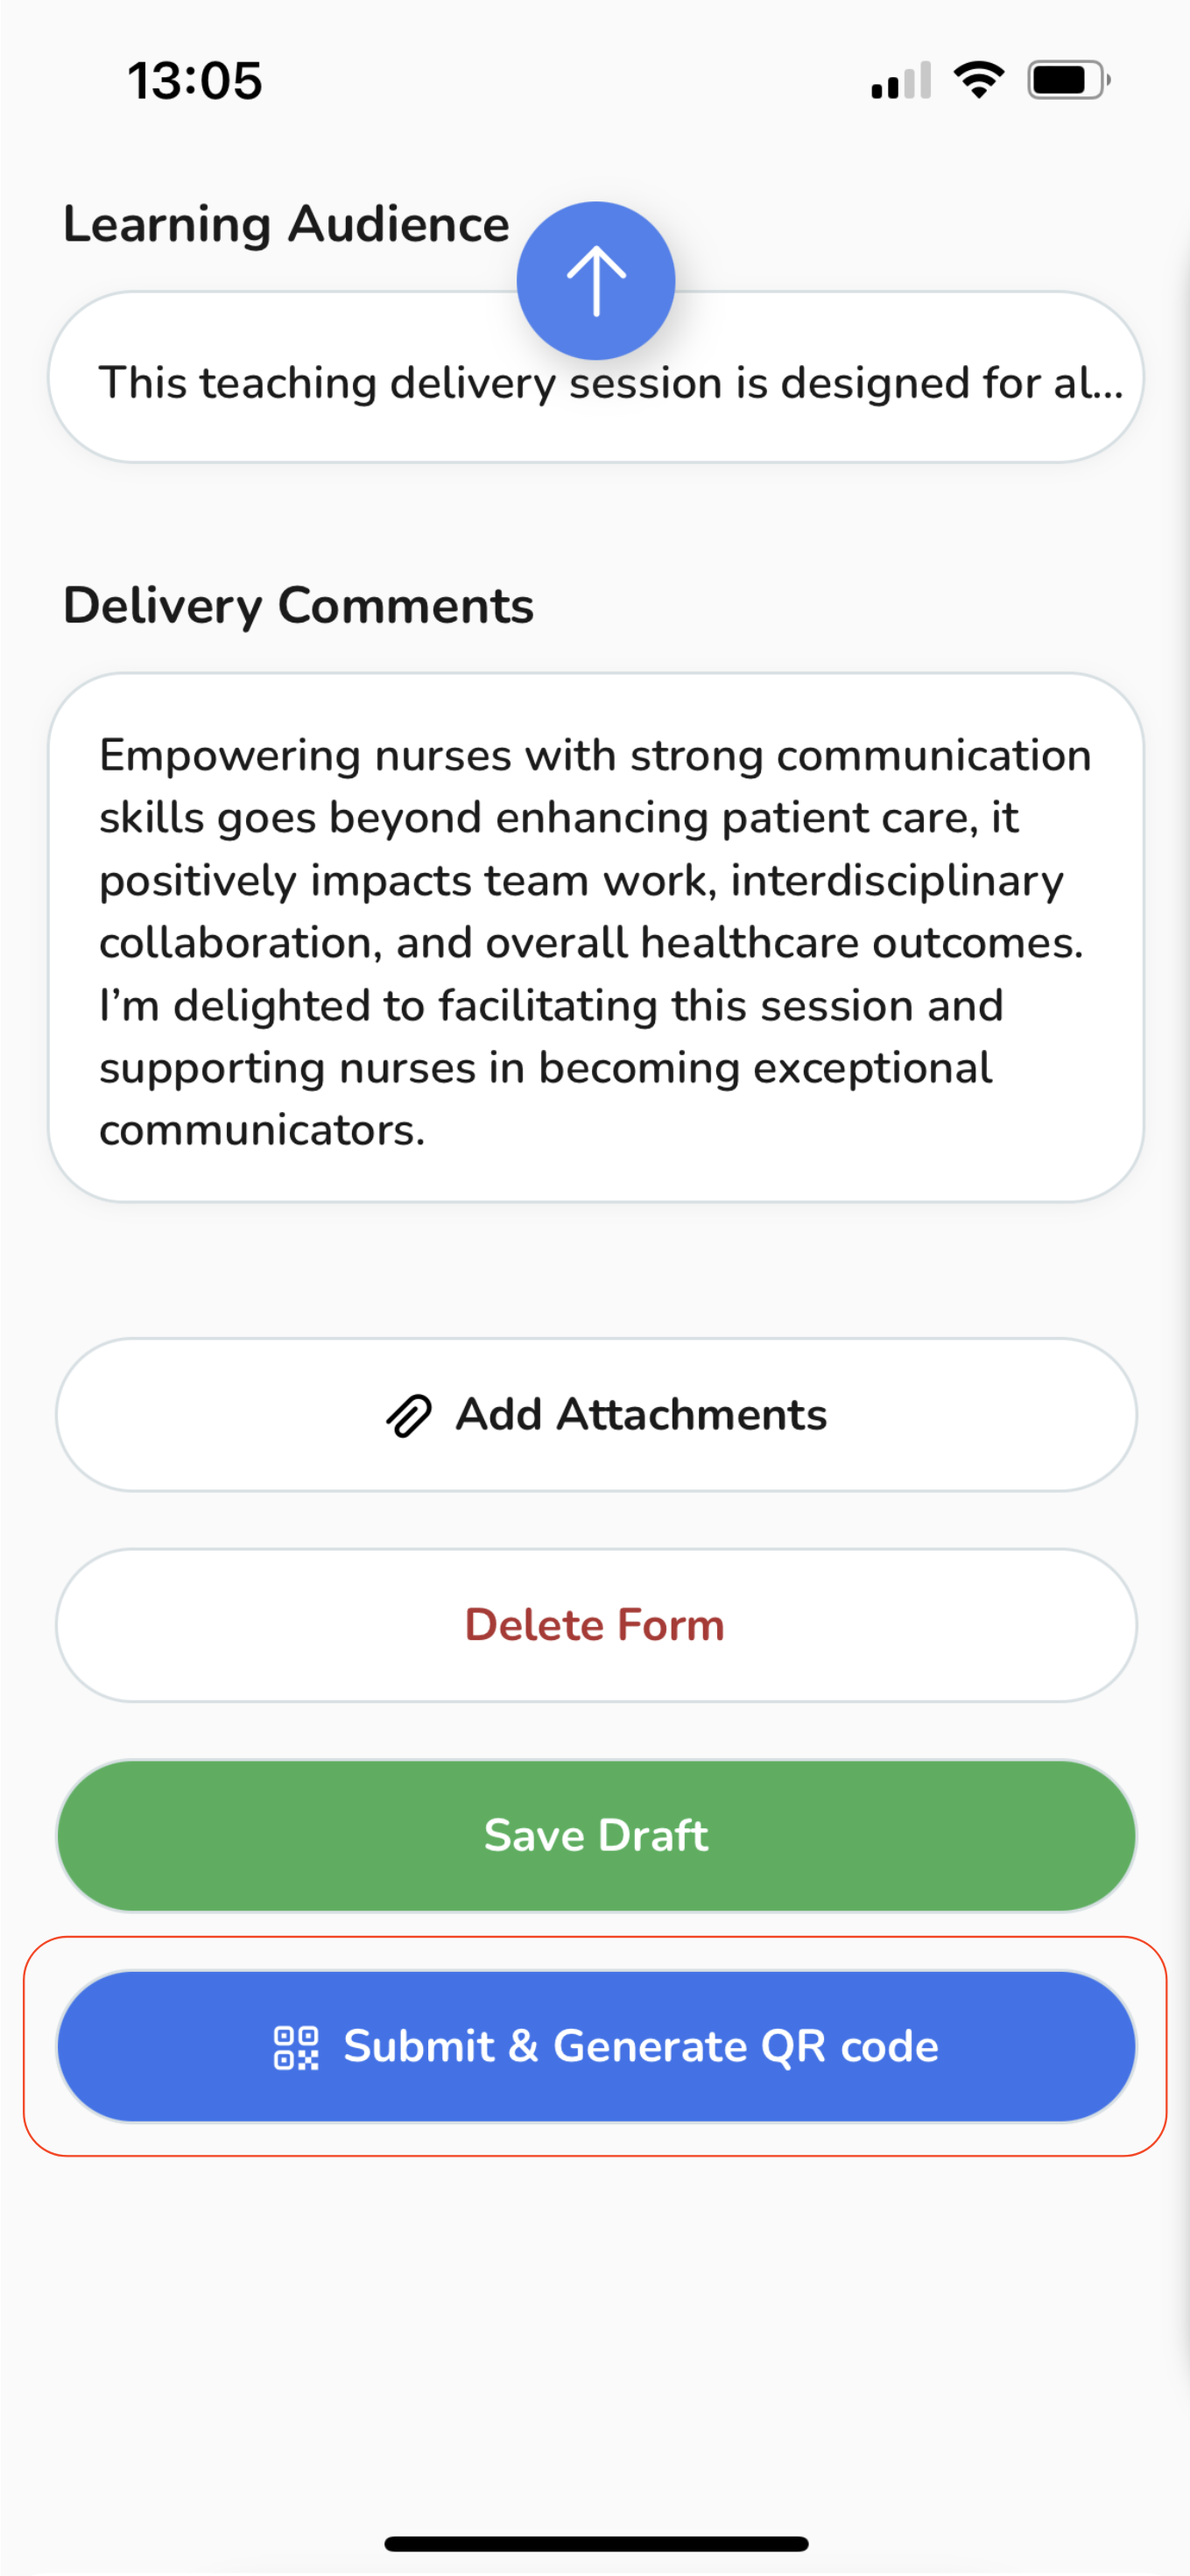
Upon clicking, a confirmation pop-up will appear. Just tap the "Submit" button.
Generating a QR Code for sharing and collecting feedback.
-
This will generate a unique QR code that you can share with your audience. It offers a convenient method to collect valuable insights and feedback. To view and share the code, simply tap "View QR Code."
-
A pop-up will display the QR code. You can distribute this link to as many people as necessary!
-
When someone scans the QR code or clicks on the shared link, they will be directed to a page where they can provide feedback. All they need to do is fill out the form and submit it to share their feedback with you - Give it a try and scan the above QR code! 😉
-
After sharing the QR code, you will notice your event labelled as "Pending" with a yellow indicator. Once you have received the desired number of responses, you can view them by clicking on the event itself.
-
Upon tapping, you will be directed to the event page, scroll down to find a list of feedback forms that have been submitted.
This will generate a unique QR code that you can share with your audience. It offers a convenient method to collect valuable insights and feedback. To view and share the code, simply tap "View QR Code."
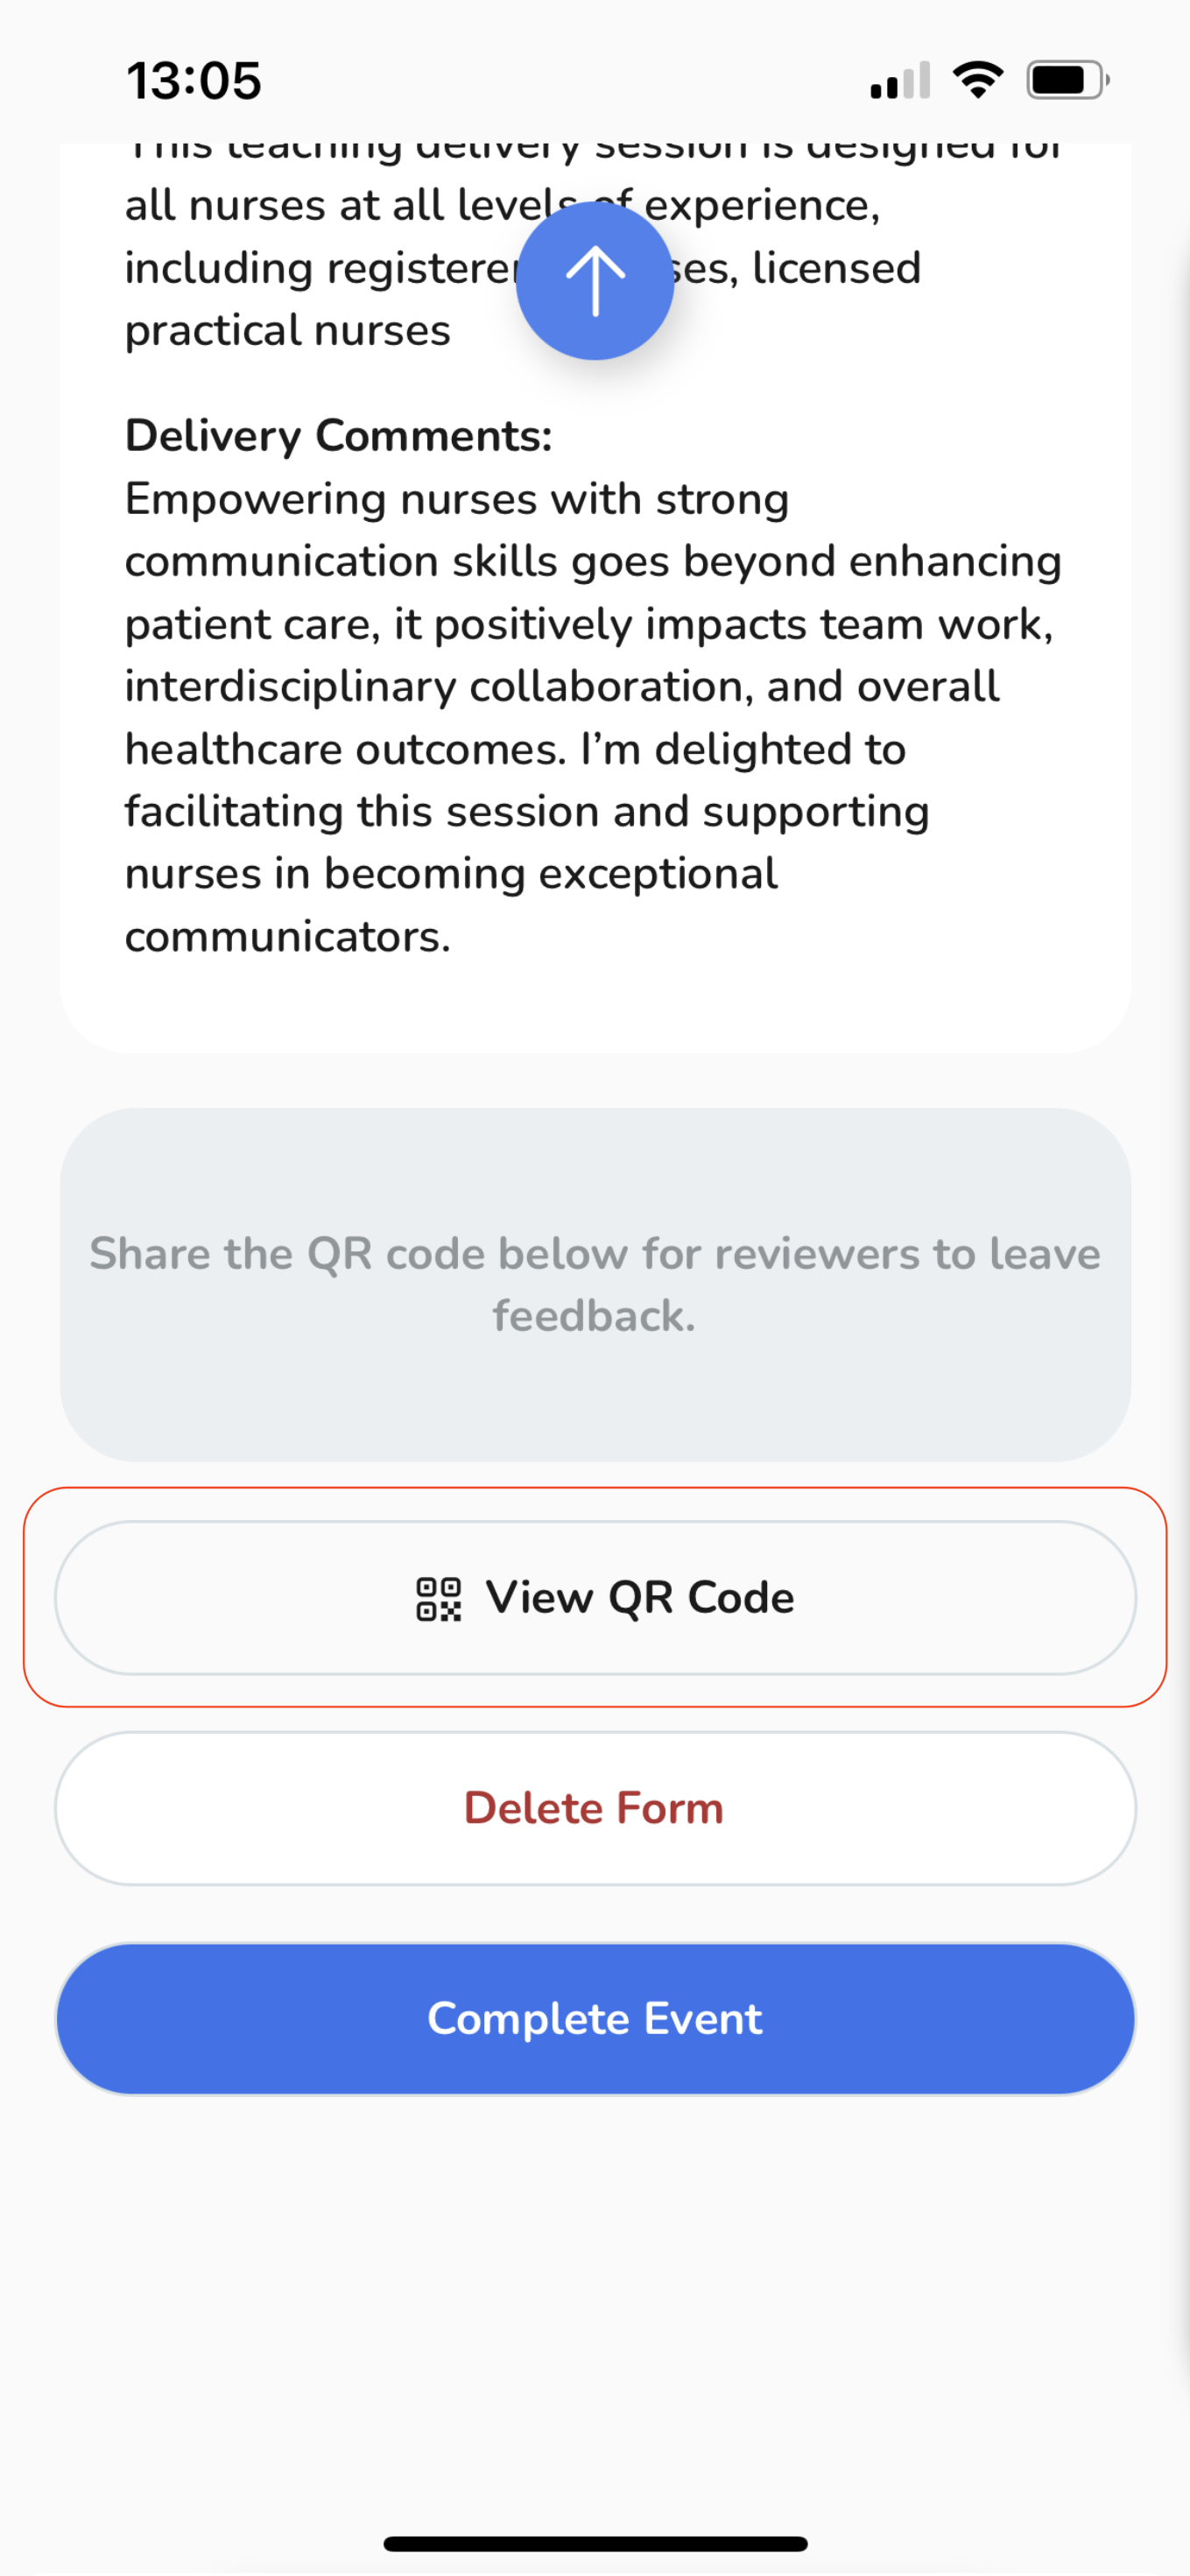
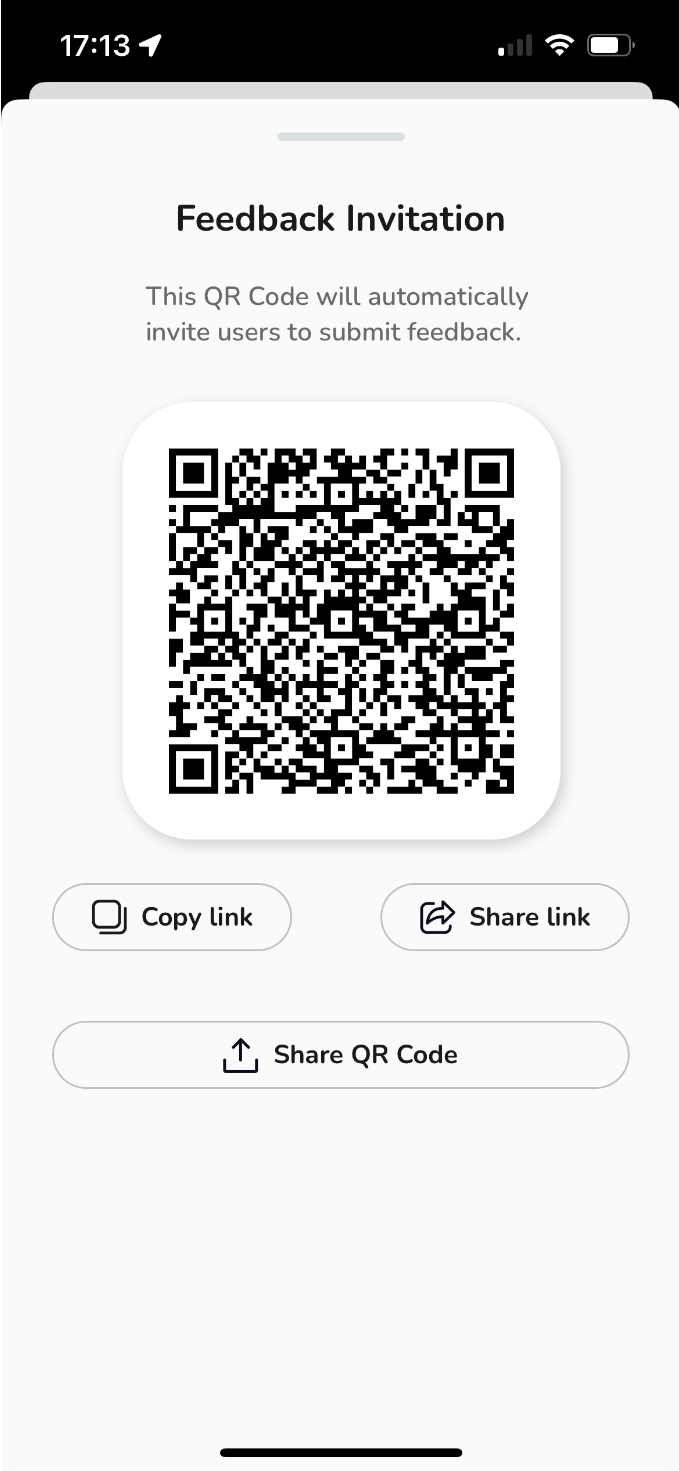
A pop-up will display the QR code. You can distribute this link to as many people as necessary!
-
To share it, tap on the "Share QR code" button,
To share it, tap on the "Share QR code" button,
-
Alternatively copy the link by tapping the "Copy link" button,
Alternatively copy the link by tapping the "Copy link" button,
-
Or share the link by tapping the "Share link" button.
Or share the link by tapping the "Share link" button.
When someone scans the QR code or clicks on the shared link, they will be directed to a page where they can provide feedback. All they need to do is fill out the form and submit it to share their feedback with you - Give it a try and scan the above QR code! 😉
After sharing the QR code, you will notice your event labelled as "Pending" with a yellow indicator. Once you have received the desired number of responses, you can view them by clicking on the event itself.
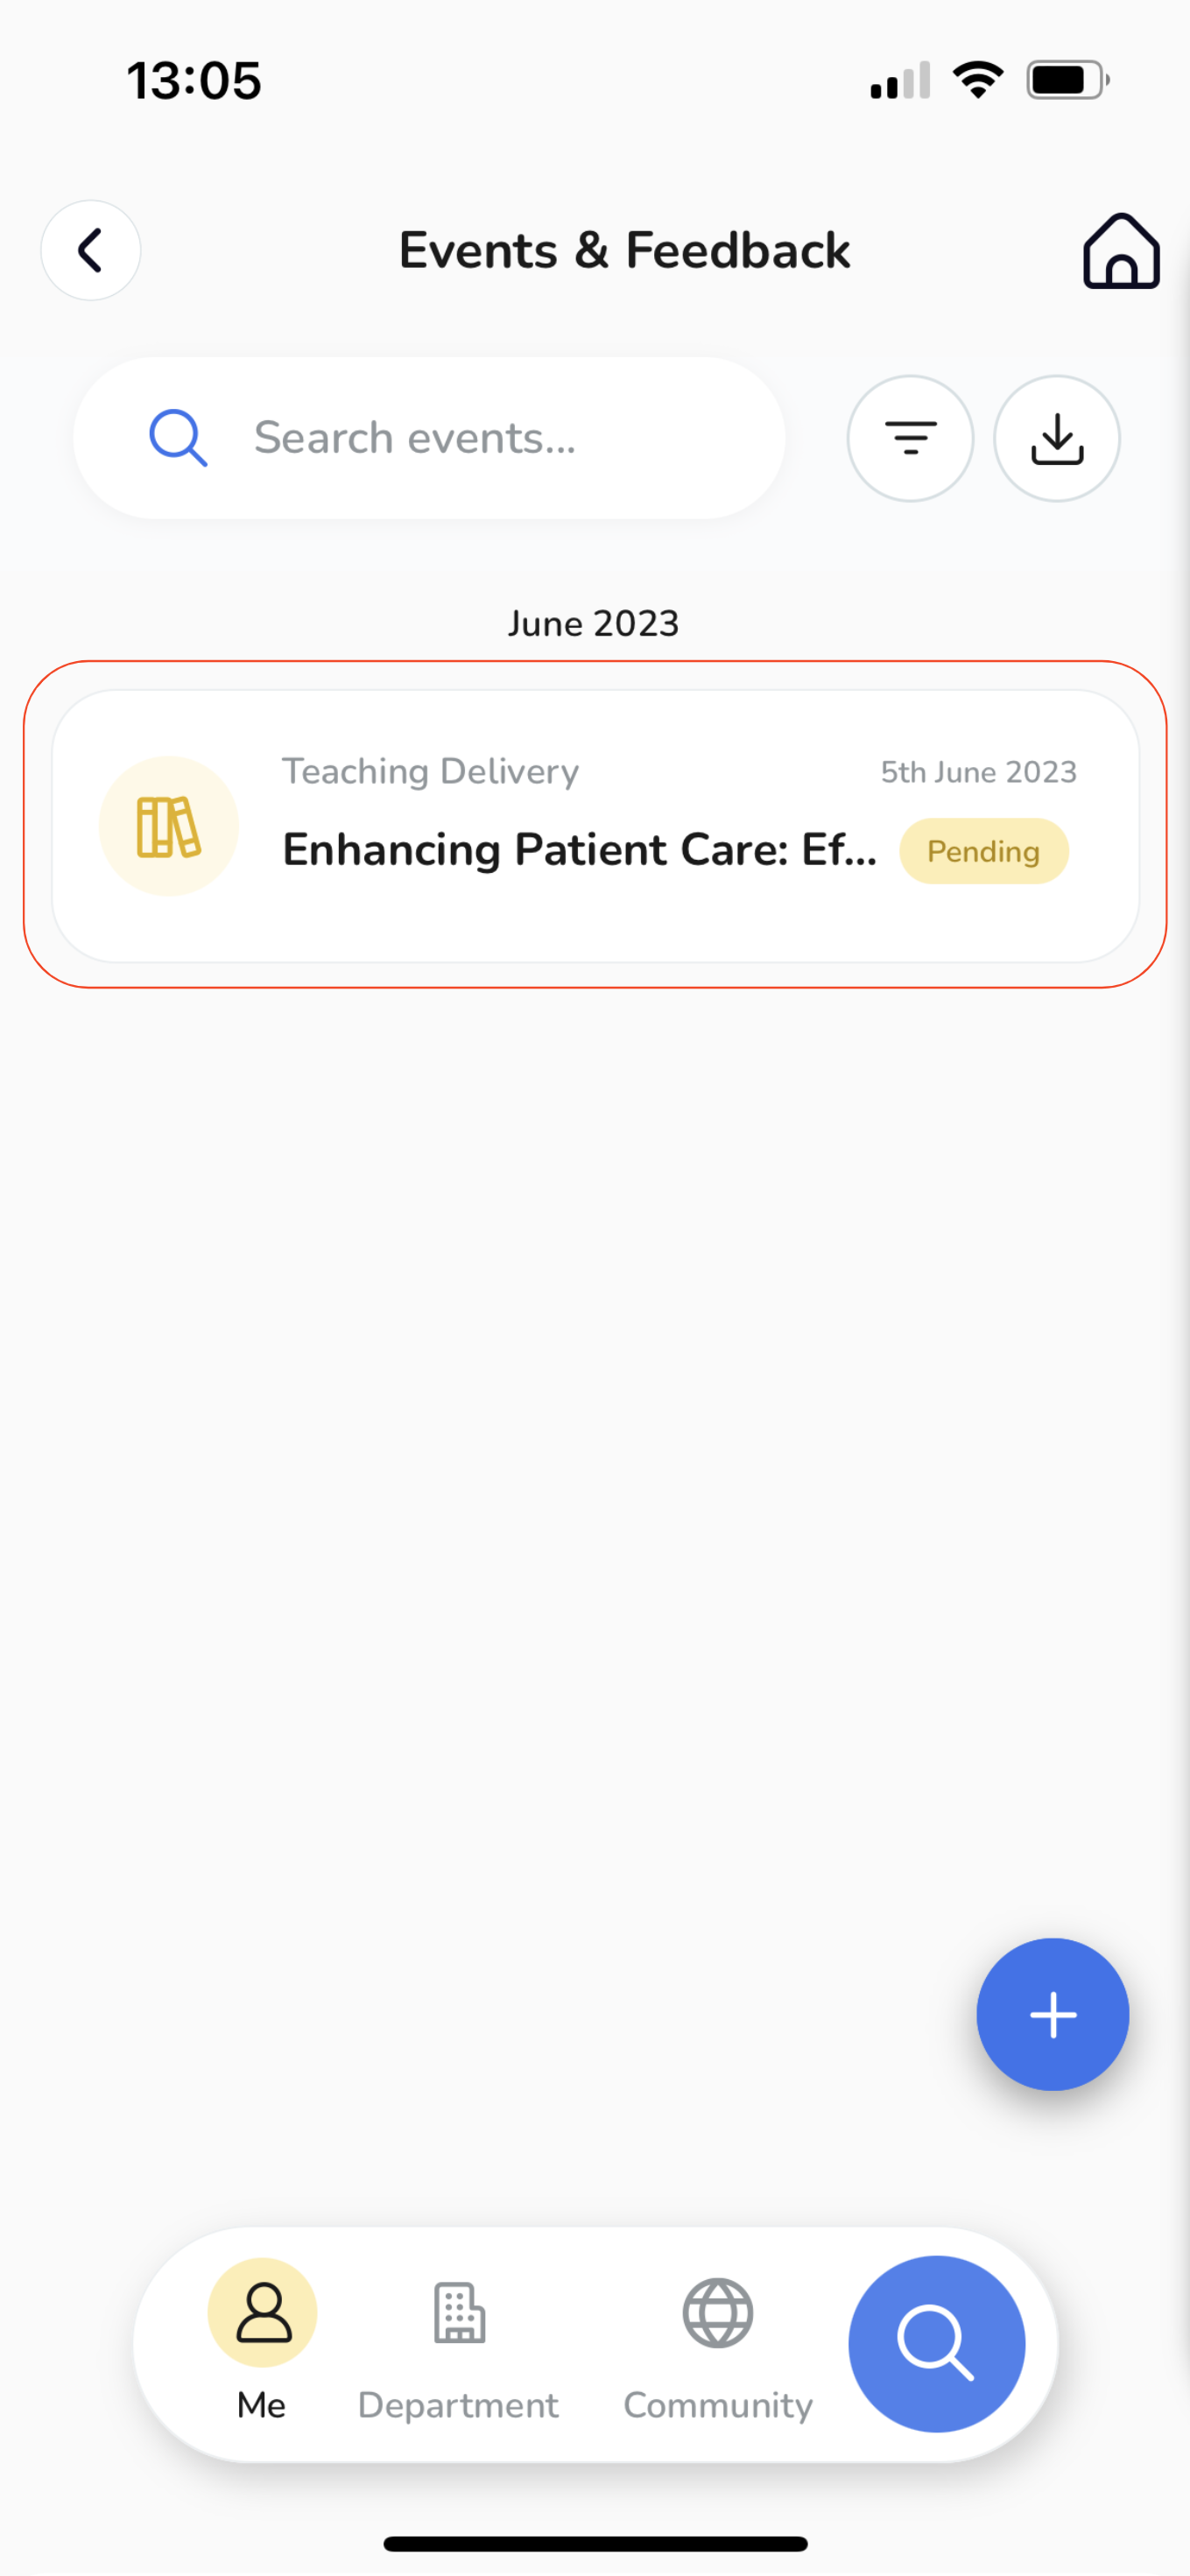
Upon tapping, you will be directed to the event page, scroll down to find a list of feedback forms that have been submitted.
Reviewing the Feedback.
-
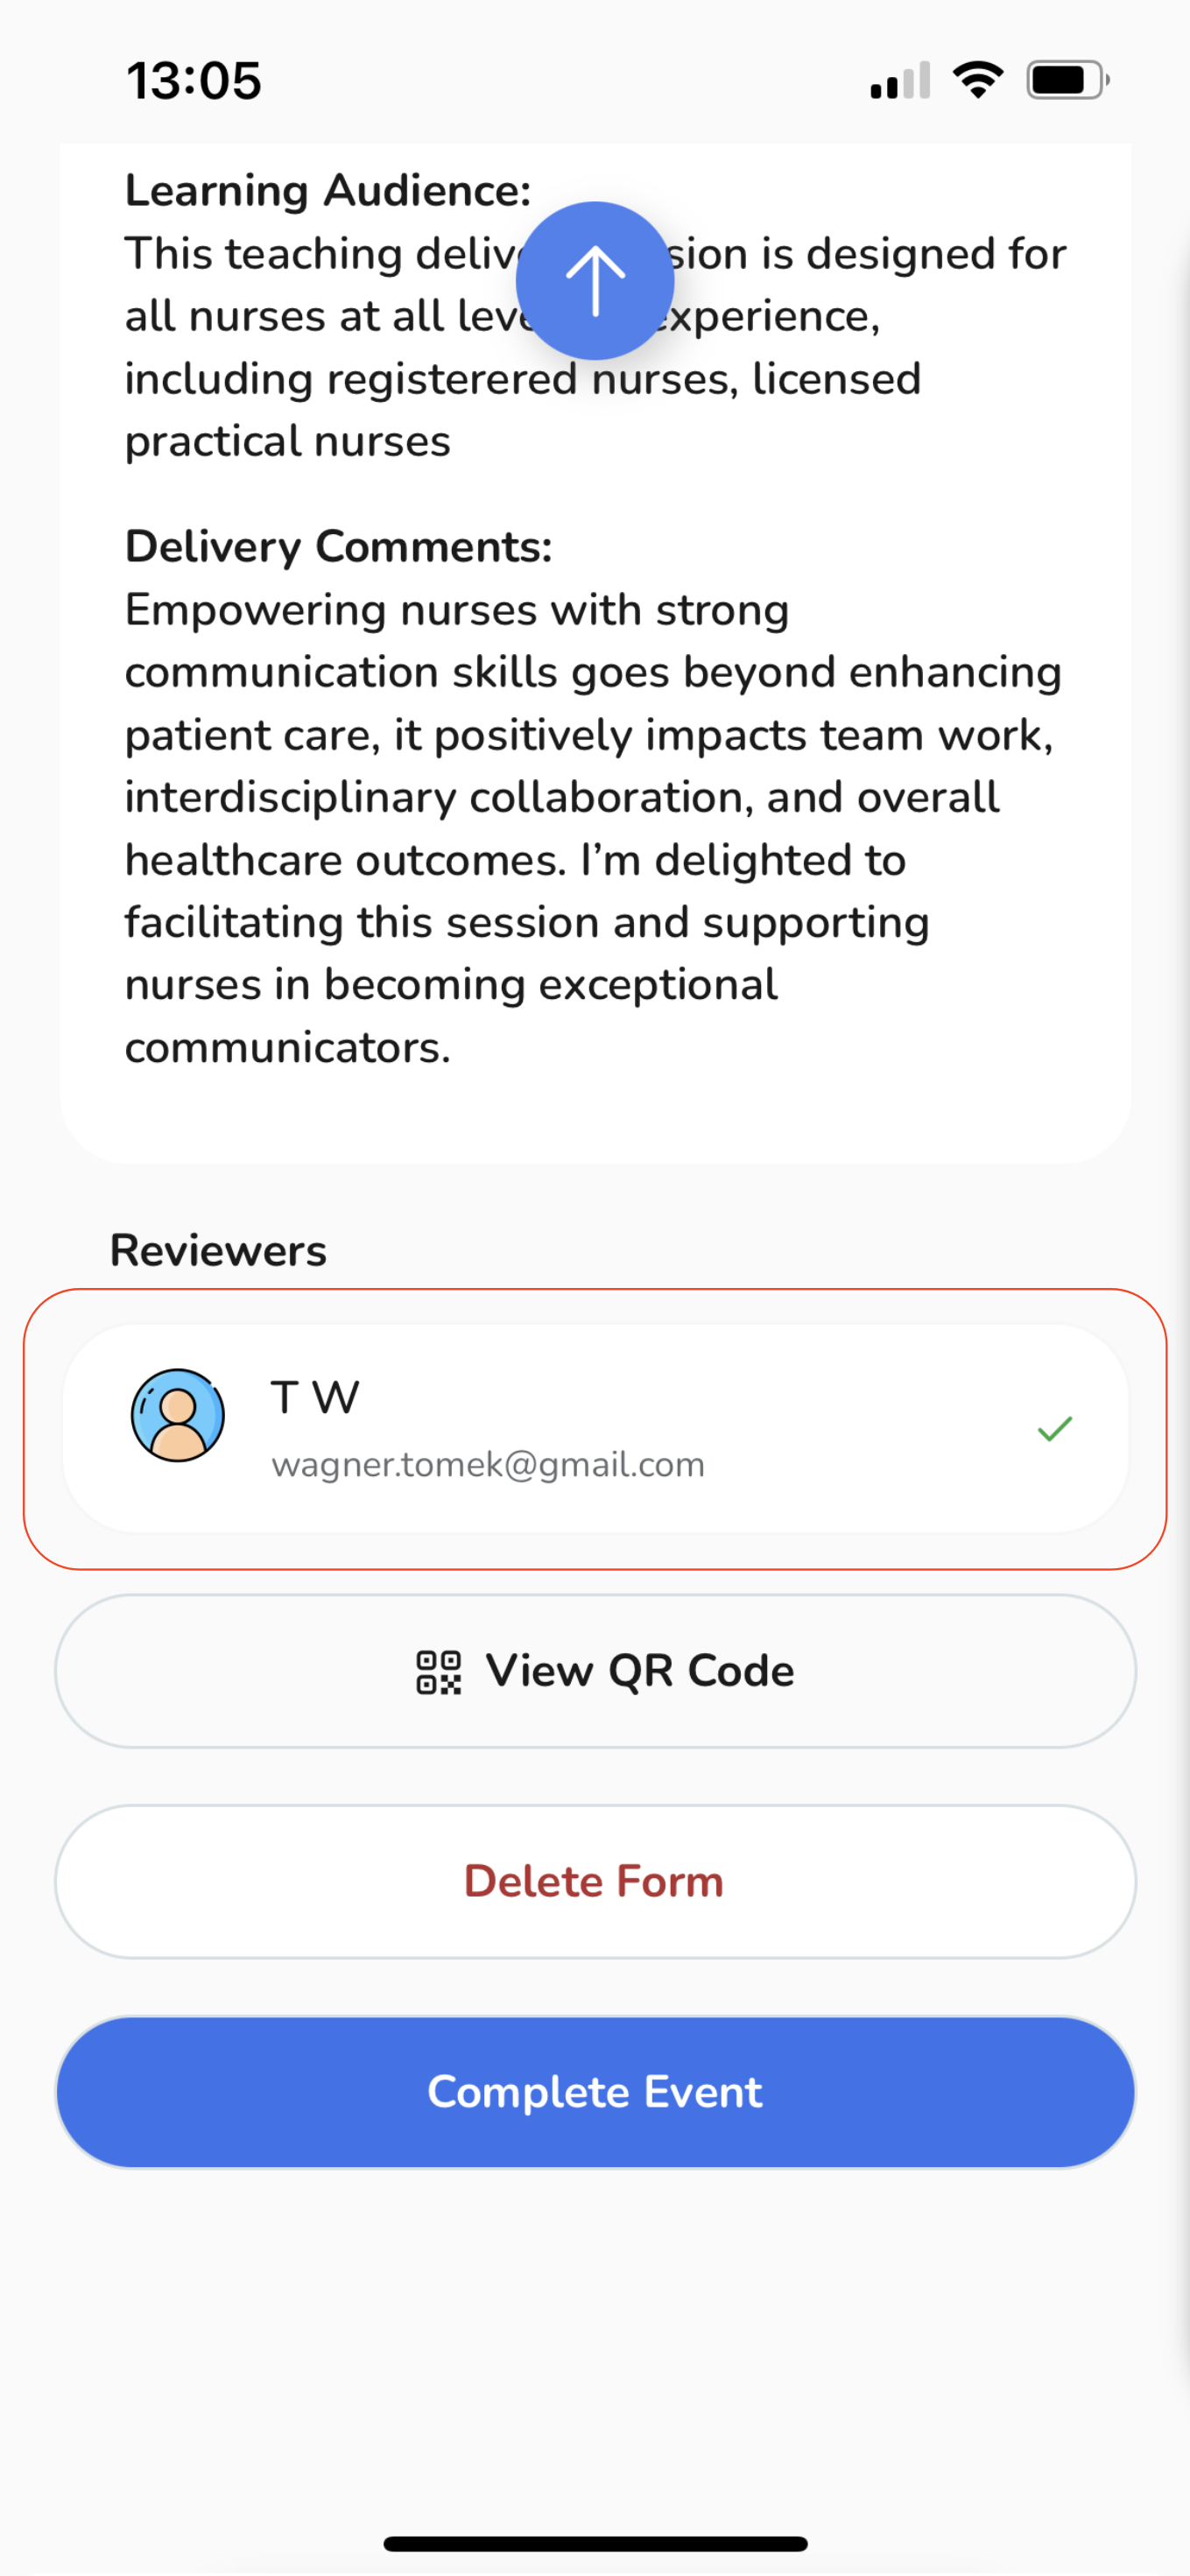
Once all respondents have submitted their feedback, you can view the feedback by closing the event. Simply tap on the "Complete Event" button.
-
A confirmation pop-up will appear, to view the feedback simply tap on the "Yes" button.
-
Afterward, you will have access to the feedback overview, including any additional comments posted by your audience. To review the comments, tap on the "Generate Feedback" button. Alternatively, if you prefer to export the feedback as a PDF, select the corresponding button.
-
Returning to the Events & Feedback page, you will notice that the event is marked as "Complete" with a green label.
Once all respondents have submitted their feedback, you can view the feedback by closing the event. Simply tap on the "Complete Event" button.
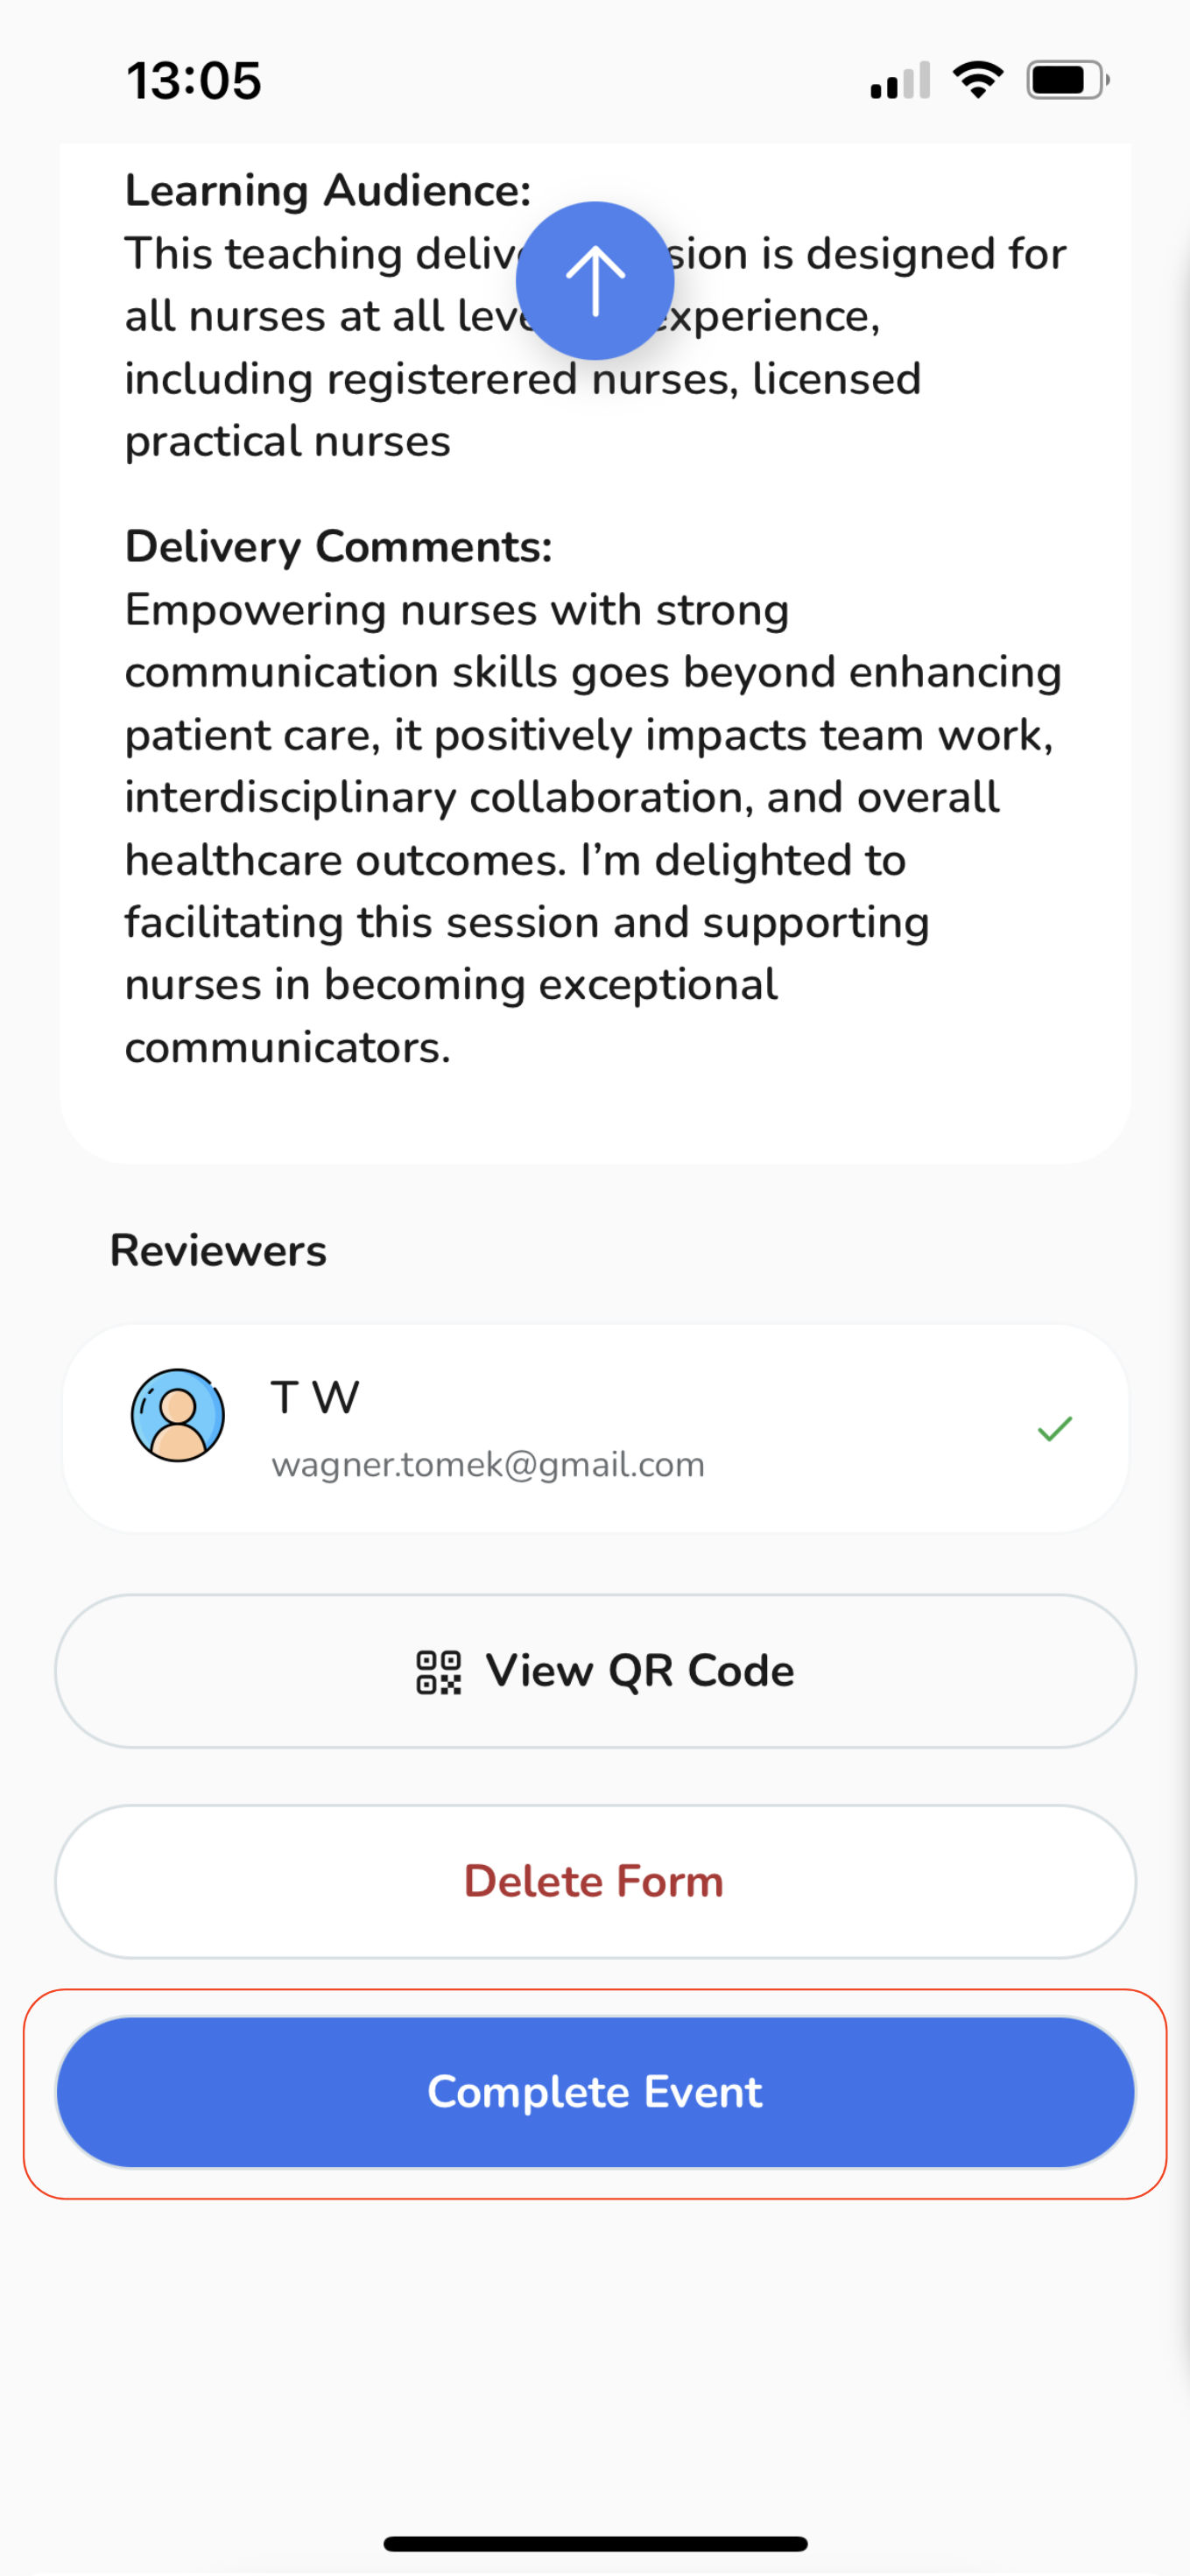
A confirmation pop-up will appear, to view the feedback simply tap on the "Yes" button.
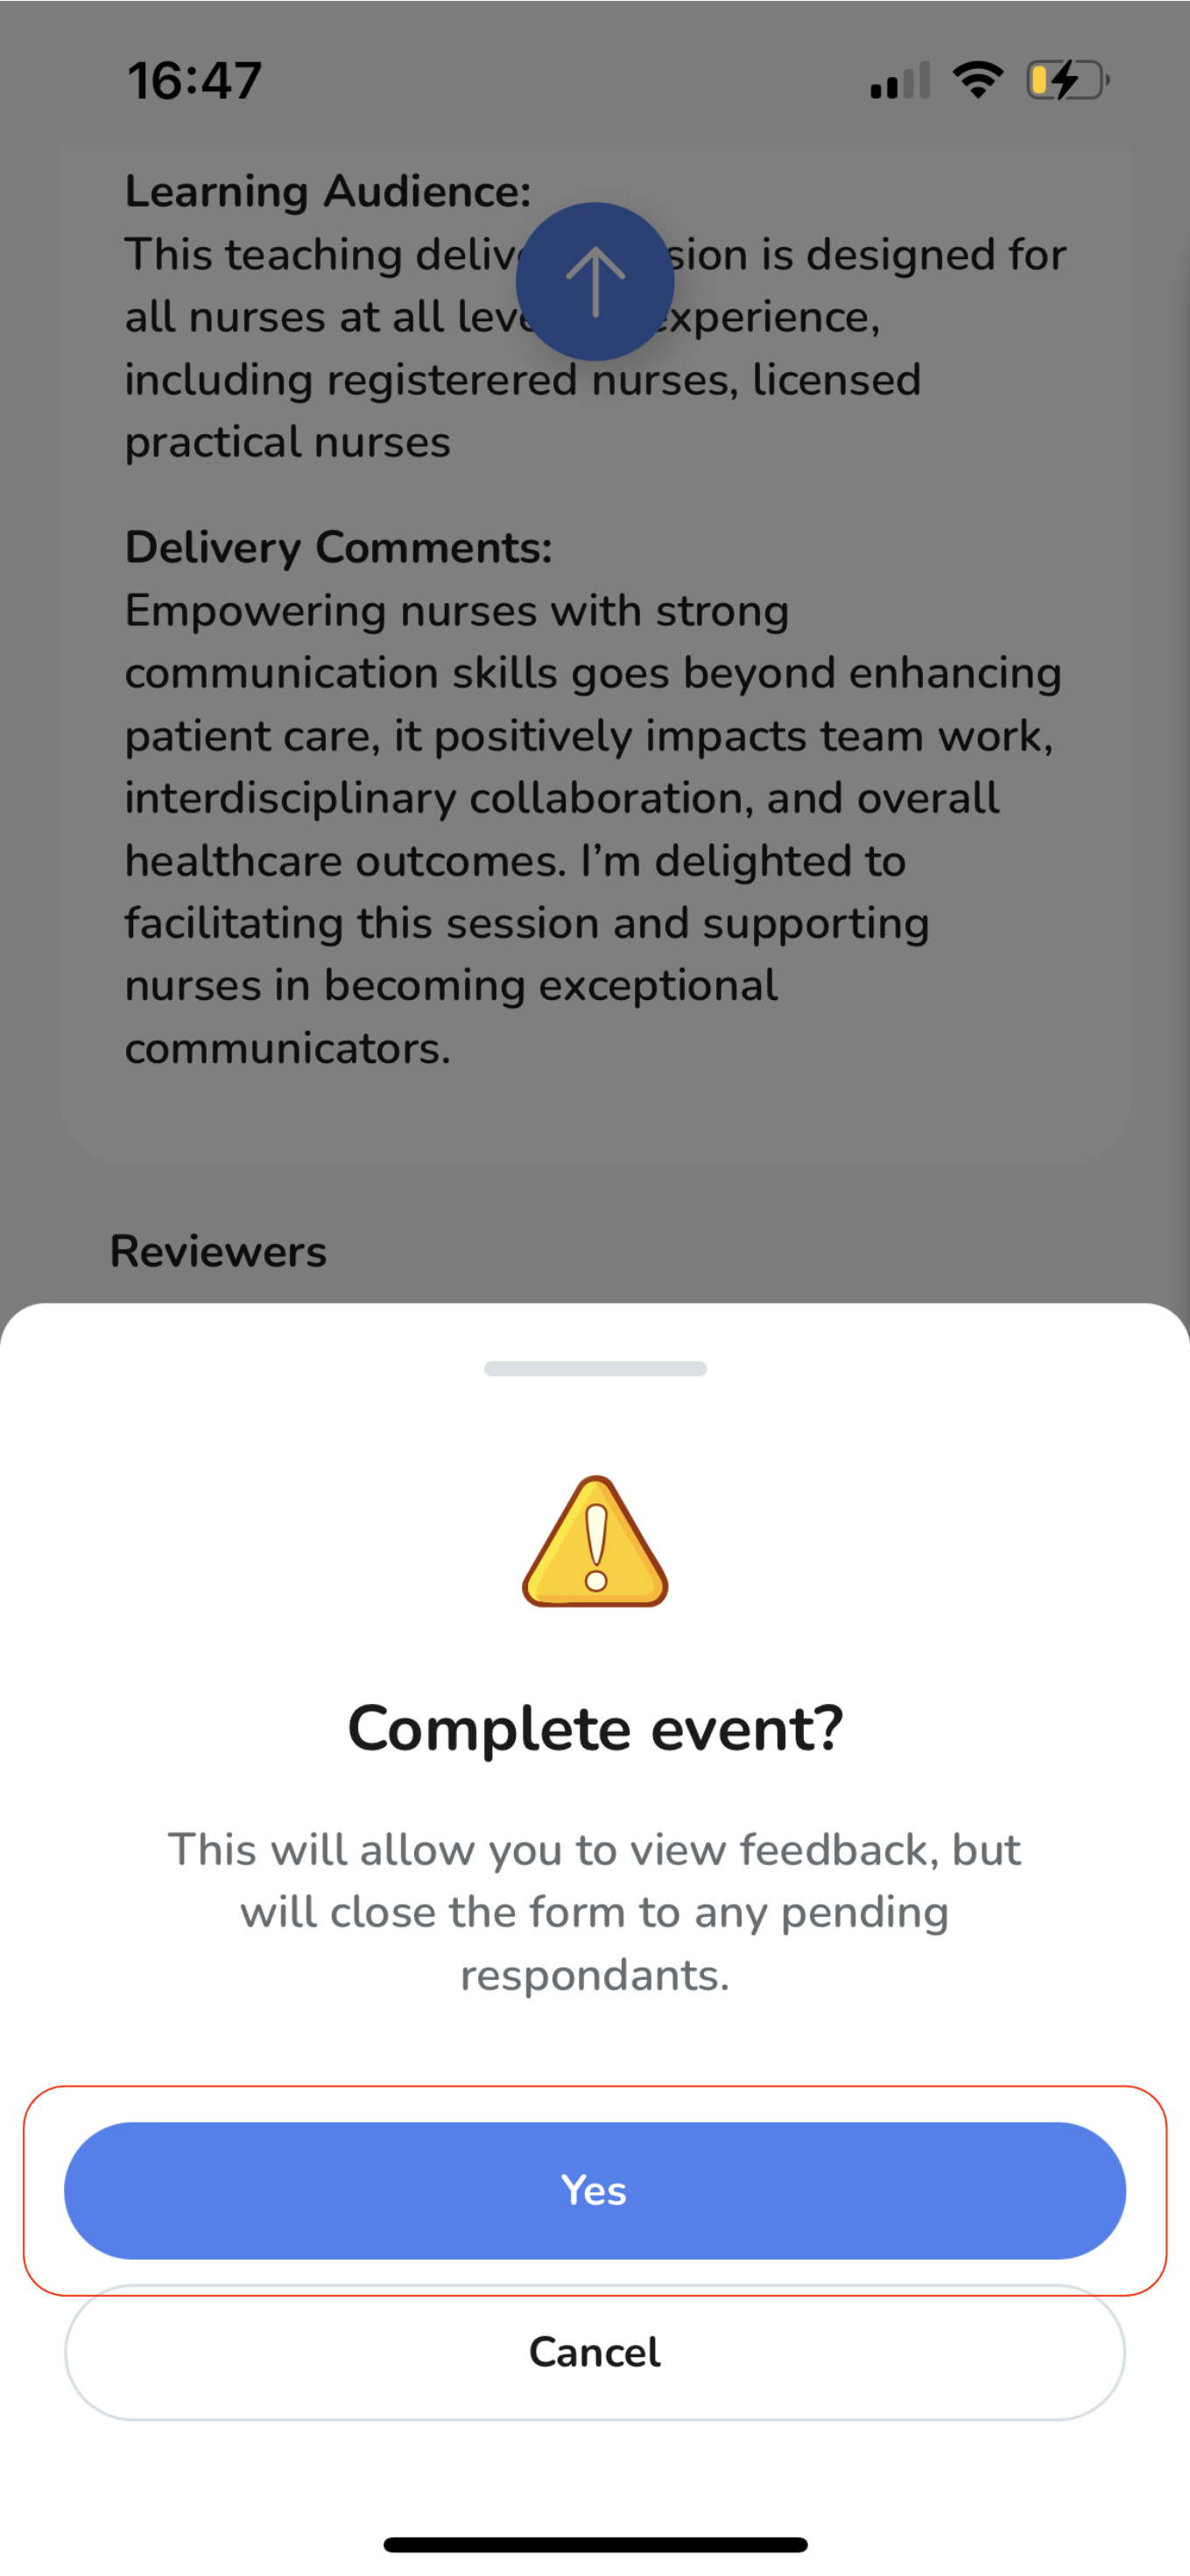
Afterward, you will have access to the feedback overview, including any additional comments posted by your audience. To review the comments, tap on the "Generate Feedback" button. Alternatively, if you prefer to export the feedback as a PDF, select the corresponding button.
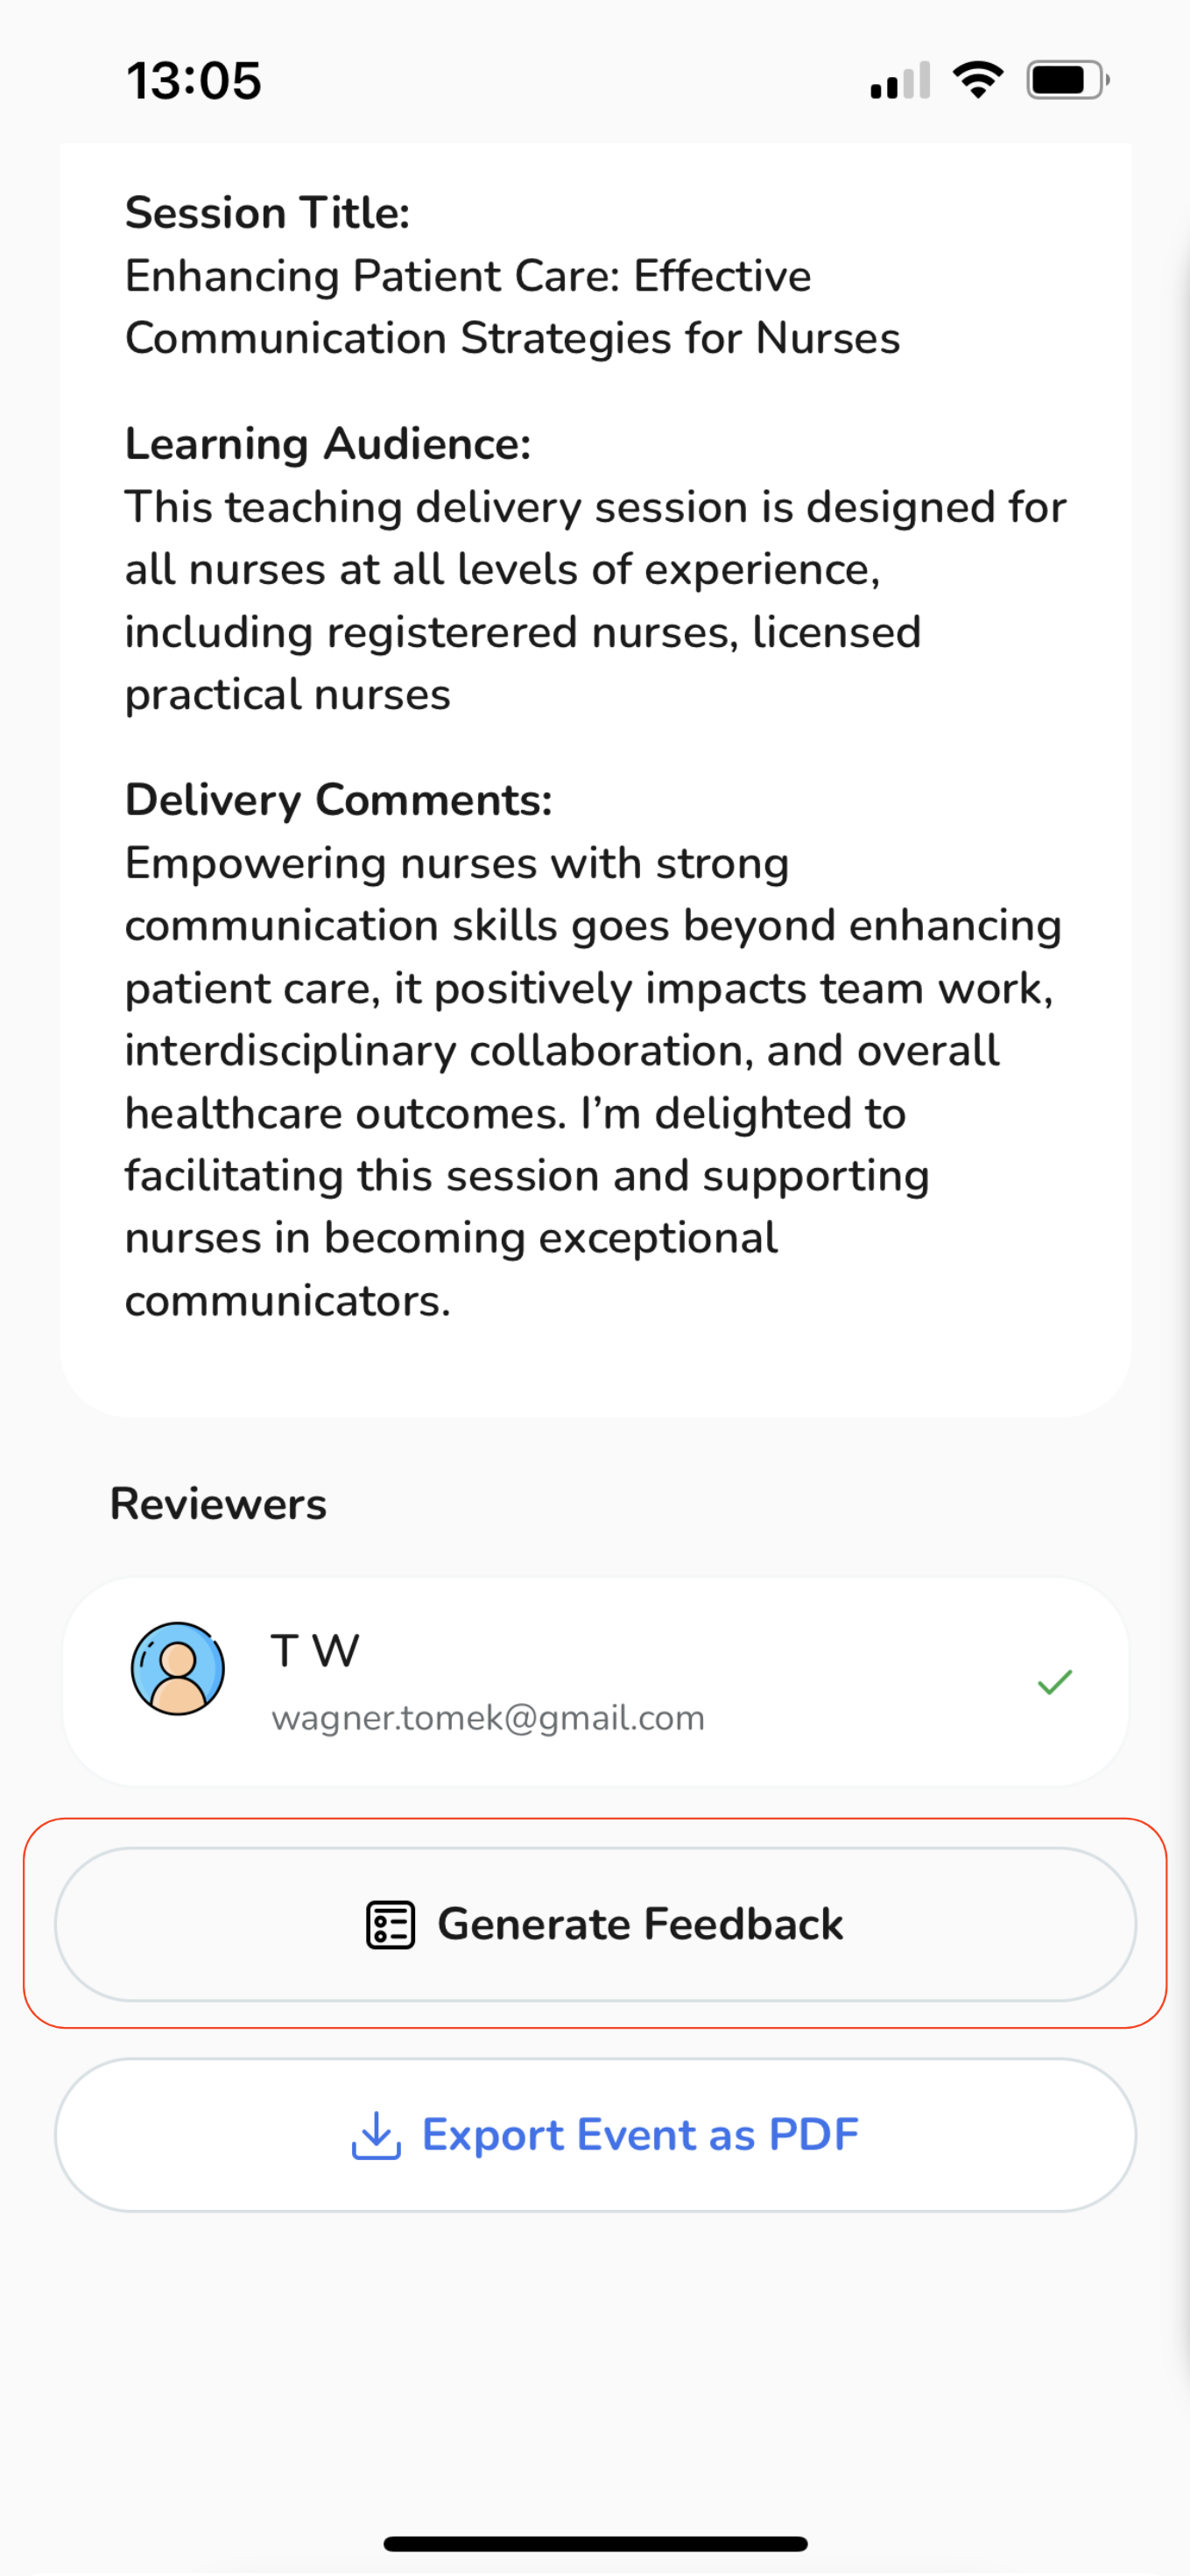
Returning to the Events & Feedback page, you will notice that the event is marked as "Complete" with a green label.
