Adding a New QI/Audit Project Event to Your Portfolio. | Eolas Medical | Help Center
Learn how to add a QI/Audit Project event to your portfolio, attach support evidence, request feedback, and submit the event.
As healthcare professionals, the pursuit of excellence in patient care and personal growth is a constant journey. One powerful way to demonstrate your commitment to quality care and lifelong learning is by incorporating Audit/QI (Quality Improvement) Projects into your professional portfolio.
Why Audit/QI Projects Matter?
Audit/QI Projects are at the heart of quality healthcare. They serve as a vehicle for identifying areas of improvement, implementing evidence-based solutions, and measuring the impact on patient care. Healthcare professionals' participation in these projects signifies a commitment to continuous learning and quality enhancement, a vital aspect of modern healthcare practice.
Centralised Record Keeping.
Maintain a central repository of all your quality improvement initiatives. This makes it easy to access and share your accomplishments at any time.
Interactive Documentation.
You can create dynamic, multimedia-rich documentation of your projects, which enhances your ability to convey the project's scope, process, and outcomes.
Measurable Impact.
Display quantitative and qualitative data, highlighting the measurable impact of your quality improvement efforts. Use charts, graphs, and testimonials to tell a compelling story.
Continuous Learning Showcase.
Show your journey of continuous learning and improvement. Document how each project builds on the previous one, reflecting your growth as a healthcare professional.
Demonstration of Leadership.
Showcase your leadership and collaboration skills. Demonstrate your ability to work within a team and lead change initiatives in healthcare.
To create a New QI/Audit event simply follow this steps:
Web - Add a New QI/Audit Project event.
-
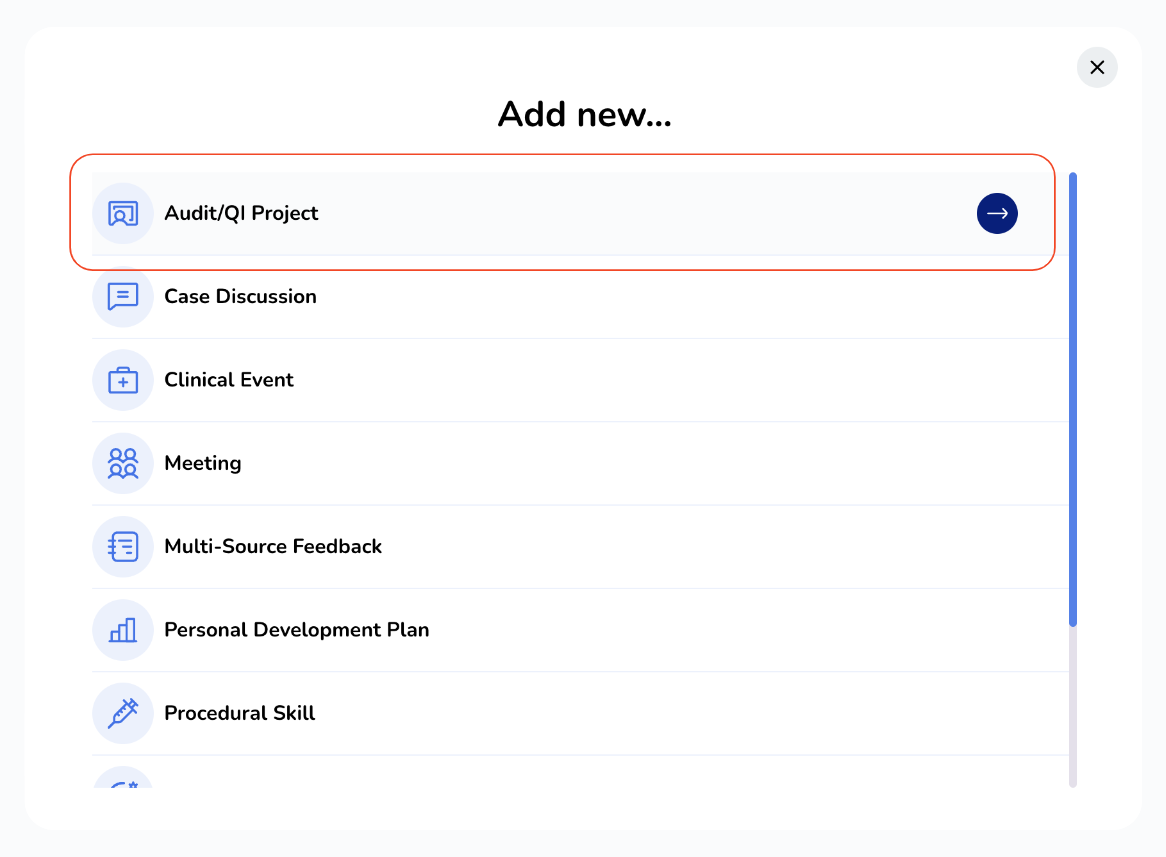
Start by choosing "QI/Audit Project" from the list of available options.
-
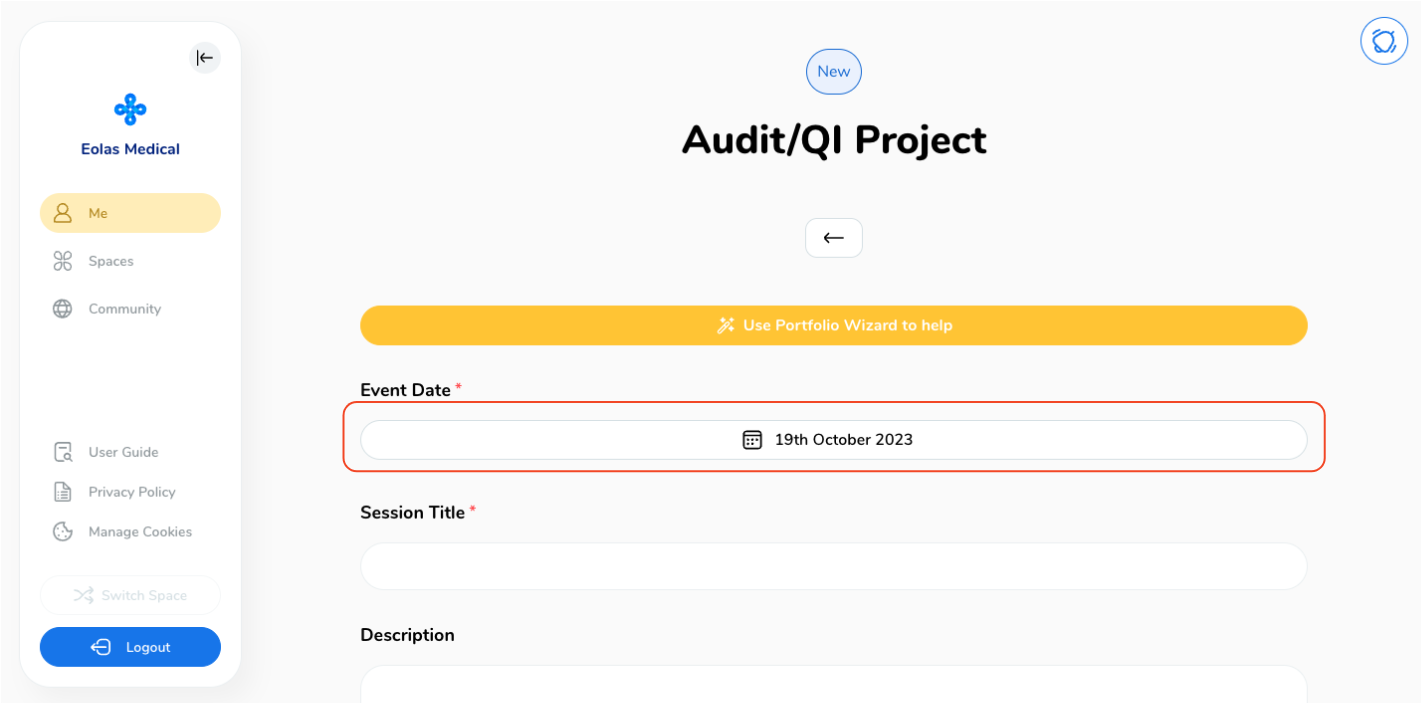
Select the date for your event. By default, the current date will be displayed, but if you wish to modify it, simply click on the "Date" button and choose your preferred date.
-
Provide a descriptive title for your project.
-
Compose your description.
-
Please don't hesitate to provide any extra remarks and action steps that you find important.
-
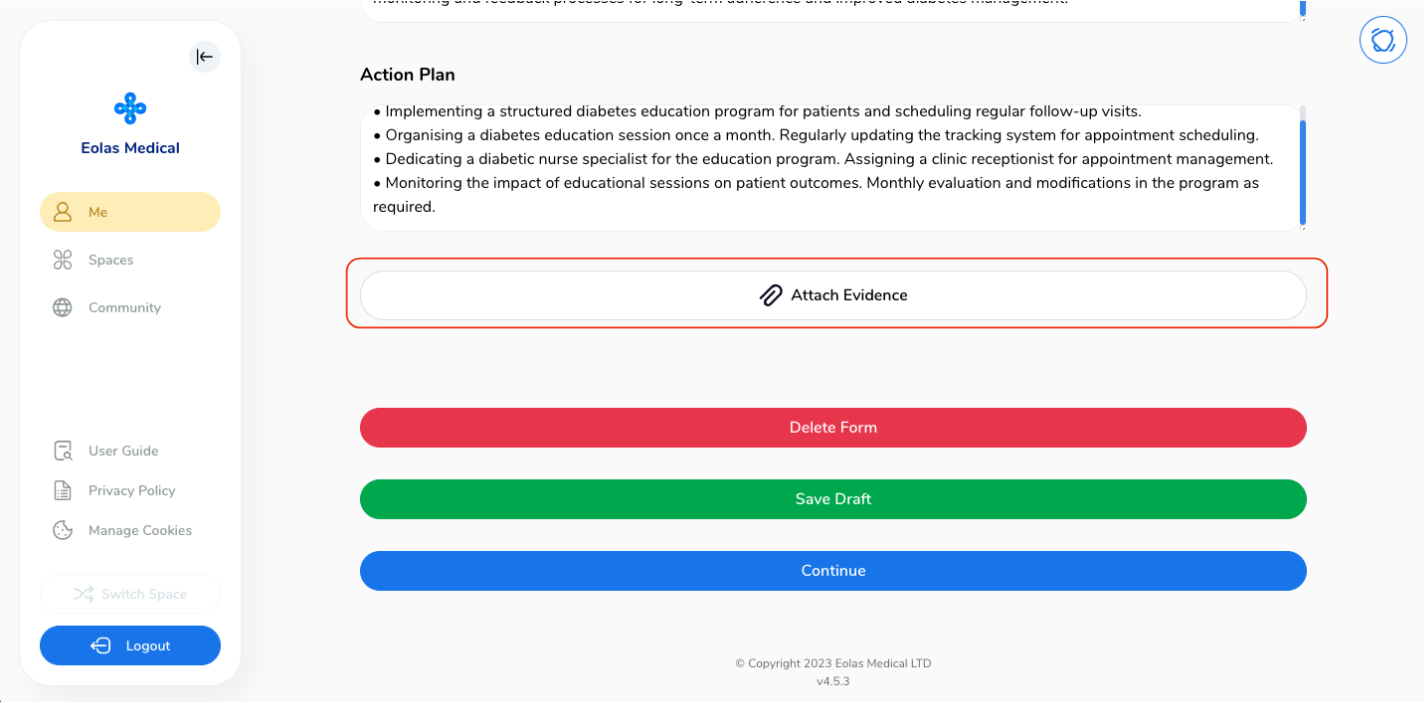
If you're looking to enhance your record-keeping for the QI/Audit Project, click on the "Attach Evidence" option. This will enable you to maintain a comprehensive record, ensuring easy access and documentation for future reference.
-
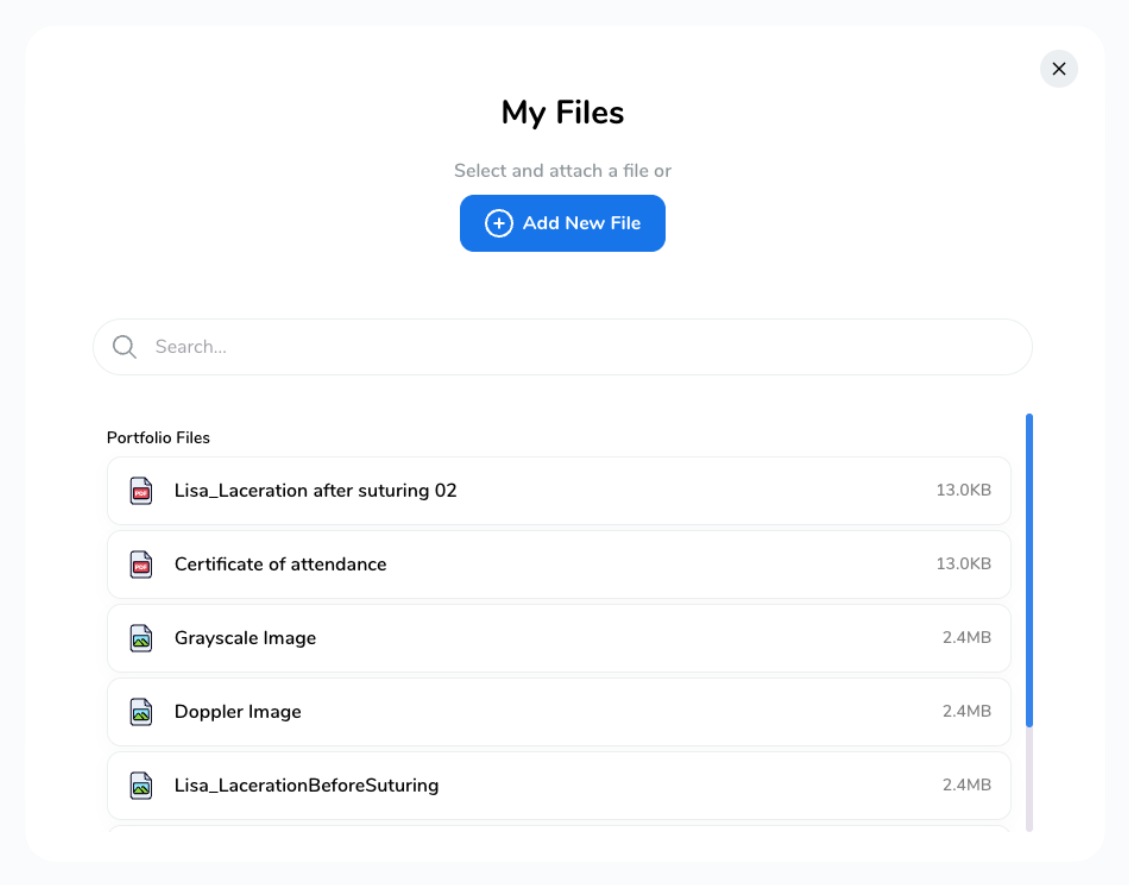
A pop-up window will appear. You can either choose from your existing files or upload a new one from your device.
-
To upload a new file, select "Add New File".
-
Depending on your needs, you can upload various file types like MS Office documents, PDFs, images, videos and web links.
-
To upload a new file,
-
To add a weblink,
-
If you wish to attach multiple files, simply click on "Attach Evidence" once more and repeat the process.
-
You can choose to share the attachment with your assessor or keep it private by clicking the "toggle" button.
-
When you're done, you have few options:
-
Once you've chosen "Continue", a pop-up window will appear, offering you the option to assign an assessor and gather feedback.
Start by choosing "QI/Audit Project" from the list of available options.
Select the date for your event. By default, the current date will be displayed, but if you wish to modify it, simply click on the "Date" button and choose your preferred date.
Provide a descriptive title for your project.
Compose your description.
Please don't hesitate to provide any extra remarks and action steps that you find important.
If you're looking to enhance your record-keeping for the QI/Audit Project, click on the "Attach Evidence" option. This will enable you to maintain a comprehensive record, ensuring easy access and documentation for future reference.
A pop-up window will appear. You can either choose from your existing files or upload a new one from your device.
To upload a new file, select "Add New File".
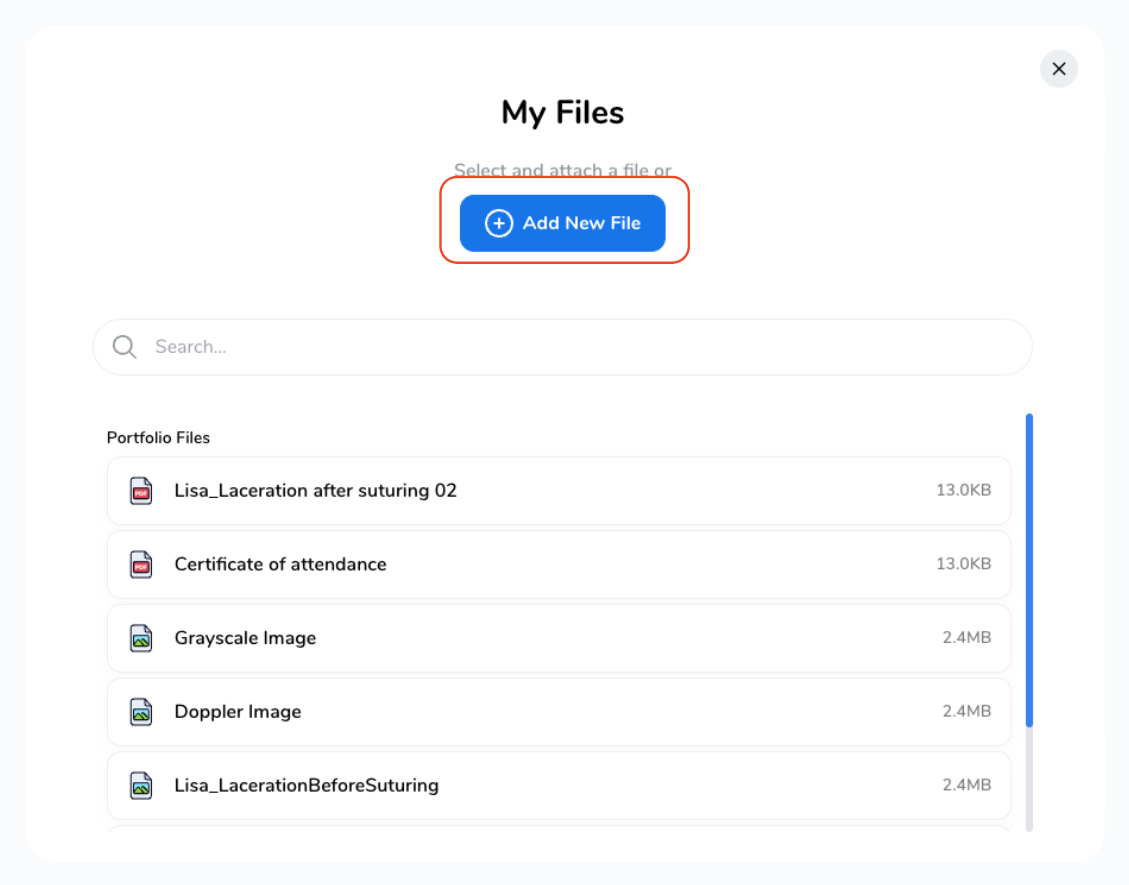
Depending on your needs, you can upload various file types like MS Office documents, PDFs, images, videos and web links.
To upload a new file,
-
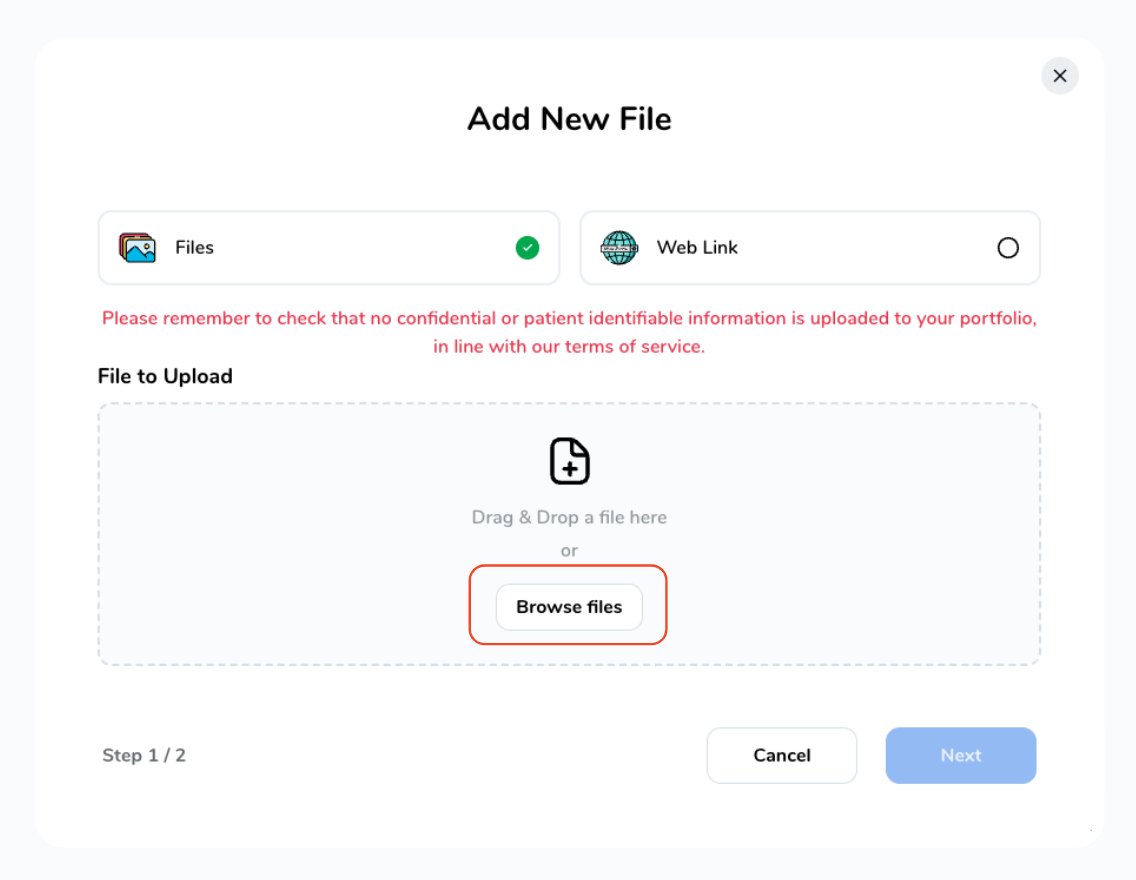
Select "Files", click on "Browse Files" and select a file from your device, then click "Next".
Select "Files", click on "Browse Files" and select a file from your device, then click "Next".
-
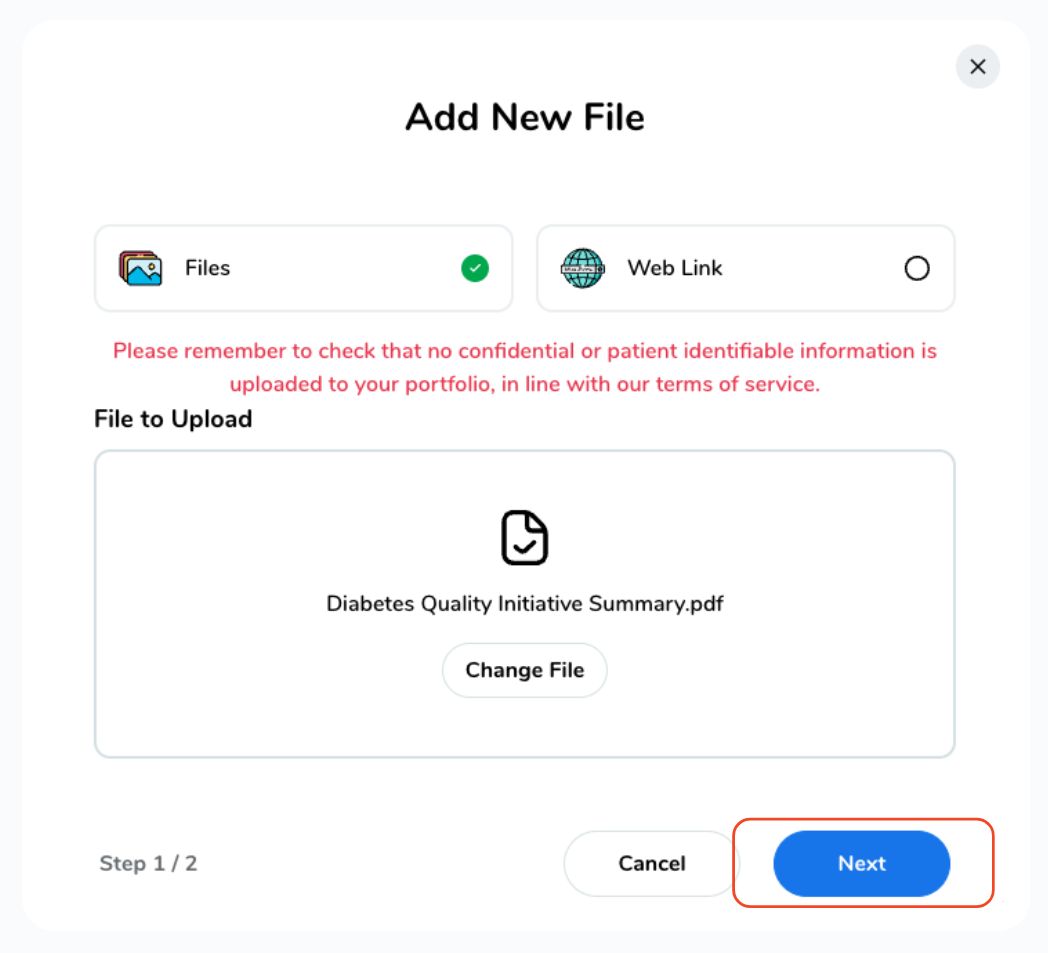
Select a file from your device, then click "Next".
Select a file from your device, then click "Next".
-
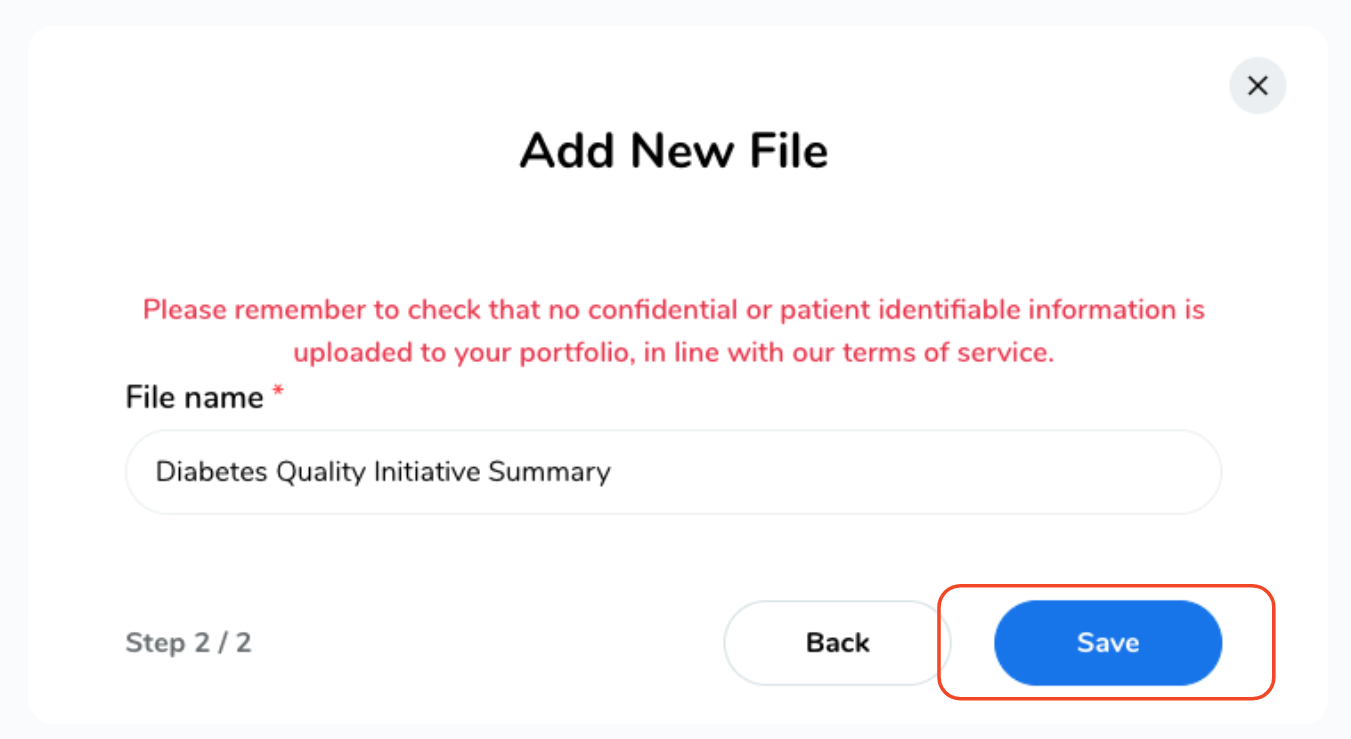
Finally, give your file a name and click "Save"
Finally, give your file a name and click "Save"
To add a weblink,
-
Select "Web Link",
Select "Web Link",
-
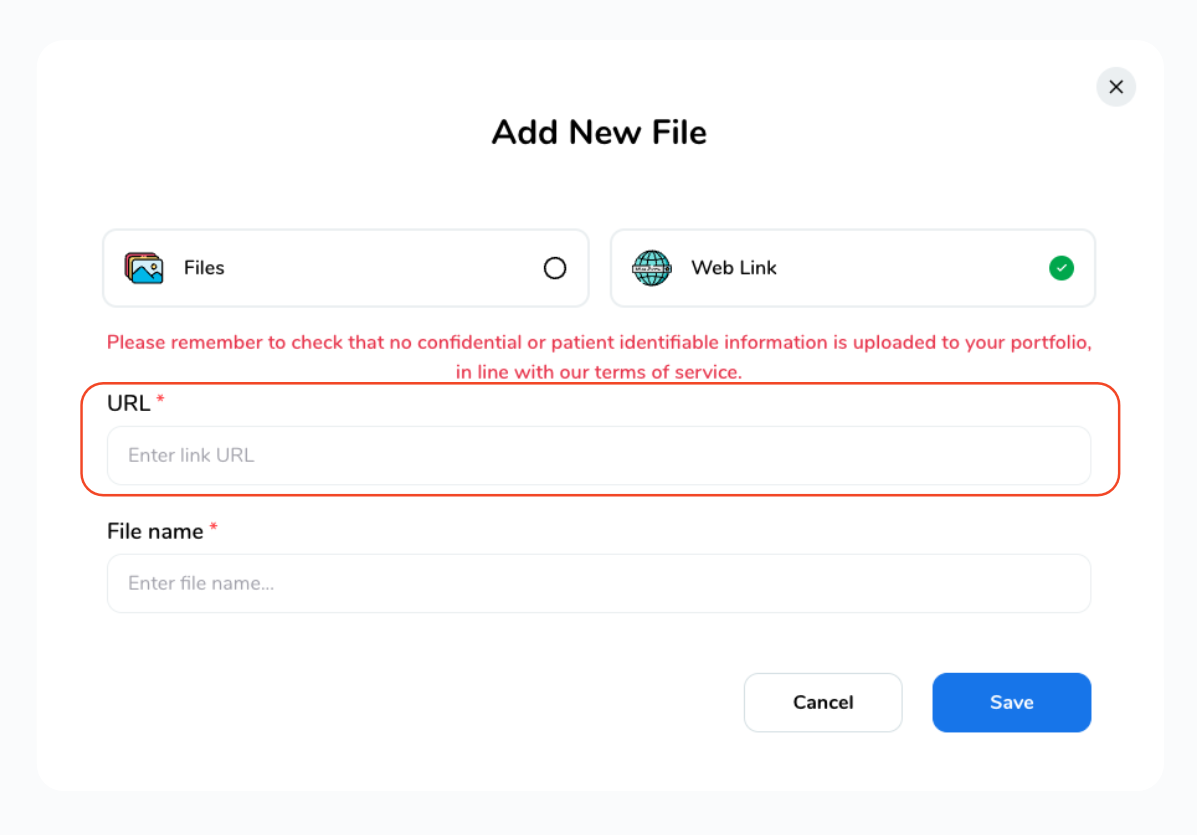
Enter the URL link and a File Name, then click "Save"
Enter the URL link and a File Name, then click "Save"
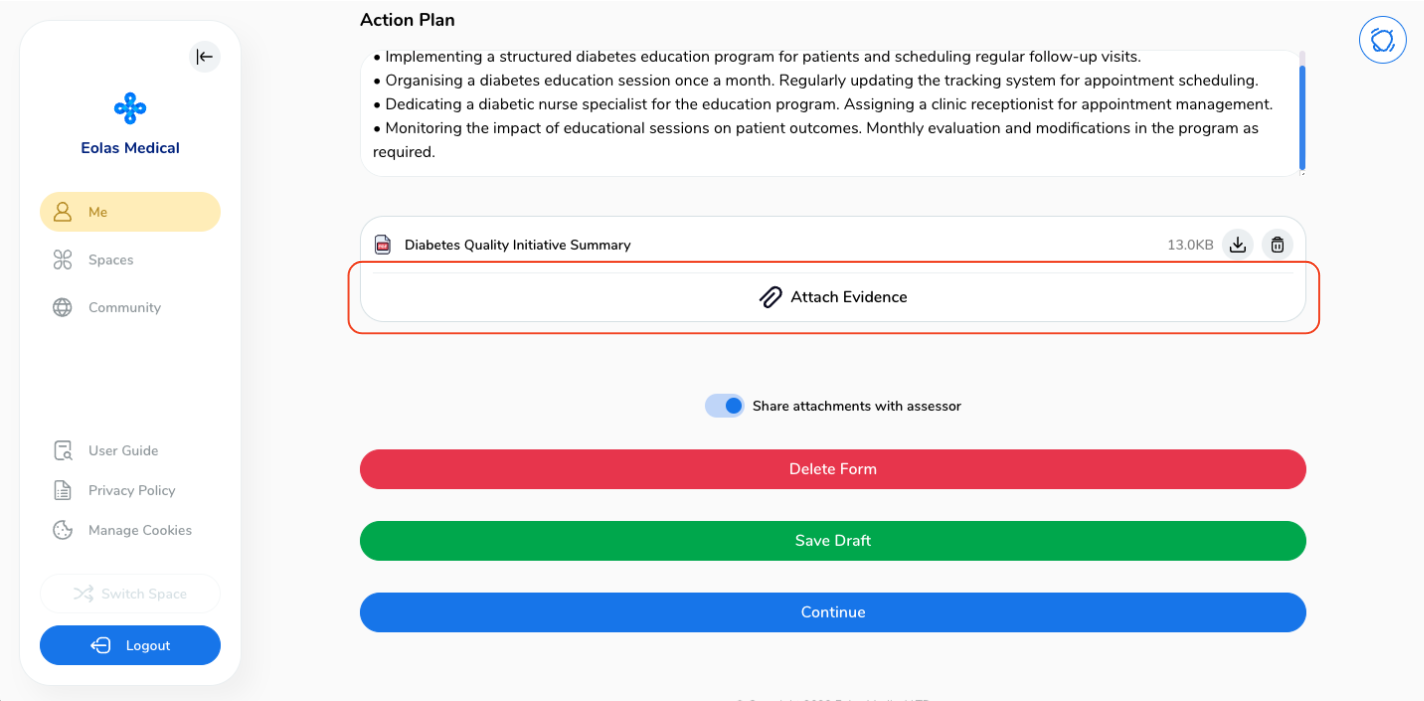
If you wish to attach multiple files, simply click on "Attach Evidence" once more and repeat the process.
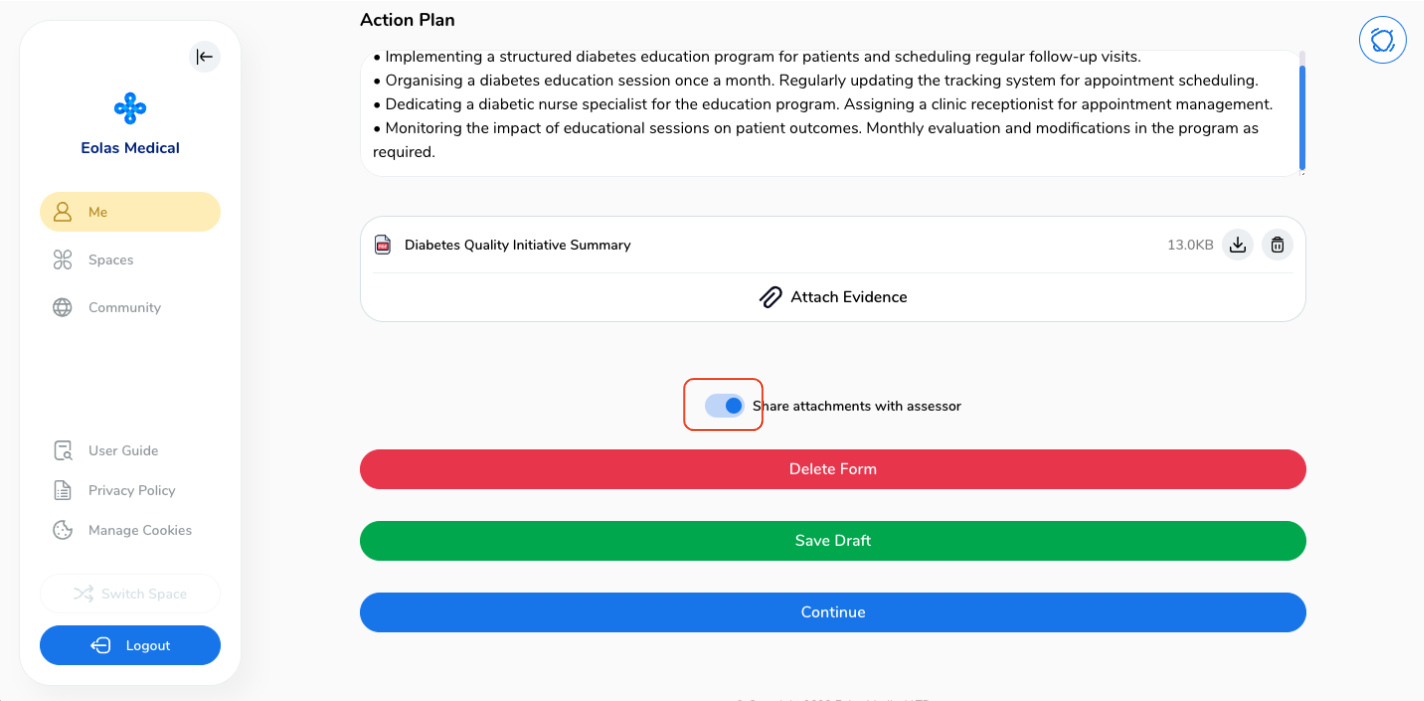
You can choose to share the attachment with your assessor or keep it private by clicking the "toggle" button.
When you're done, you have few options:
-
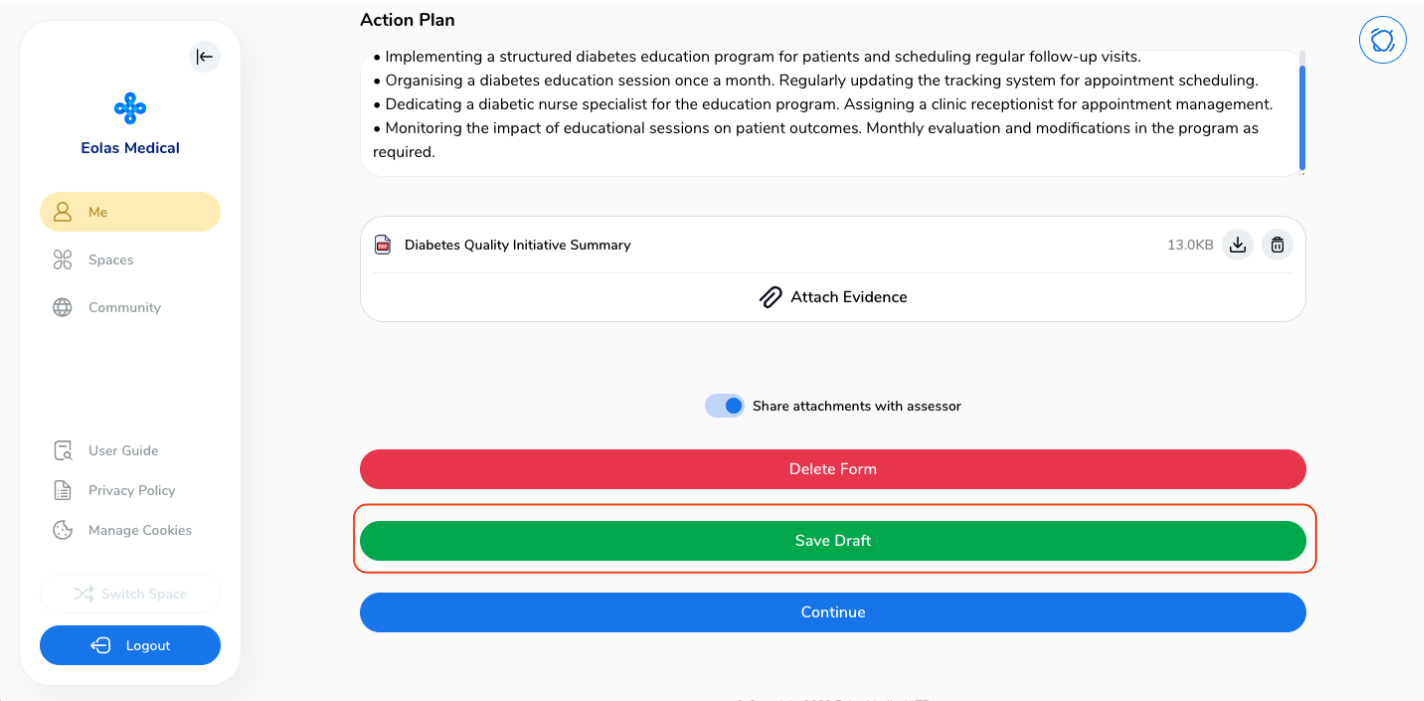
Save your session as a draft for future reference and make any necessary adjustments or,
Save your session as a draft for future reference and make any necessary adjustments or,
-
Alternatively, click the "Continue" button to proceed with the submission.
Alternatively, click the "Continue" button to proceed with the submission.
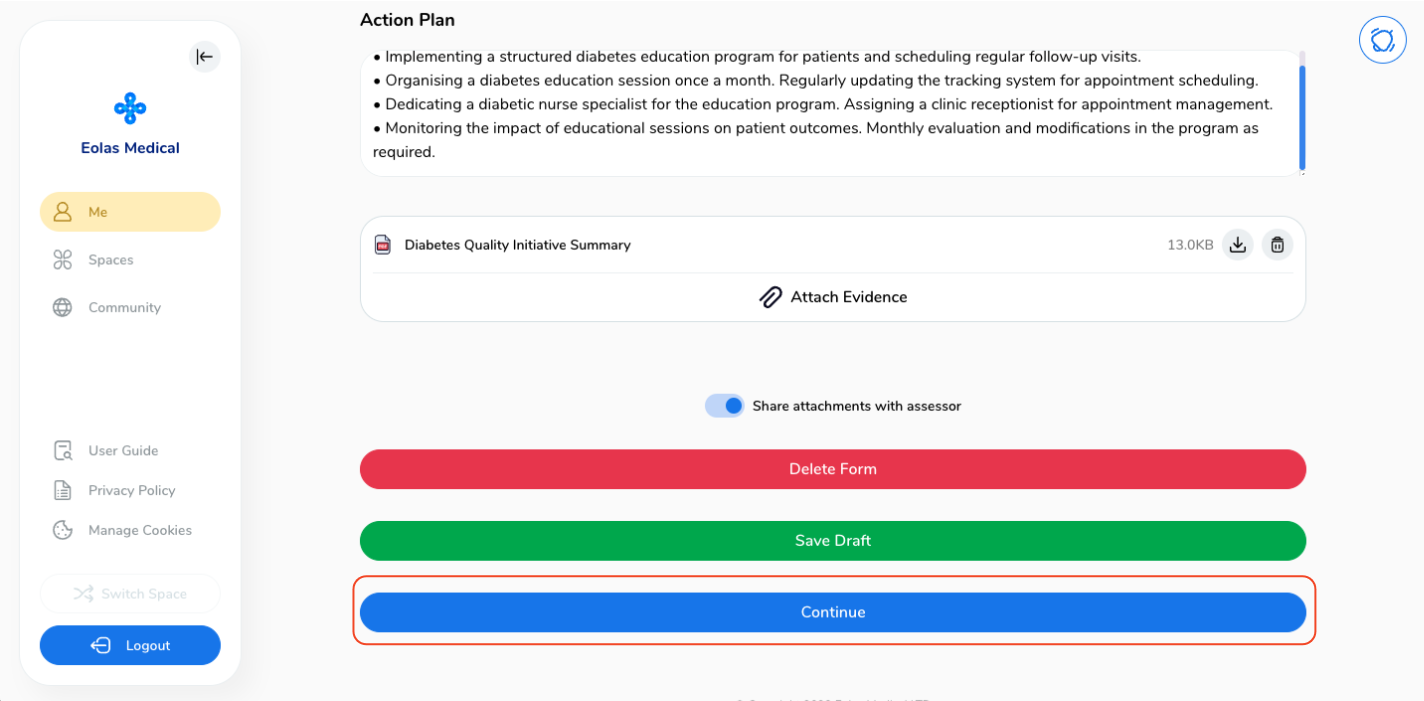
Once you've chosen "Continue", a pop-up window will appear, offering you the option to assign an assessor and gather feedback.
Assigning an assessor to your QI/Audit Project Event.
-
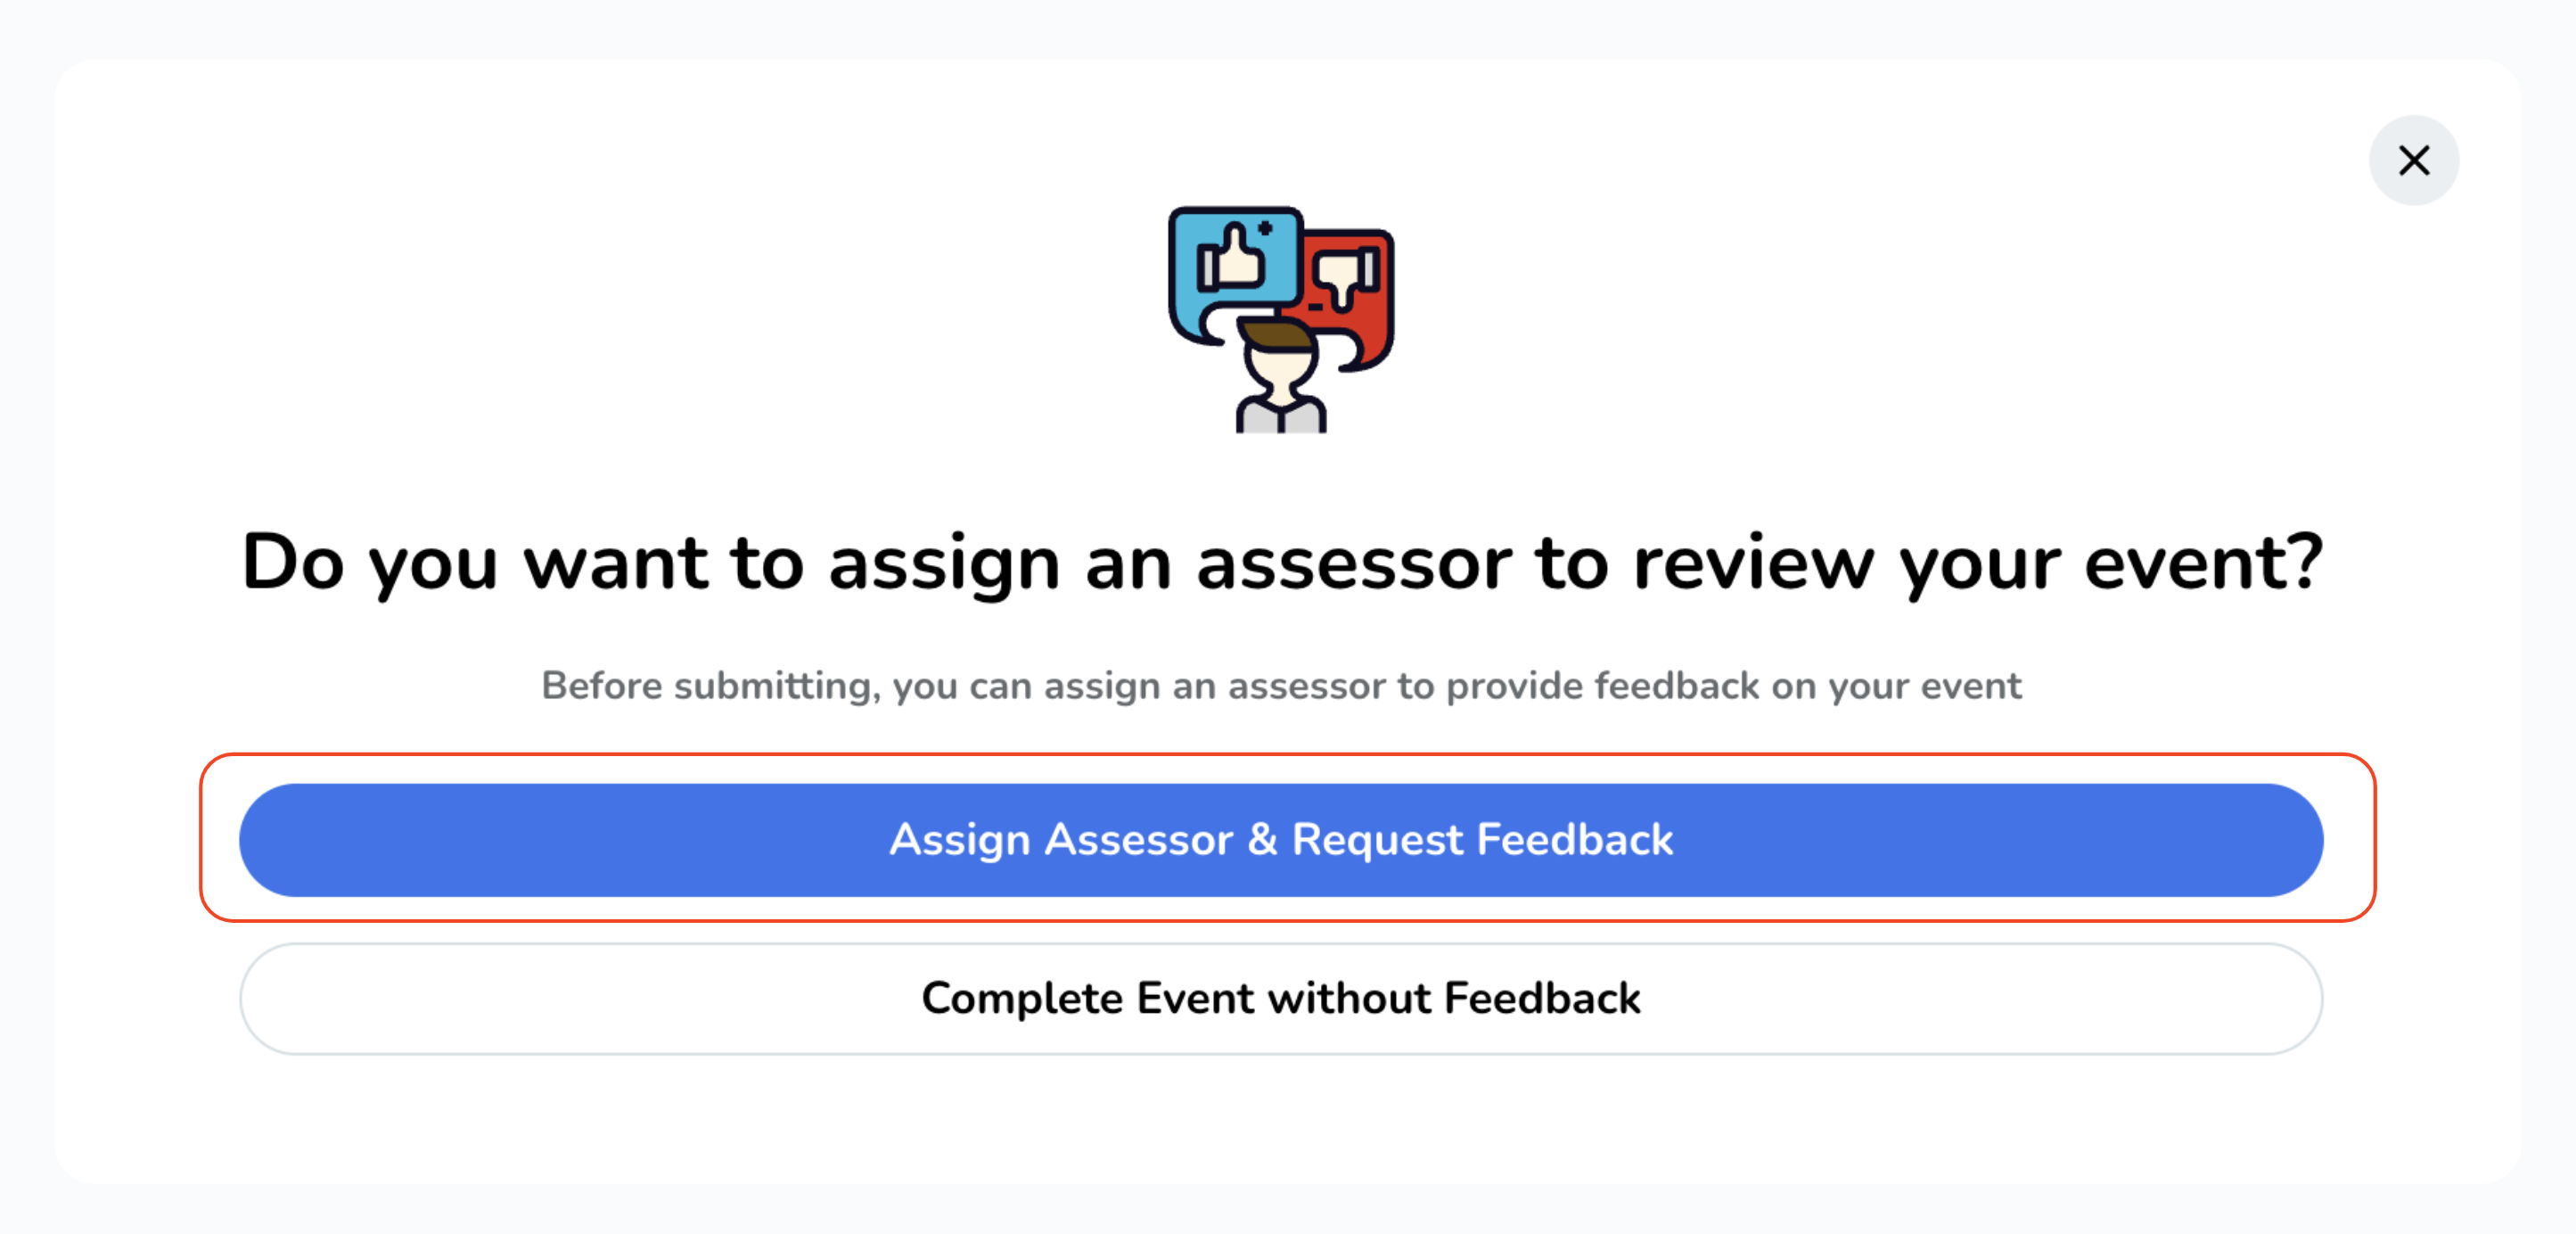
To assign an assessor for your QI/Audit Project, click on the "Assign Assessor & Request Feedback" button. If you prefer to complete the event without feedback, choose the appropriate option accordingly.
-
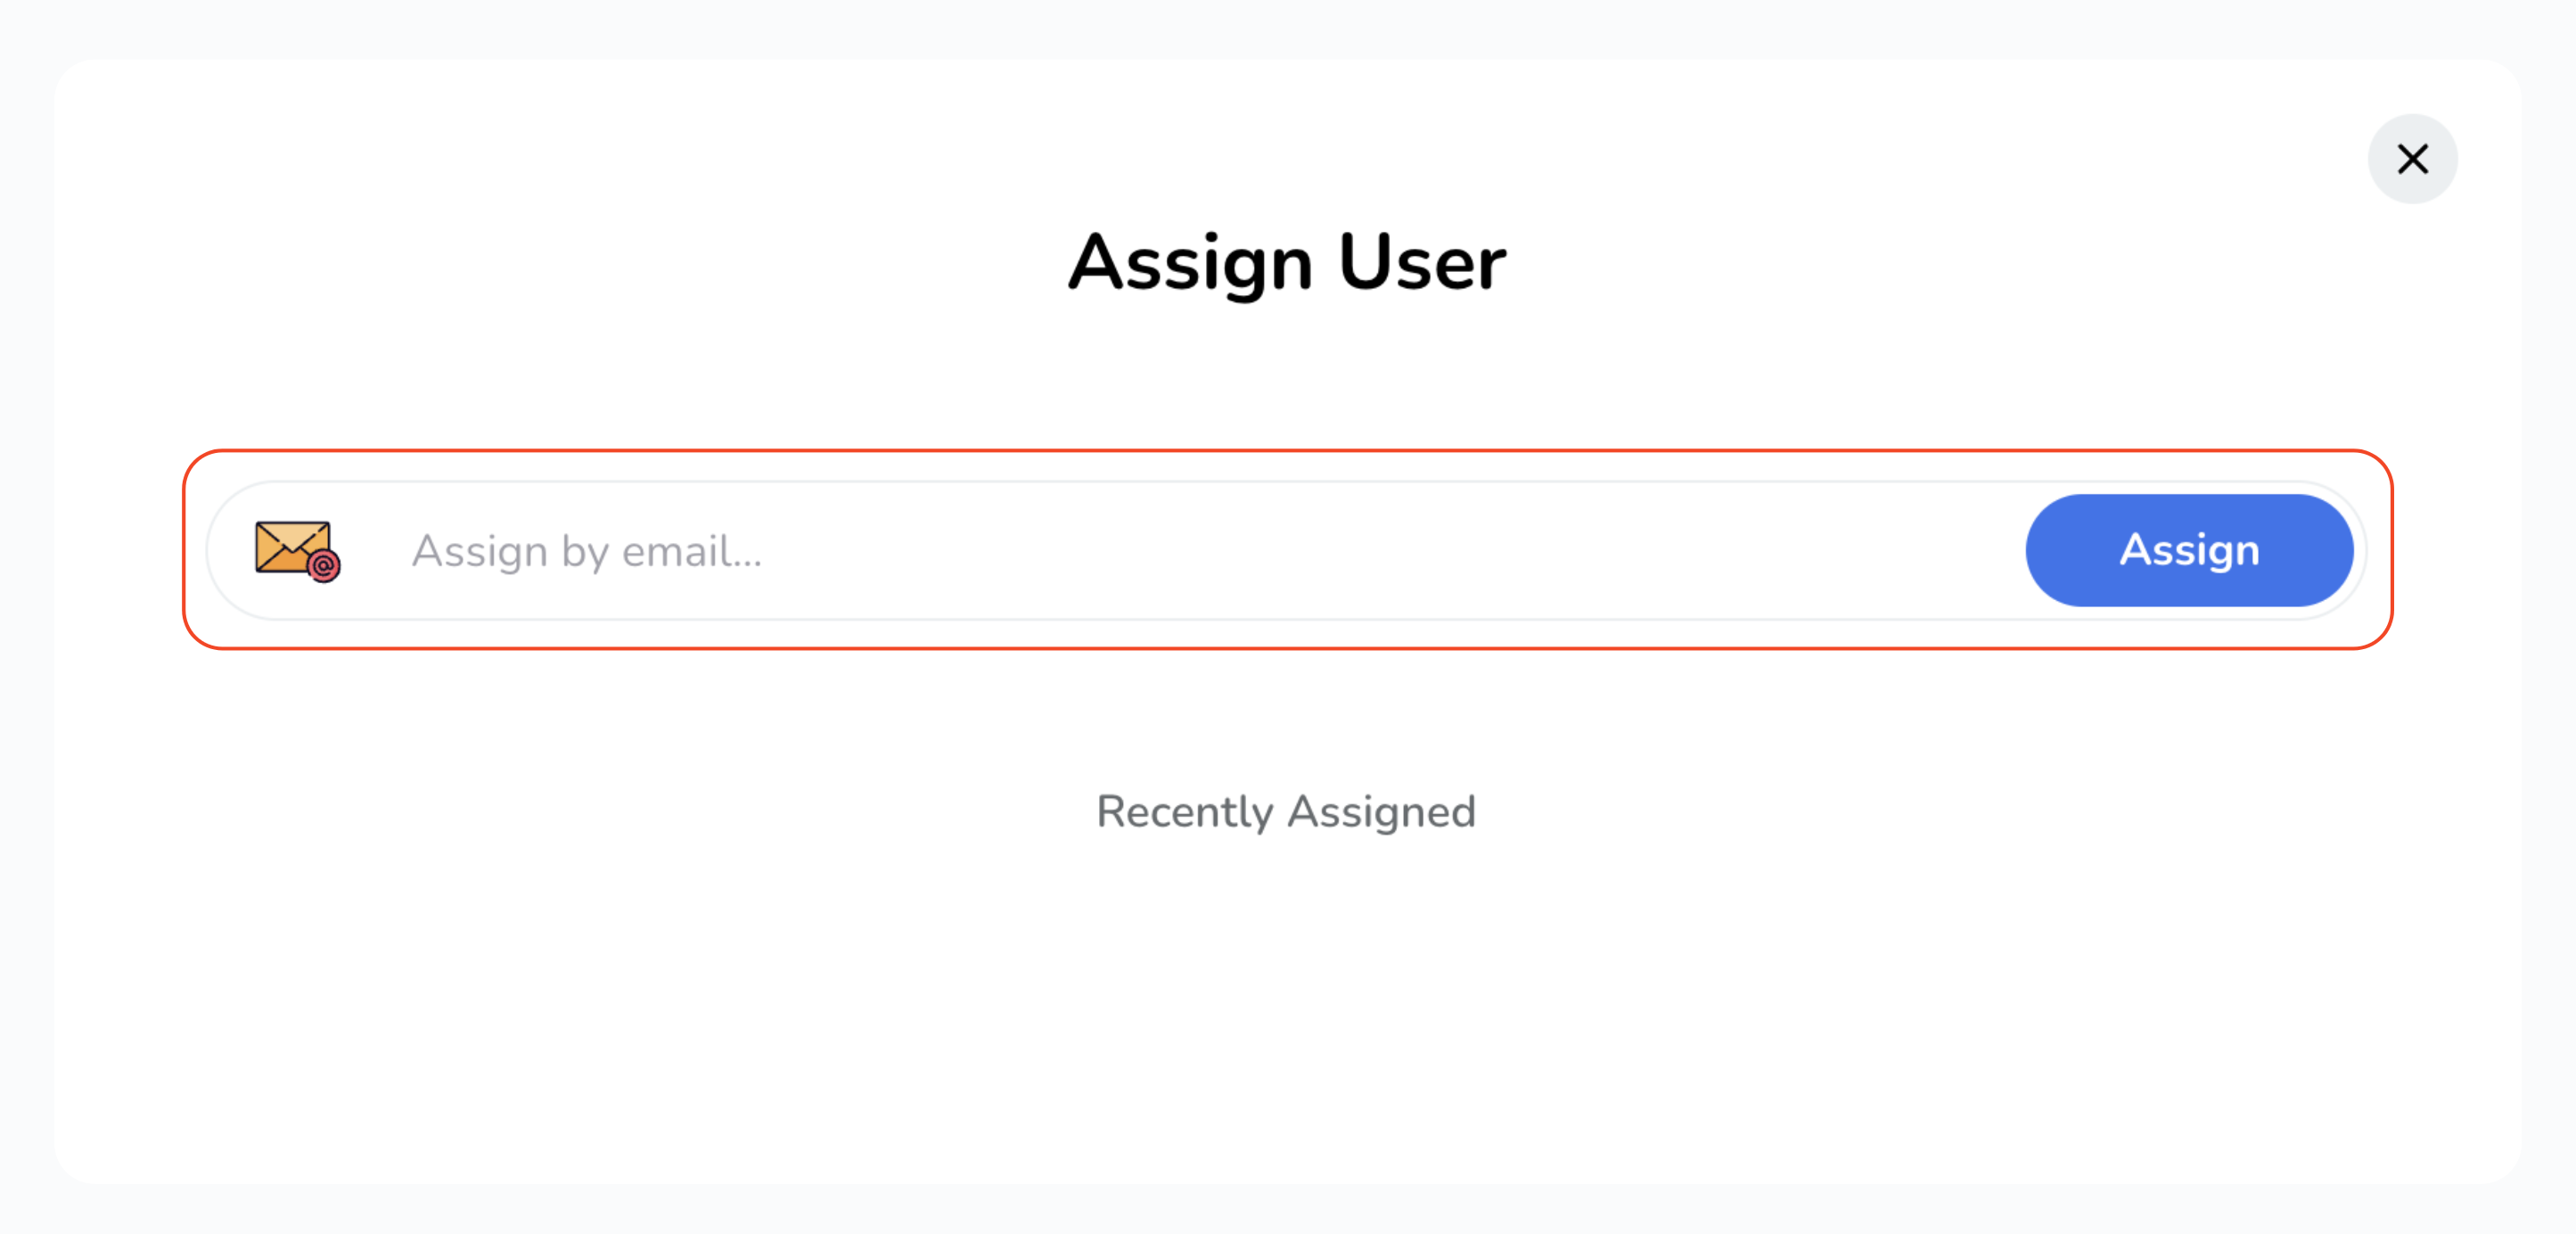
In the pop-up, enter the assessor's email address and click on the "Assign" button. Alternatively, you can choose an assessor from the list of recent assessors (if available).
-
Finally, confirm your selection by clicking on "Submit Event." An email notification will be sent to your assigned assessor.
To assign an assessor for your QI/Audit Project, click on the "Assign Assessor & Request Feedback" button. If you prefer to complete the event without feedback, choose the appropriate option accordingly.
In the pop-up, enter the assessor's email address and click on the "Assign" button. Alternatively, you can choose an assessor from the list of recent assessors (if available).
Finally, confirm your selection by clicking on "Submit Event." An email notification will be sent to your assigned assessor.

What happens after assigning an assessor?
-
Upon submitting, you will be directed to the event's page. Here, you can view important details such as the assigned assessor and the feedback status.
-
At this point your event page will display a yellow label indicating "Pending".
-
In addition, you have the flexibility to:
-
Send a reminder to your assessor.
-
Reassign the assessor.
-
Delete it completely.
-
Or, choose to complete the case without feedback.
-
Upon submitting, you will be directed to the event's page. Here, you can view important details such as the assigned assessor and the feedback status.
At this point your event page will display a yellow label indicating "Pending".
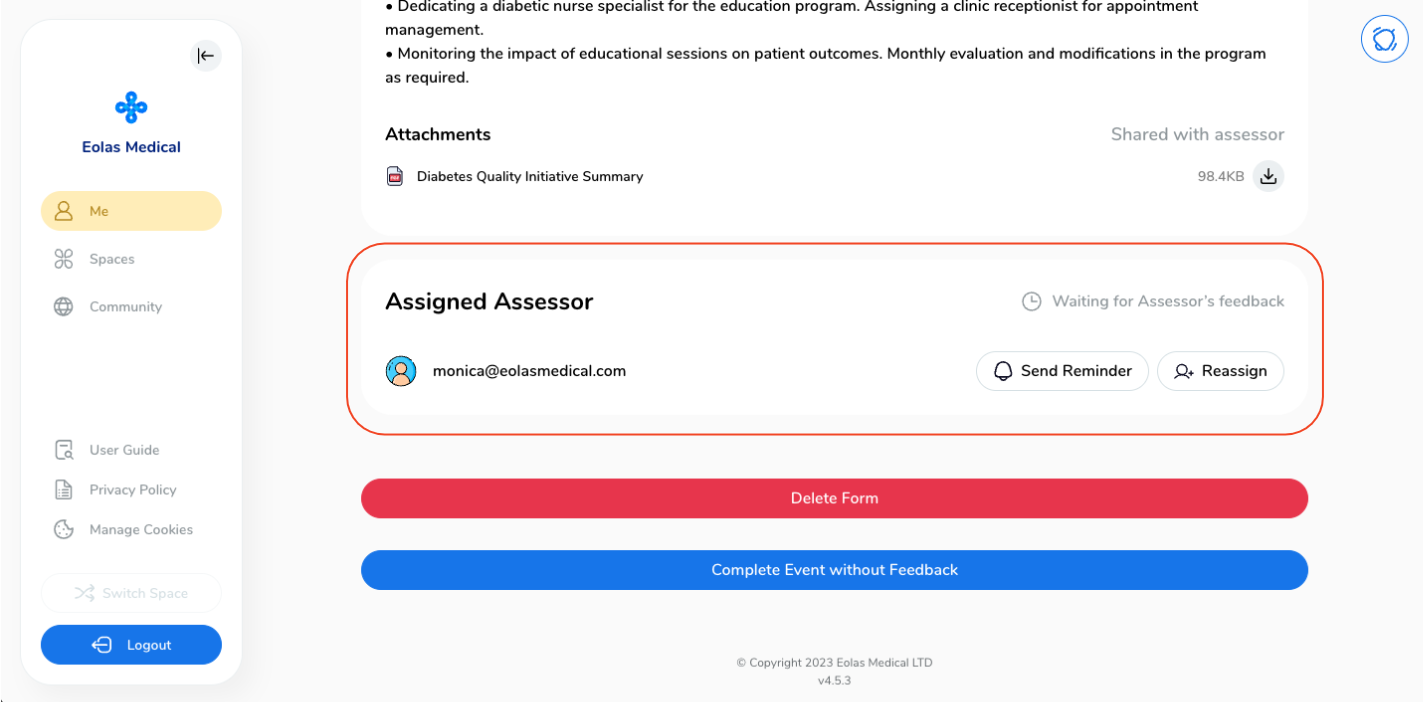
In addition, you have the flexibility to:
-
Send a reminder to your assessor.
Send a reminder to your assessor.
-
Reassign the assessor.
Reassign the assessor.
-
Delete it completely.
Delete it completely.
-
Or, choose to complete the case without feedback.
Or, choose to complete the case without feedback.
Receiving feedback from an assessor.
-
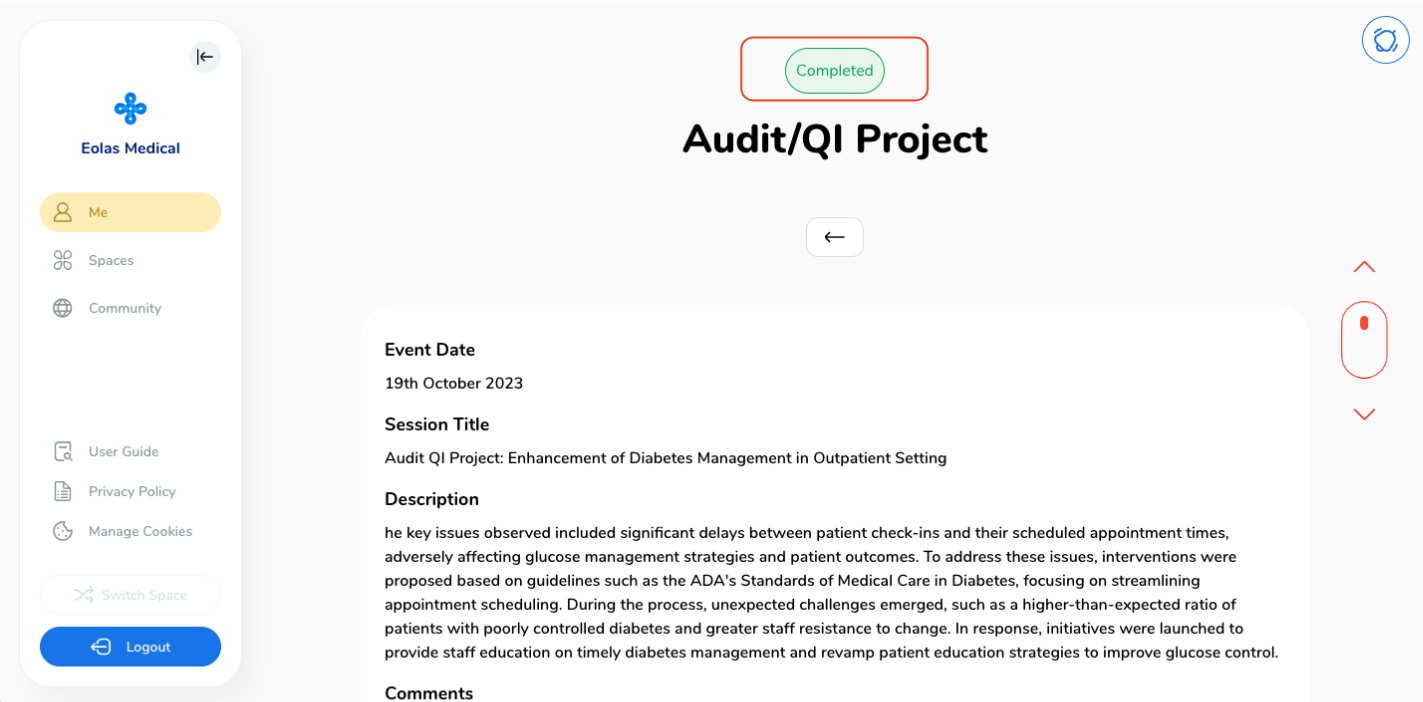
After receiving feedback from your assessor, the event's page will display a green label indicating "Completed." To review the feedback, simply scroll down on the page.
-
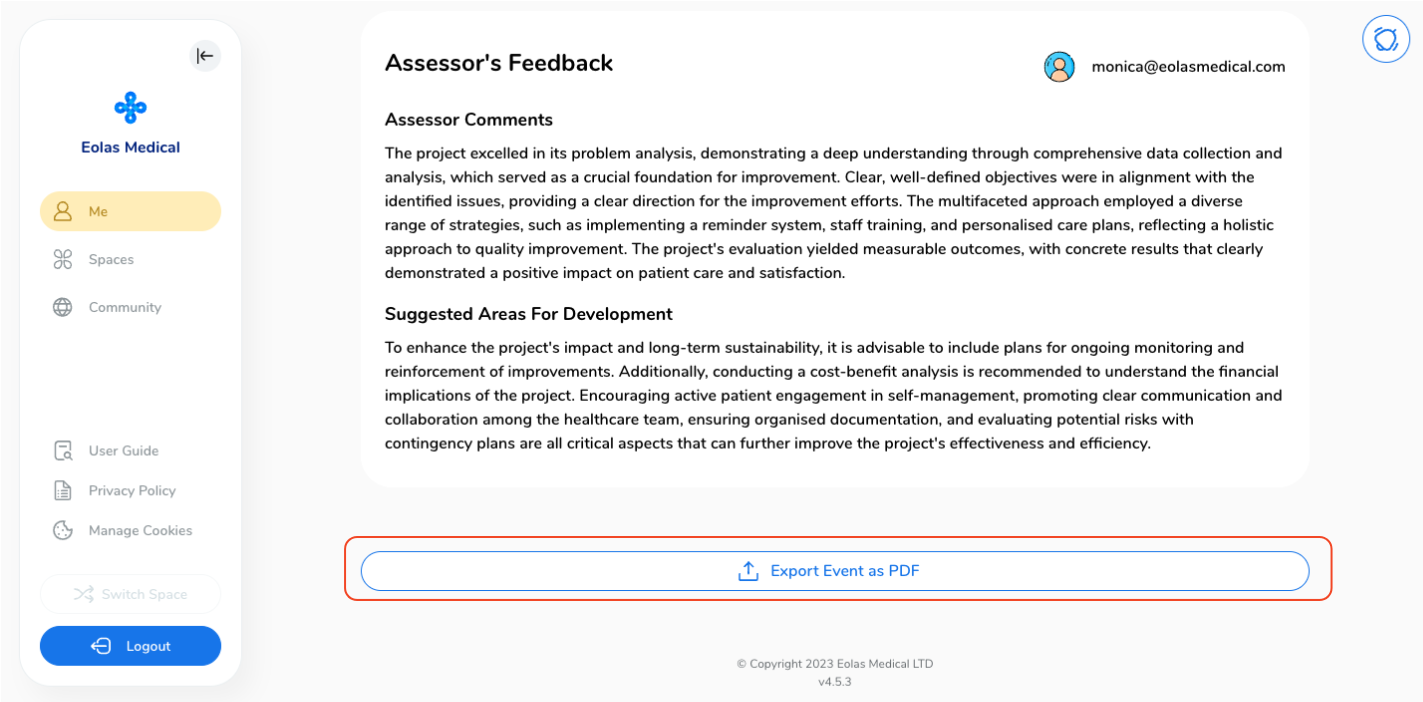
Additionally, if desired, you have the option to export the feedback as a PDF.
After receiving feedback from your assessor, the event's page will display a green label indicating "Completed." To review the feedback, simply scroll down on the page.
Additionally, if desired, you have the option to export the feedback as a PDF.
And there you have it – a comprehensive guide to optimising your QI/Audit Project event in your Portfolio.
Mobile - Add a New QI/Audit Project event.
-
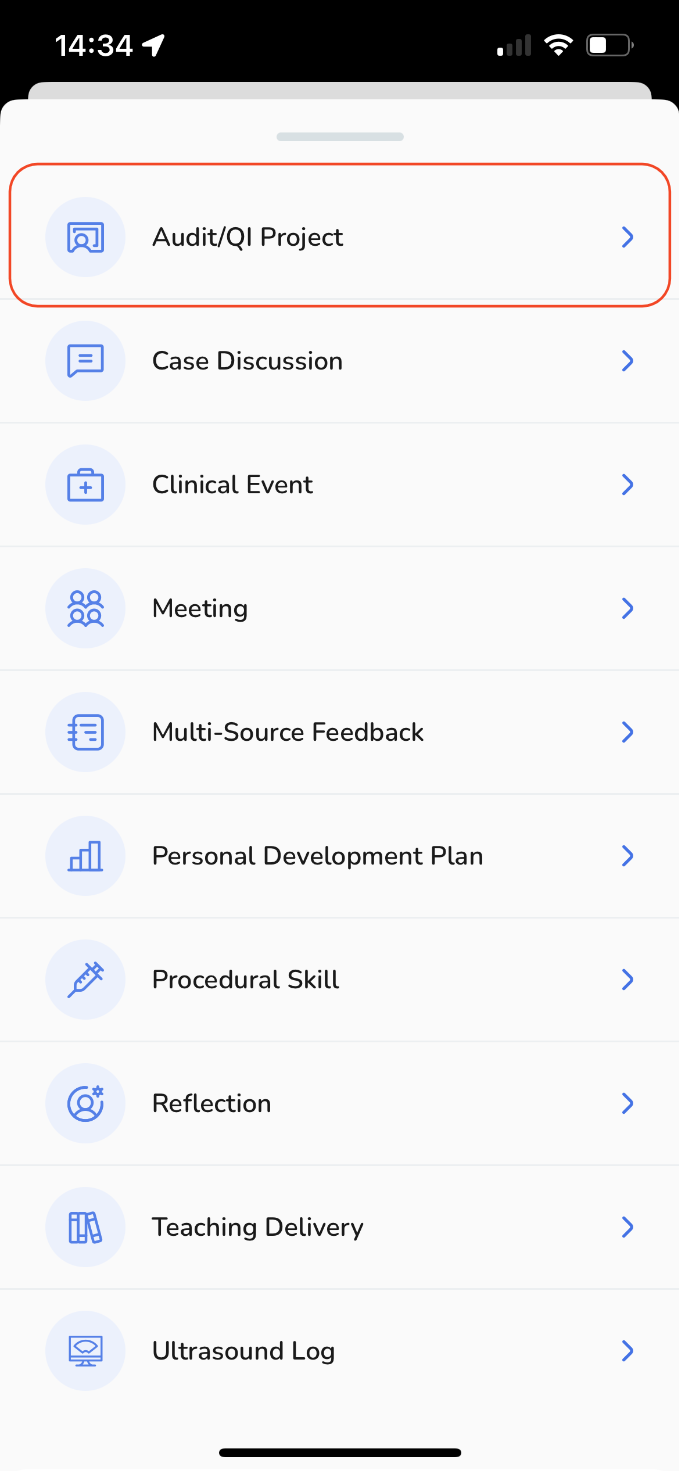
When adding a new portfolio event, select "QI/Audit Project" from the results list.
-
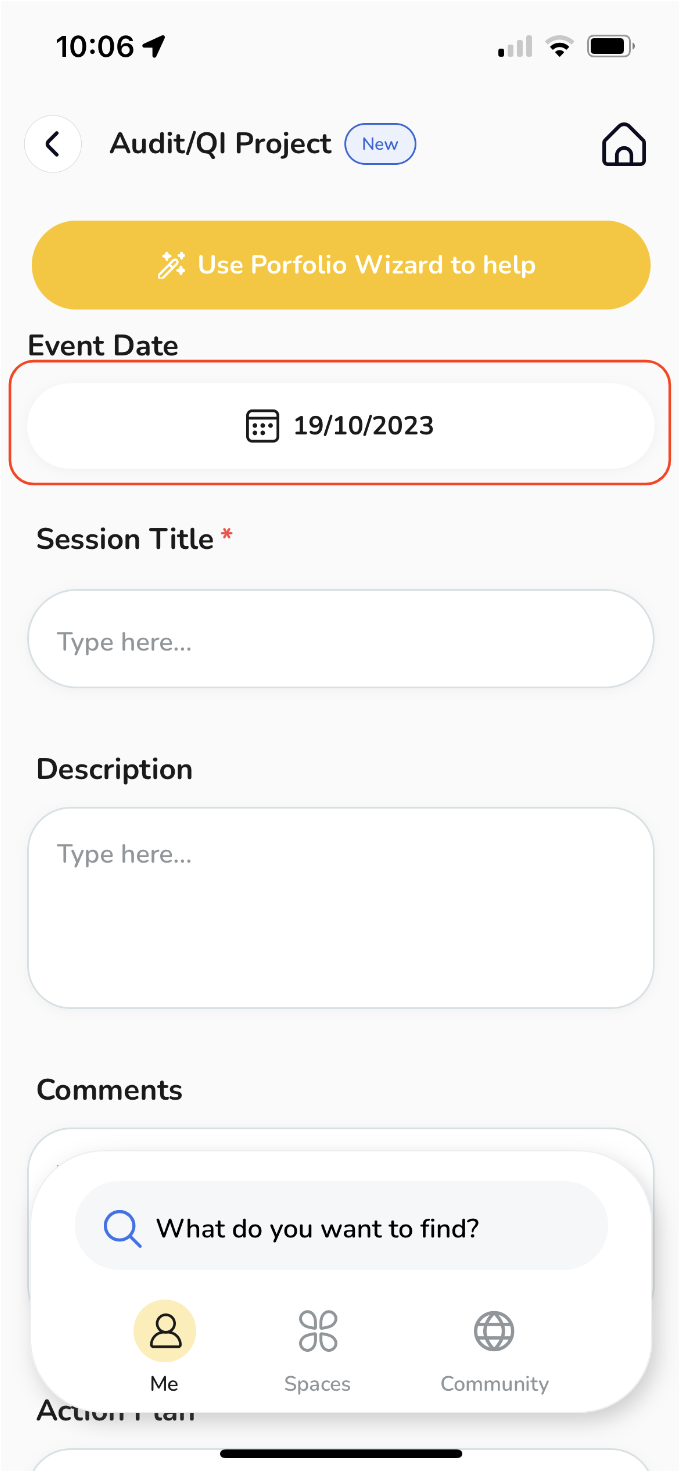
Select the date for your event. By default, the current date will be displayed, but if you wish to modify it, simply tap on the "Date" button and choose your preferred date.
-
Provide an informative title for your case.
-
Compose your description.
-
Please don't hesitate to provide any extra remarks and action steps that you find important.
-
If you're looking to enhance your record-keeping for the QI/Audit Project, click on the "Attach Evidence" option. This will enable you to maintain a comprehensive record, ensuring easy access and documentation for future reference.
-
A pop-up window will appear, offering you the choice to either select from your existing files or upload a new one from your device.
-
To upload a new file, select "Add New File".
-
Depending on your needs, you can upload various file types like MS Office documents, PDFs, images, videos, and web links. Choose the relevant option.
-
To upload a new file,
-
To add a weblink, select "Web Link"
-
Your file will now be attached, If you wish to add multiple files, simply click on "Add Attachments" once more and follow the same process again.
-
To access the recently uploaded file, download it or to remove it in case of an error, just click on the "file" box.
-
By tapping on the "toggle" button, you have the option to decide whether to share the attachment with your assessor or not.
-
When you're ready, you have few options:
-
Once you've chosen "Continue", a pop-up window will surface, offering you the option to assign an assessor and gather feedback.
When adding a new portfolio event, select "QI/Audit Project" from the results list.
Select the date for your event. By default, the current date will be displayed, but if you wish to modify it, simply tap on the "Date" button and choose your preferred date.
Provide an informative title for your case.
Compose your description.
Please don't hesitate to provide any extra remarks and action steps that you find important.
If you're looking to enhance your record-keeping for the QI/Audit Project, click on the "Attach Evidence" option. This will enable you to maintain a comprehensive record, ensuring easy access and documentation for future reference.
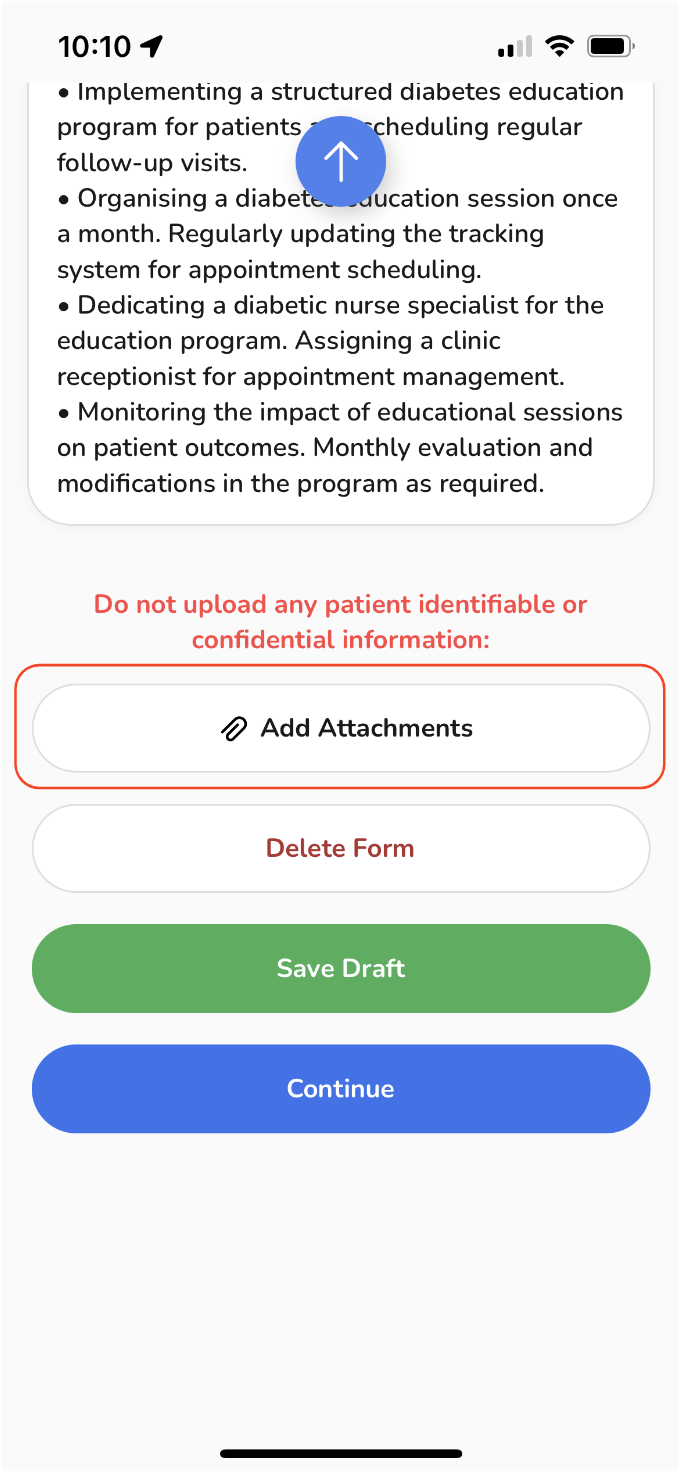
A pop-up window will appear, offering you the choice to either select from your existing files or upload a new one from your device.
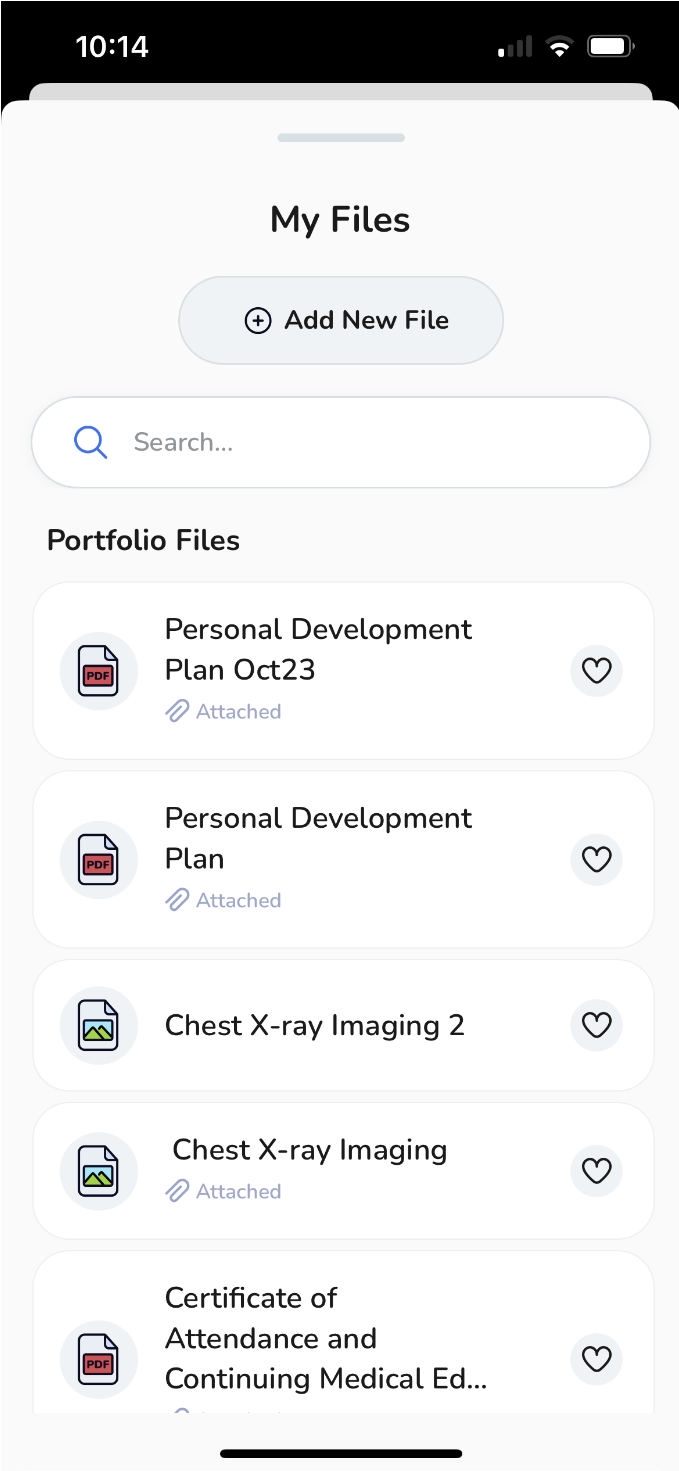
To upload a new file, select "Add New File".
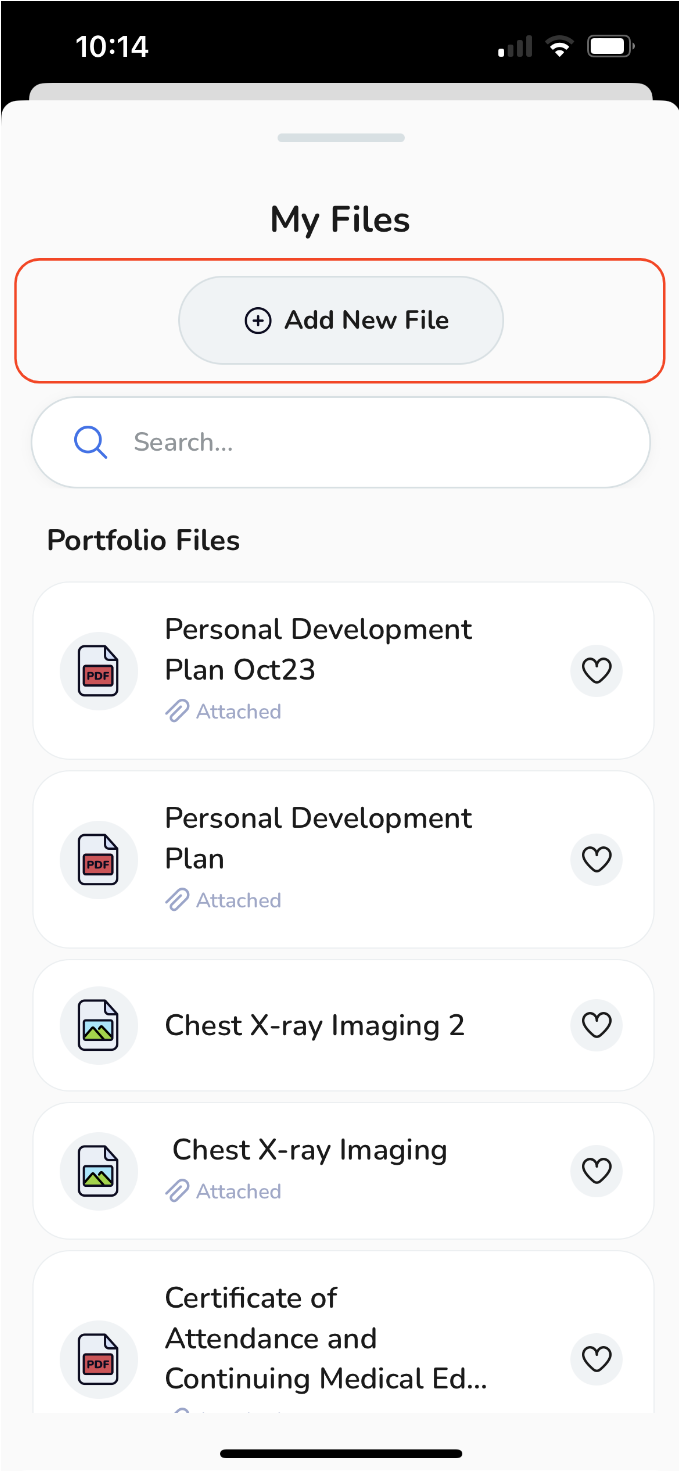
Depending on your needs, you can upload various file types like MS Office documents, PDFs, images, videos, and web links. Choose the relevant option.
To upload a new file,
-
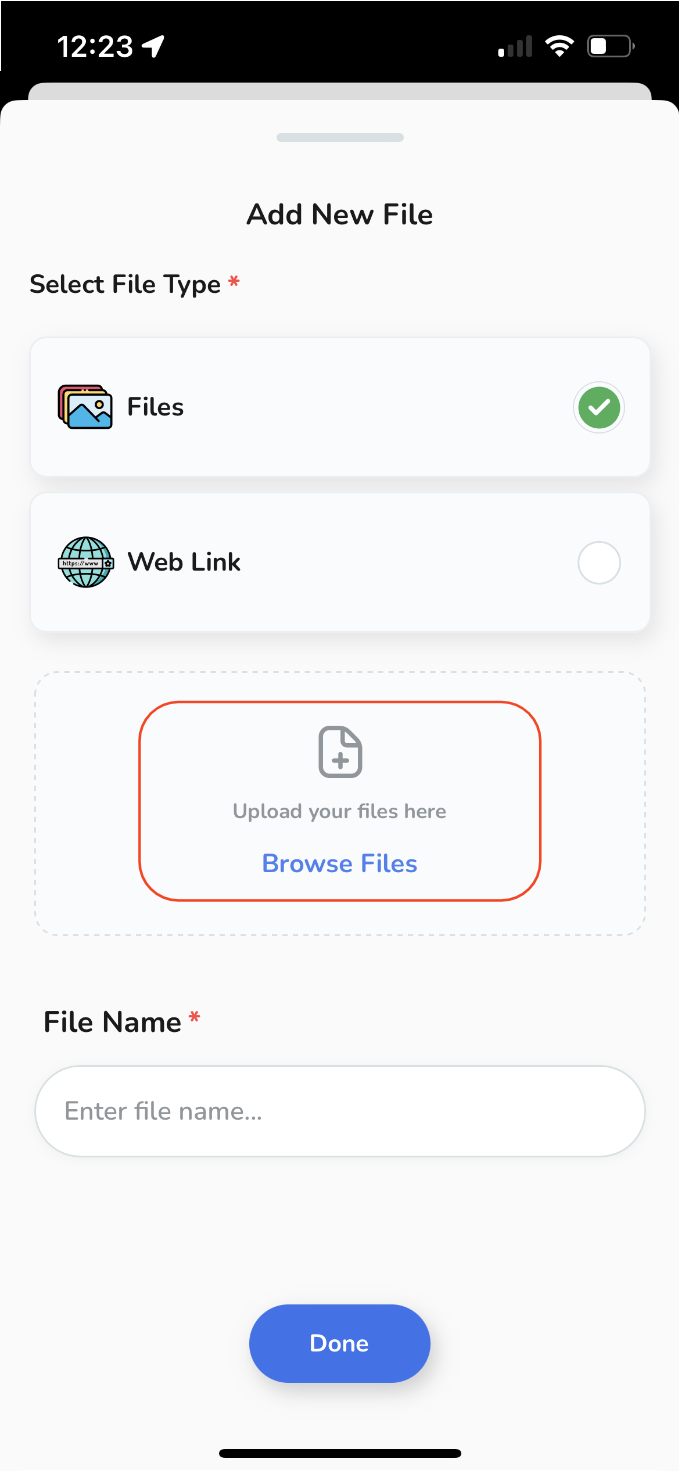
Select "Files" and then tap on "Browse Files",
Select "Files" and then tap on "Browse Files",
-
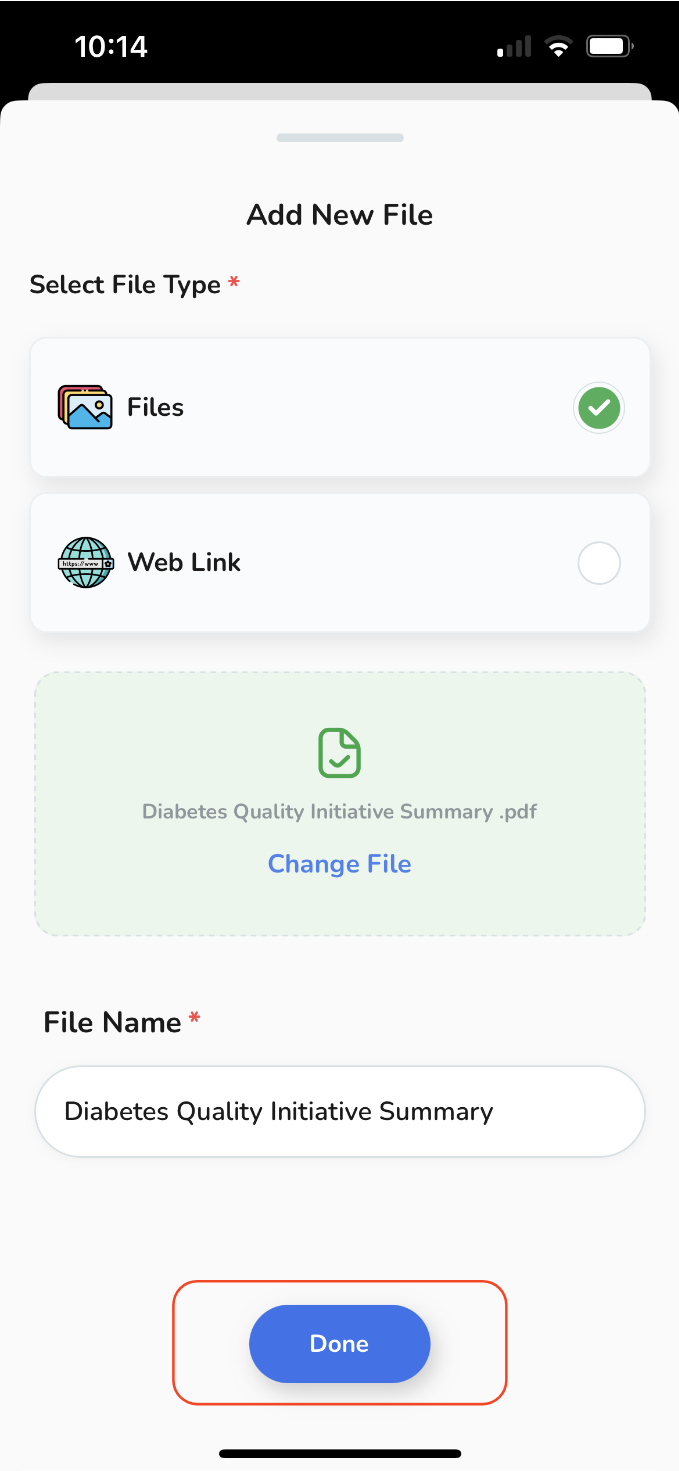
Select the desired file from your device, give it a name and then tap "Done".
Select the desired file from your device, give it a name and then tap "Done".
-
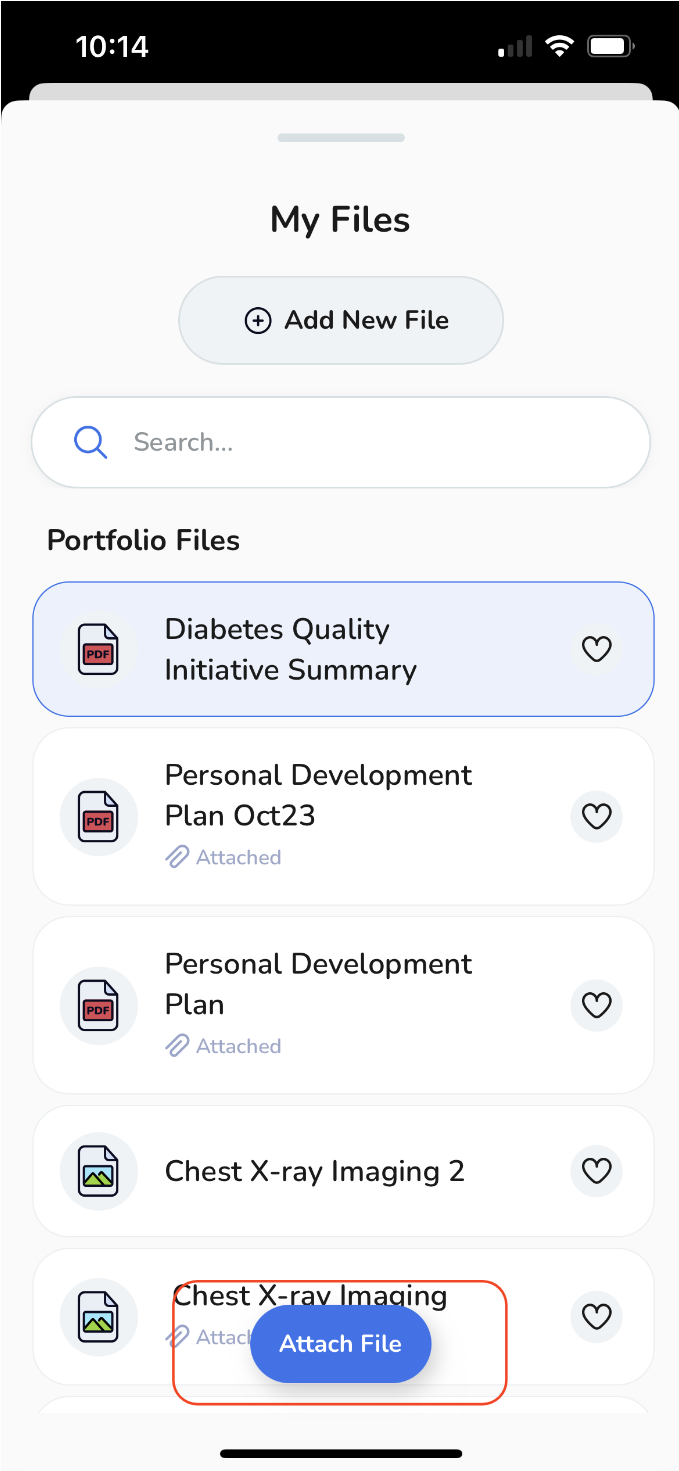
The recently added file will join your personal storage files. Simply tap "Attach File" to incorporate it into your event.
The recently added file will join your personal storage files. Simply tap "Attach File" to incorporate it into your event.
To add a weblink, select "Web Link"
-
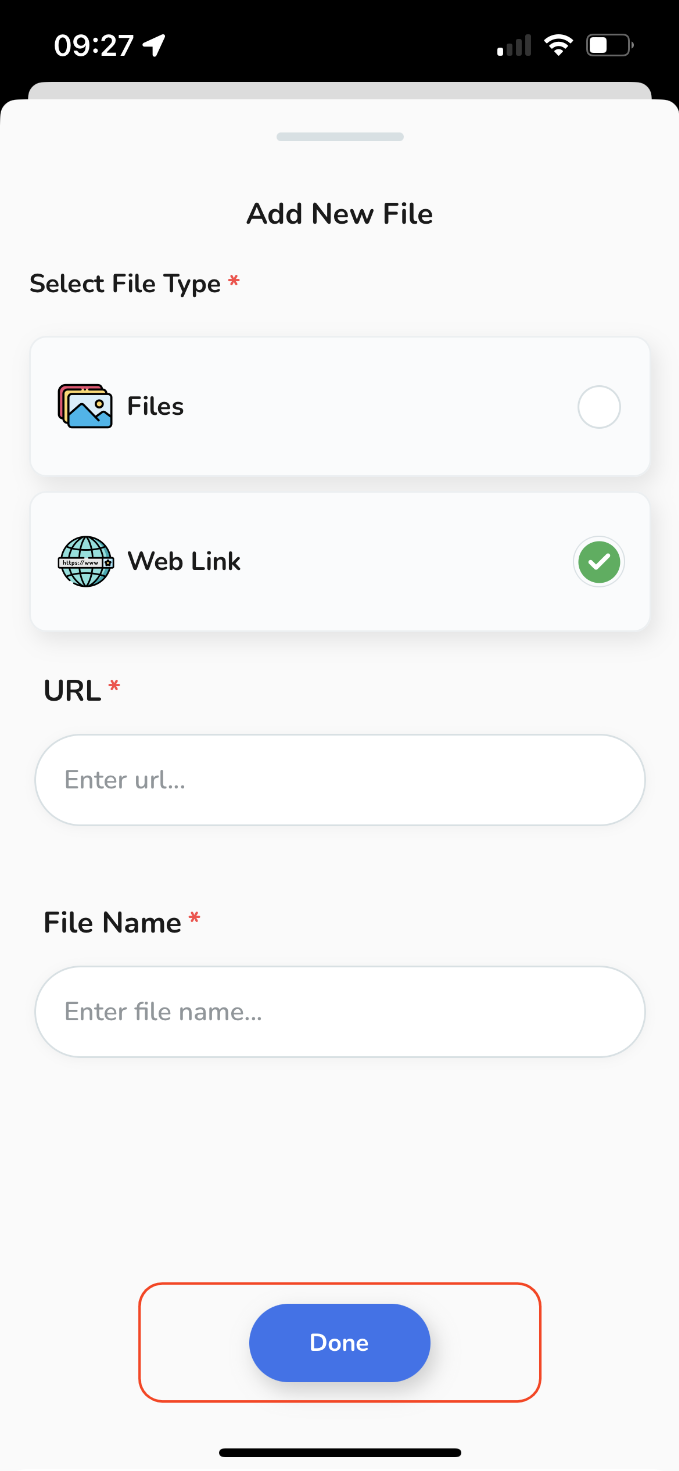
Provide the URL link along with a File Name, and then tap "Done".
Provide the URL link along with a File Name, and then tap "Done".
Your file will now be attached, If you wish to add multiple files, simply click on "Add Attachments" once more and follow the same process again.
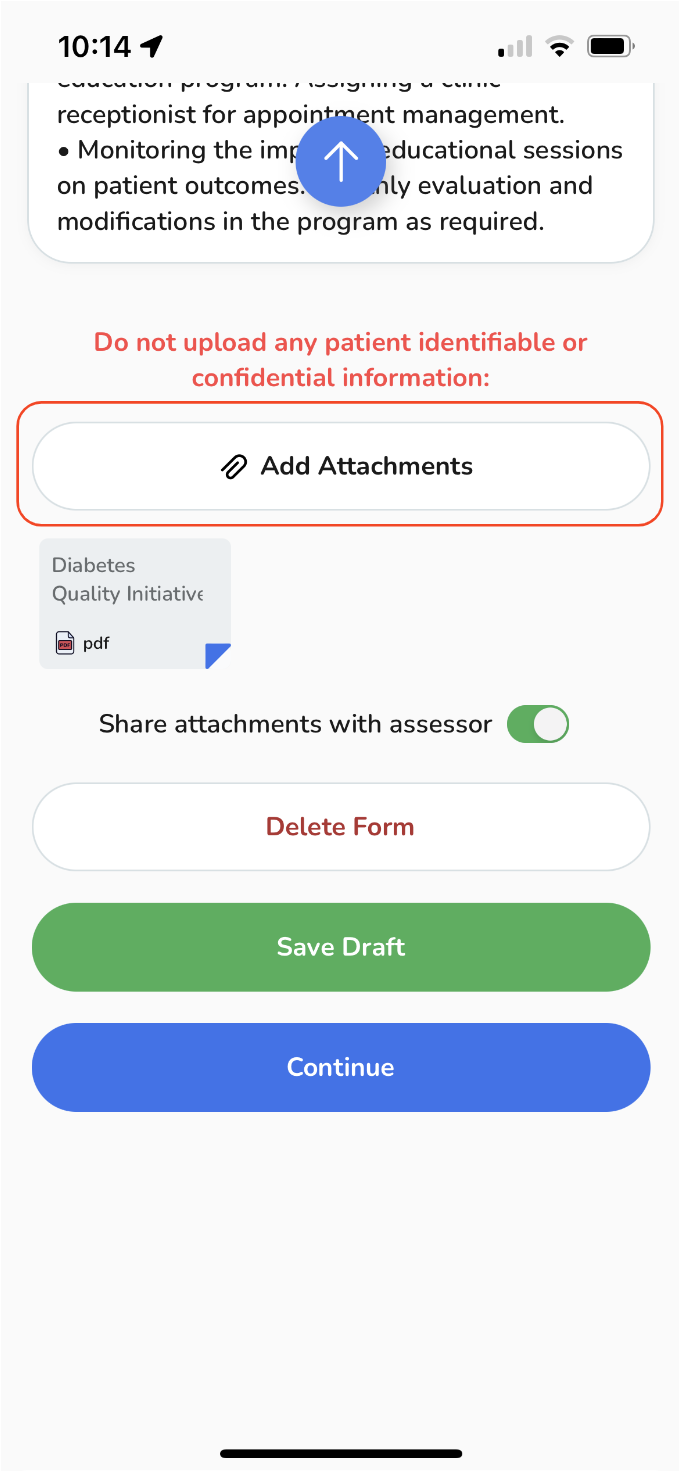
To access the recently uploaded file, download it or to remove it in case of an error, just click on the "file" box.
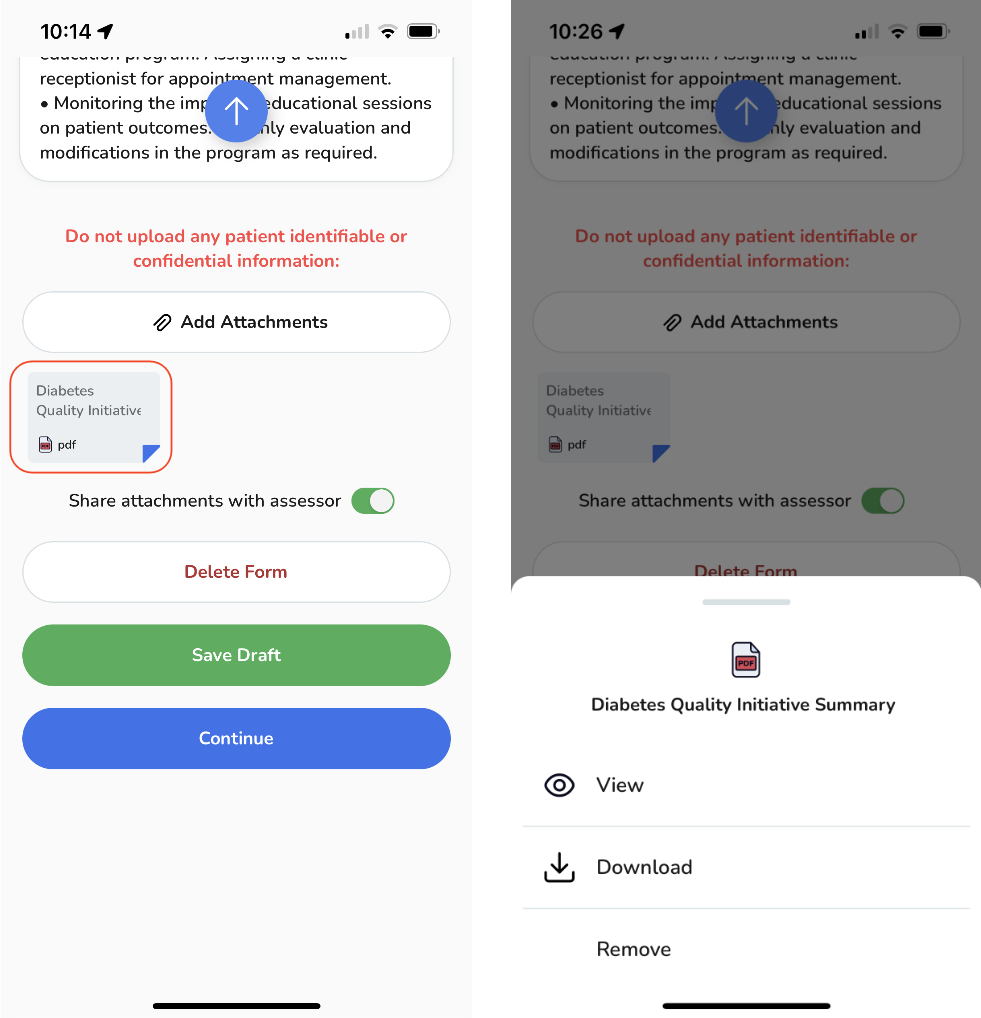
By tapping on the "toggle" button, you have the option to decide whether to share the attachment with your assessor or not.
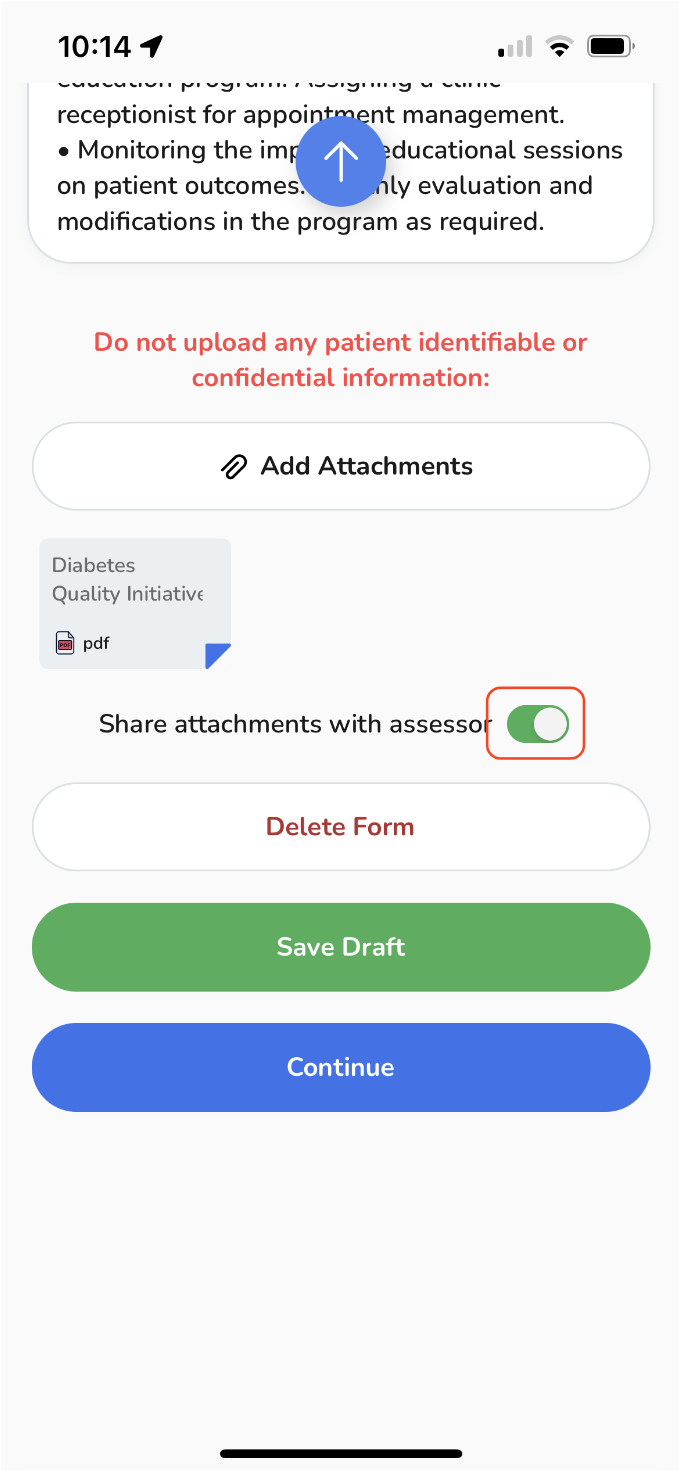
When you're ready, you have few options:
-
Delete your event completely.
Delete your event completely.
-
Save your session as a draft for future reference and make any necessary adjustments.
Save your session as a draft for future reference and make any necessary adjustments.
-
Alternatively, tap the "Continue" button to proceed with the submission..
Alternatively, tap the "Continue" button to proceed with the submission..
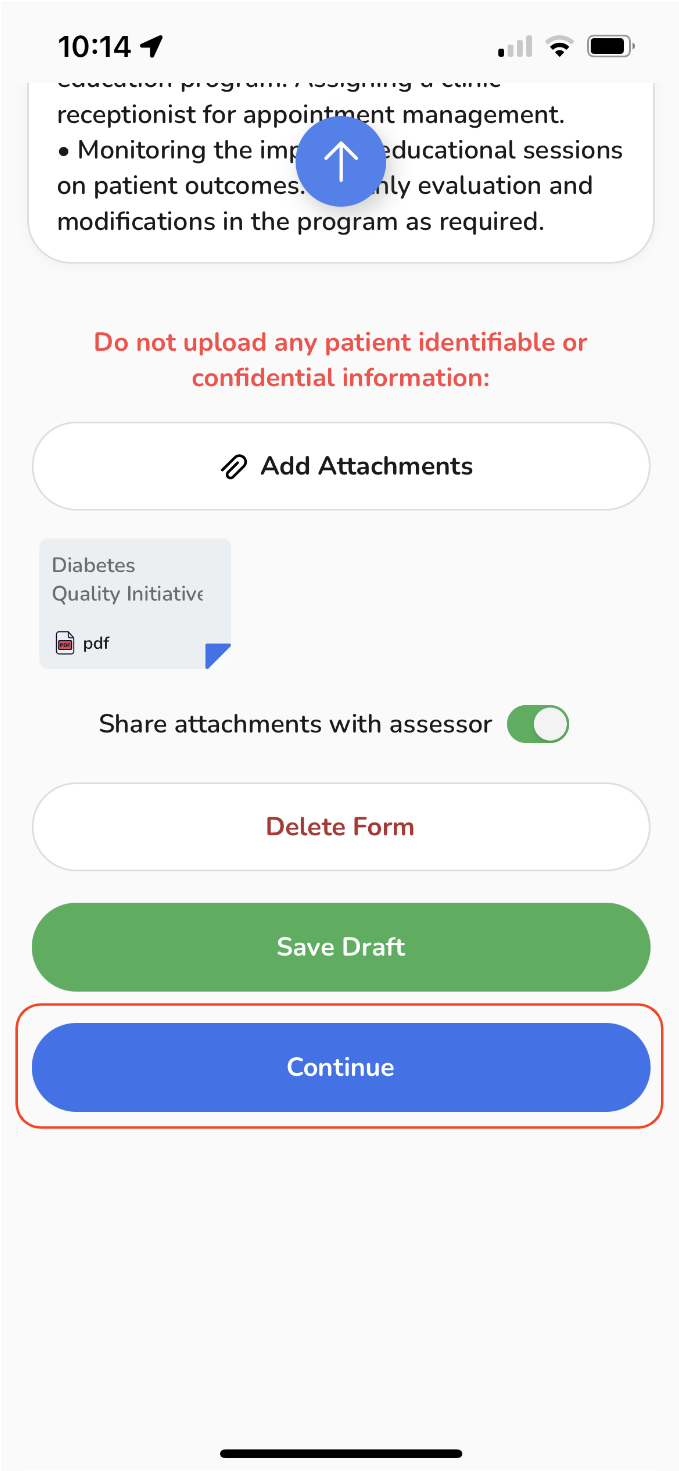
Once you've chosen "Continue", a pop-up window will surface, offering you the option to assign an assessor and gather feedback.
Assigning an assessor to your QI/Audit Project event.
-
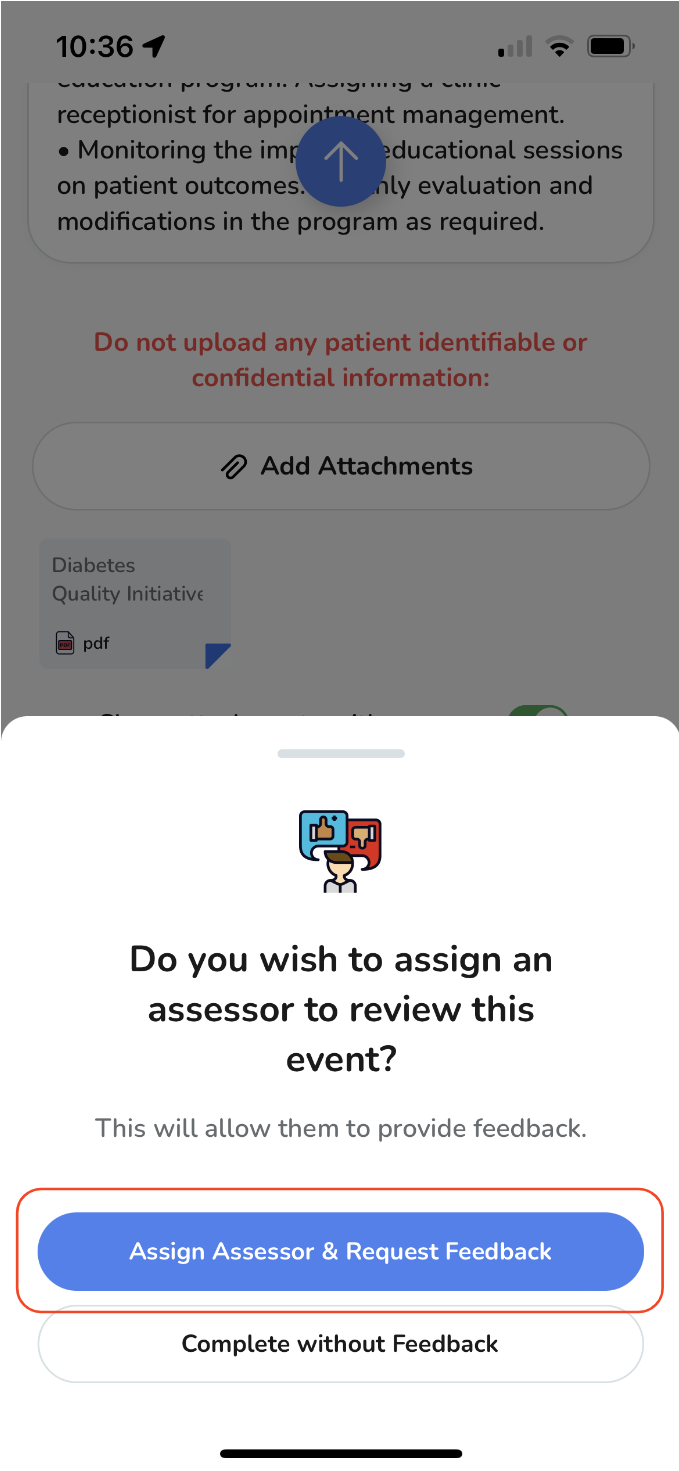
To assign an assessor for your QI/Audit Project event, tap on the "Assign Assessor & Request Feedback" button.
-
If you prefer to complete the event without feedback, choose the appropriate option accordingly.
-
-
Then tap in "Submit Event" on the second pop-up.
-
Once tapped, enter the assessor's email address. Alternatively, you can choose an assessor from the list of recent assessors (if available).
-
Then tap on the "Assign" button.
To assign an assessor for your QI/Audit Project event, tap on the "Assign Assessor & Request Feedback" button.
-
If you prefer to complete the event without feedback, choose the appropriate option accordingly.
If you prefer to complete the event without feedback, choose the appropriate option accordingly.
Then tap in "Submit Event" on the second pop-up.
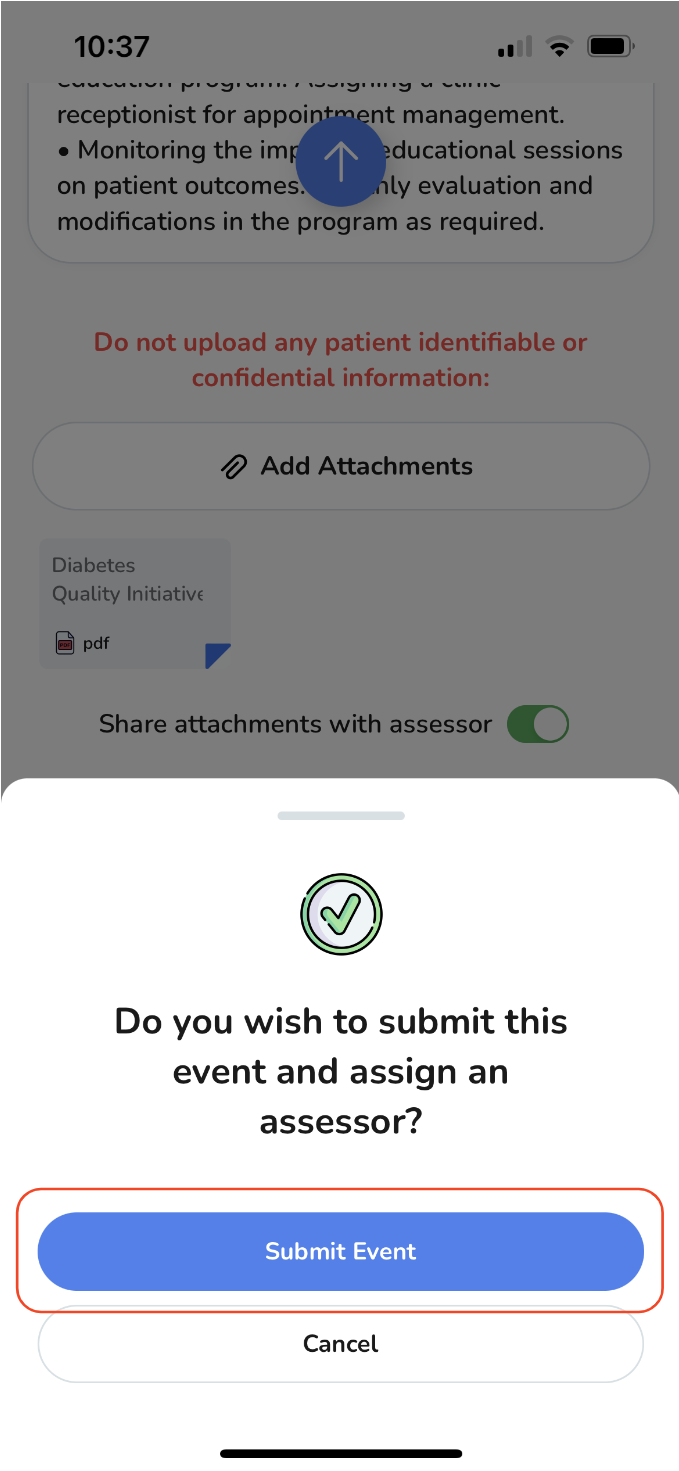
Once tapped, enter the assessor's email address. Alternatively, you can choose an assessor from the list of recent assessors (if available).
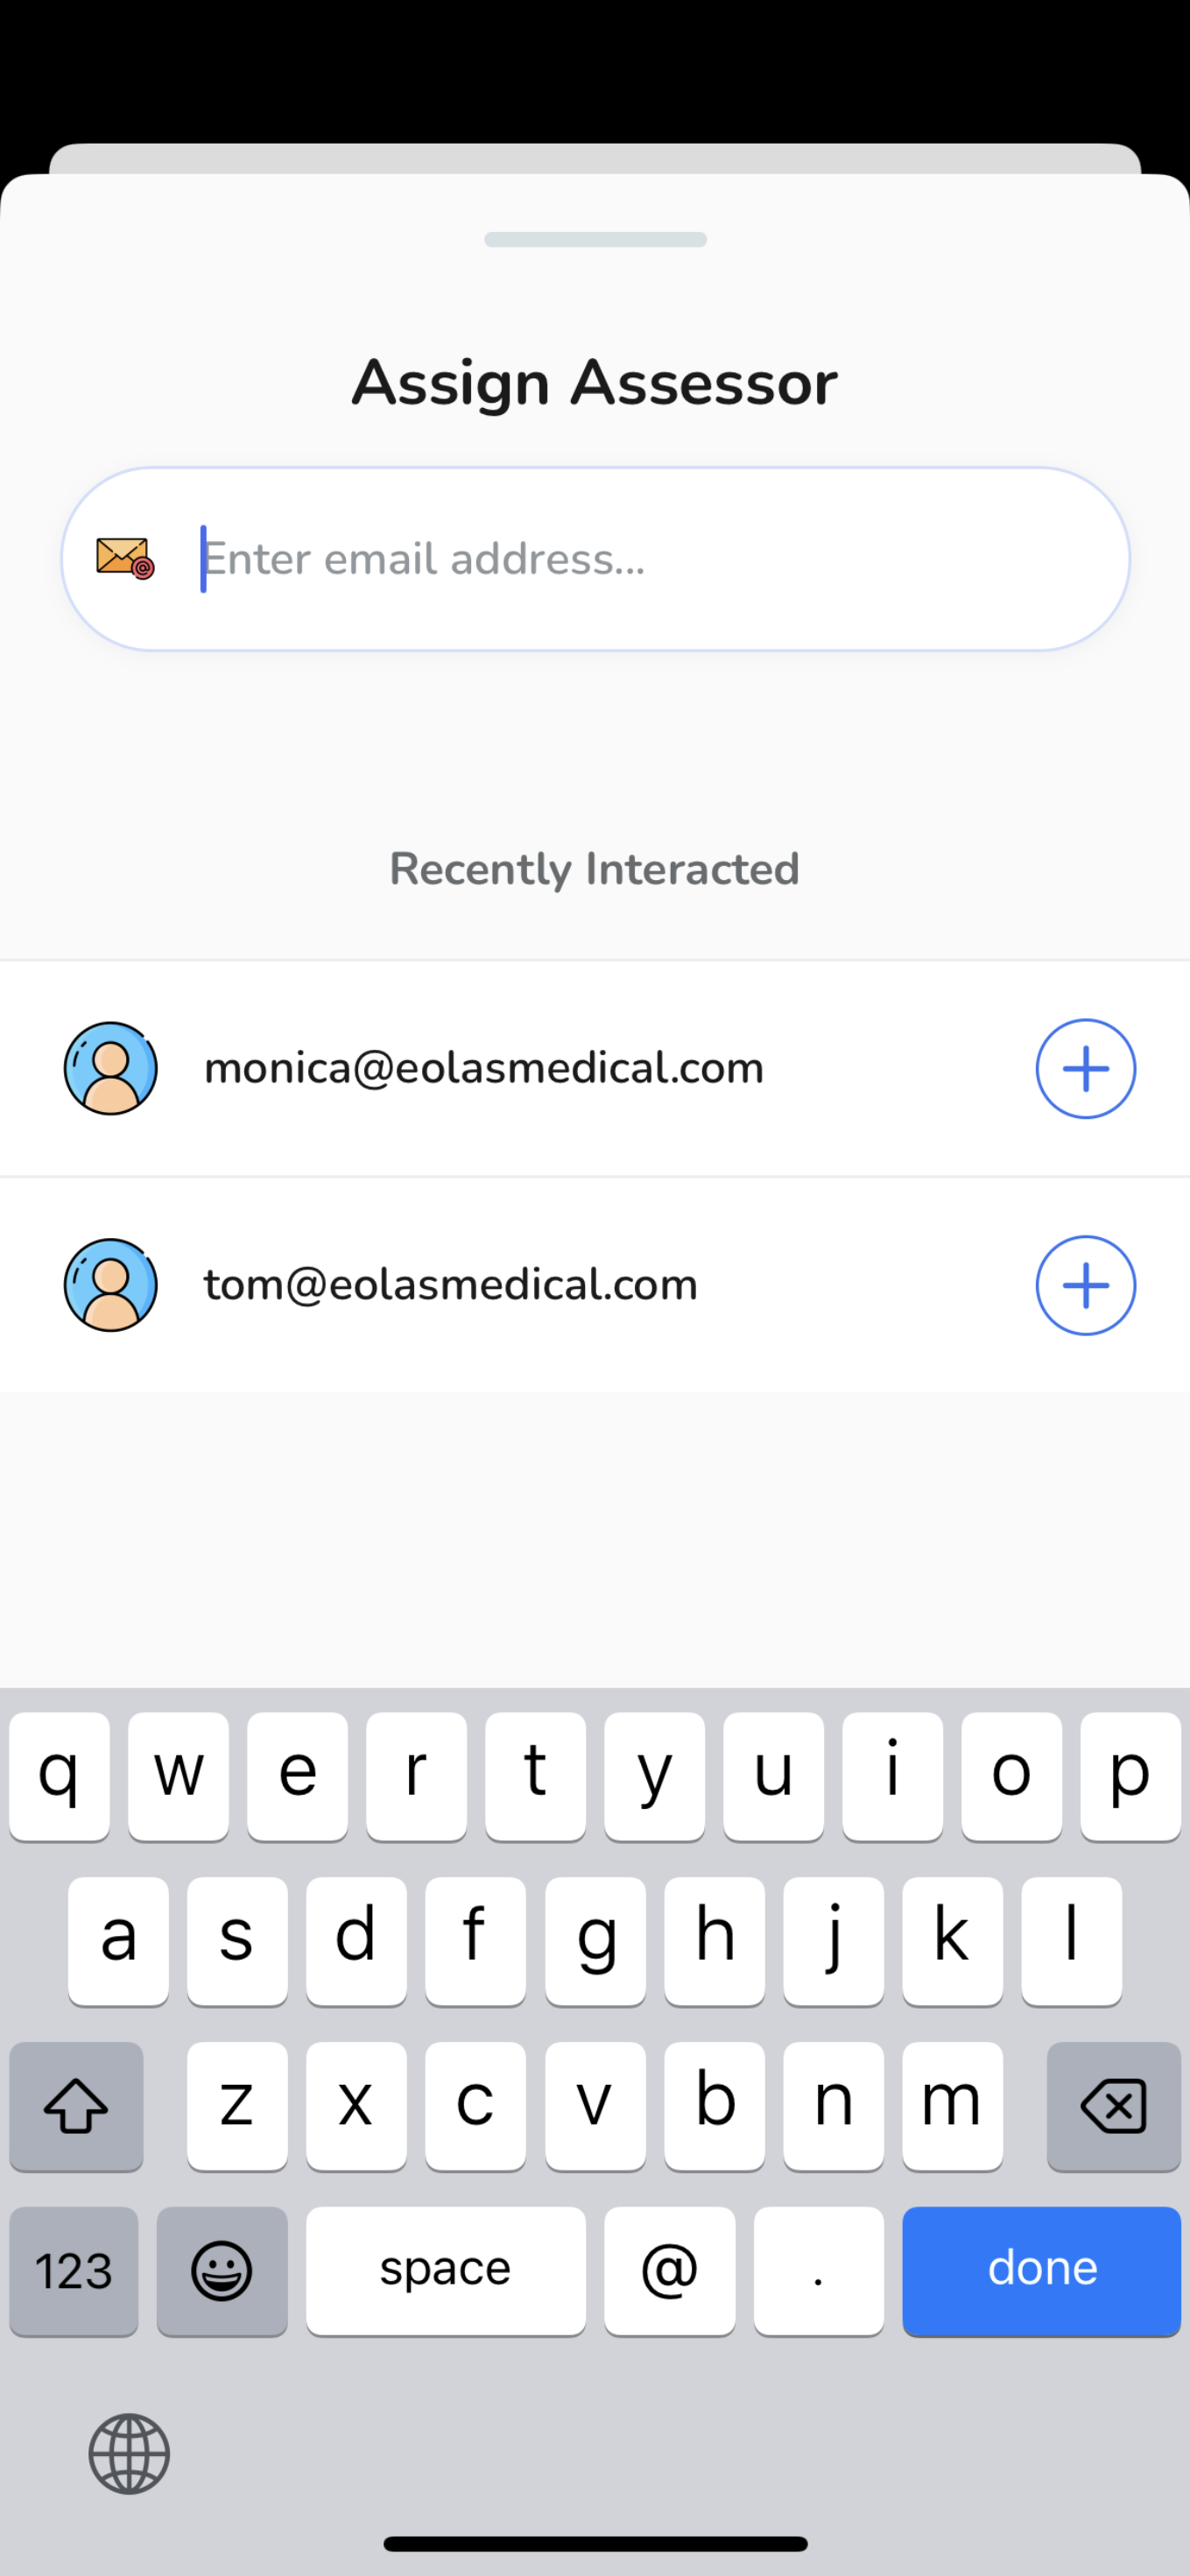
Then tap on the "Assign" button.

What happens after assigning an assessor?
-
Upon submitting, you will be directed to the event's page. Here, you can view important details such as the assigned assessor and the feedback status.
At this point your event page will display a yellow label indicating "Pending".
-
To send a reminder to the assessor or reassign assessor, simply tap on the "Three Dots" button next to the assessor's email and choose the appropriate option.
-
In addition, you have the flexibility to:
-
Delete it completely.
-
Or, choose to complete the case without feedback.
-
Upon submitting, you will be directed to the event's page. Here, you can view important details such as the assigned assessor and the feedback status.
At this point your event page will display a yellow label indicating "Pending".
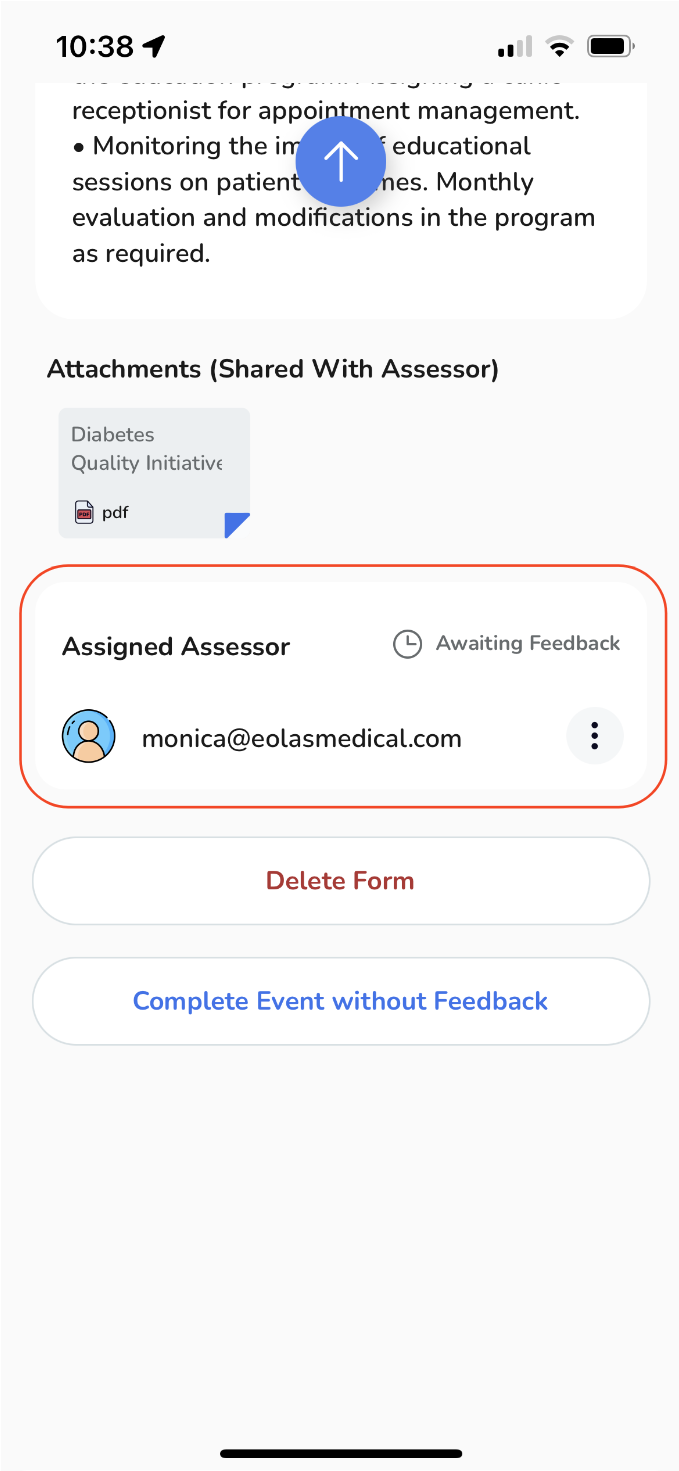
To send a reminder to the assessor or reassign assessor, simply tap on the "Three Dots" button next to the assessor's email and choose the appropriate option.
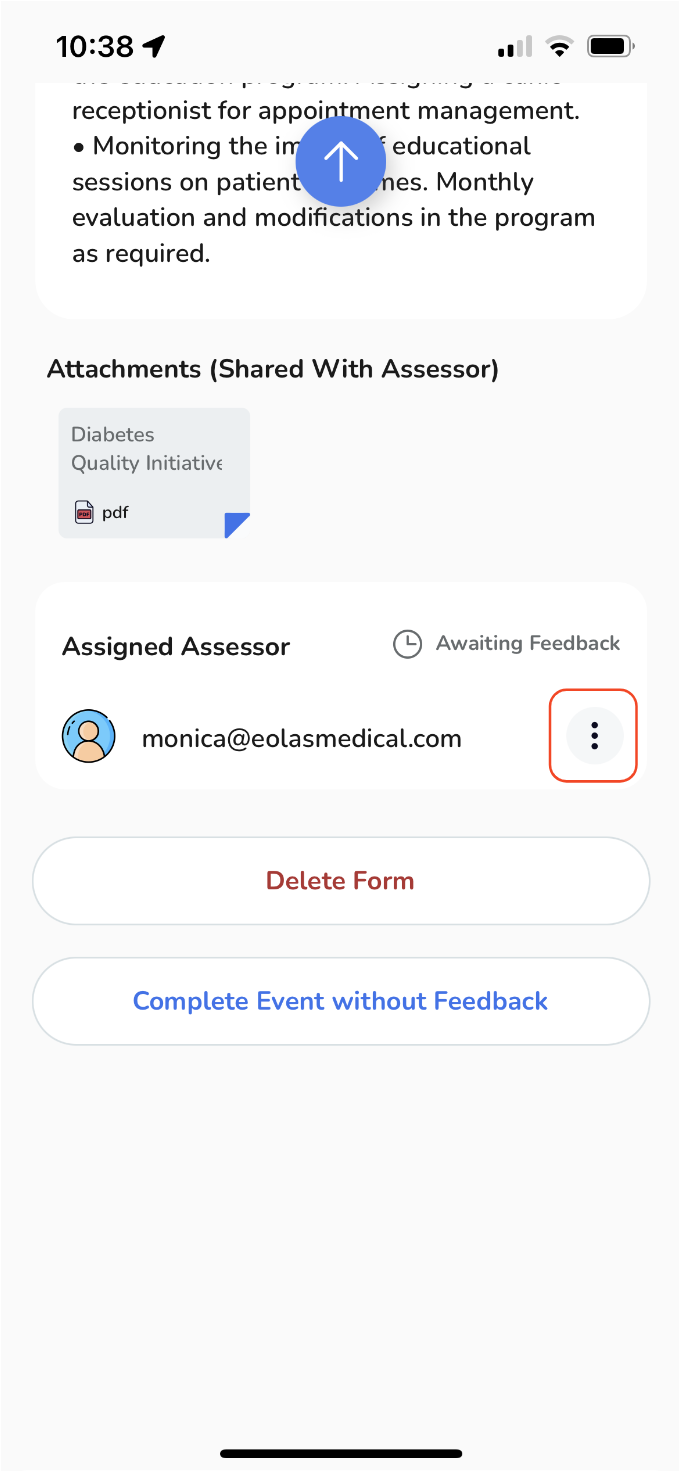
In addition, you have the flexibility to:
-
Delete it completely.
Delete it completely.
-
Or, choose to complete the case without feedback.
Or, choose to complete the case without feedback.
Receiving feedback from an assessor.
-
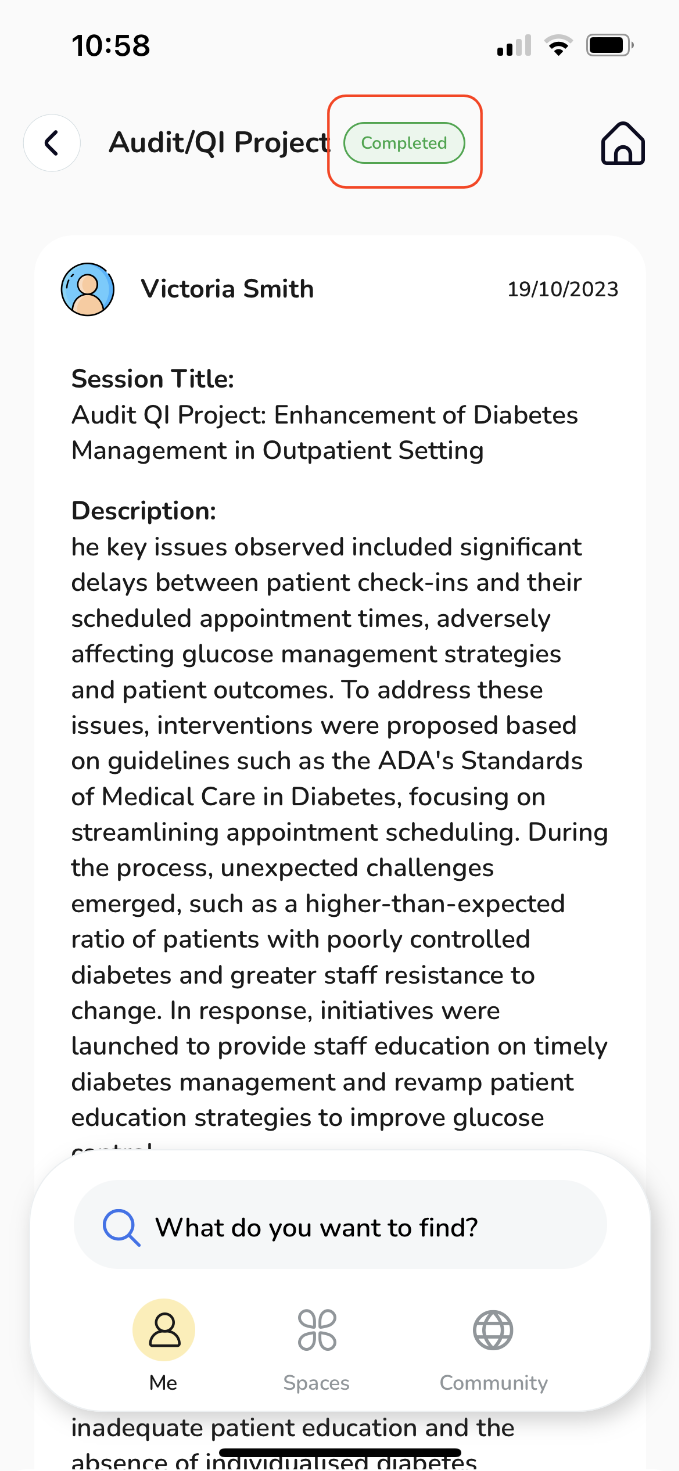
After receiving feedback from your assessor, the event's page will display a green label indicating "Completed." To review the feedback, simply scroll down on the page.
-
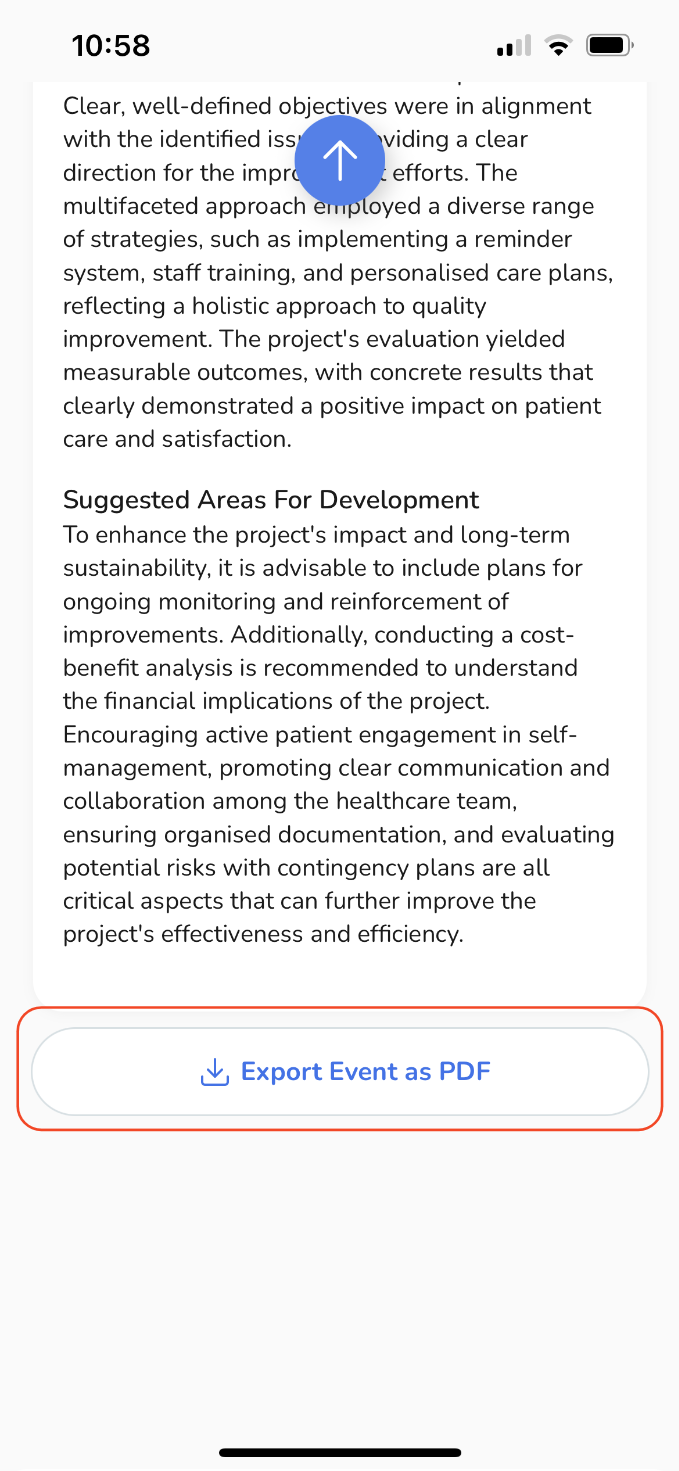
Additionally, if desired, you have the option to export the feedback as a PDF by tapping on the "Export Event as PDF" button.
-
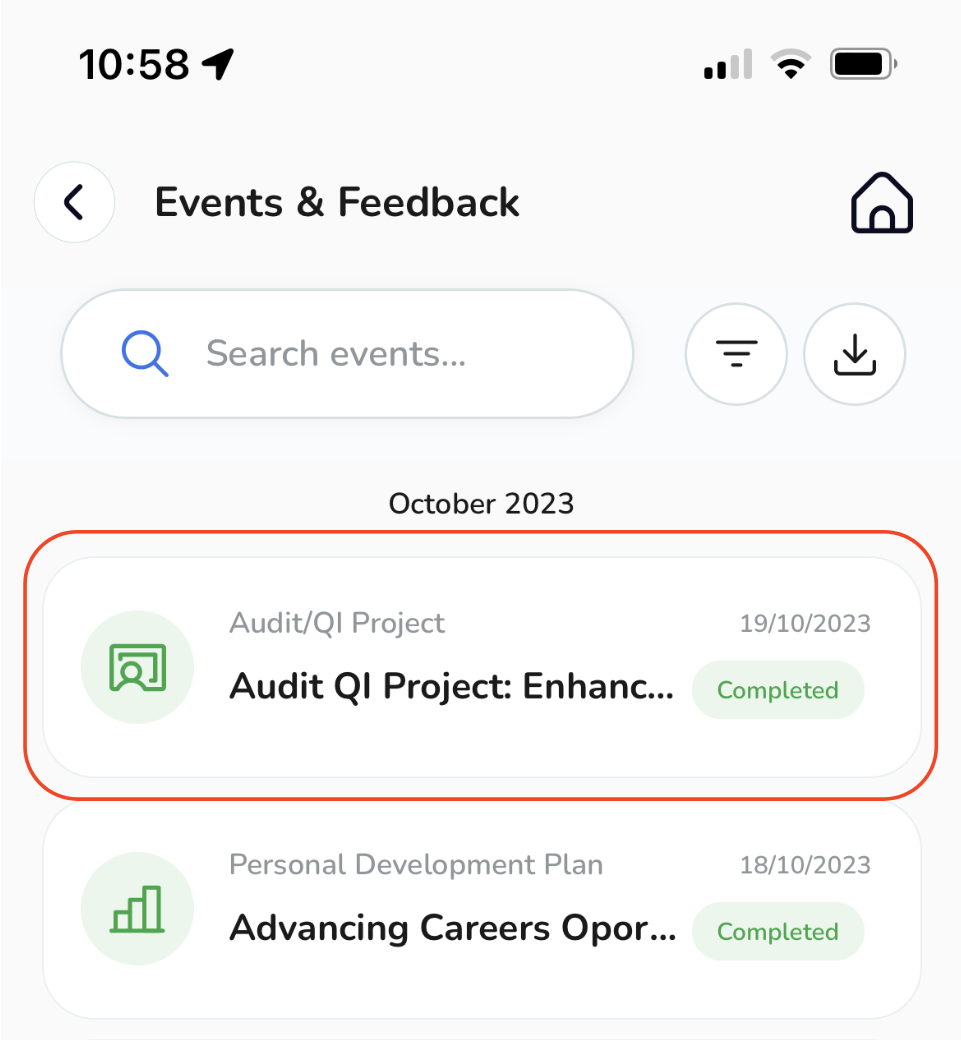
Returning to the Events & Feedback page, you will notice that the event is marked as "Complete" with a green label.
After receiving feedback from your assessor, the event's page will display a green label indicating "Completed." To review the feedback, simply scroll down on the page.
Additionally, if desired, you have the option to export the feedback as a PDF by tapping on the "Export Event as PDF" button.
Returning to the Events & Feedback page, you will notice that the event is marked as "Complete" with a green label.
And there you have it – a comprehensive guide to optimising your QI/Audit Project event in your Portfolio.


