How to get started by adding guidelines to your Eolas space
How do I upload a guideline?
Before you get started with adding your new Guideline, it's essential to have some Sections prepared to keep things organised.
Now, let's get started! Follow these simple steps to smoothly add your new guideline. Happy uploading! 😄
Add/Upload a New Guideline to a section.
Now, let's dive into adding/uploading a Guideline. It's a breeze, I promise! Just follow these steps:
-
Click on the selected section.
You will then navigate to the section page and the section name will be clearly visible at the top of the window.
-
Click on the "Add New Guideline" button.
-
A pop-up window will open, allowing you to upload various file types such as MS Office files, PDFs, images, videos, and web-links.
-
When uploading a PDF document or MS Office file, choose the appropriate option and then either drag and drop the file into the "File to Upload" box or click on "Browse Files" to select it from your computer's documents folder.
-
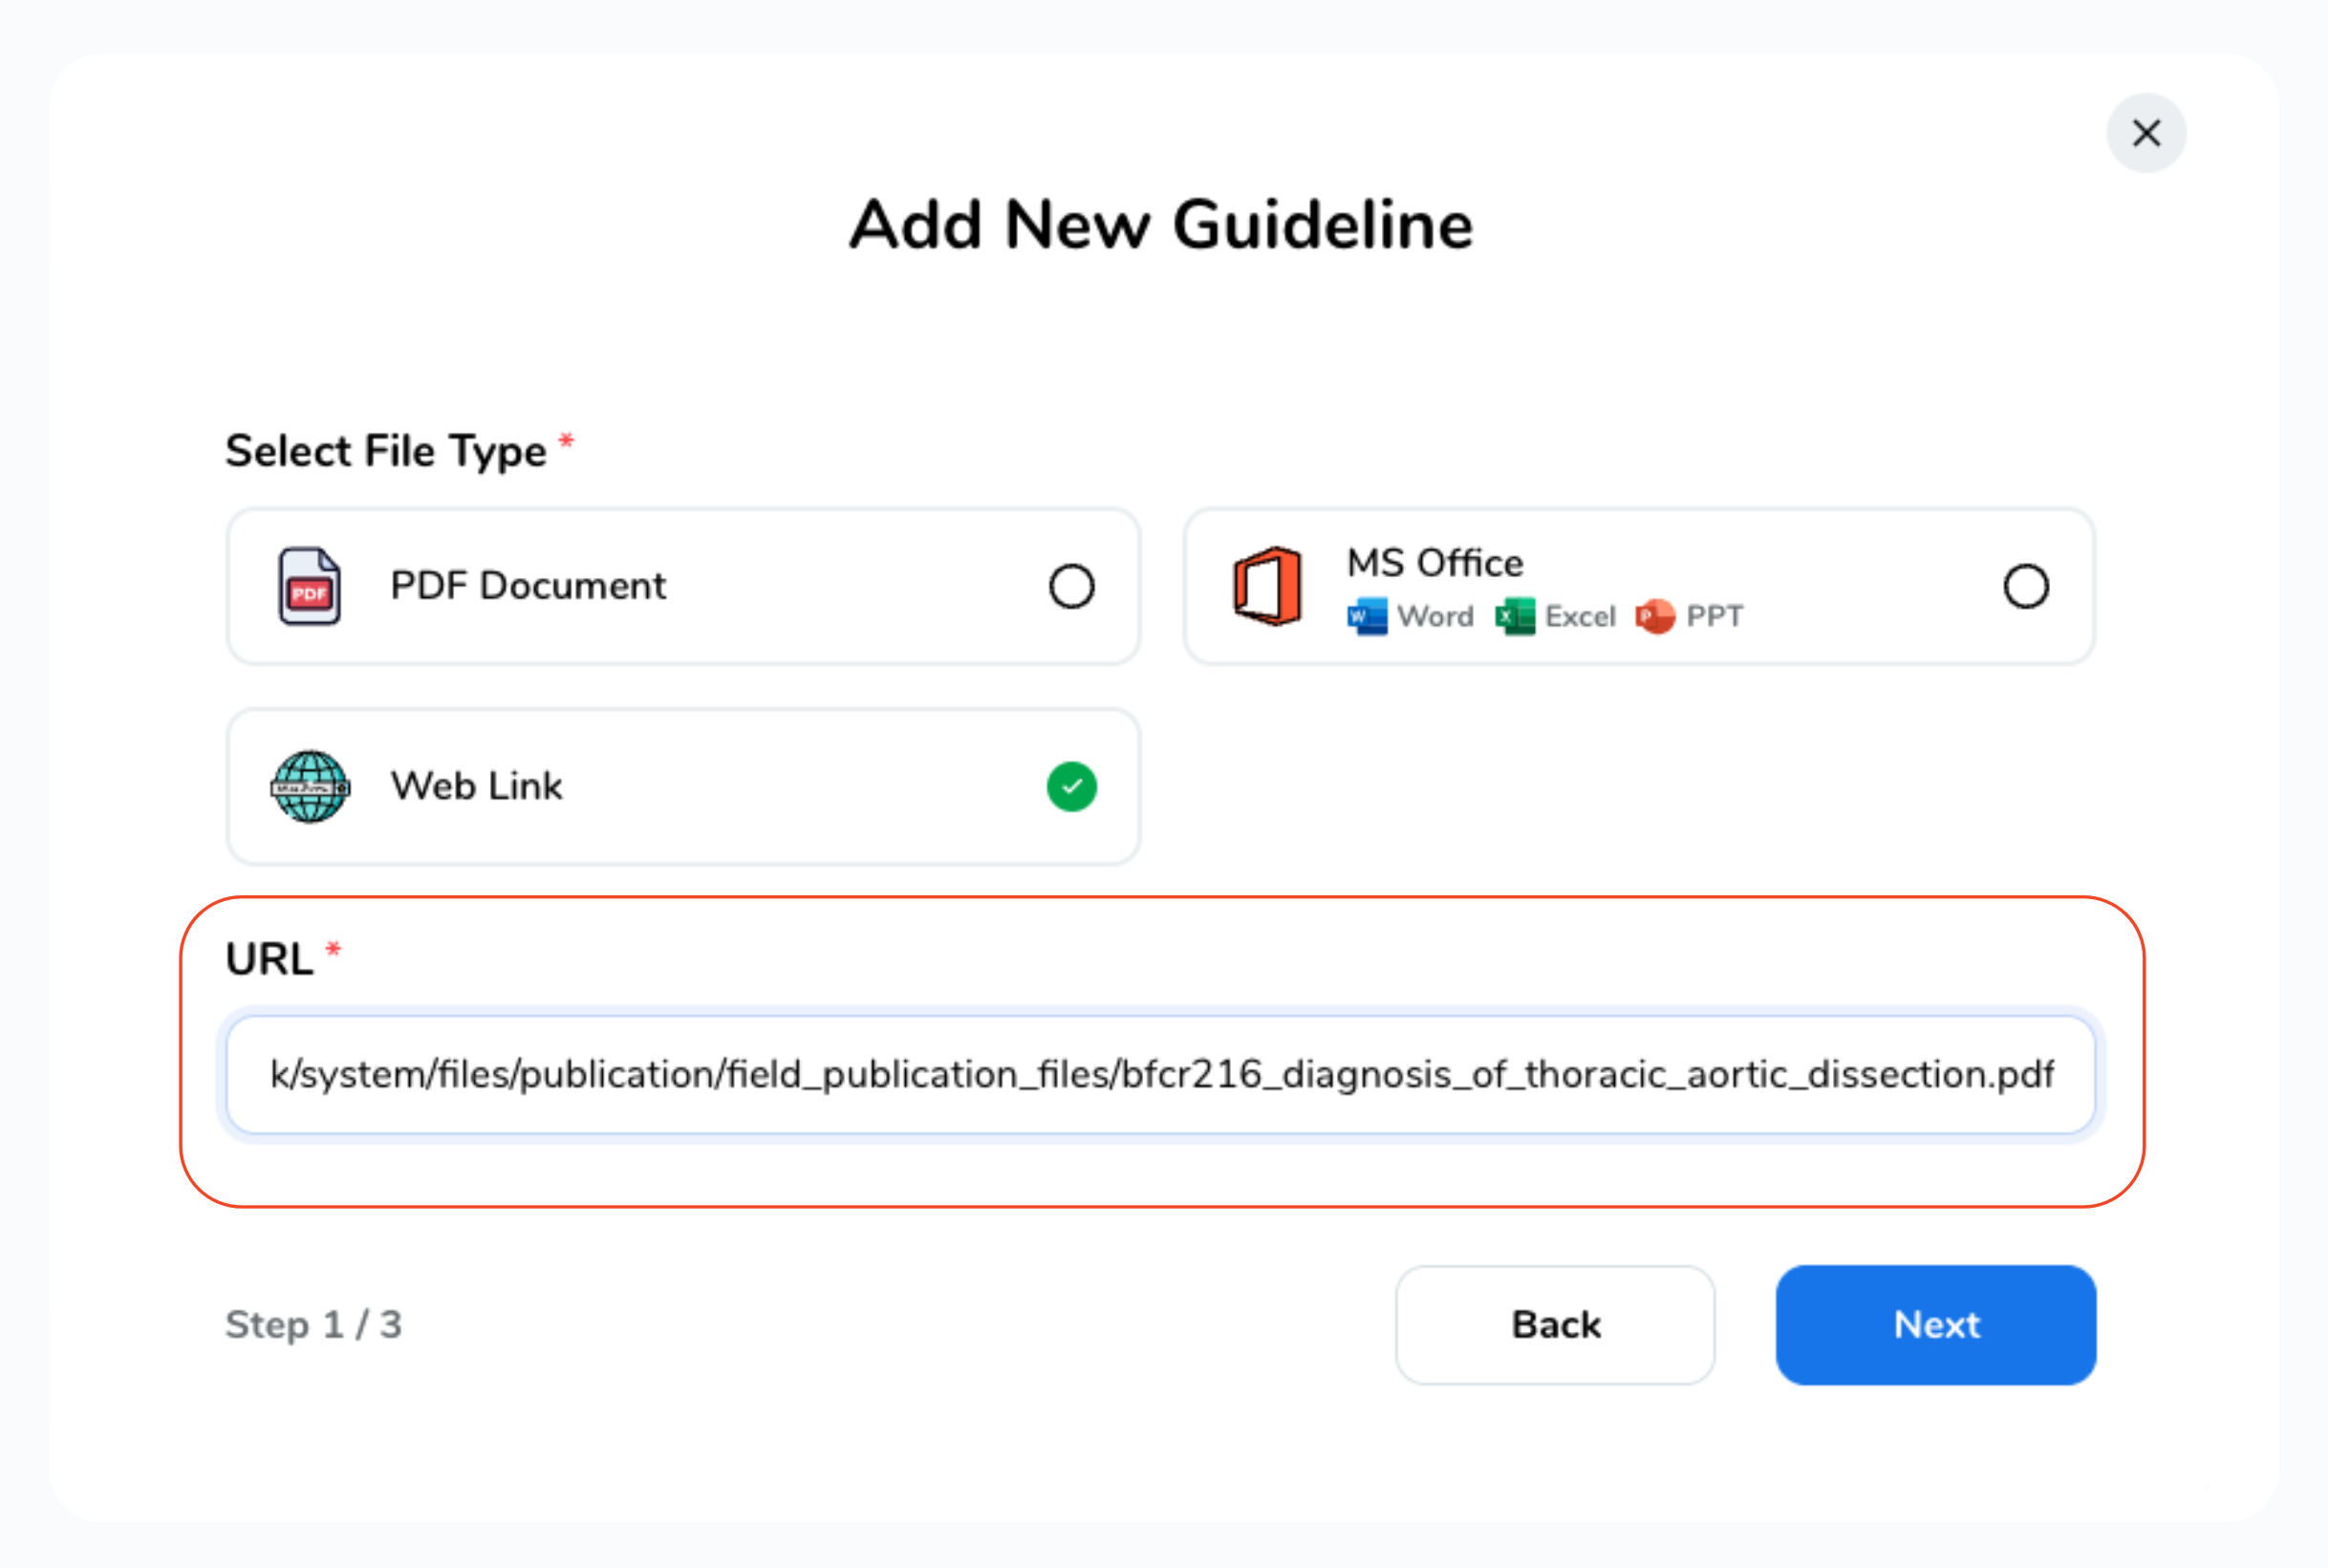
If you're adding a Web Link as a Guideline - for example, a link to a Youtube video or website - select the "Web Link" option and insert the link URL for the website you want to add.
-
To copy a Web Link, select the URL on your browser and either do a 'Right Click' and select 'Copy' or you can use your computers shortcuts for Copy (Windows is ctrl+c or MAC is command+c).
-
To insert your copied Web Link, select the URL field and either do a 'Right Click' and select 'Paste' or you can use your Computers shortcuts for Pasting (Windows is ctrl+v or MAC is command+v).
Your copied Web Link should now be inserted in the URL field.
Bear in mind, you can only upload one type of file at a time (e.g., either PDF or Web Link), and currently only one file can be uploaded at a time - so only select one file to upload.
-
-
Click "Next" to proceed.
-
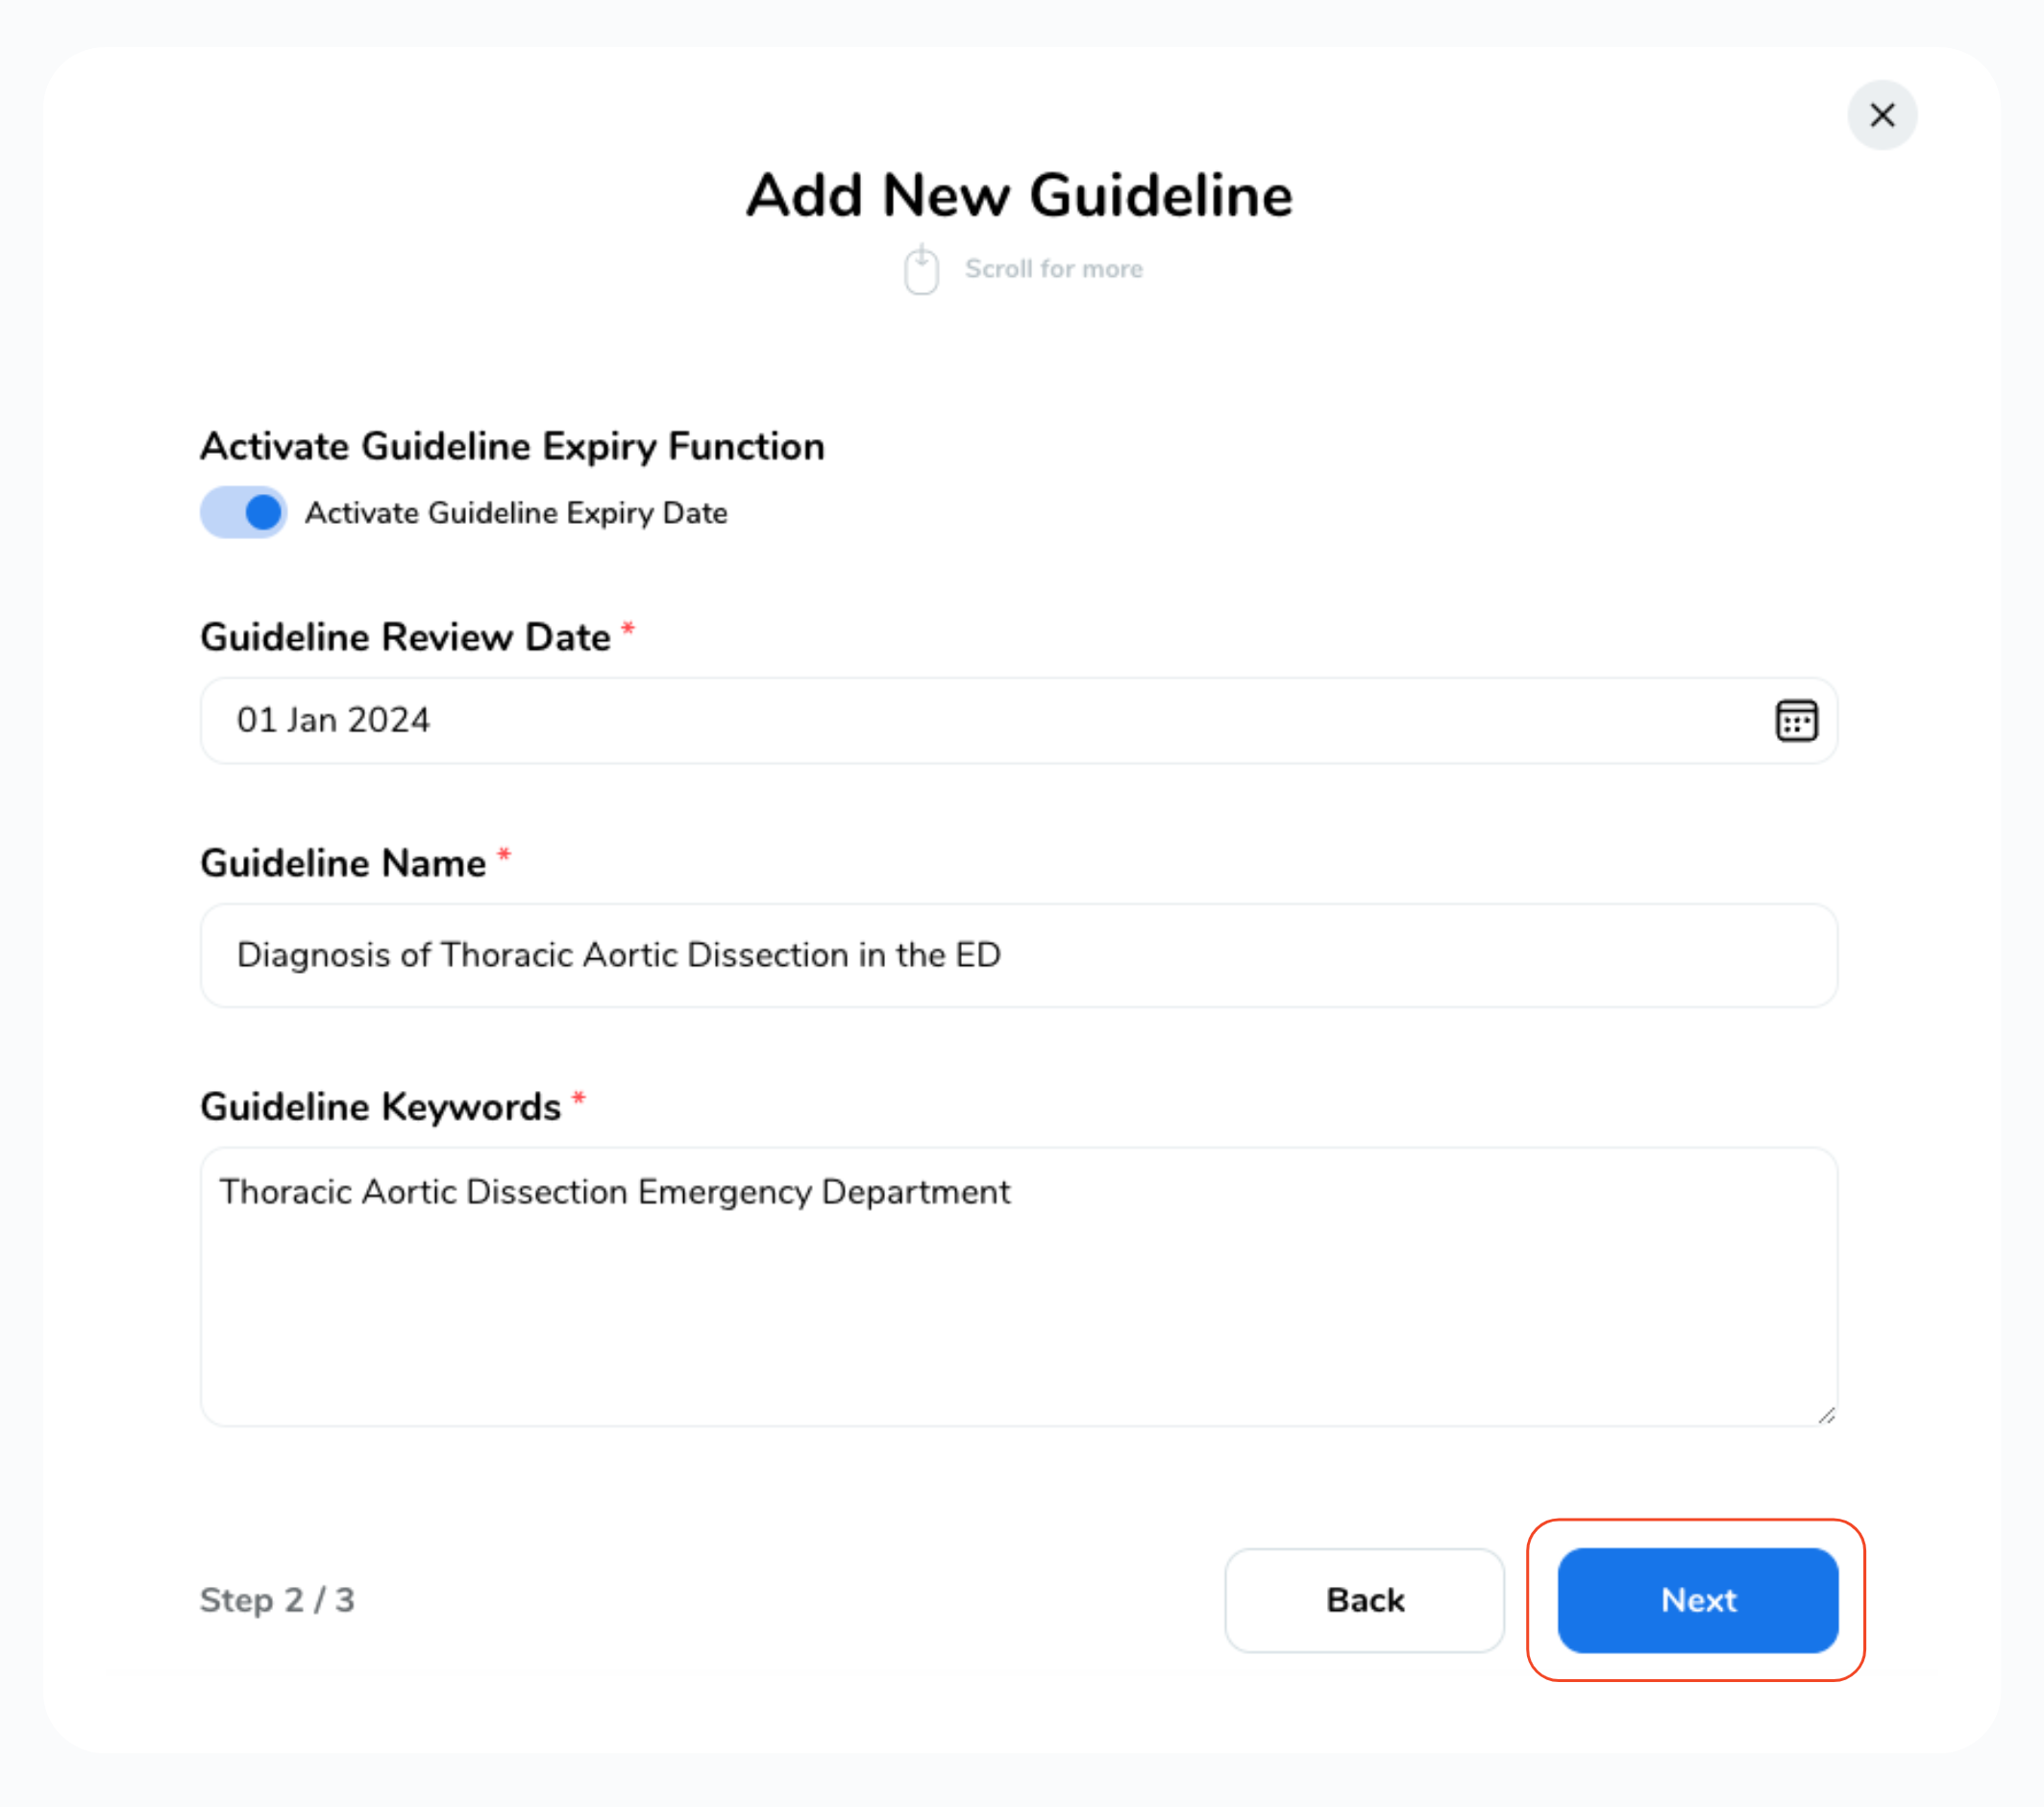
Here you can optionally activate the Guideline Expiry Function, useful for monitoring Guidelines that expire.
If you would like to set an expiry date:
-
Click on the toggle button "Activate Guideline Expiry Date" and a new input field "Guideline Review Date" will appear.
-
Then "Click to Select a date” to pick a date from the calendar.
-
If you would like to remove the expiry date click back on the toggle button to deactivate.
-
Or, if you change your mind or select it in error, simply click back on the date to amend it.
-
-
Give your Guideline a name that's easily identifiable for you and your team.
-
Enter Guideline Keywords, this is super important! as these will assist the app's master search functionality in providing relevant search results.
-
Click on the "Next" button.
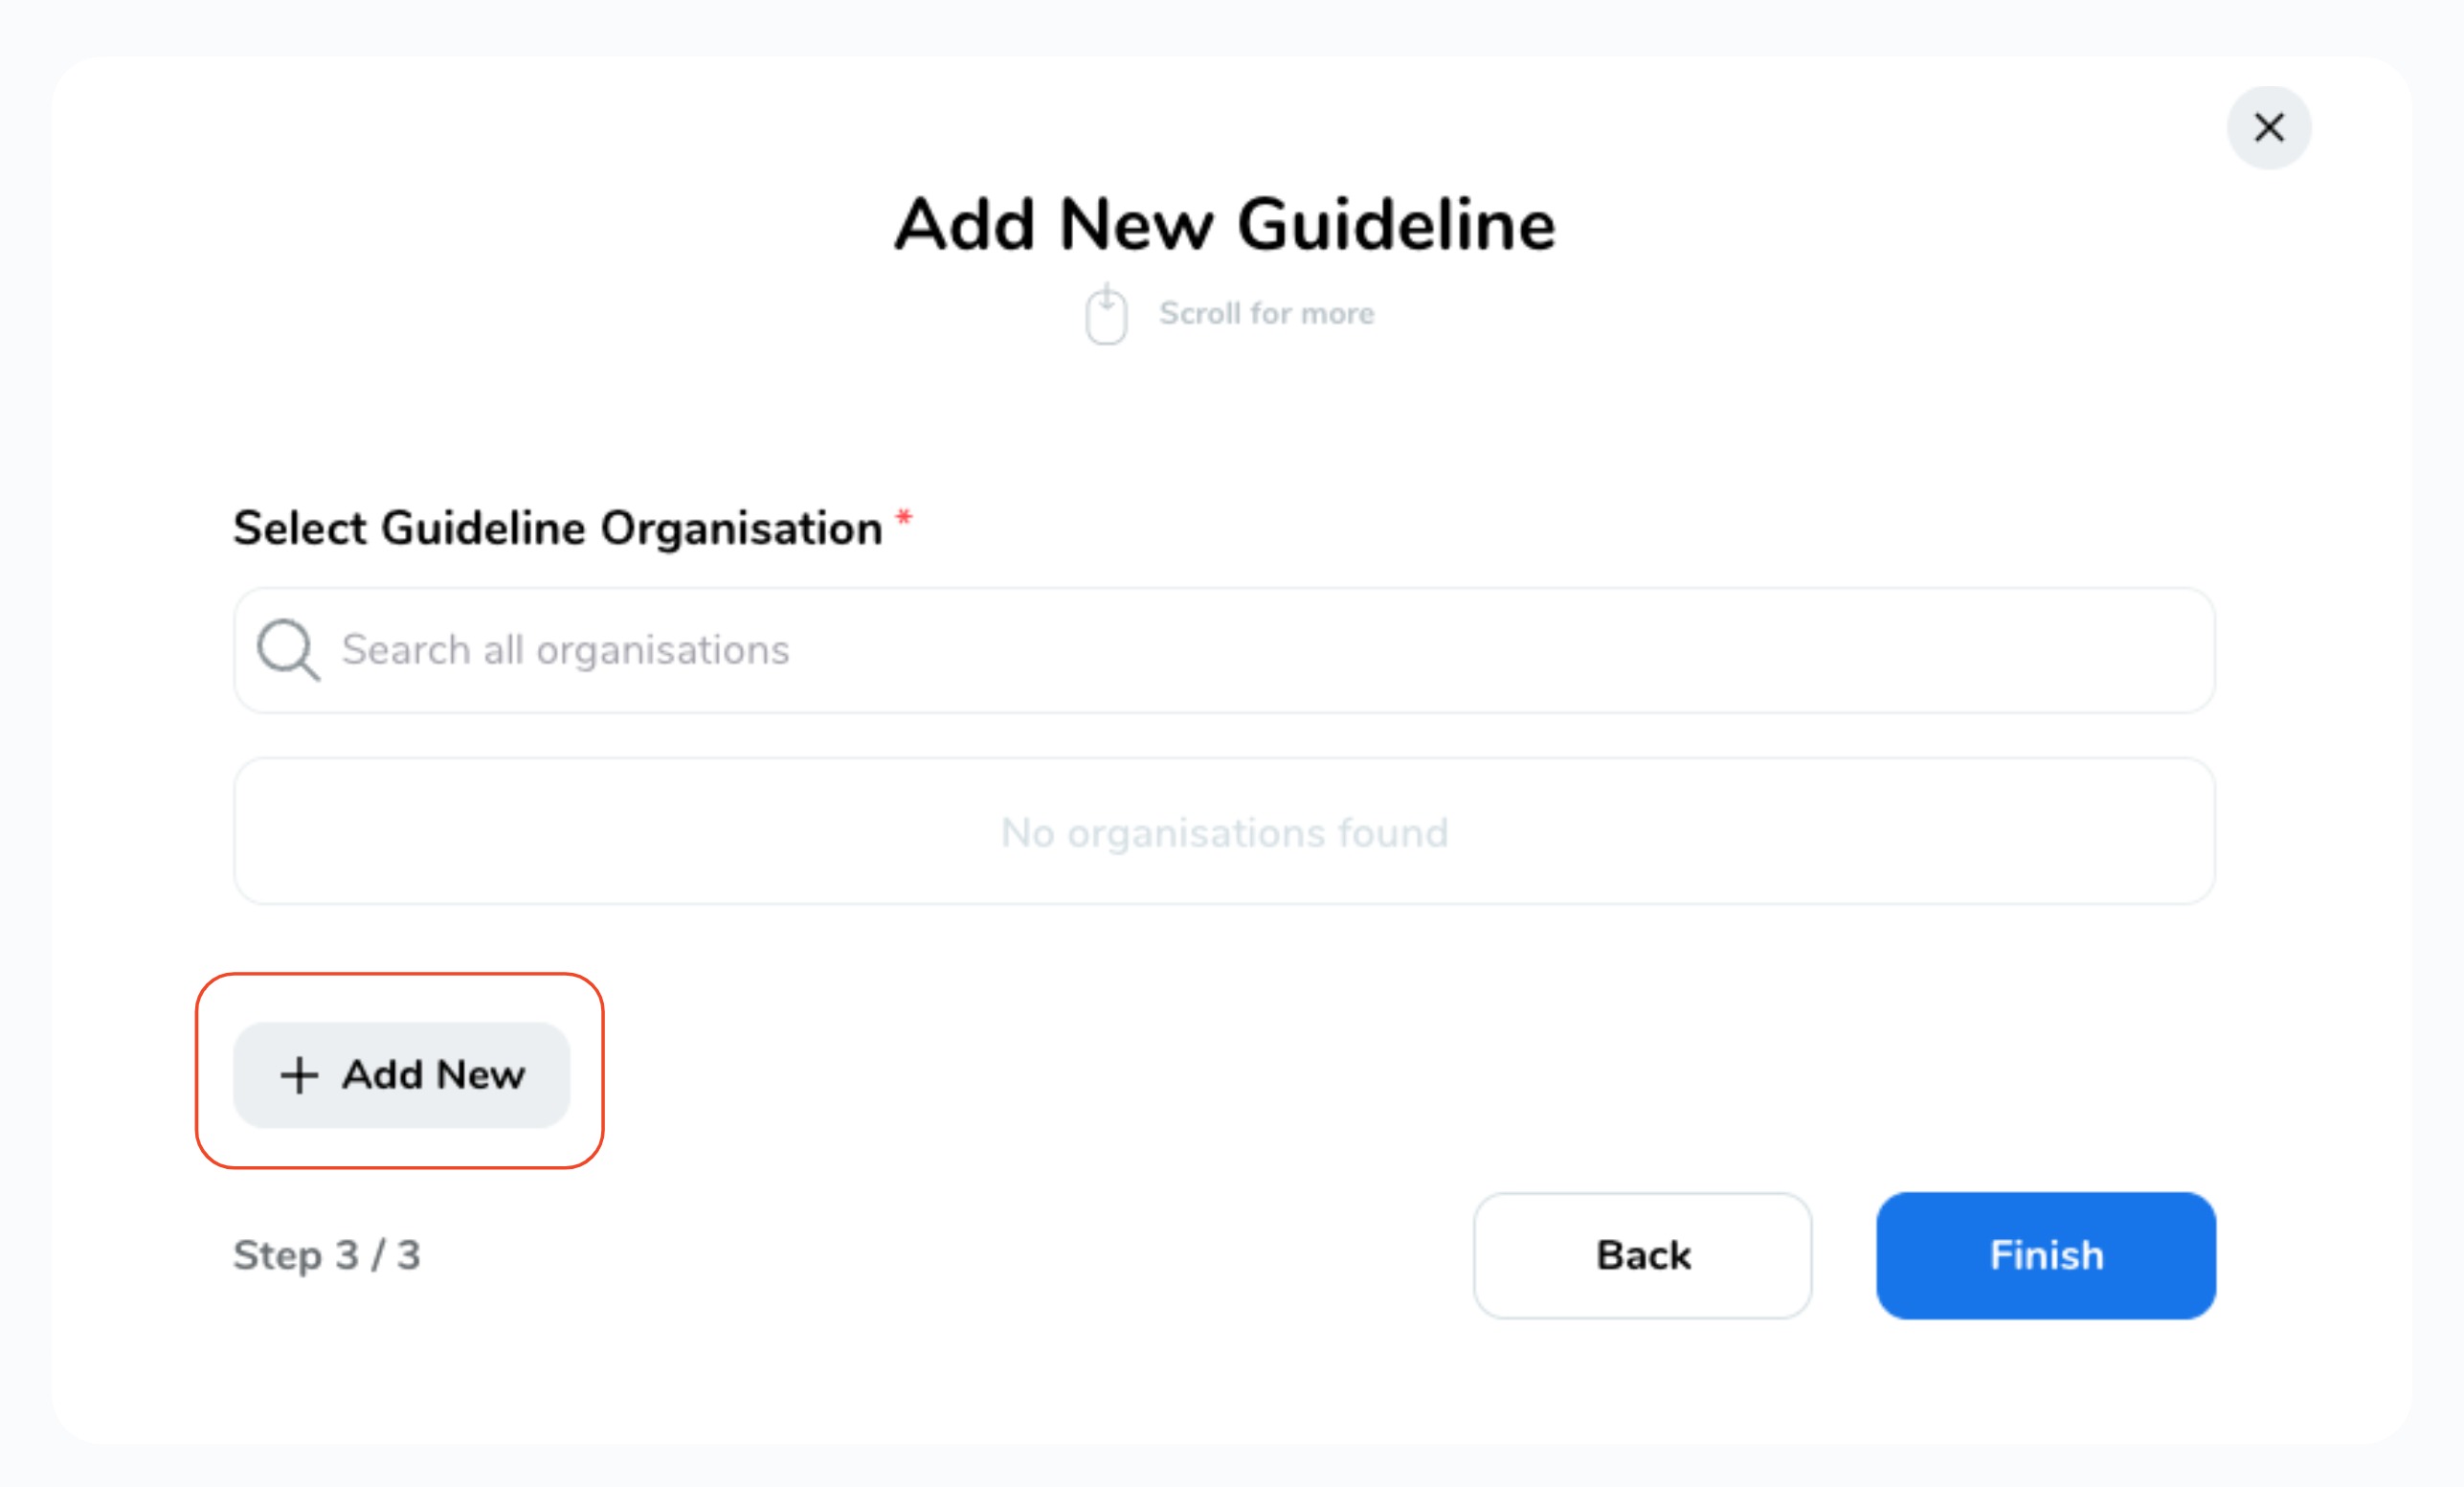
Once you've given a name and keywords to your guideline, you will need to select an organisation for your guideline.
-
Select a pre-existing organization if available...
-
Alternatively, if there are no organisations found, don’t worry! you can add a new one by clicking on the “Add New" button.
-
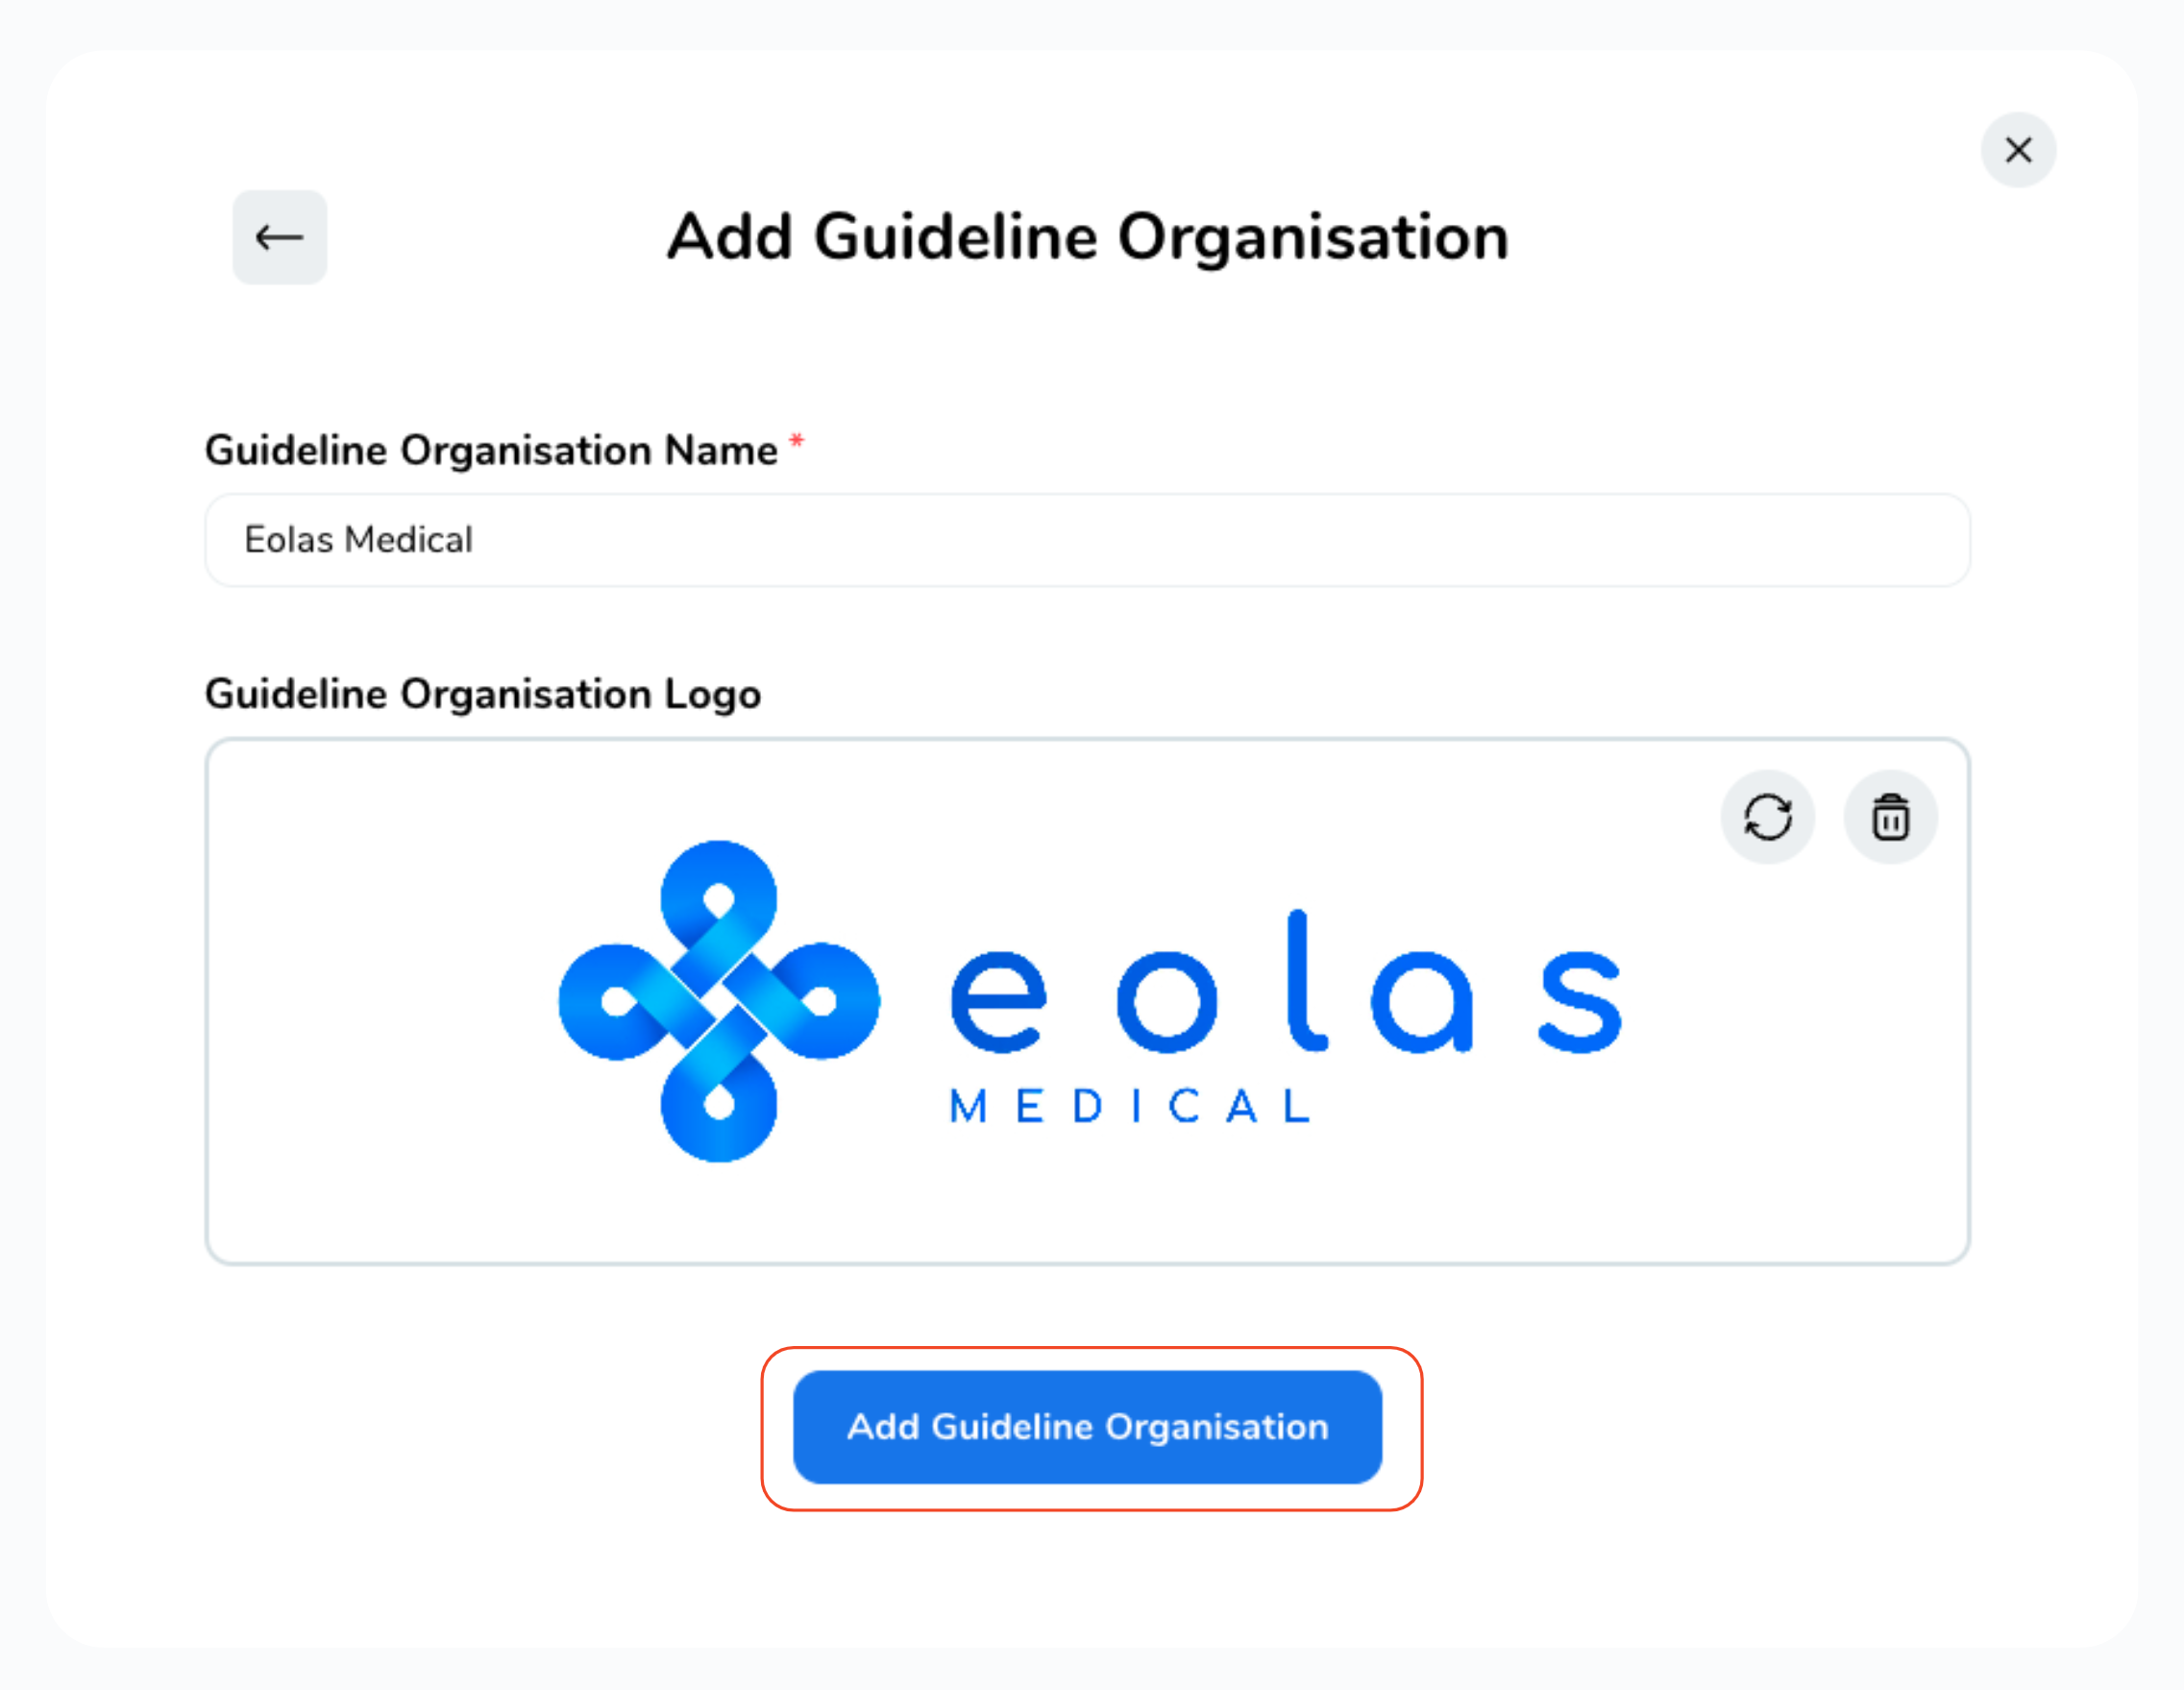
Write the Guideline Organization name (e.g., NHS, NICE).
-
Upload the Organization logo.
-
Once completed, click on the “Add Guideline Organisation” button.
You will return to the select organization step, where you can select the recently created Organization or any pre-existing organization for your Guideline.
-
Once you've selected the organisation for your Guideline, you will see a green tick indicating your choice.
-
Finally, click the "Finish" button to upload your Guideline.
Click on the selected section.

You will then navigate to the section page and the section name will be clearly visible at the top of the window.
Click on the "Add New Guideline" button.

A pop-up window will open, allowing you to upload various file types such as MS Office files, PDFs, images, videos, and web-links.
When uploading a PDF document or MS Office file, choose the appropriate option and then either drag and drop the file into the "File to Upload" box or click on "Browse Files" to select it from your computer's documents folder.
.gif)
If you're adding a Web Link as a Guideline - for example, a link to a Youtube video or website - select the "Web Link" option and insert the link URL for the website you want to add.
-
To copy a Web Link, select the URL on your browser and either do a 'Right Click' and select 'Copy' or you can use your computers shortcuts for Copy (Windows is ctrl+c or MAC is command+c).
To copy a Web Link, select the URL on your browser and either do a 'Right Click' and select 'Copy' or you can use your computers shortcuts for Copy (Windows is ctrl+c or MAC is command+c).
-
To insert your copied Web Link, select the URL field and either do a 'Right Click' and select 'Paste' or you can use your Computers shortcuts for Pasting (Windows is ctrl+v or MAC is command+v).
Your copied Web Link should now be inserted in the URL field.
To insert your copied Web Link, select the URL field and either do a 'Right Click' and select 'Paste' or you can use your Computers shortcuts for Pasting (Windows is ctrl+v or MAC is command+v).
Your copied Web Link should now be inserted in the URL field.
Bear in mind, you can only upload one type of file at a time (e.g., either PDF or Web Link), and currently only one file can be uploaded at a time - so only select one file to upload.
Click "Next" to proceed.
Here you can optionally activate the Guideline Expiry Function, useful for monitoring Guidelines that expire.
If you would like to set an expiry date:
-
Click on the toggle button "Activate Guideline Expiry Date" and a new input field "Guideline Review Date" will appear.
Click on the toggle button "Activate Guideline Expiry Date" and a new input field "Guideline Review Date" will appear.
-
Then "Click to Select a date” to pick a date from the calendar.
Then "Click to Select a date” to pick a date from the calendar.
.gif)
-
If you would like to remove the expiry date click back on the toggle button to deactivate.
If you would like to remove the expiry date click back on the toggle button to deactivate.
-
Or, if you change your mind or select it in error, simply click back on the date to amend it.
Or, if you change your mind or select it in error, simply click back on the date to amend it.
Give your Guideline a name that's easily identifiable for you and your team.
Enter Guideline Keywords, this is super important! as these will assist the app's master search functionality in providing relevant search results.
Click on the "Next" button.
Once you've given a name and keywords to your guideline, you will need to select an organisation for your guideline.
Select a pre-existing organization if available...
Alternatively, if there are no organisations found, don’t worry! you can add a new one by clicking on the “Add New" button.
Write the Guideline Organization name (e.g., NHS, NICE).
Upload the Organization logo.
Once completed, click on the “Add Guideline Organisation” button.
You will return to the select organization step, where you can select the recently created Organization or any pre-existing organization for your Guideline.
Once you've selected the organisation for your Guideline, you will see a green tick indicating your choice.
Finally, click the "Finish" button to upload your Guideline.
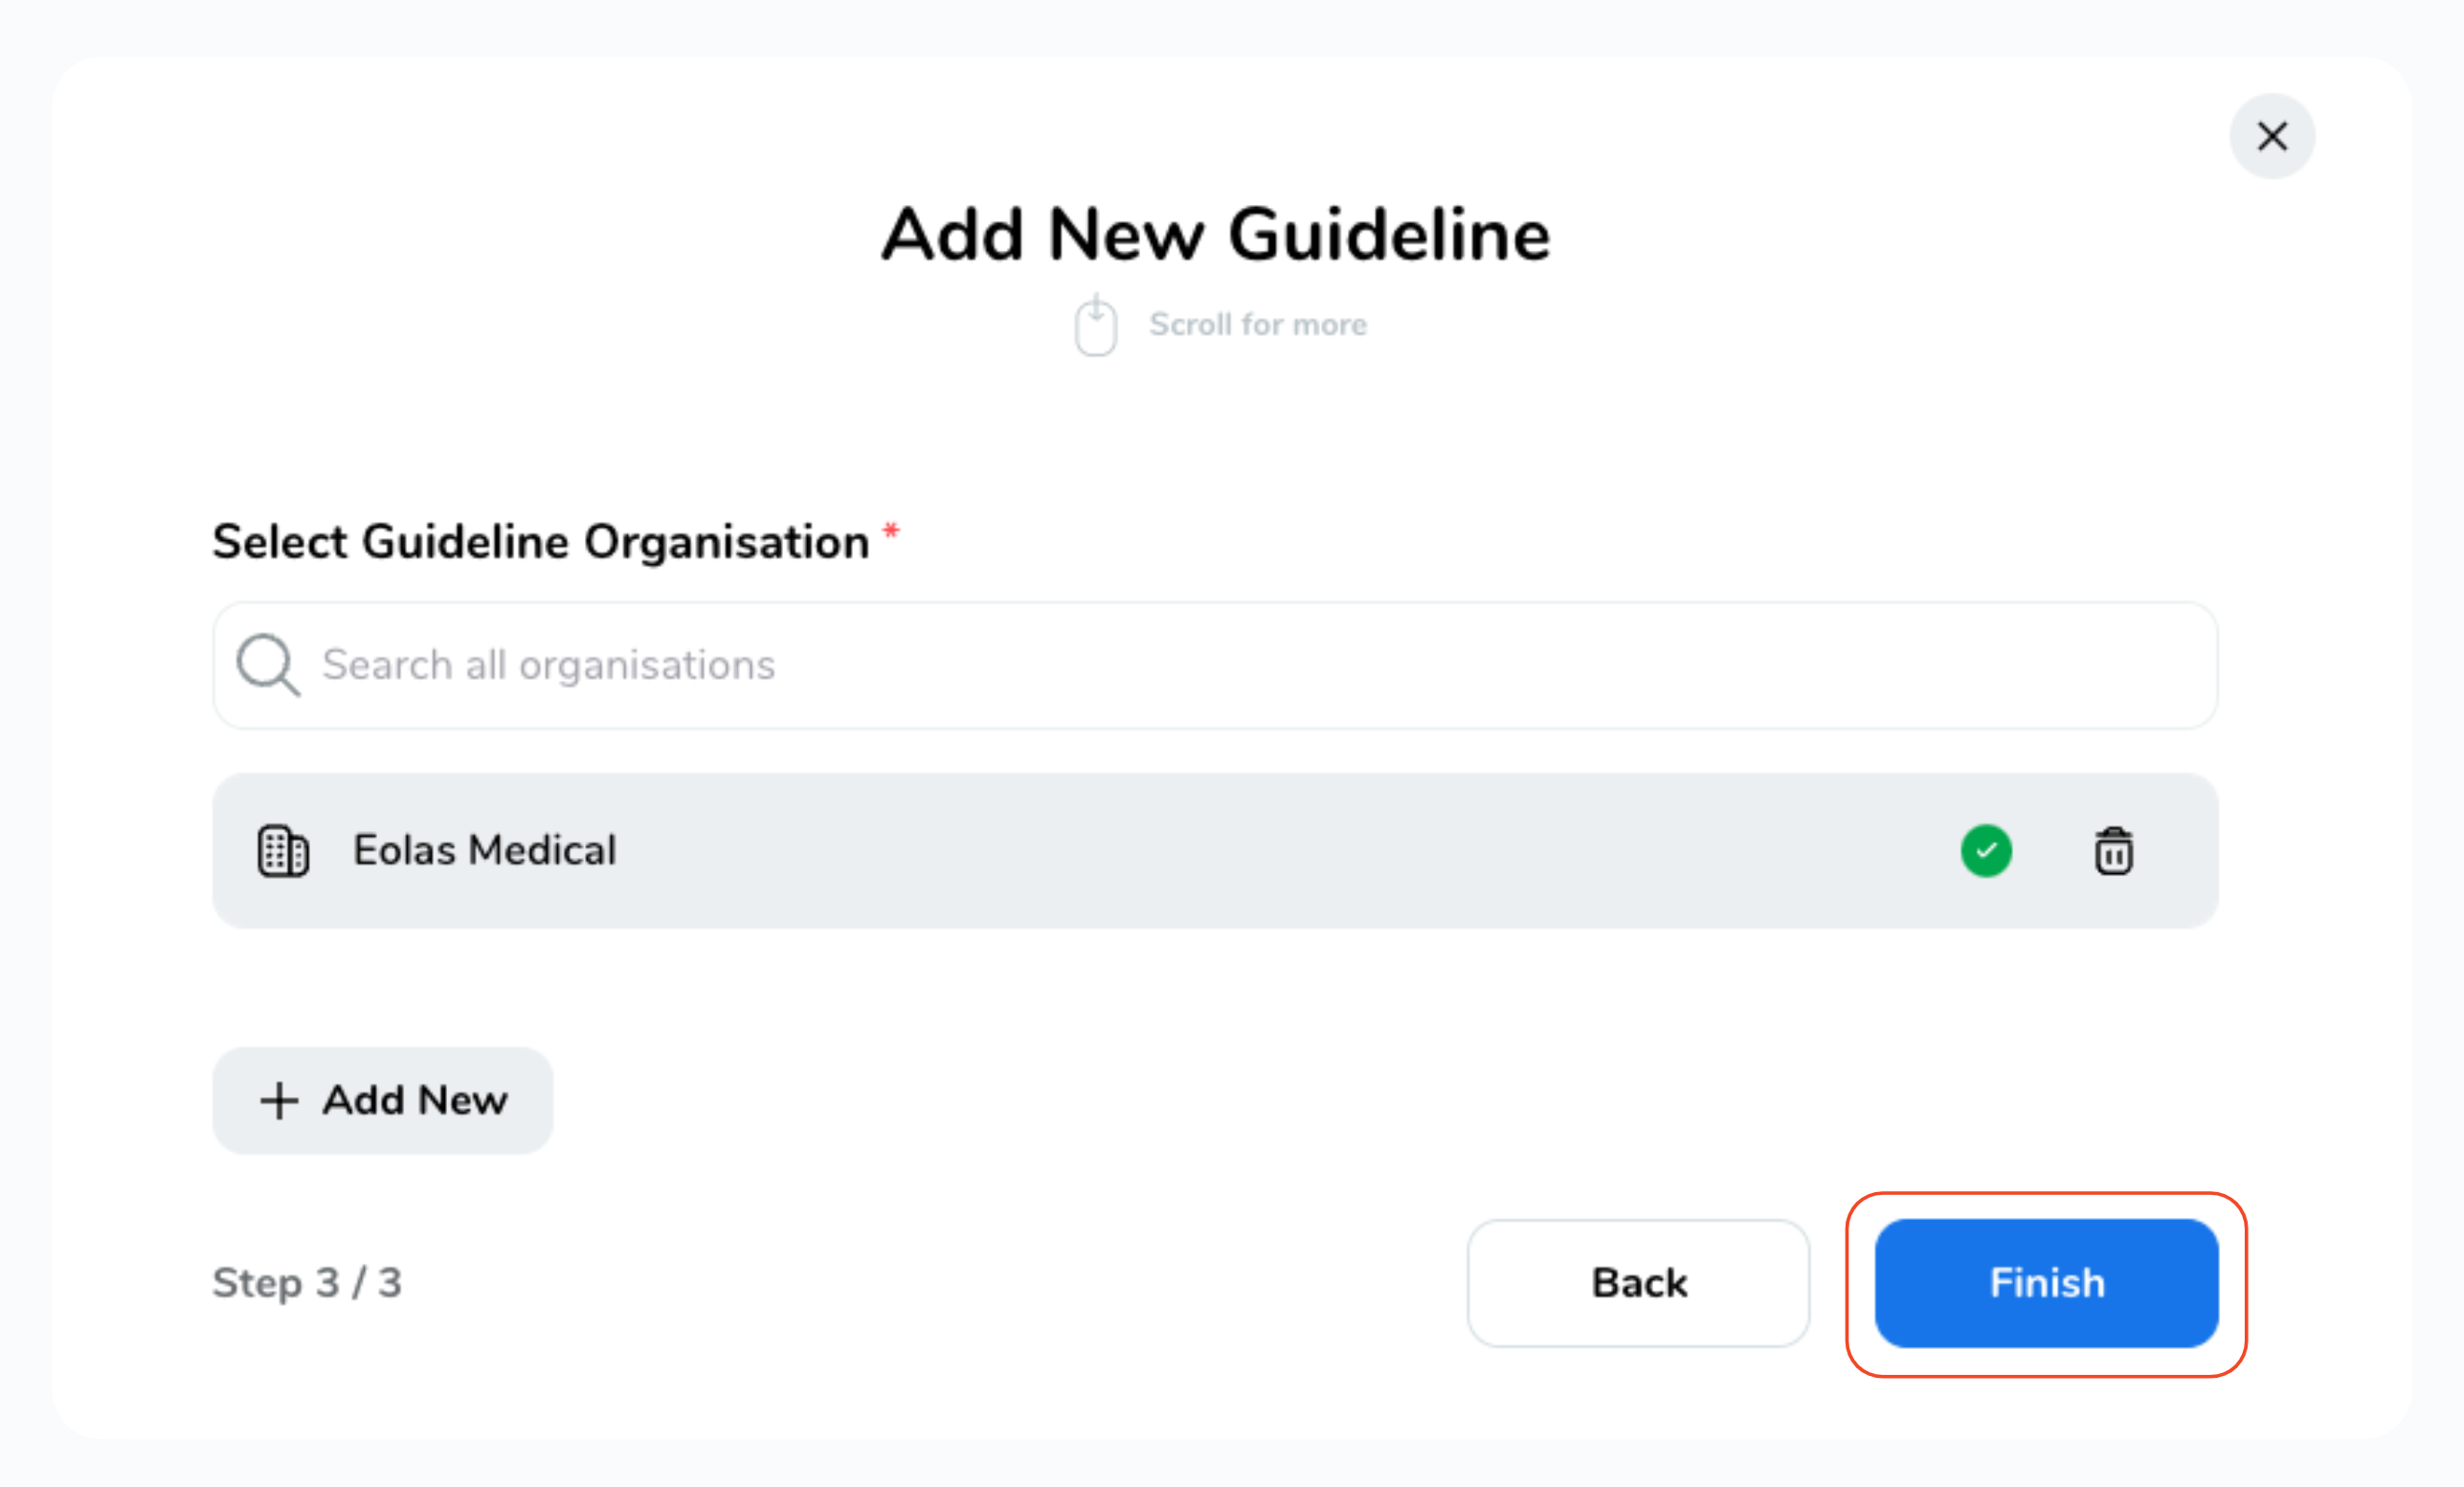
And voila! You've successfully added/uploaded a new Guideline to your space. 🎉
If you encounter any issues or need further assistance, don't hesitate to reach out to our support team. Happy uploading!
Viewing the Guideline.
To check out the Guideline, all you need to do is click on it whether it's from the admin panel or your space dashboard.
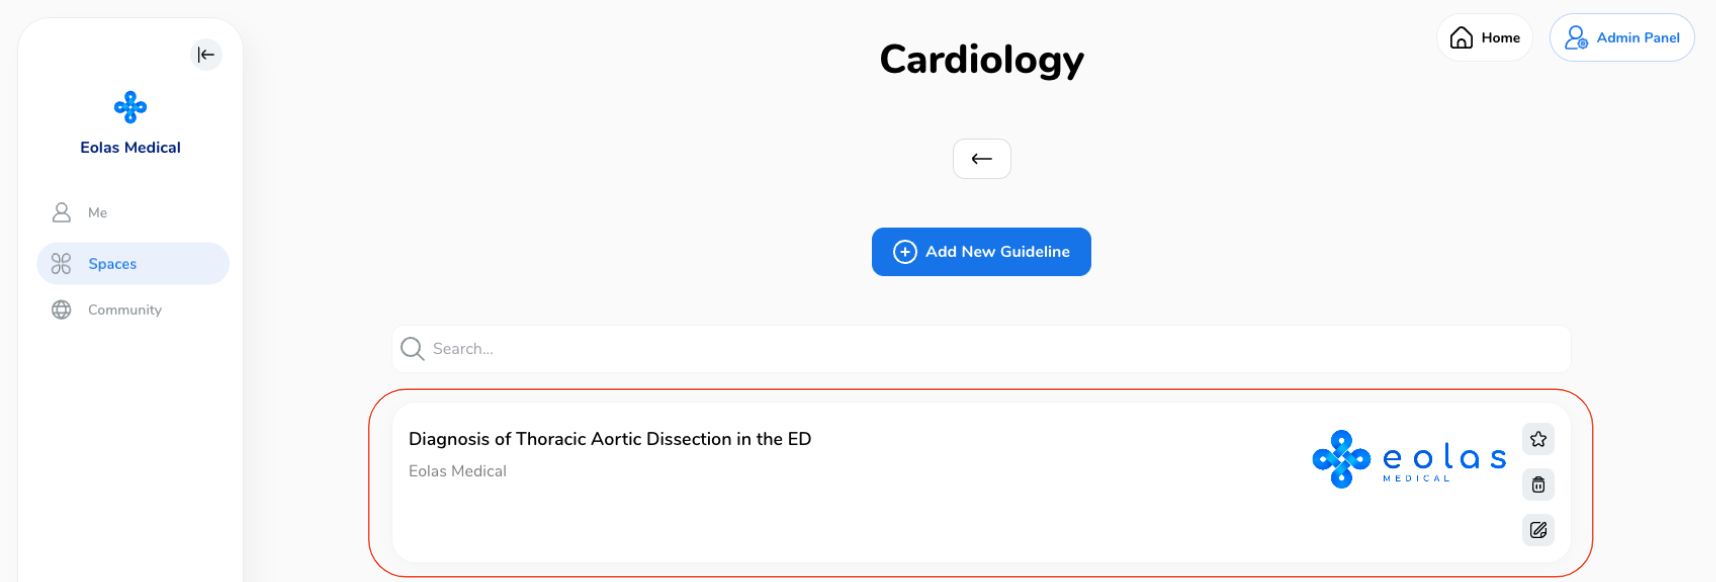
If it's the first Guideline you've uploaded, you'll spot it at the top of the page.
For URL links, they will pop open in a new window, while file Guidelines will open right within our platform. If you wish to return, just click on the "Back" arrow.


